An agreement is a record that establishes the terms and conditions of a transaction in the Marketplace.
It defines the relationship between different objects, such as buyers, sellers, and licensees, and serves as the foundation for placing orders and creating subscriptions on the platform.
You can access your agreements and manage them through the Agreements page. Managing implies renaming an agreement as well as changing an agreement's client ID. If you wish to terminate an agreement, you can do this by terminating all subscriptions in the agreement.
You can access the Agreements page by selecting Marketplace > Agreements from the main menu.
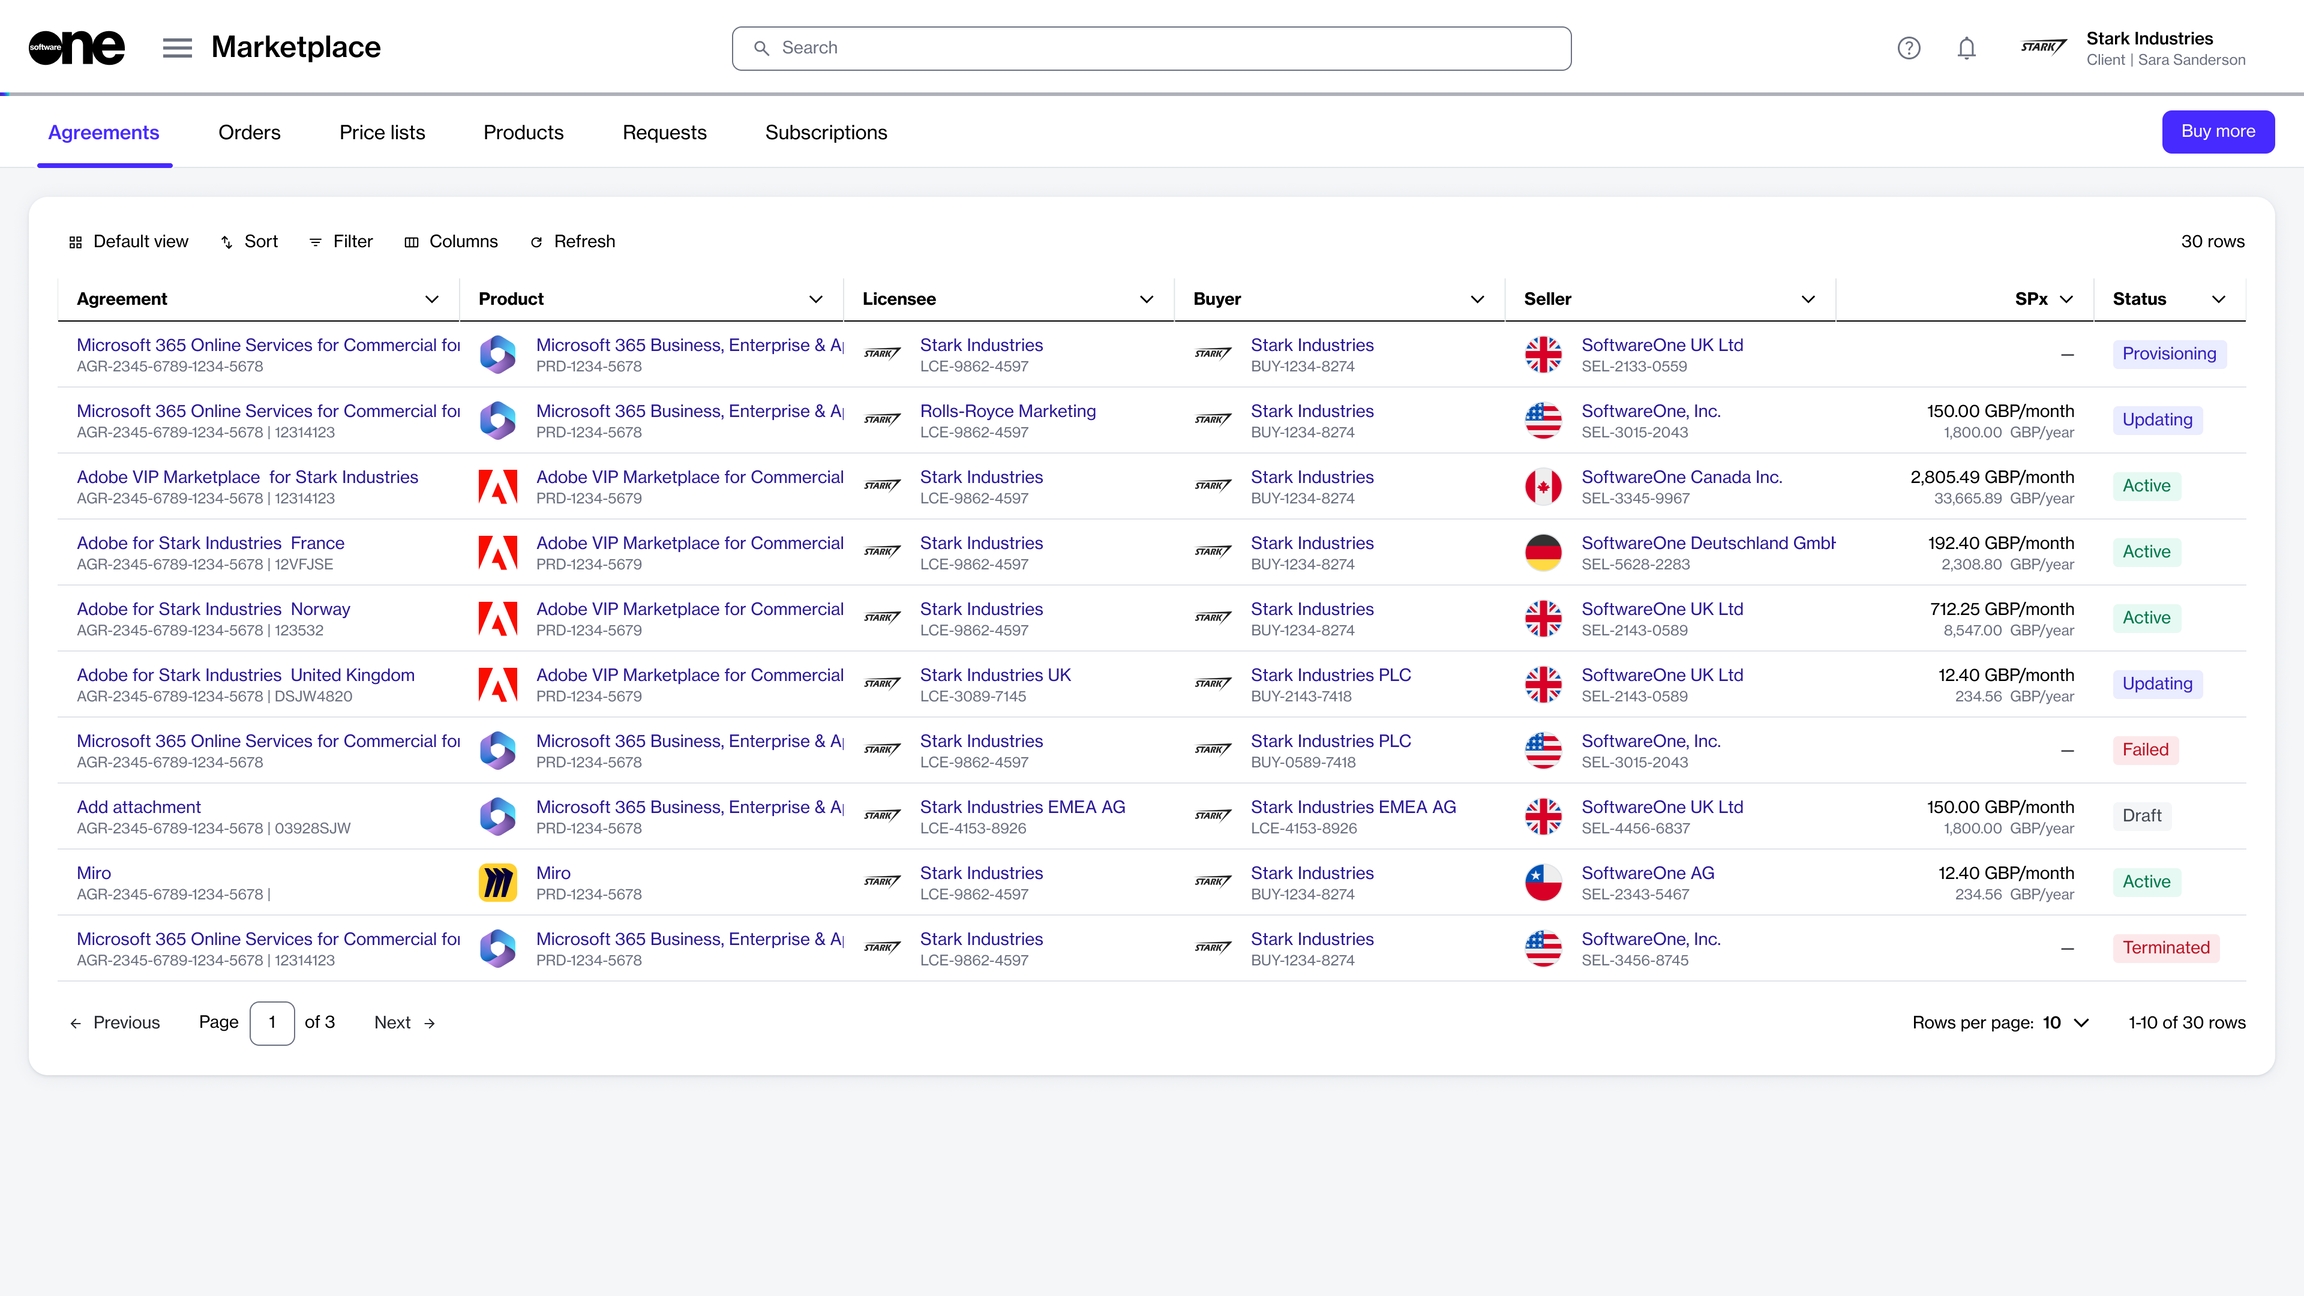
The Agreements page displays all agreements that exist in your account. It also contains a Buy more option, which gives you quick access to the Products page.
For each agreement, you can view the following details:
Agreement - Displays the name and ID of the agreement.
Product - Displays the details of the product you've ordered under the agreement.
Licensee - Displays the name and ID of the licensee to whom the license is issued.
Buyer - Displays the buyer linked to the agreement.
Seller - Displays the SoftwareOne entity linked to the agreement.
SPx - Displays the estimated sales price of the product.
Created - Displays the date and time when the agreement was created in the platform.
Currency - Displays the currency of the price list.
Updated - Displays the date and time when the agreement was updated.
Status - Displays the status of the agreement. For a description of the possible statuses, see Agreement States.
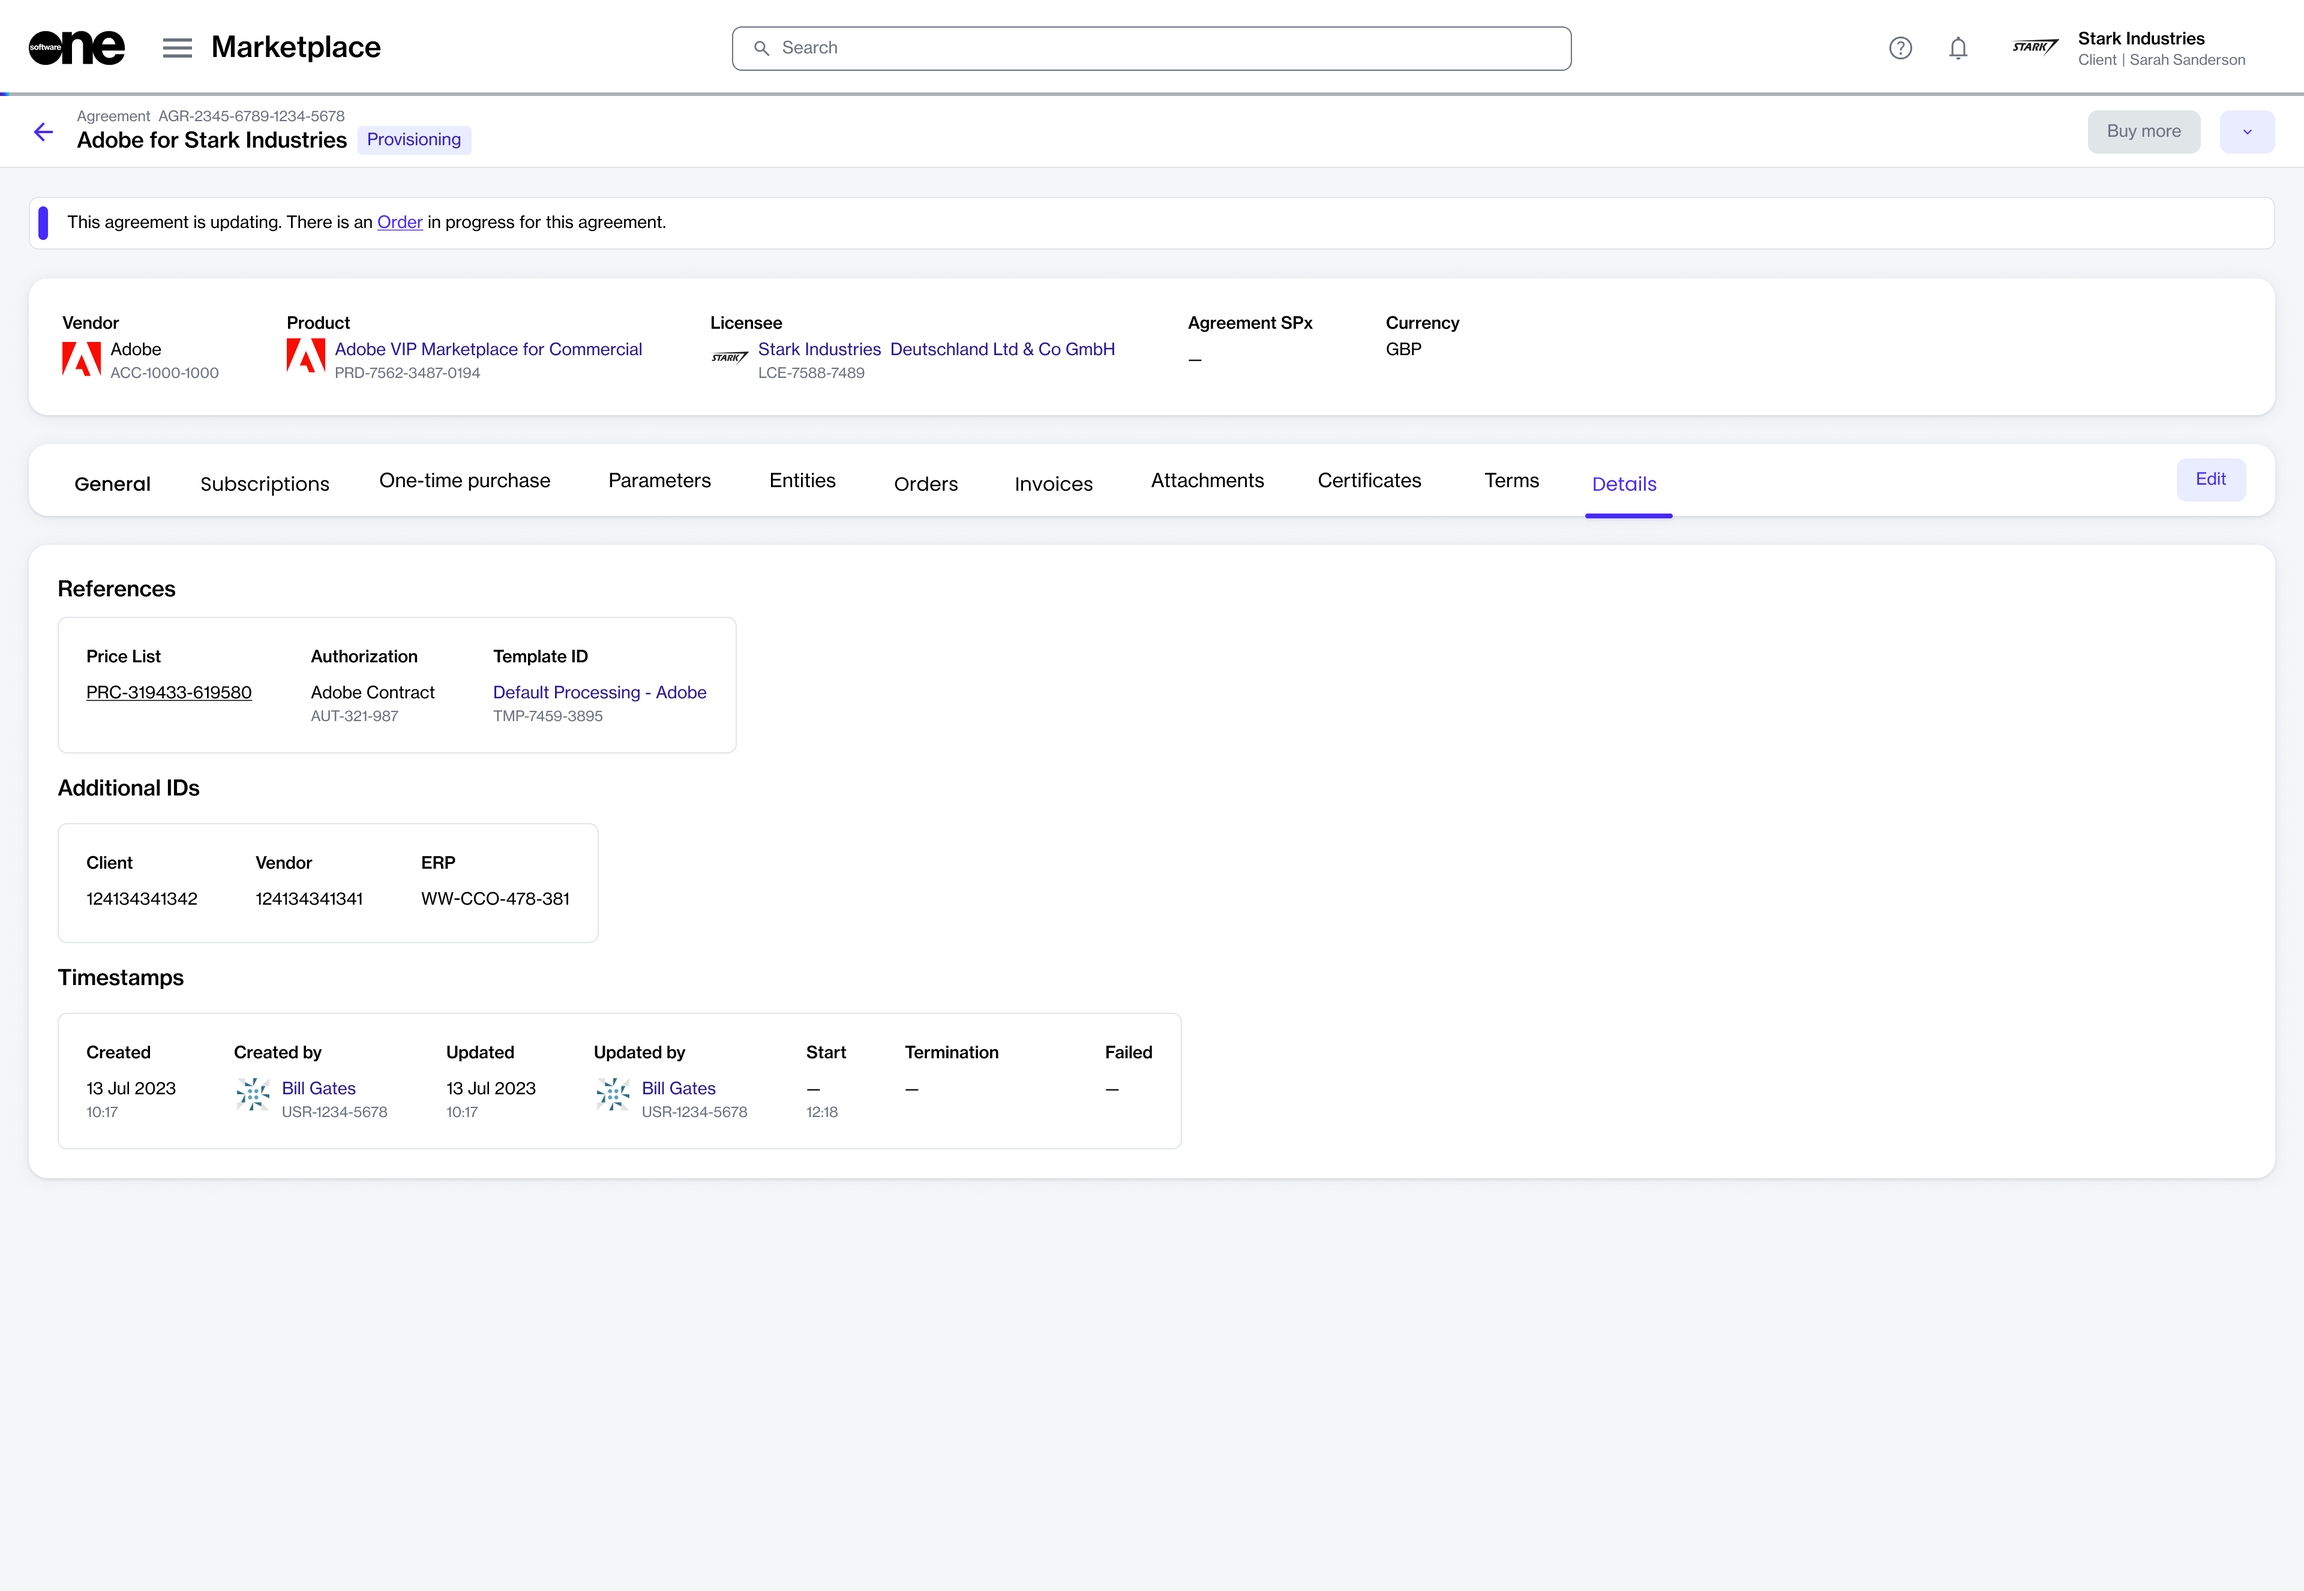
The details page of an agreement provides all information related to the agreement. You can open the details page by clicking the agreement name.
The agreement details page shows the agreement's name, ID, and status. Active agreements also contain a Buy more option, which starts the purchase wizard and lets you add more items to the agreement. For instructions, see How to Add Items to your Agreement.
The details page is divided into the following tabs:
General - Displays the general information for the agreement.
Subscriptions - Displays the subscriptions within the agreement. You can view the details of each subscription, like the name and ID, commitment term, start date, renewal date, and termination date. The estimated sales price per month and year, along with the subscription status is also displayed.
One-time purchase - Shows the items you've ordered as one-time purchases and the item details. One-time purchase items are non-subscription items where you own the license indefinitely.
Parameters - Displays the different ordering and fulfillment parameters.
Entities - Displays details of the entities linked to the agreement. Entities include licensees, buyers, and sellers.
Orders - Displays all orders placed under the agreement, including purchase orders, change orders, and termination orders. Clicking an order opens up the details page of that order.
Split billing - Displays the buyers for split billing. This tab is displayed only if split billing has been enabled for the agreement. You can configure buyers by adding buyers or removing existing ones. For details, see Configure Buyers for Split Billing.
Attachments - Displays all files attached to the agreement. Attachments are added by the vendor or SoftwareOne, and they can include PDFs as well as your license keys. See View and Download Attachments to learn more.
Terms - Displays the terms associated with the agreement and shows when they were accepted, and by whom.
Details - Displays the additional IDs for the agreement, including the client and vendor IDs, and the timestamps of all changes made to the agreement. You can update the client ID using Edit. For instructions, see Edit Agreement ID.
Audit trail - Displays all events that have taken place within the agreement. For each audit record, you can view the log details and summary. To learn more, see Audit Trail.
When you create a new agreement, the Marketplace Platform assigns a default ID to the agreement. You can change the default ID and assign a new ID so you can identify and manage the agreement easily.
Updating an agreement's ID is optional. If you choose not to update the ID, the platform will use the default ID.
Follow these steps to update the agreement ID:
On the Agreements page (Marketplace > Agreements), select the agreement to edit. The details page of your selected agreement opens.
Select the Details tab and then click Edit.
In the Edit ID dialog, enter the new ID and click Save. The agreement ID is updated and displayed on the details page of the agreement.
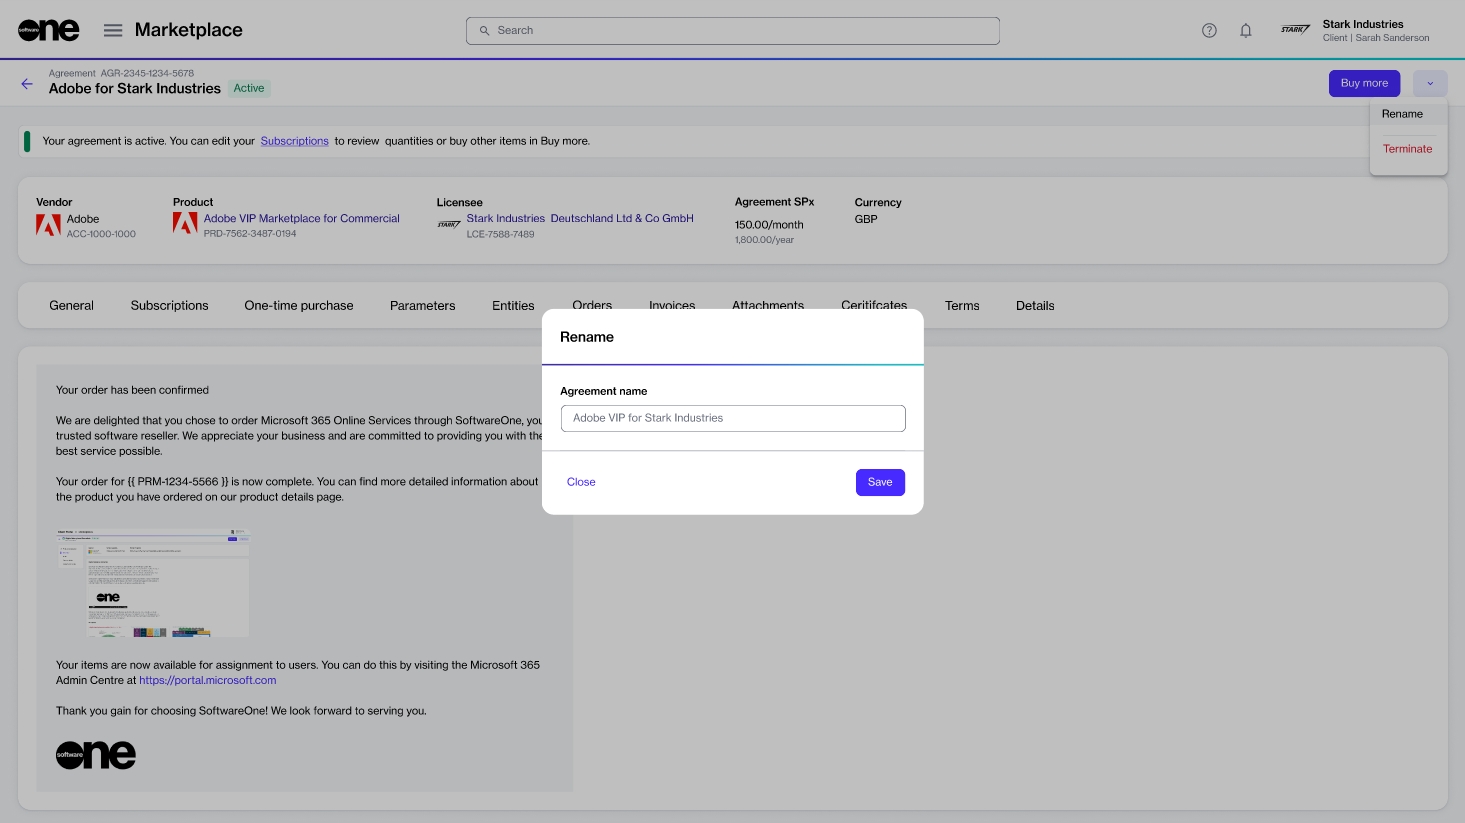
If your account contains multiple agreements, you can rename those agreements.
Agreements can be renamed as long as they are active. When choosing a new agreement name, we recommend that you enter a name that will help you easily search for or locate the agreement in your list of agreements.
When renaming an agreement, ensure that the new name is not blank. Otherwise, the platform will display an error message.
Follow these steps to update the agreement name:
On the Agreements page (Marketplace > Agreements), locate the required agreement.
Select the agreement you wish to rename. The details page of your selected agreement opens.
Click the down arrowin the upper right and select Rename.
In the Rename dialog, enter the new name and click Save. The agreement's name is updated instantly and displayed across all pages featuring the agreement in the platform.
You can terminate an agreement by creating a termination order for the agreement.
When you terminate an agreement, all subscriptions with the agreement are terminated. Once terminated, the agreement can't be restored or used when ordering new subscriptions. However, you can still access and view the terminated agreement.
Before terminating an agreement, note the following points:
You can only terminate agreements in the Active state. Agreements in any other state (such as Processing or Updating) can't be terminated. For a description of these states, see Agreement States.
Creating a termination order doesn't immediately cancel your agreement. An agreement is terminated only after the vendor approves it for termination.
Follow these steps to terminate an agreement:
On the Agreements page (Marketplace > Agreements), locate the agreement to terminate.
Click the agreement name. The details page of your selected agreement opens.
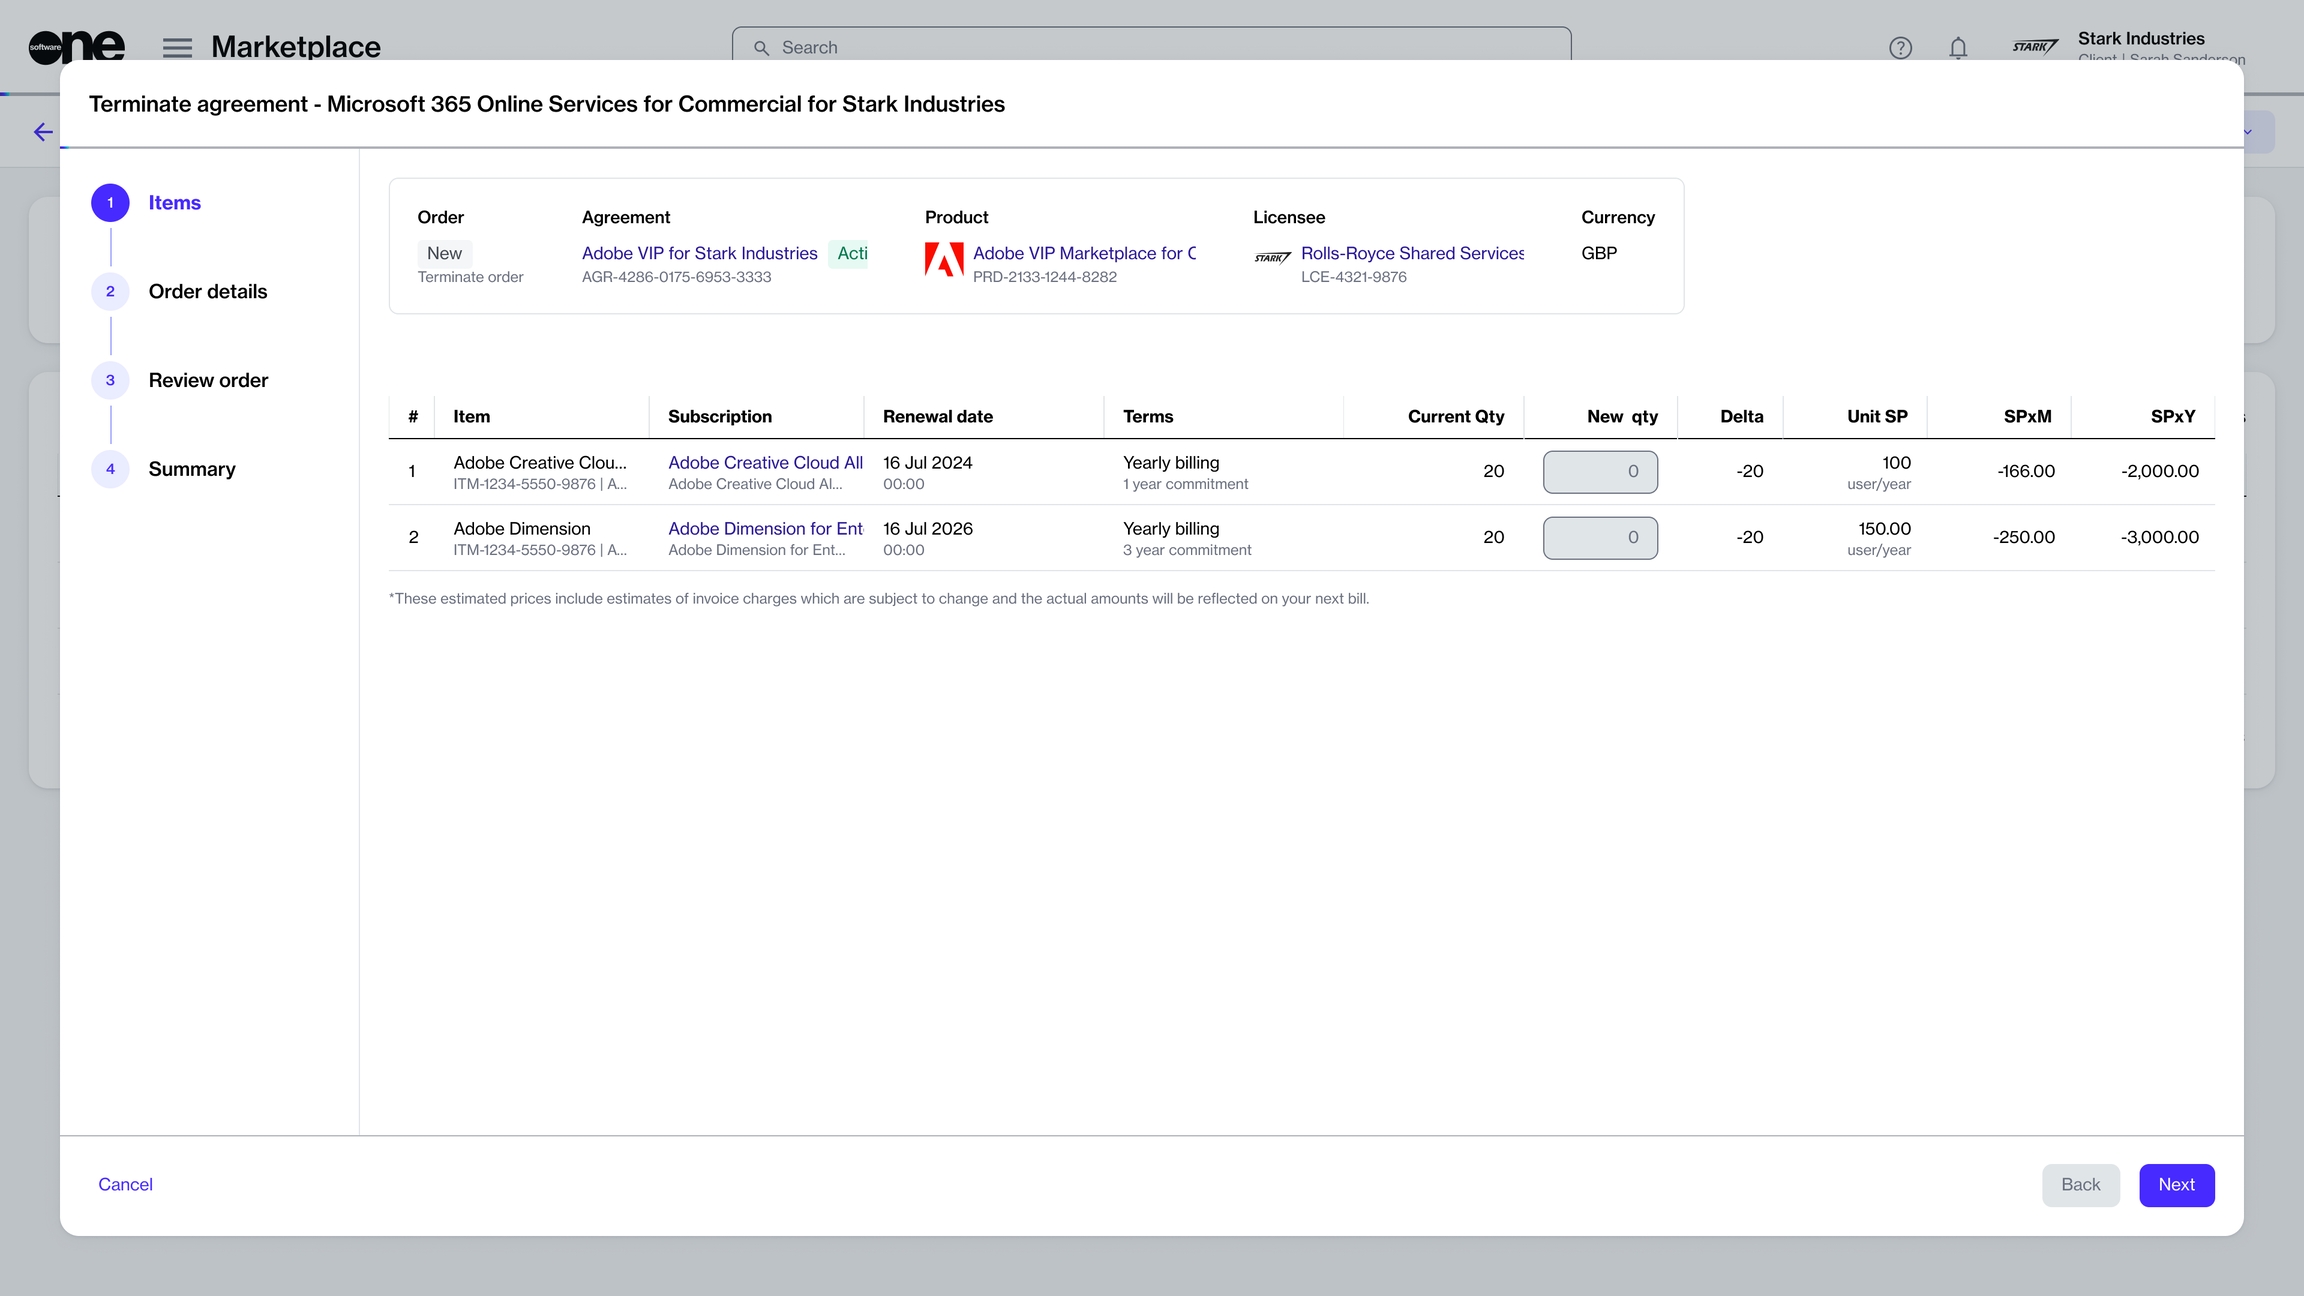
Click the down arrow in the upper right and select Terminate. The Terminate agreement wizard opens.
In the Terminate agreement wizard, do the following:
In Items, review the quantity details and click Next. All items will have the new quantity of 0.
In Order details, add or update the additional ID and notes for the agreement and termination order. Click Next.
In Review order, click Place order to finalize the termination order.
Click View order to open the details page of the termination order. Otherwise, click Close to close the page.
When the order is placed, the agreement status changes from Active to Updating. After the termination order is processed and all subscriptions within the agreement are canceled, the status changes to Terminated.
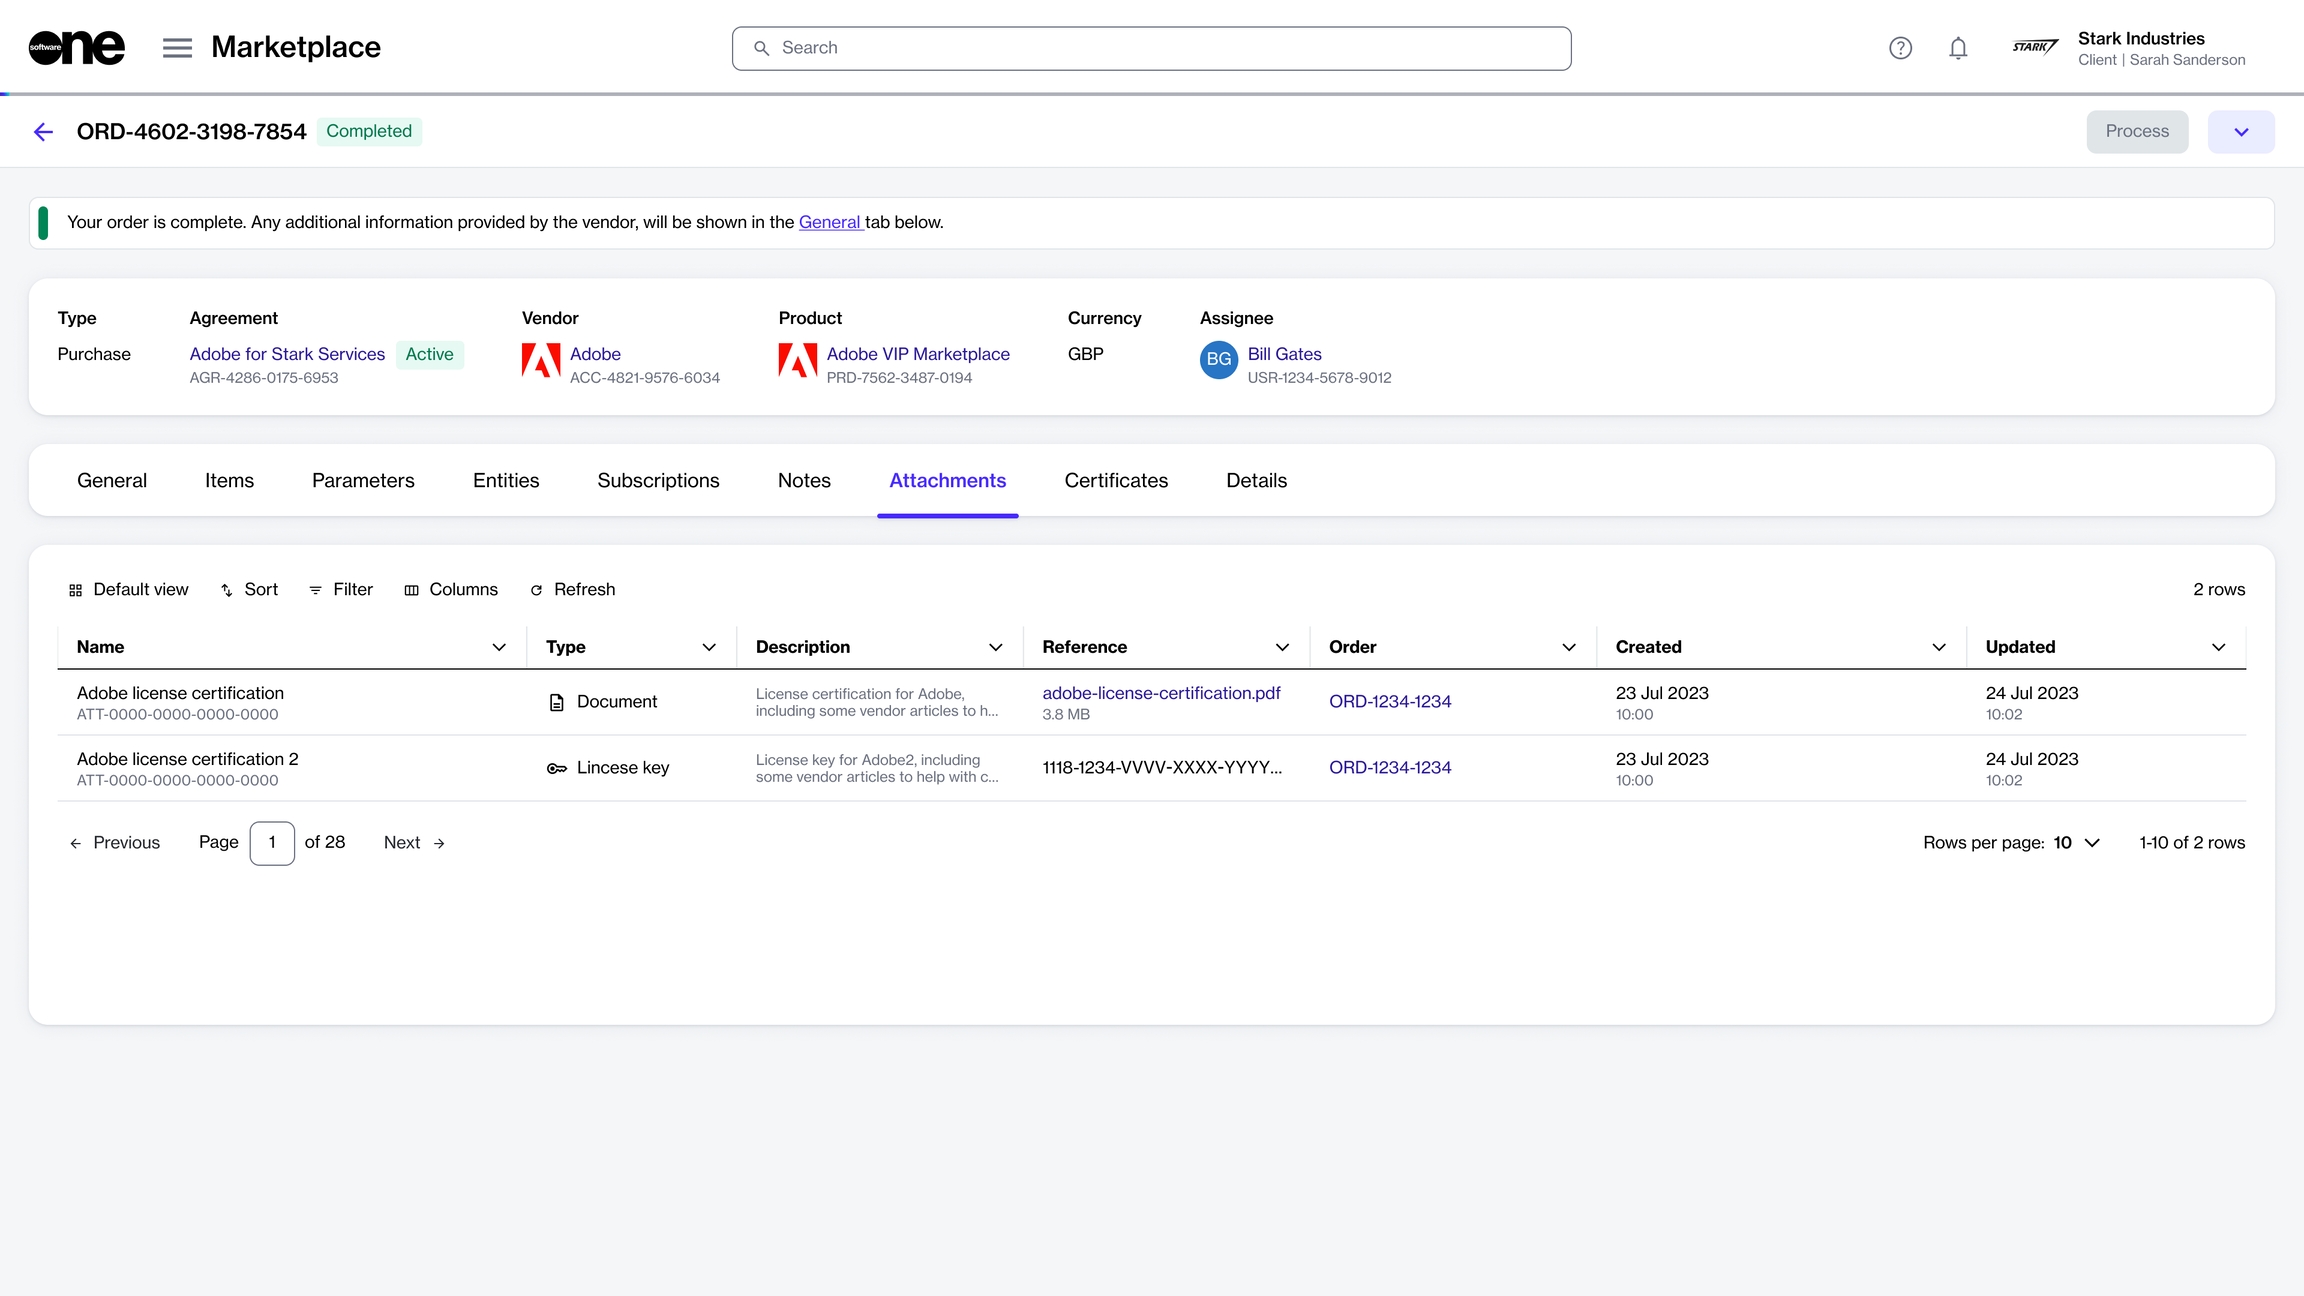
The Attachments tab on the agreement details page displays all files that have been added to your agreement by the vendor or SoftwareOne.
Attachments can include PDFs as well as your license keys. The same attachments are also visible within the Attachments tab on the order details page.
Follow these steps to view and download attachments:
Open the required agreement.
Select the Attachments tab. All files relevant to the agreement are displayed.
Click the filename in the Reference column to download it.
License keys can only be viewed and copied, not downloaded.
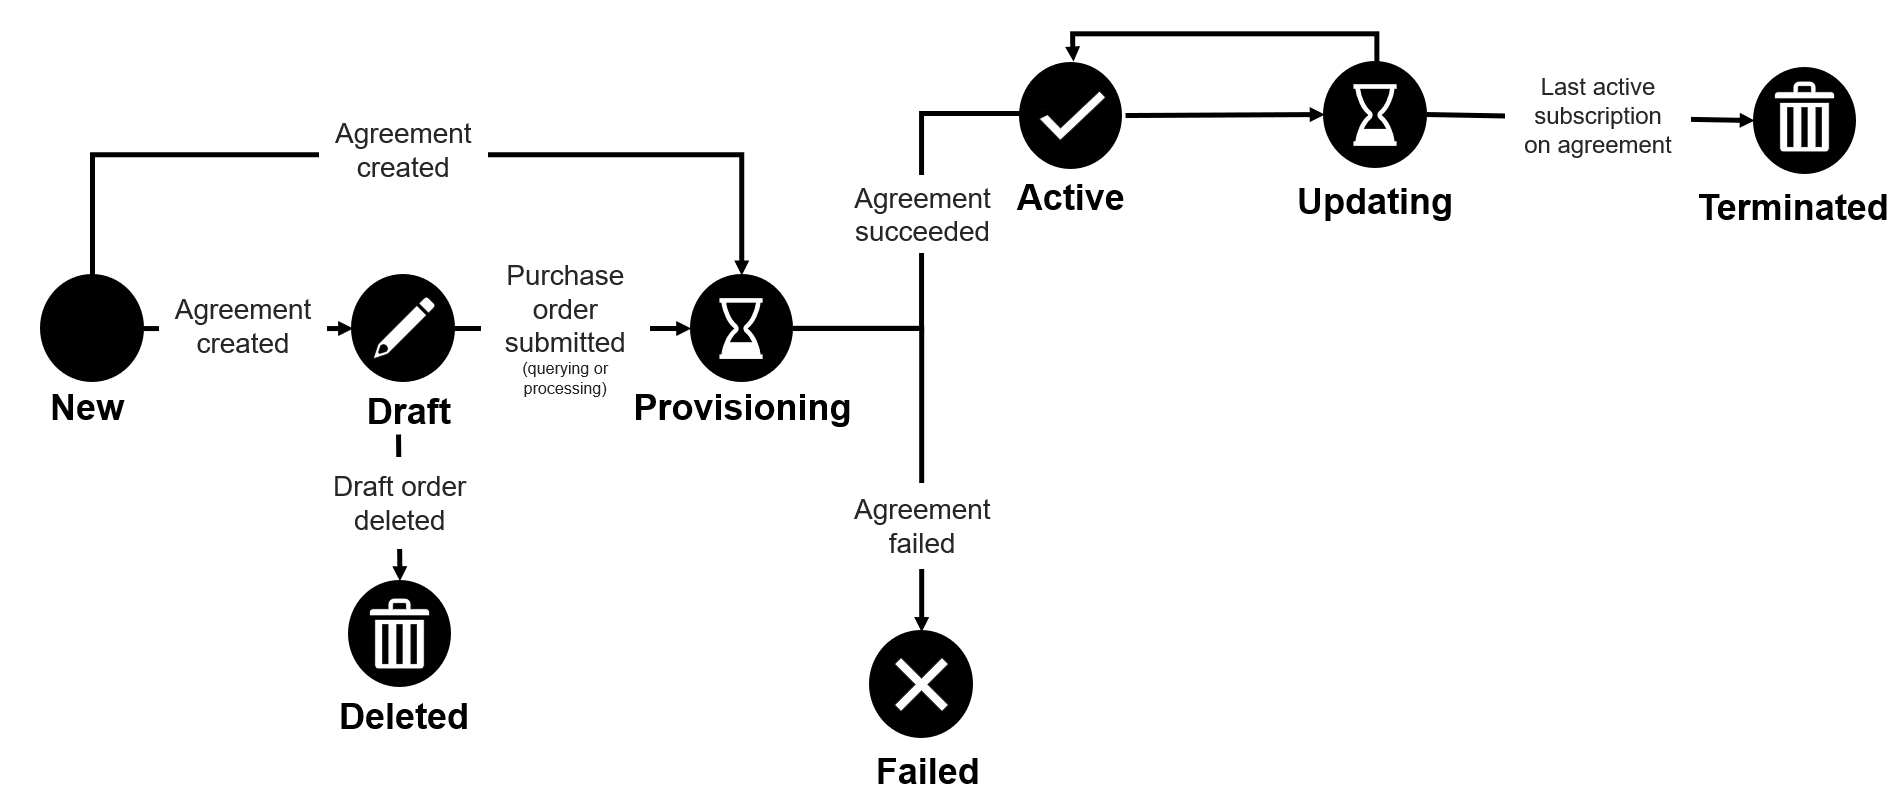
In the Marketplace Platform, an agreement can have several states (also known as status).
The following diagram shows the possible states and the transition between these states:
These states are displayed as Status within the platform. They are also shown beside the agreement name and ID on the details page.
Draft
The agreement is saved as a draft because the purchase order is saved for later during the ordering process.
Deleted
The draft agreement has been deleted because the draft purchase order associated with the agreement was deleted.
Provisioning
The agreement has been sent to the vendor and it is pending fulfilment.
Failed
The agreement has failed because the vendor or SoftwareOne canceled the purchase order.
Active
The vendor has completed the purchase order and the agreement is now active.
Active agreements have at least one active subscription and no open orders.
Updating
A business transaction or a change order is in progress for at least one subscription in the agreement.
Terminated
The agreement has been terminated.
It no longer contains active subscriptions.