Loading...
Loading...
Loading...
Loading...
Loading...
Loading...
Loading...
Add a message to the conversation.
You can use the Add Message option on the Activity tab if you need to reply to a vendor's message or send a new message. This option allows you to communicate with the vendor from within the platform.
Before adding a message to the conversation, note the following points:
Use this option only in those scenarios where you don't need to change the request's status.
Any message you add to the conversation will be visible to everyone in your Marketplace account.
You can add a message regardless of the request's status.
Follow these steps to add a new message:
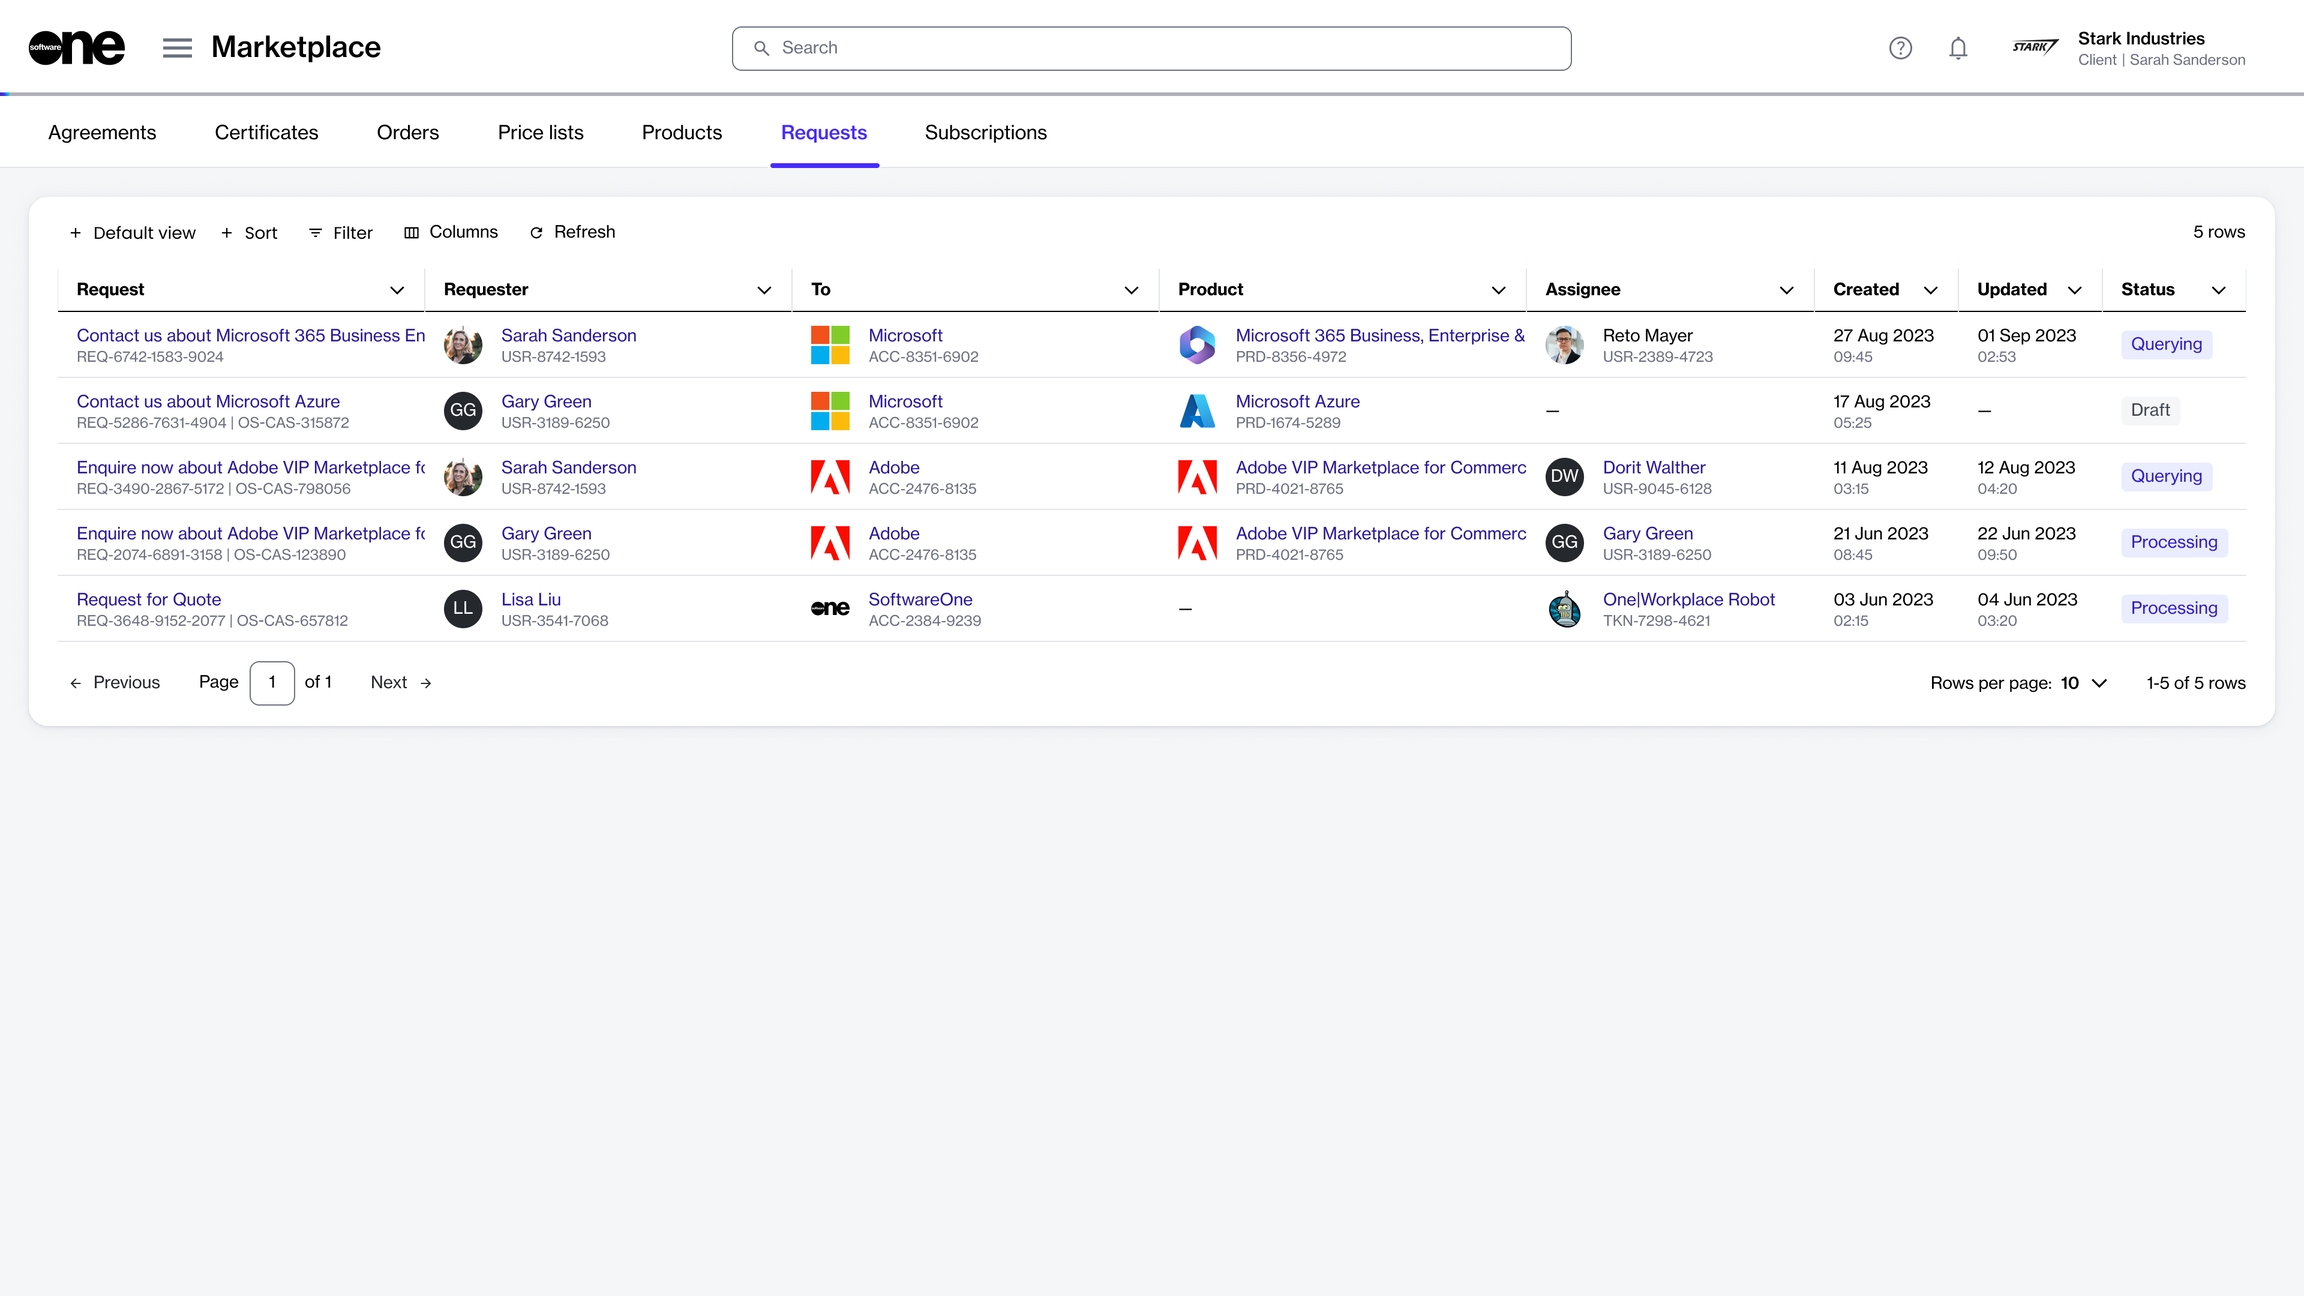
Navigate to the Requests page (Marketplace > Requests). A list of your requests is displayed.
Select the relevant request to which you want to add the message. The details page of your selected request opens.
On the Activity tab, click Add message.
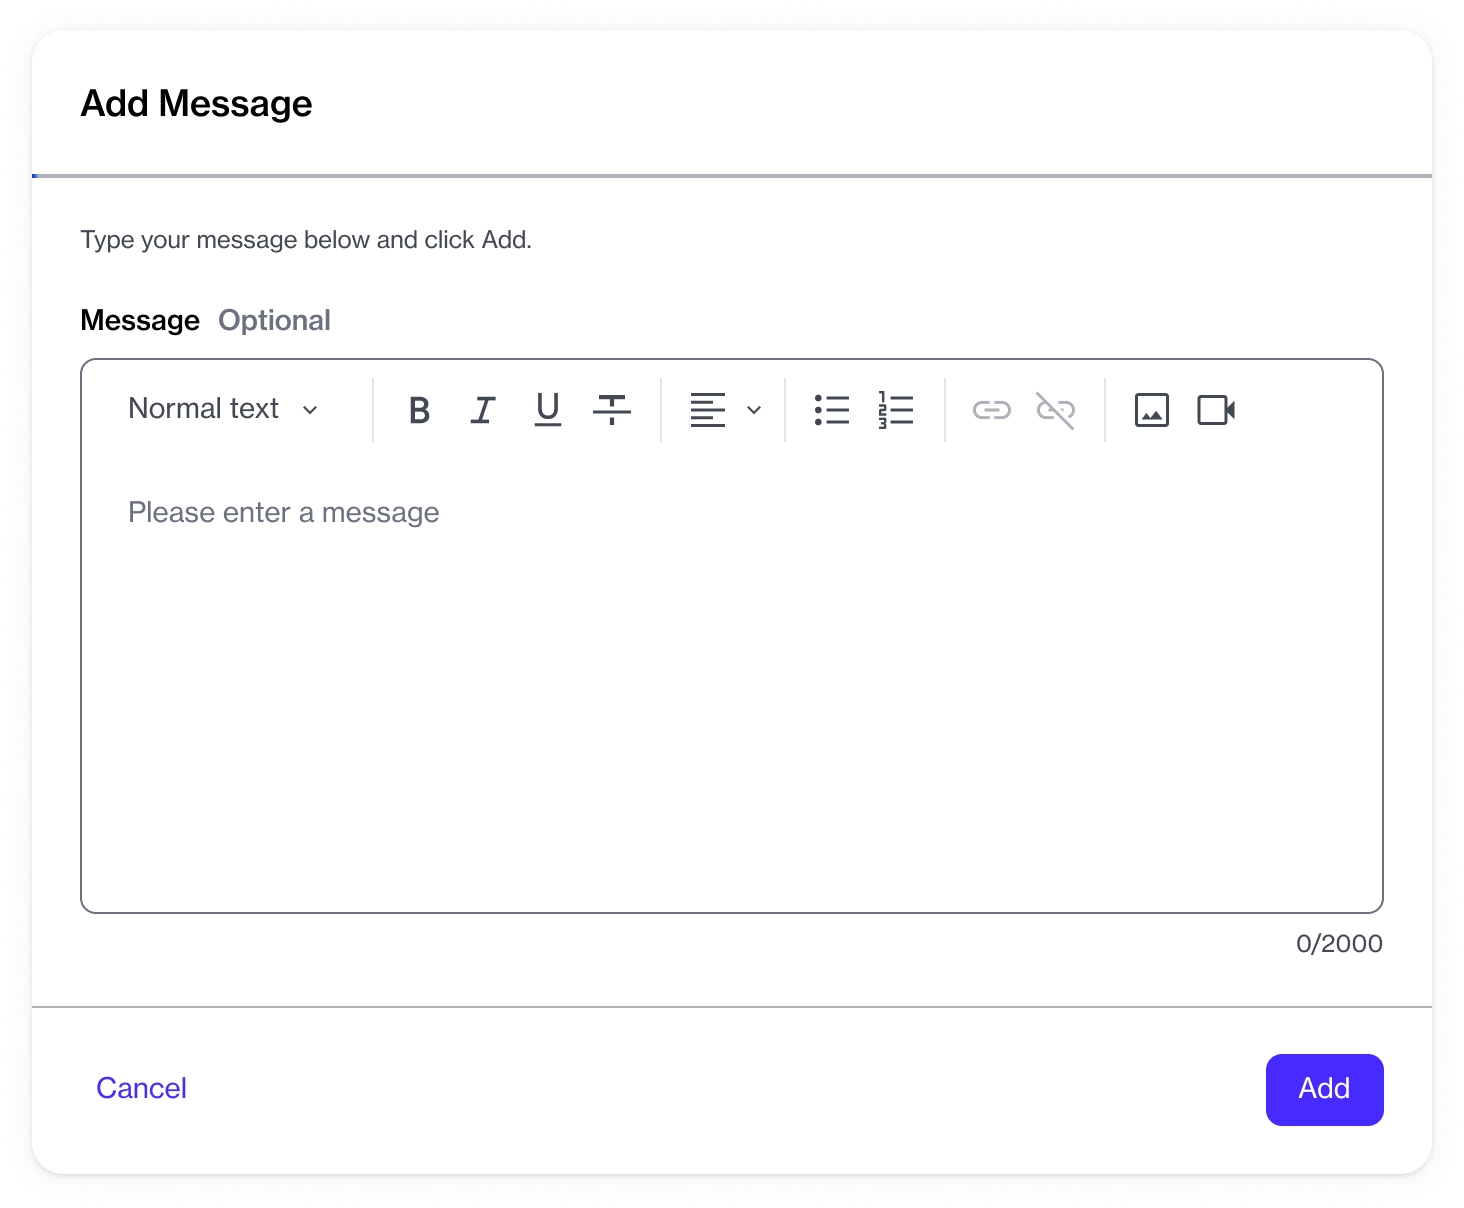
In Add Message, type your message. You can use the formatting options to style the text.
Click Add. Your message is added and displayed on the Activity tab.
Create a request to contact a vendor through the SoftwareOne Marketplace.
If you require personalized assistance or have queries regarding a product, you can contact the vendor directly through the SoftwareOne Marketplace.
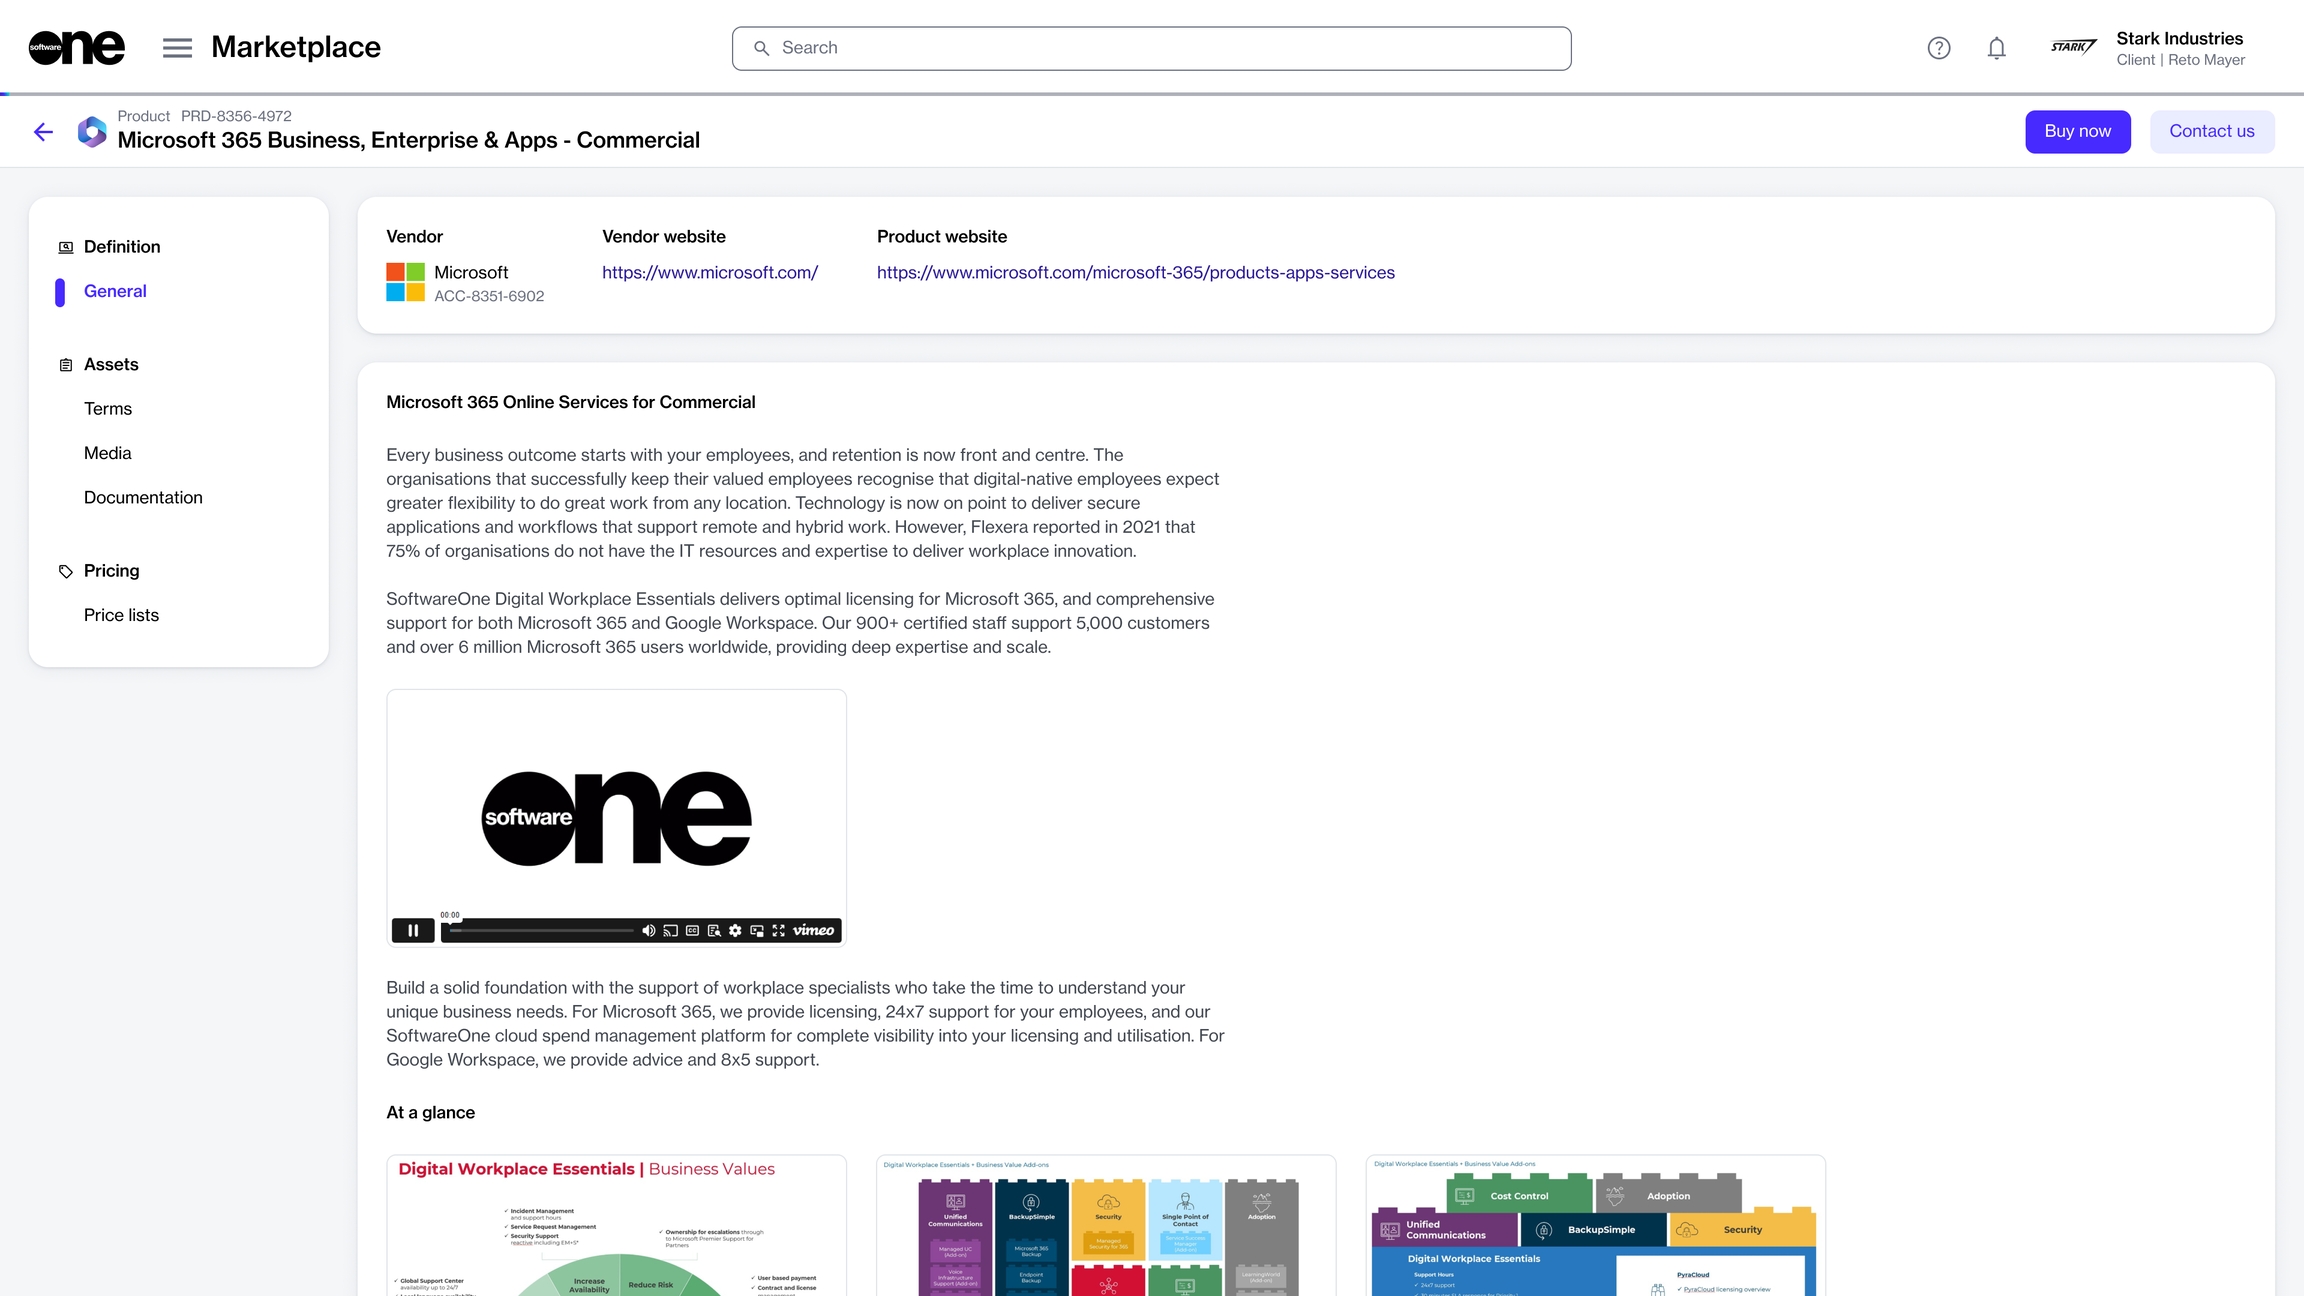
Before creating a request, note that you can contact a vendor only if they've enabled the option. If the option has been enabled, you'll see an Enquire Now, Contact Us, or a similar button on the Products page.
Follow these steps to create a new request:
Navigate to the Products page (Marketplace > Products) and find the listing from the catalog.
Click the option to contact the vendor. Alternatively, click the name of the product. When the details page of your selected product opens, click the required option in the upper right corner.
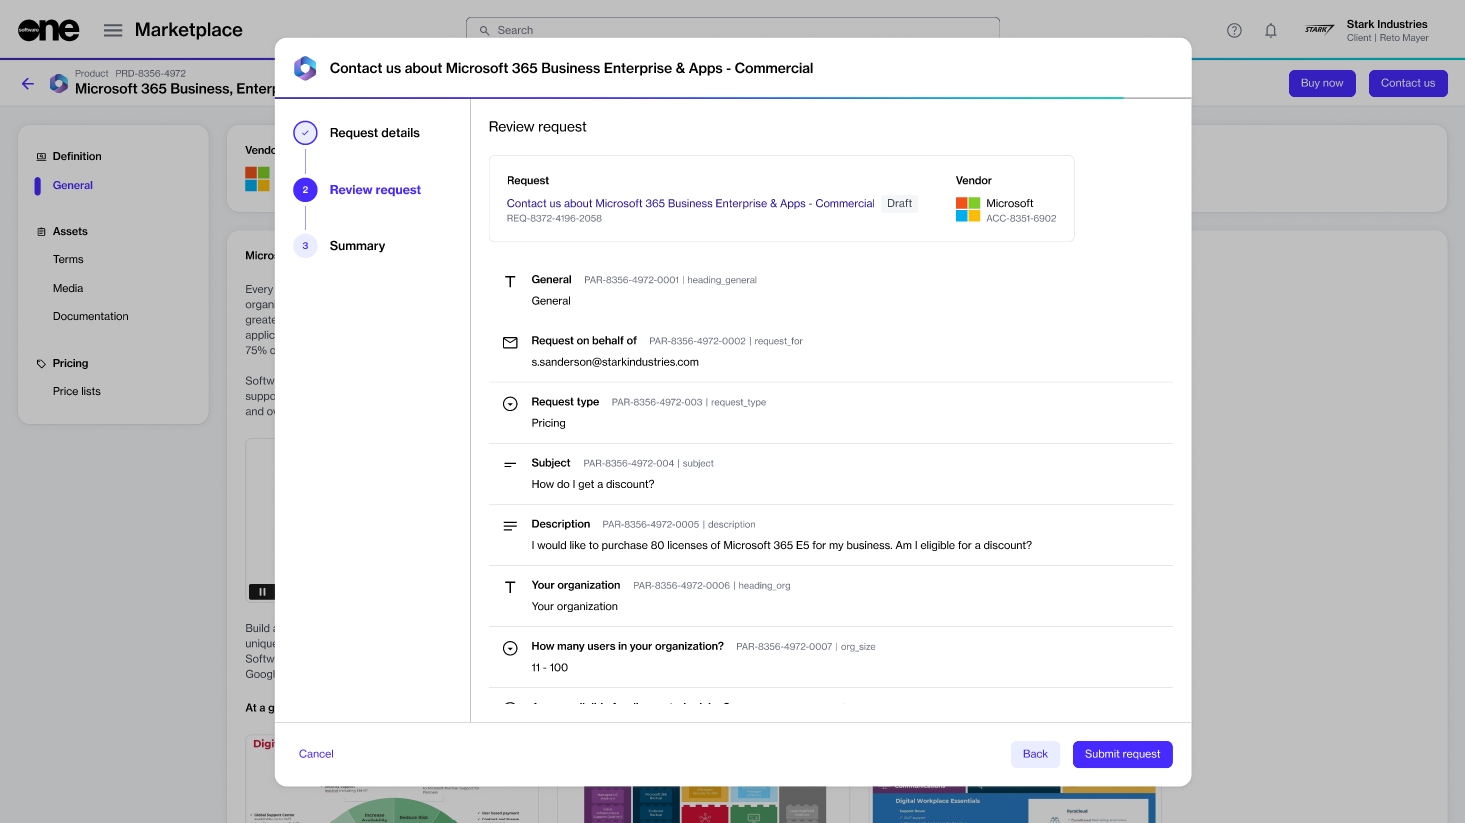
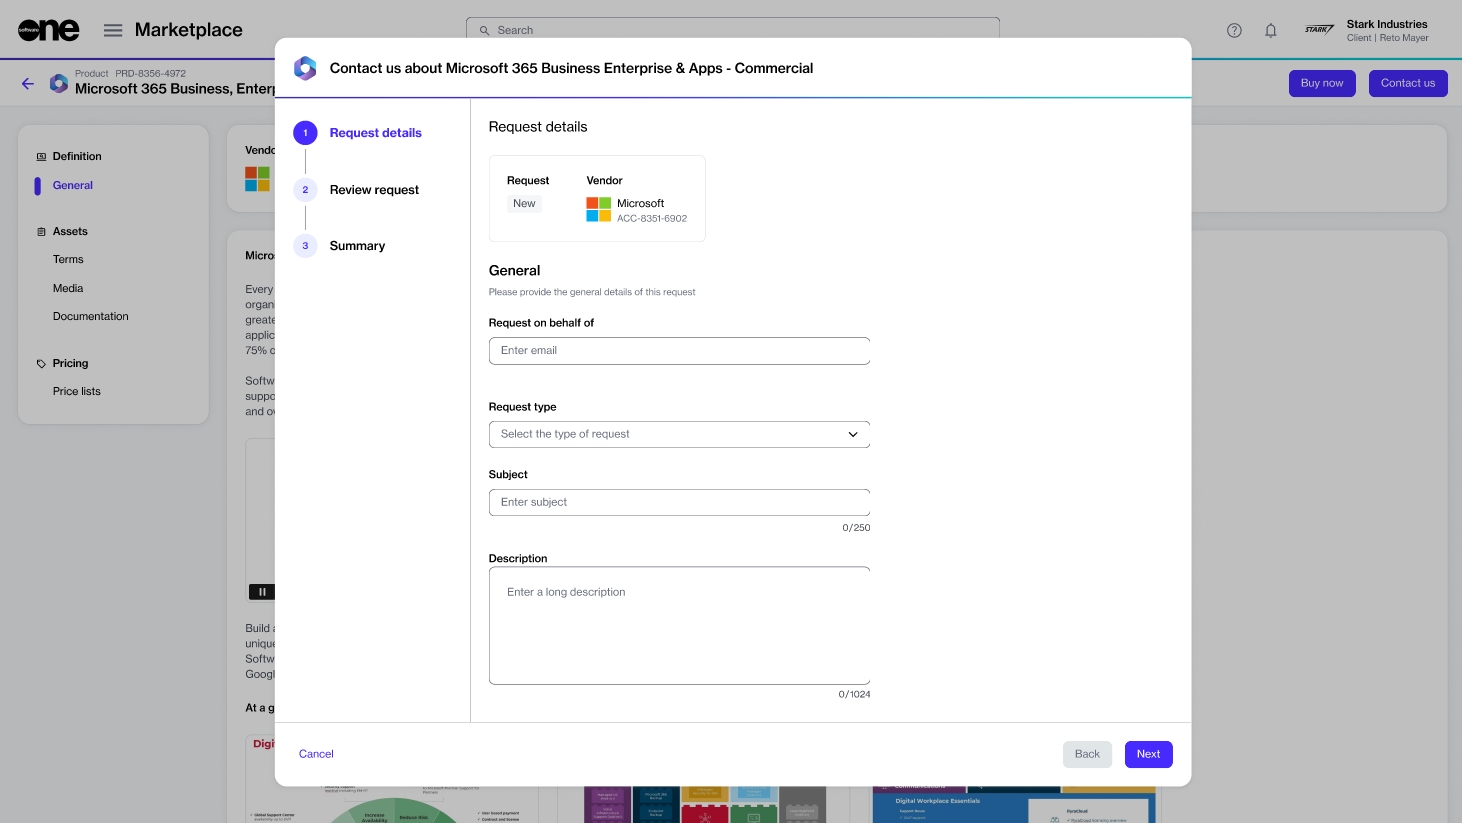
In the Request Details section, provide the details of your request and click Next.
In the Review Request section, review the information and click Submit Request.
Your request is submitted and assigned a Processing status. Click Close to close the page or click View Request to open the request's details page.
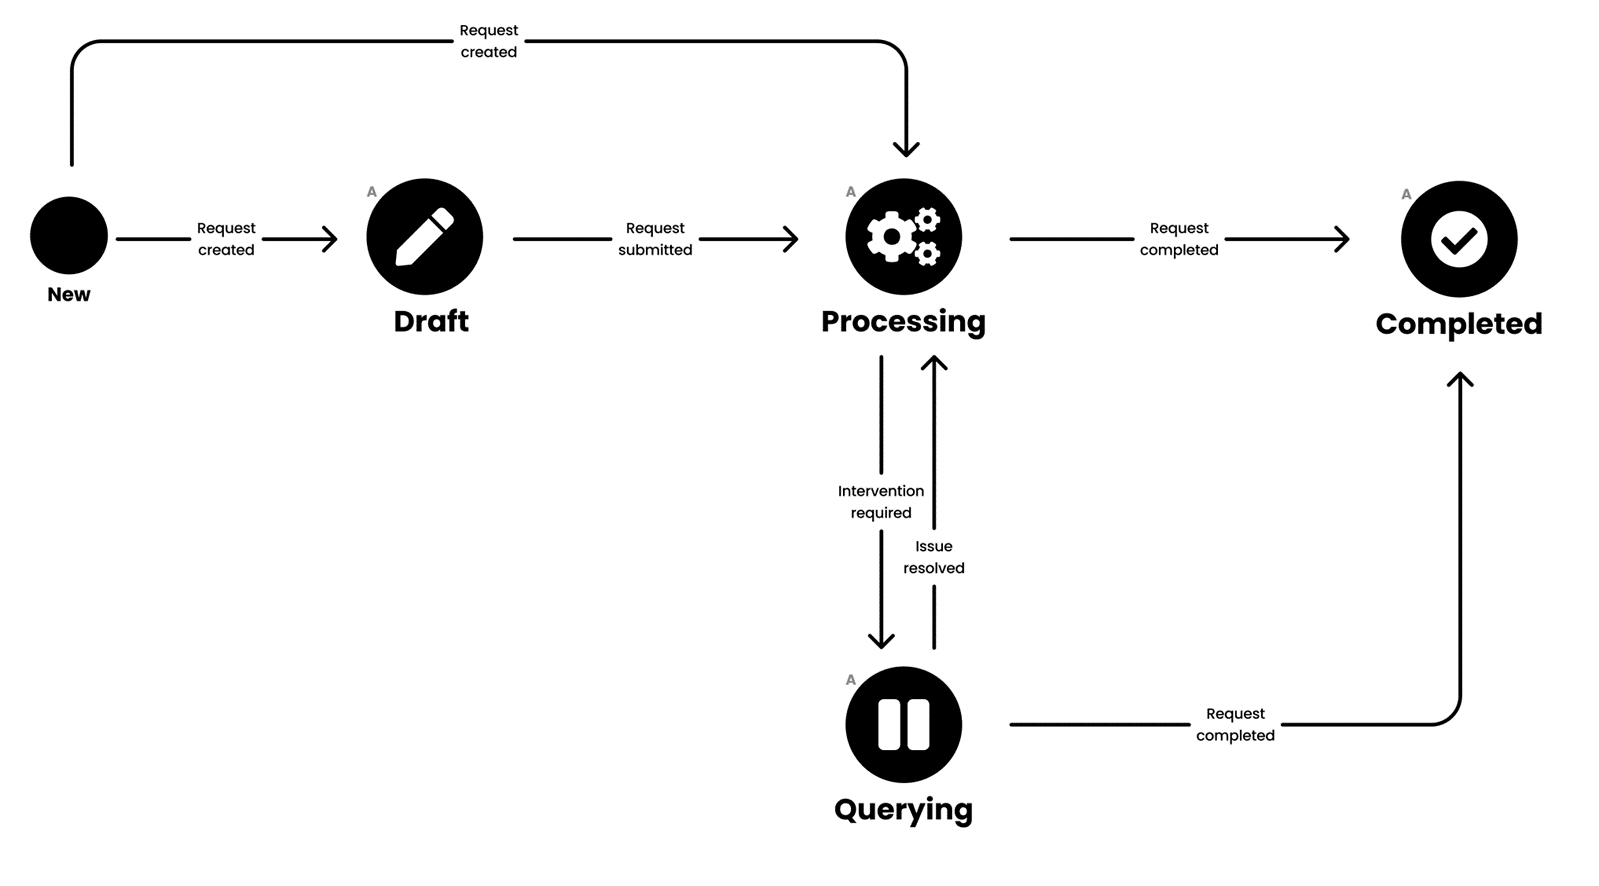
In the Marketplace Platform, a request can have several states (also known as status).
The following diagram shows the possible states and the transition between these states:
These states are displayed as Status within the platform. They are also displayed beside the request name and ID on the details page.
Draft
The request is being created.
Processing
The request is pending a response from the vendor or SoftwareOne.
Querying
The vendor or SoftwareOne has updated the request.
It now requires an action to be taken by a client account user.
Complete
The request has been completed.
Upload a new file as an attachment or remove the existing file.
If you need to upload supporting documents, you can add those files as attachments to your request. You can also delete attachments associated with your request.
Before attaching a file, note the following points:
You can attach a file regardless of the request's status.
The file you want to upload must be in one of these formats, .pdf, .pptx, .doc, or .xlsx.
Follow these steps to attach a file to your request:
Navigate to the Requests page (Marketplace > Requests). A list of your requests is displayed.
Click the request you want to update. The details page of your selected request opens.
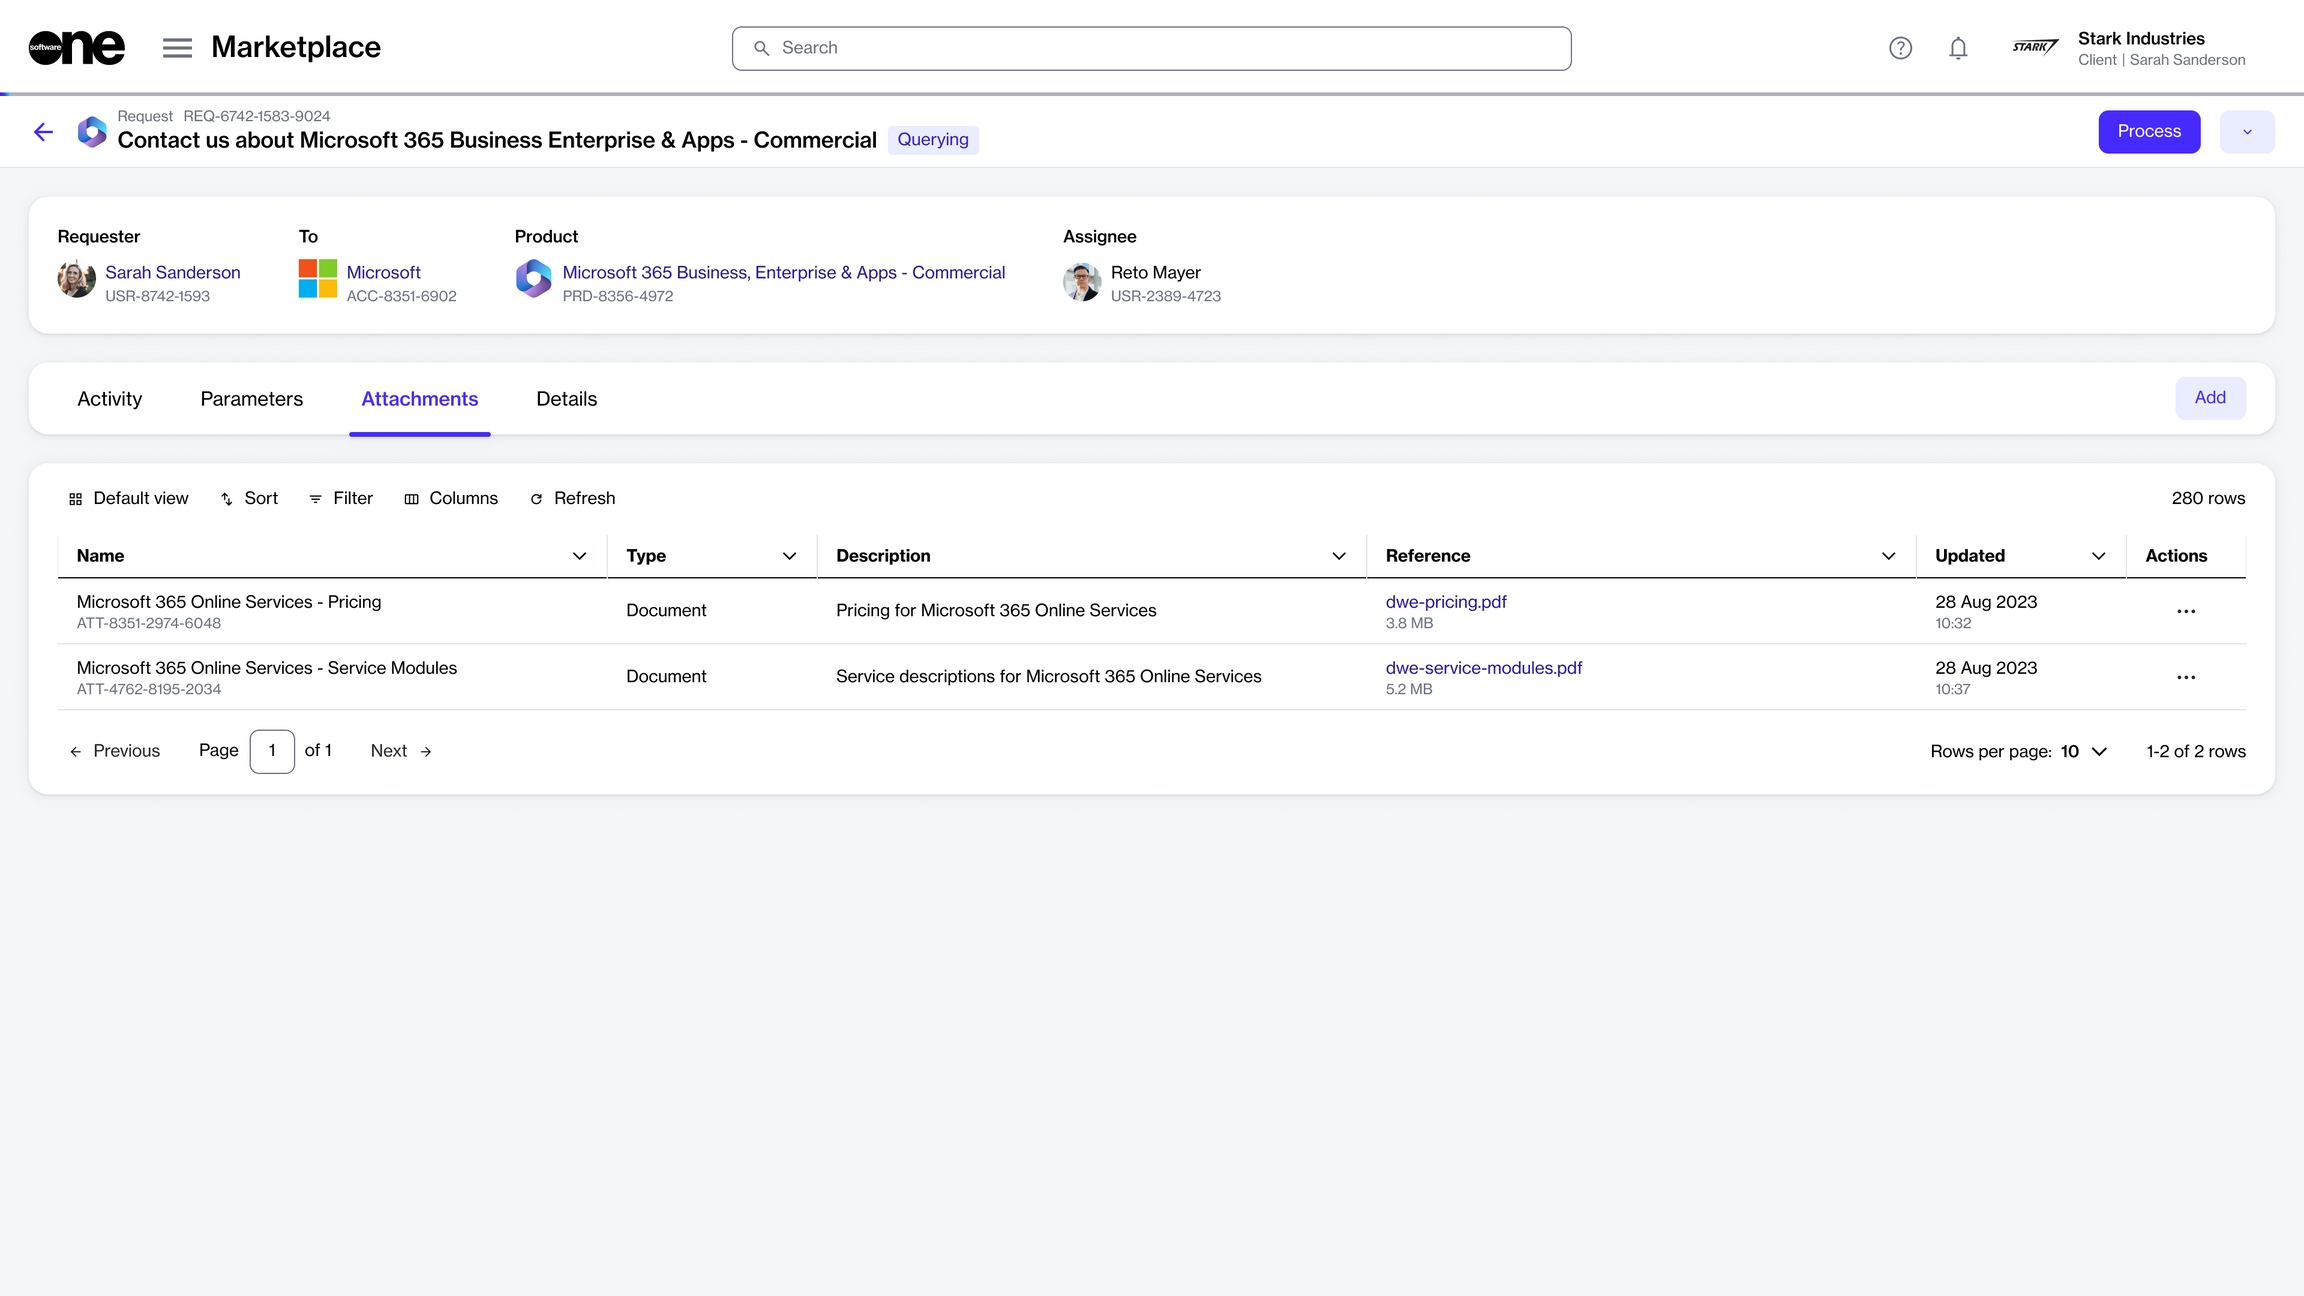
Select the Attachments tab and then click Add.
In Add attachments, do the following:
In the Name field, provide a file name.
In the Description field, add a brief description of your document.
In the Upload files section, click Select files to upload the file from your system or drag the file to the selection area.
Click Add.
The document is attached to the request and displayed on the Attachments tab.
A deleted file cannot be recovered.
Follow these steps to edit or delete an attachment:
From the Requests page (Marketplace > Requests), select the request you want to edit or delete. The details page of your selected request opens.
Select the Attachments tab.
Click the actions icon (•••) and select Edit or Delete as needed.
If you selected Edit, upload the new attachment in Edit attachment and then save your changes.
If you selected Delete, click Delete in the confirmation message to confirm the action.
Change the status of your request from Querying to Processing.
When you update your request, for example, by attaching documents, it's important to change the request status to Processing and send the request back to the vendor.
This action informs the vendor that you've replied to their query and the request is now ready for their review.
Before changing the status, note the following points:
You can change the status of your request to Processing only if the current status is Querying. If the request is already in Processing or Completed state, the option to change the status is unavailable.
Only change the status of your request to Processing once you've provided all the information and the request is ready for the vendor's review.
Follow these steps to set your request to Processing:
Navigate to the Requests page (Marketplace > Requests). A list of your requests is displayed.
Click the request you want to update. The details page of your selected request opens.
Make changes as necessary and then click Process.
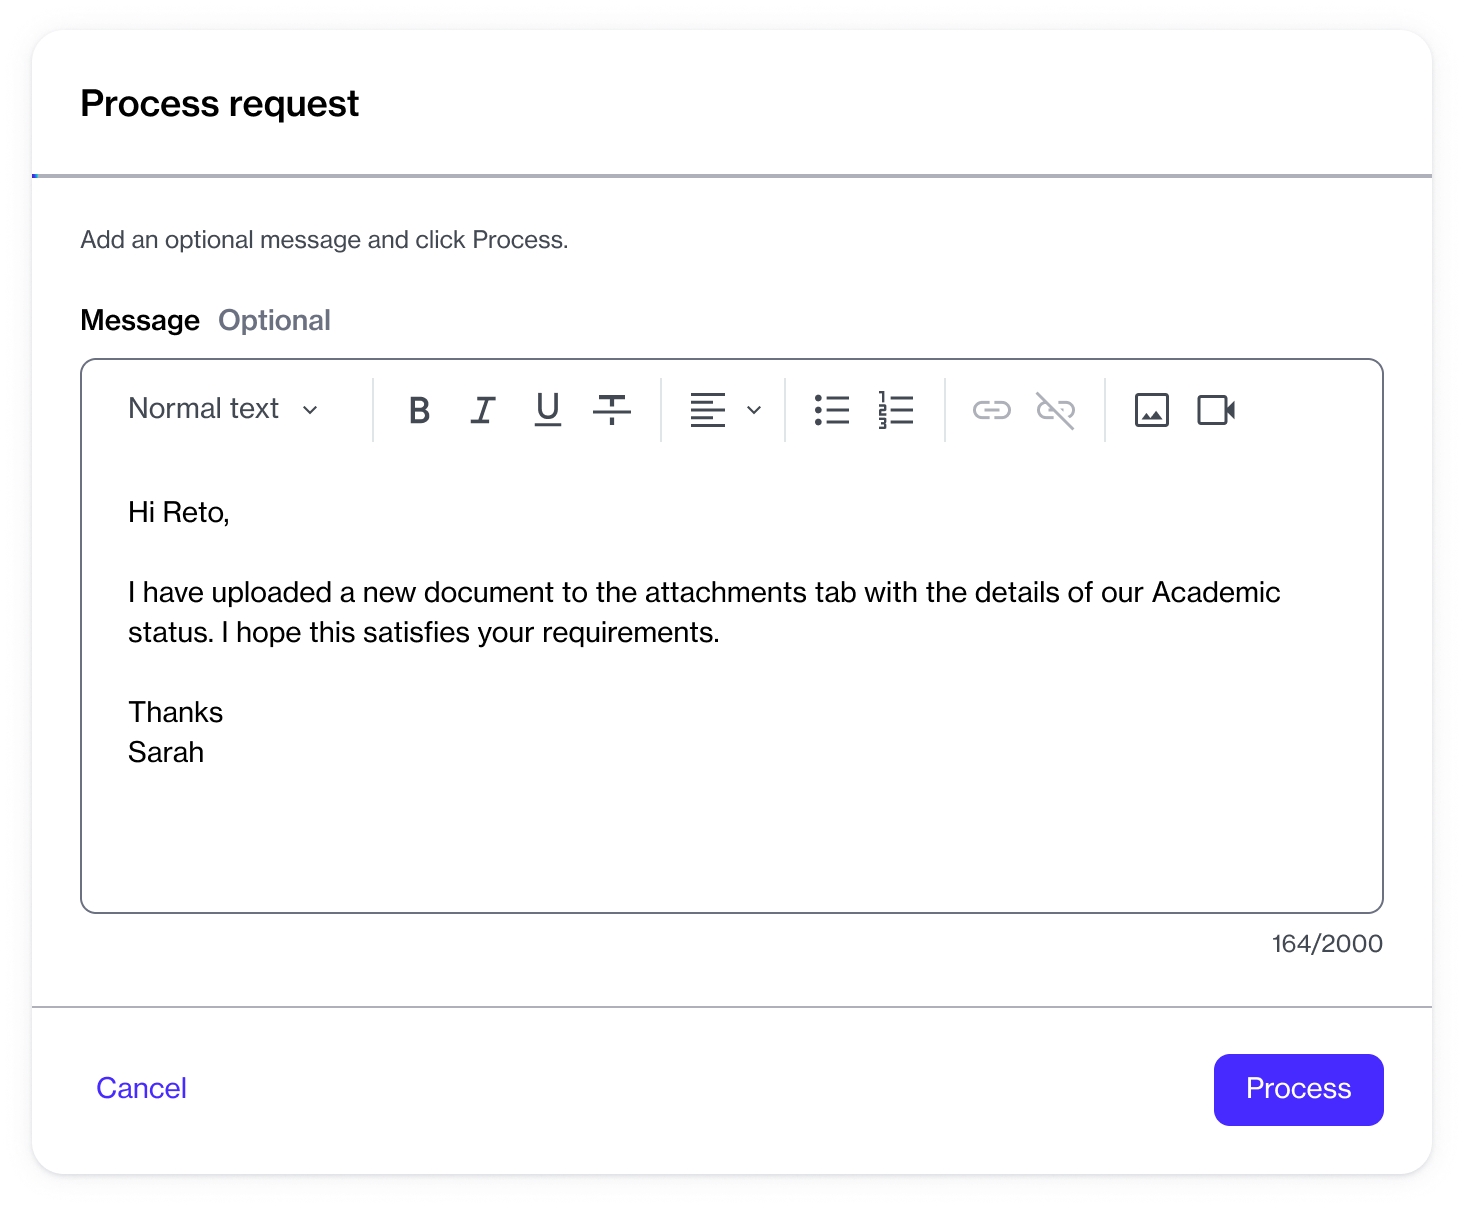
In Process request, add an optional message and click Process.
The status of your request changes from Querying to Processing. If you added comments in the Process request dialog, your comments are displayed and visible to everyone on the Activity tab.
Complete your request after it has been answered.
You can complete or close your request after it has been attended to, by either the vendor or SoftwareOne.
Before making a request complete, note that completed requests cannot be edited or reopened afterward.
Follow these steps to complete a request:
Navigate to the Requests page (Marketplace > Requests). The page displays all requests, including requests that are raised by other members of your account.
Select the request you want to complete. The details page of your selected request opens.
Click the down arrow next to Process and click Complete.
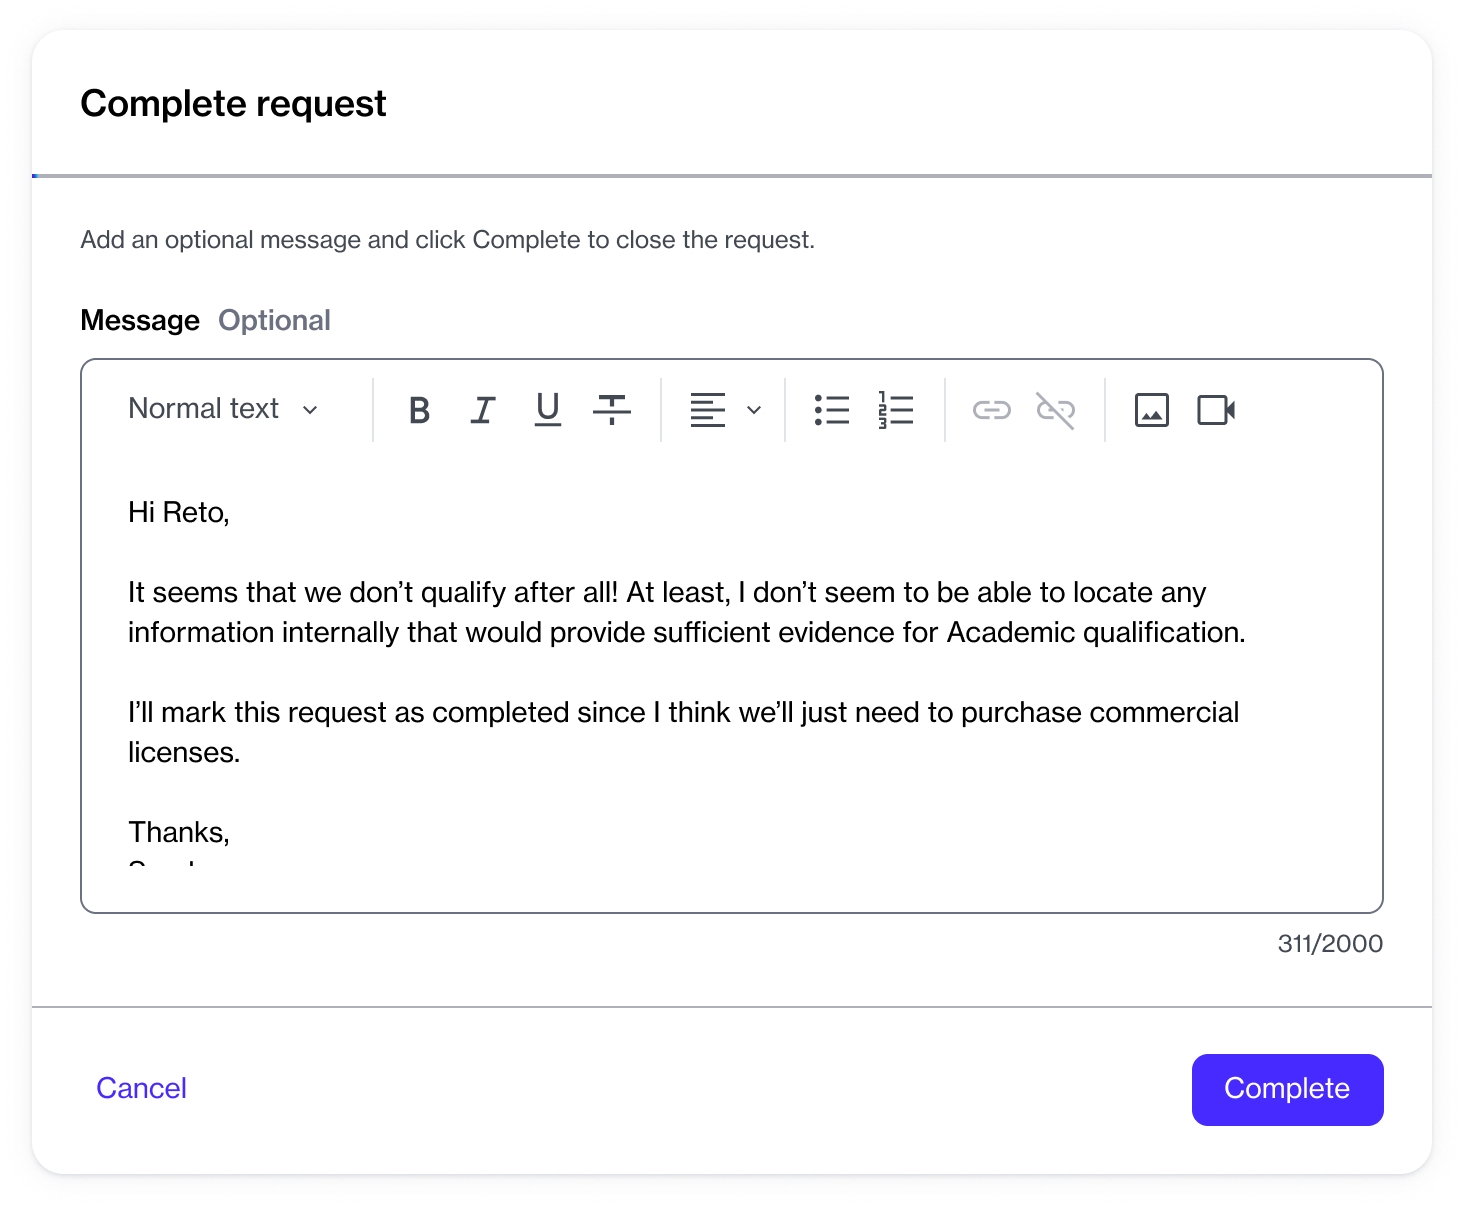
In the Complete request dialog, add your comments and click Complete.
Your request is completed and the Status column on the Requests page displays the updated status of your request.
If you added any comments while marking the request as complete, your comments are visible to everyone on the Activity tab.
Create new requests and manage your existing requests.
In the context of the Marketplace Platform, a request is a pre-sale inquiry created through the Request module. An inquiry represents questions about products, such as pricing, billing, product availability, and licensing.
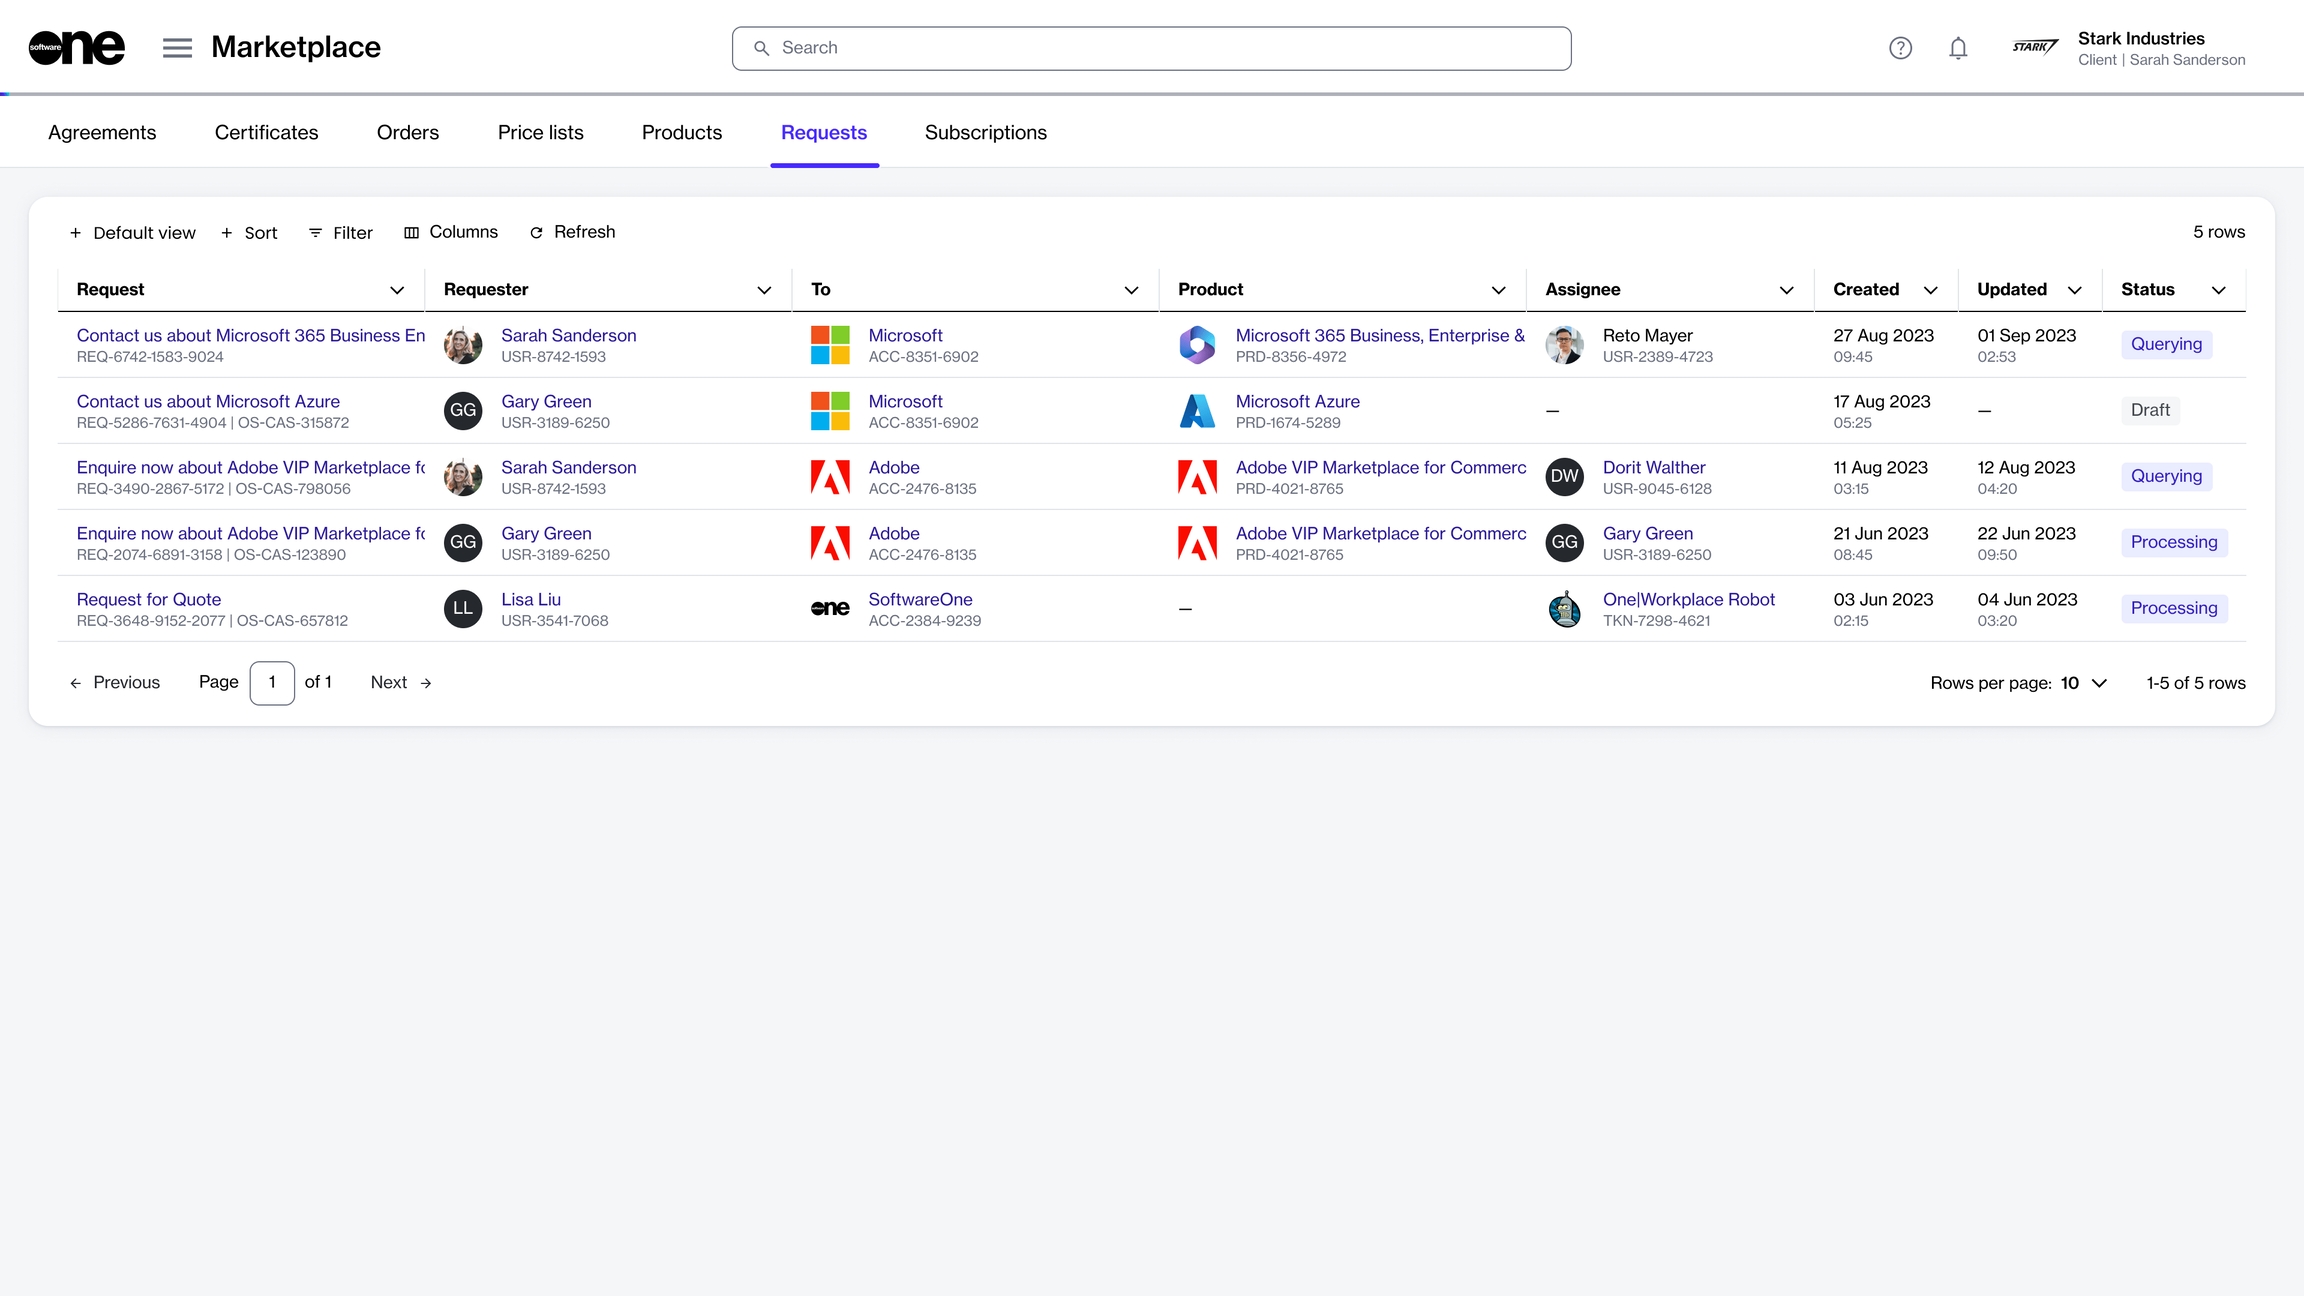
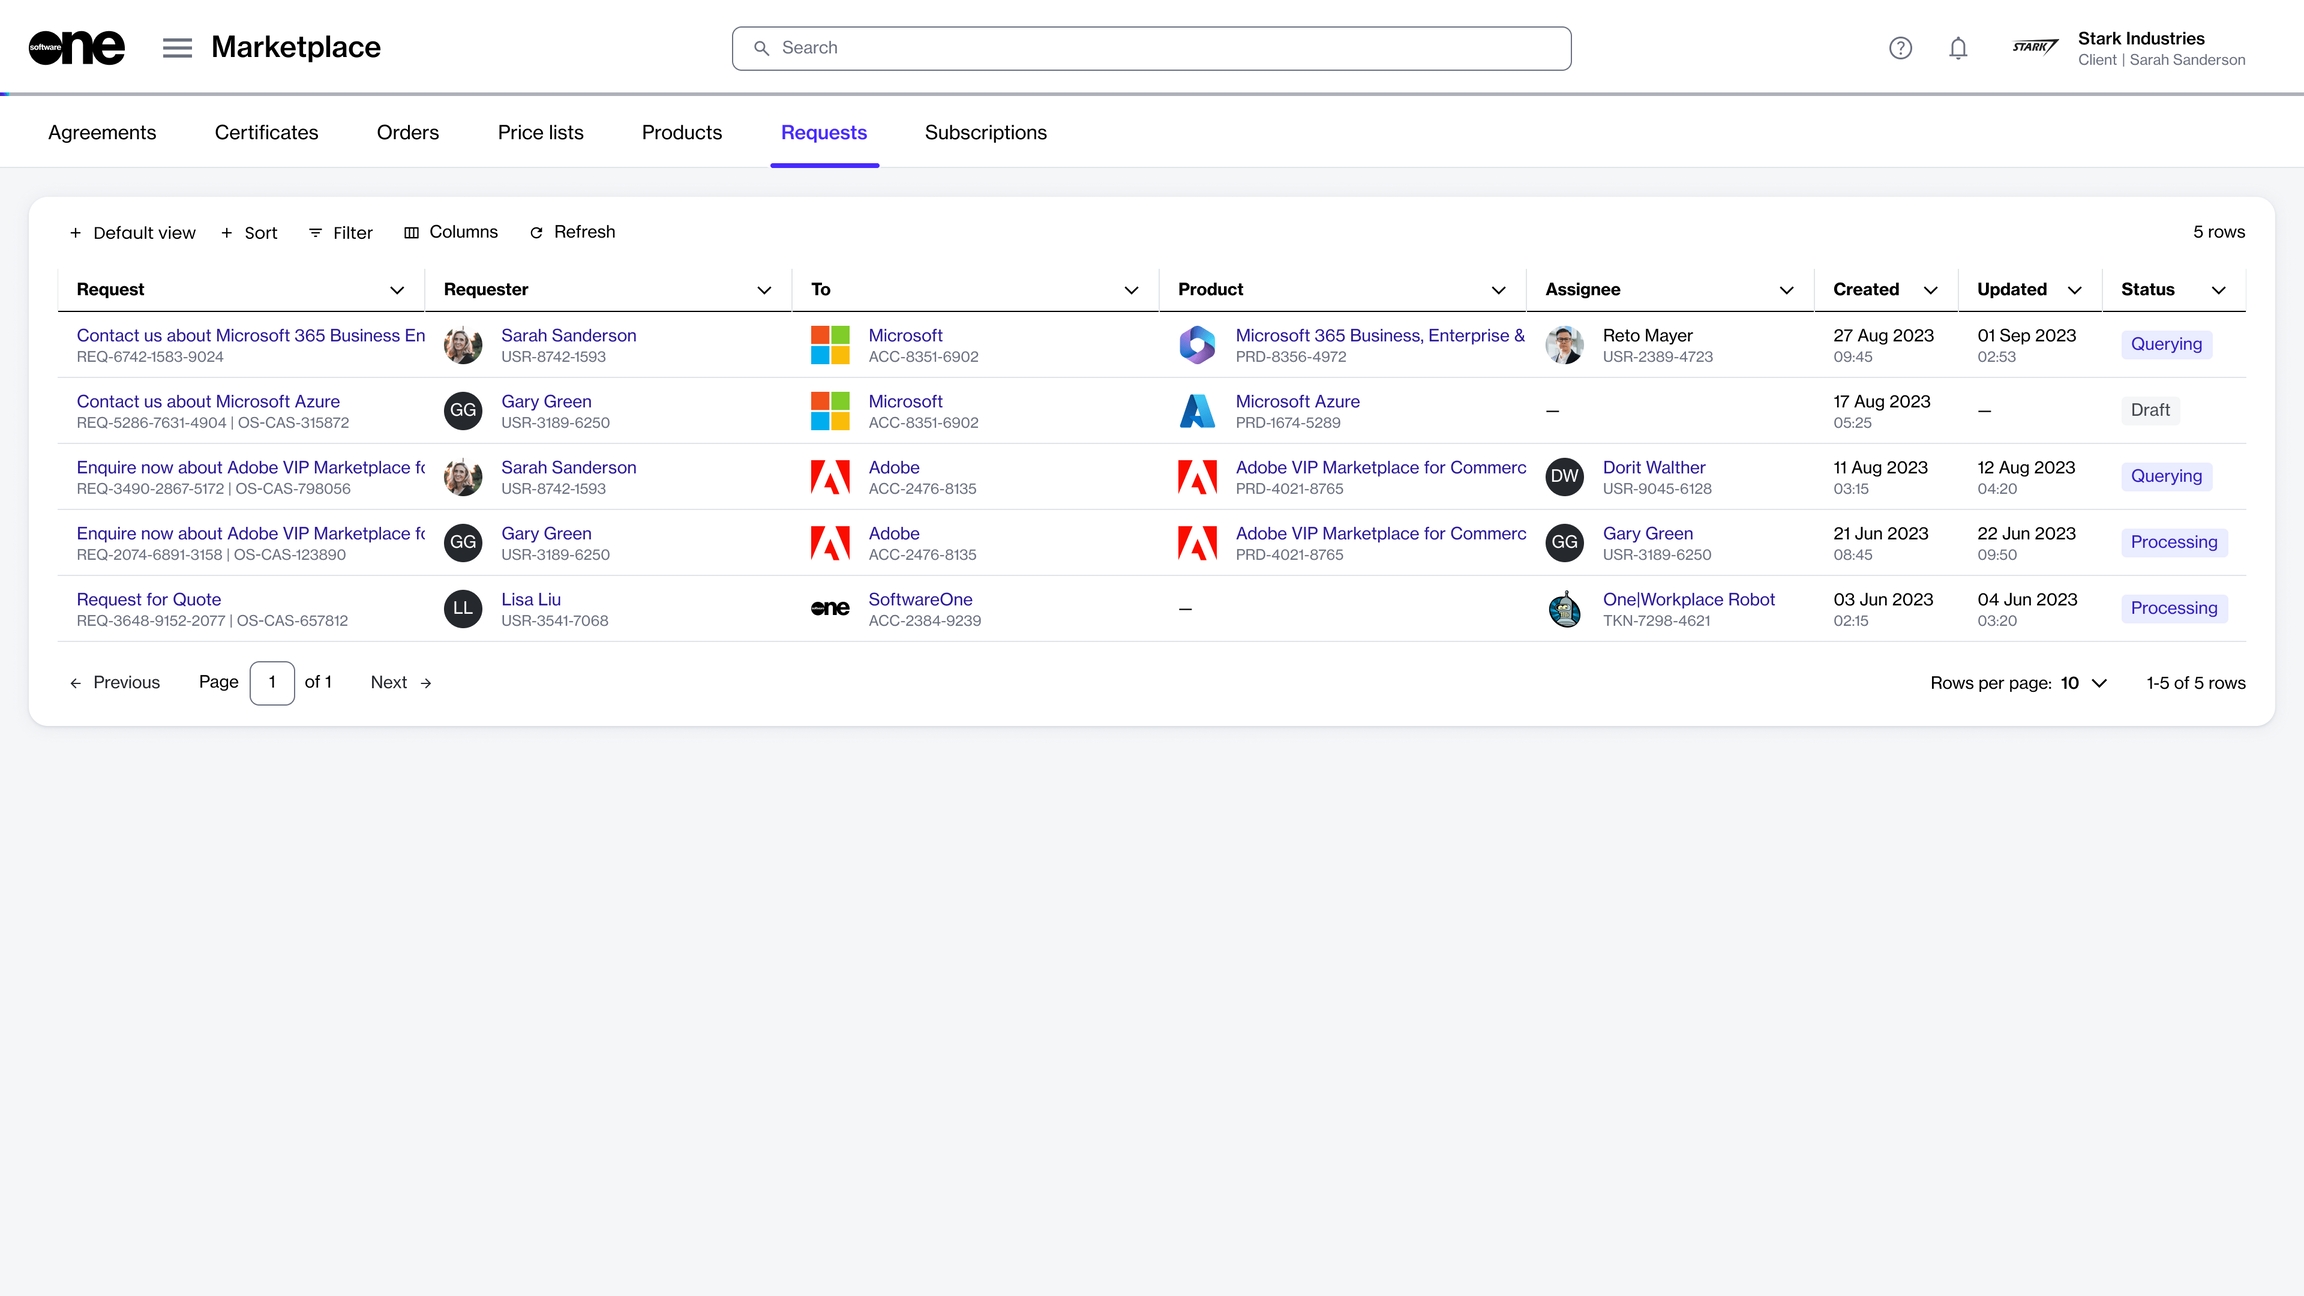
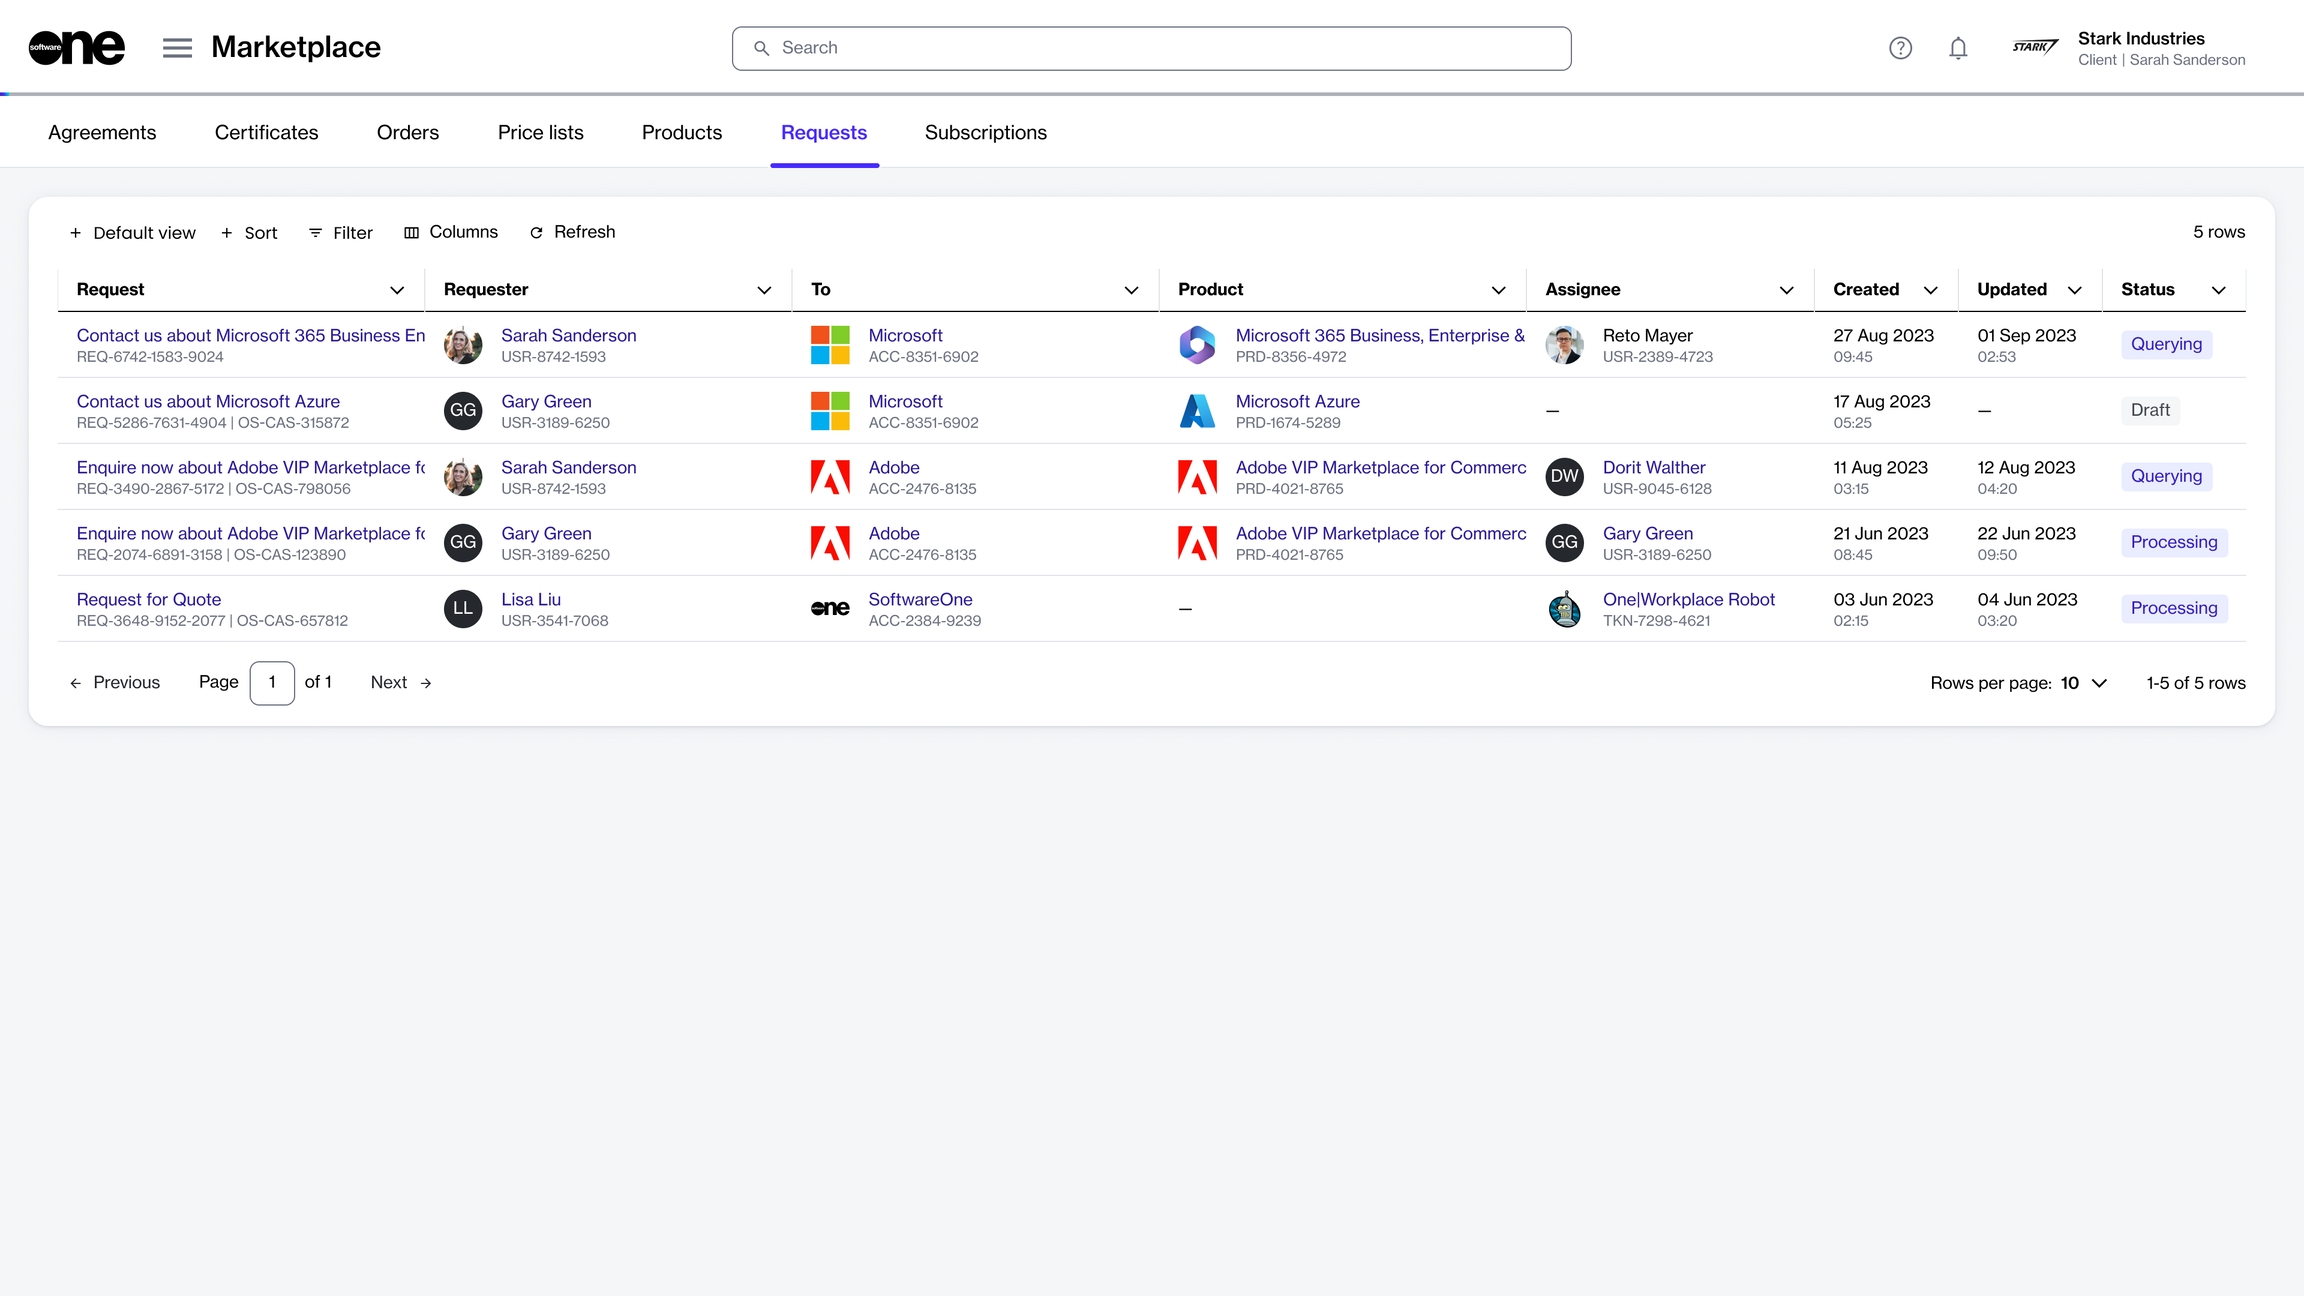
You can access the Requests page by navigating to the main menu and selecting Marketplace > Requests. The page displays a list of your requests:
On this page, you can view the following details of each request:
Request - Displays the name and unique identifier for the request.
Requester - Displays the name of the person who created the request.
To - Displays the name of the vendor.
Product - Displays the product name for which the request is created.
Assignee - Displays the contact person assigned to the request.
Created - Displays the date and time when the request was created.
Updated - Displays the date and time when the request was updated.
Status - Displays the status of your request. For more information on the status, see Request States.
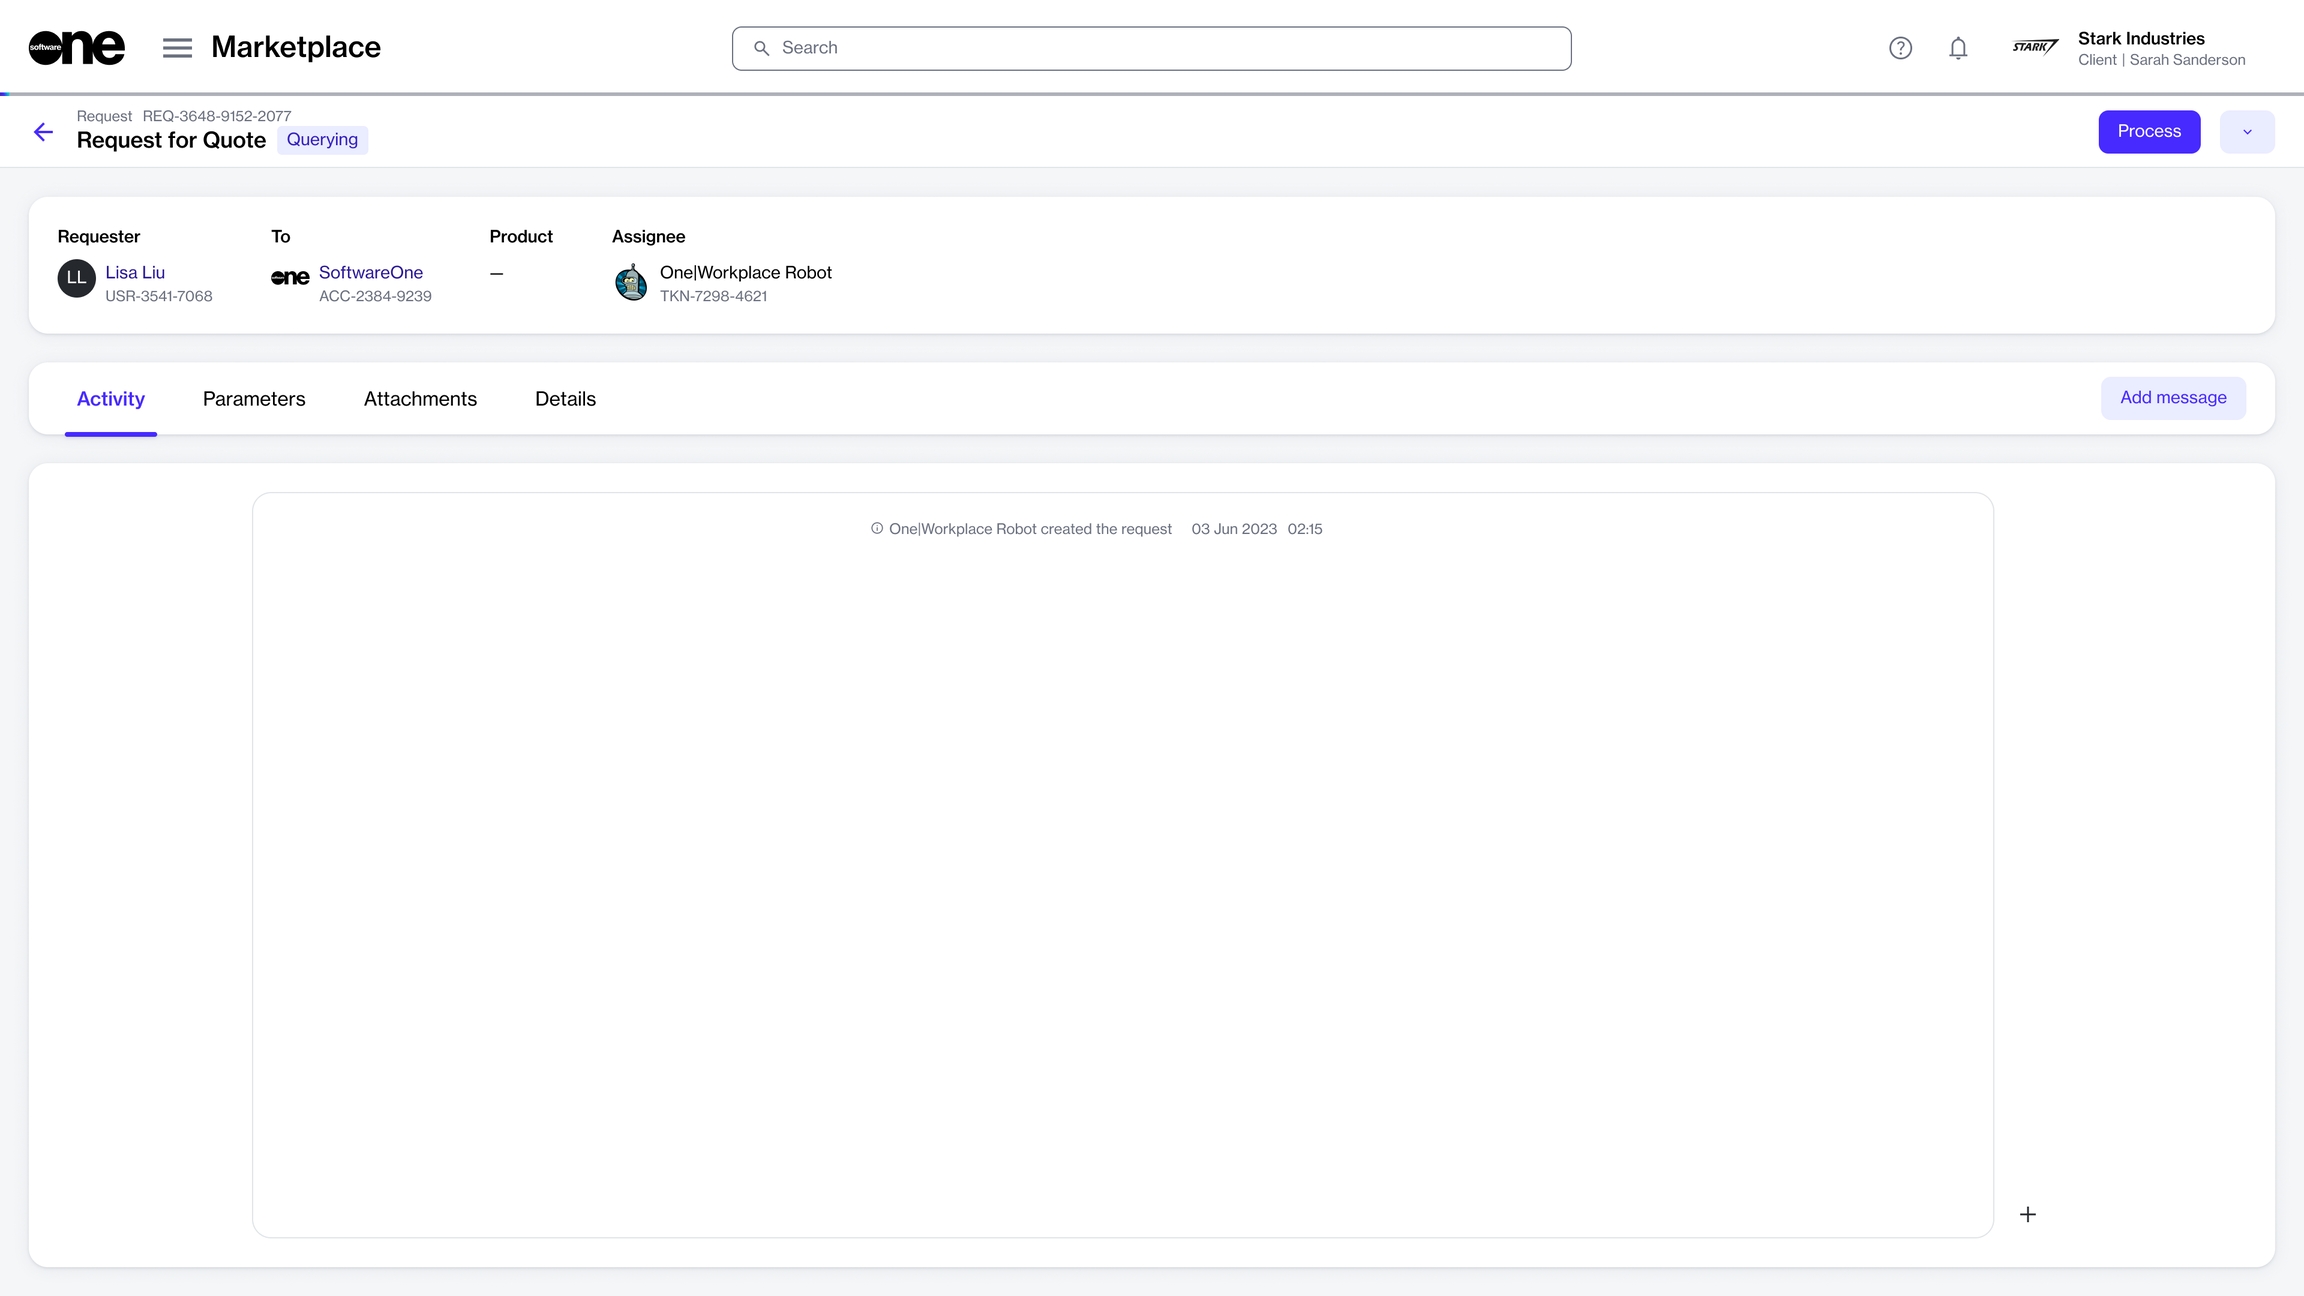
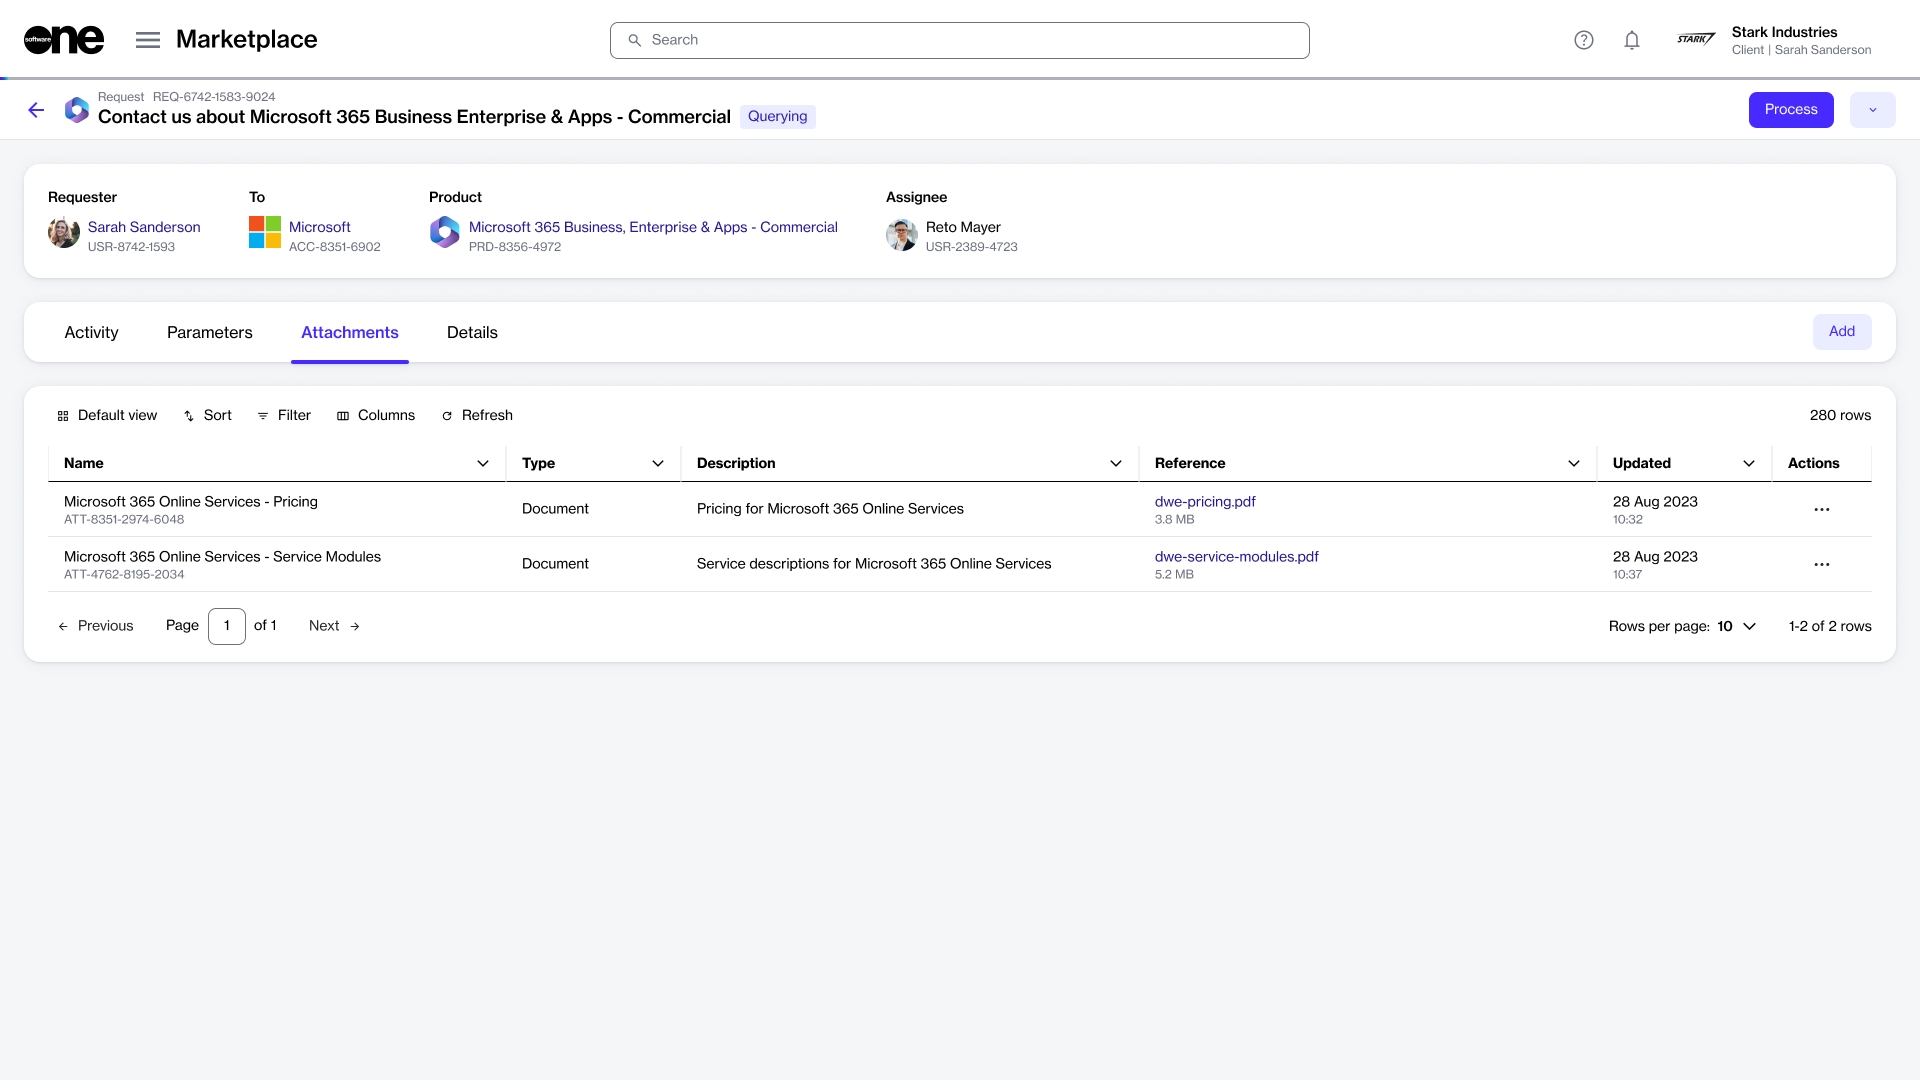
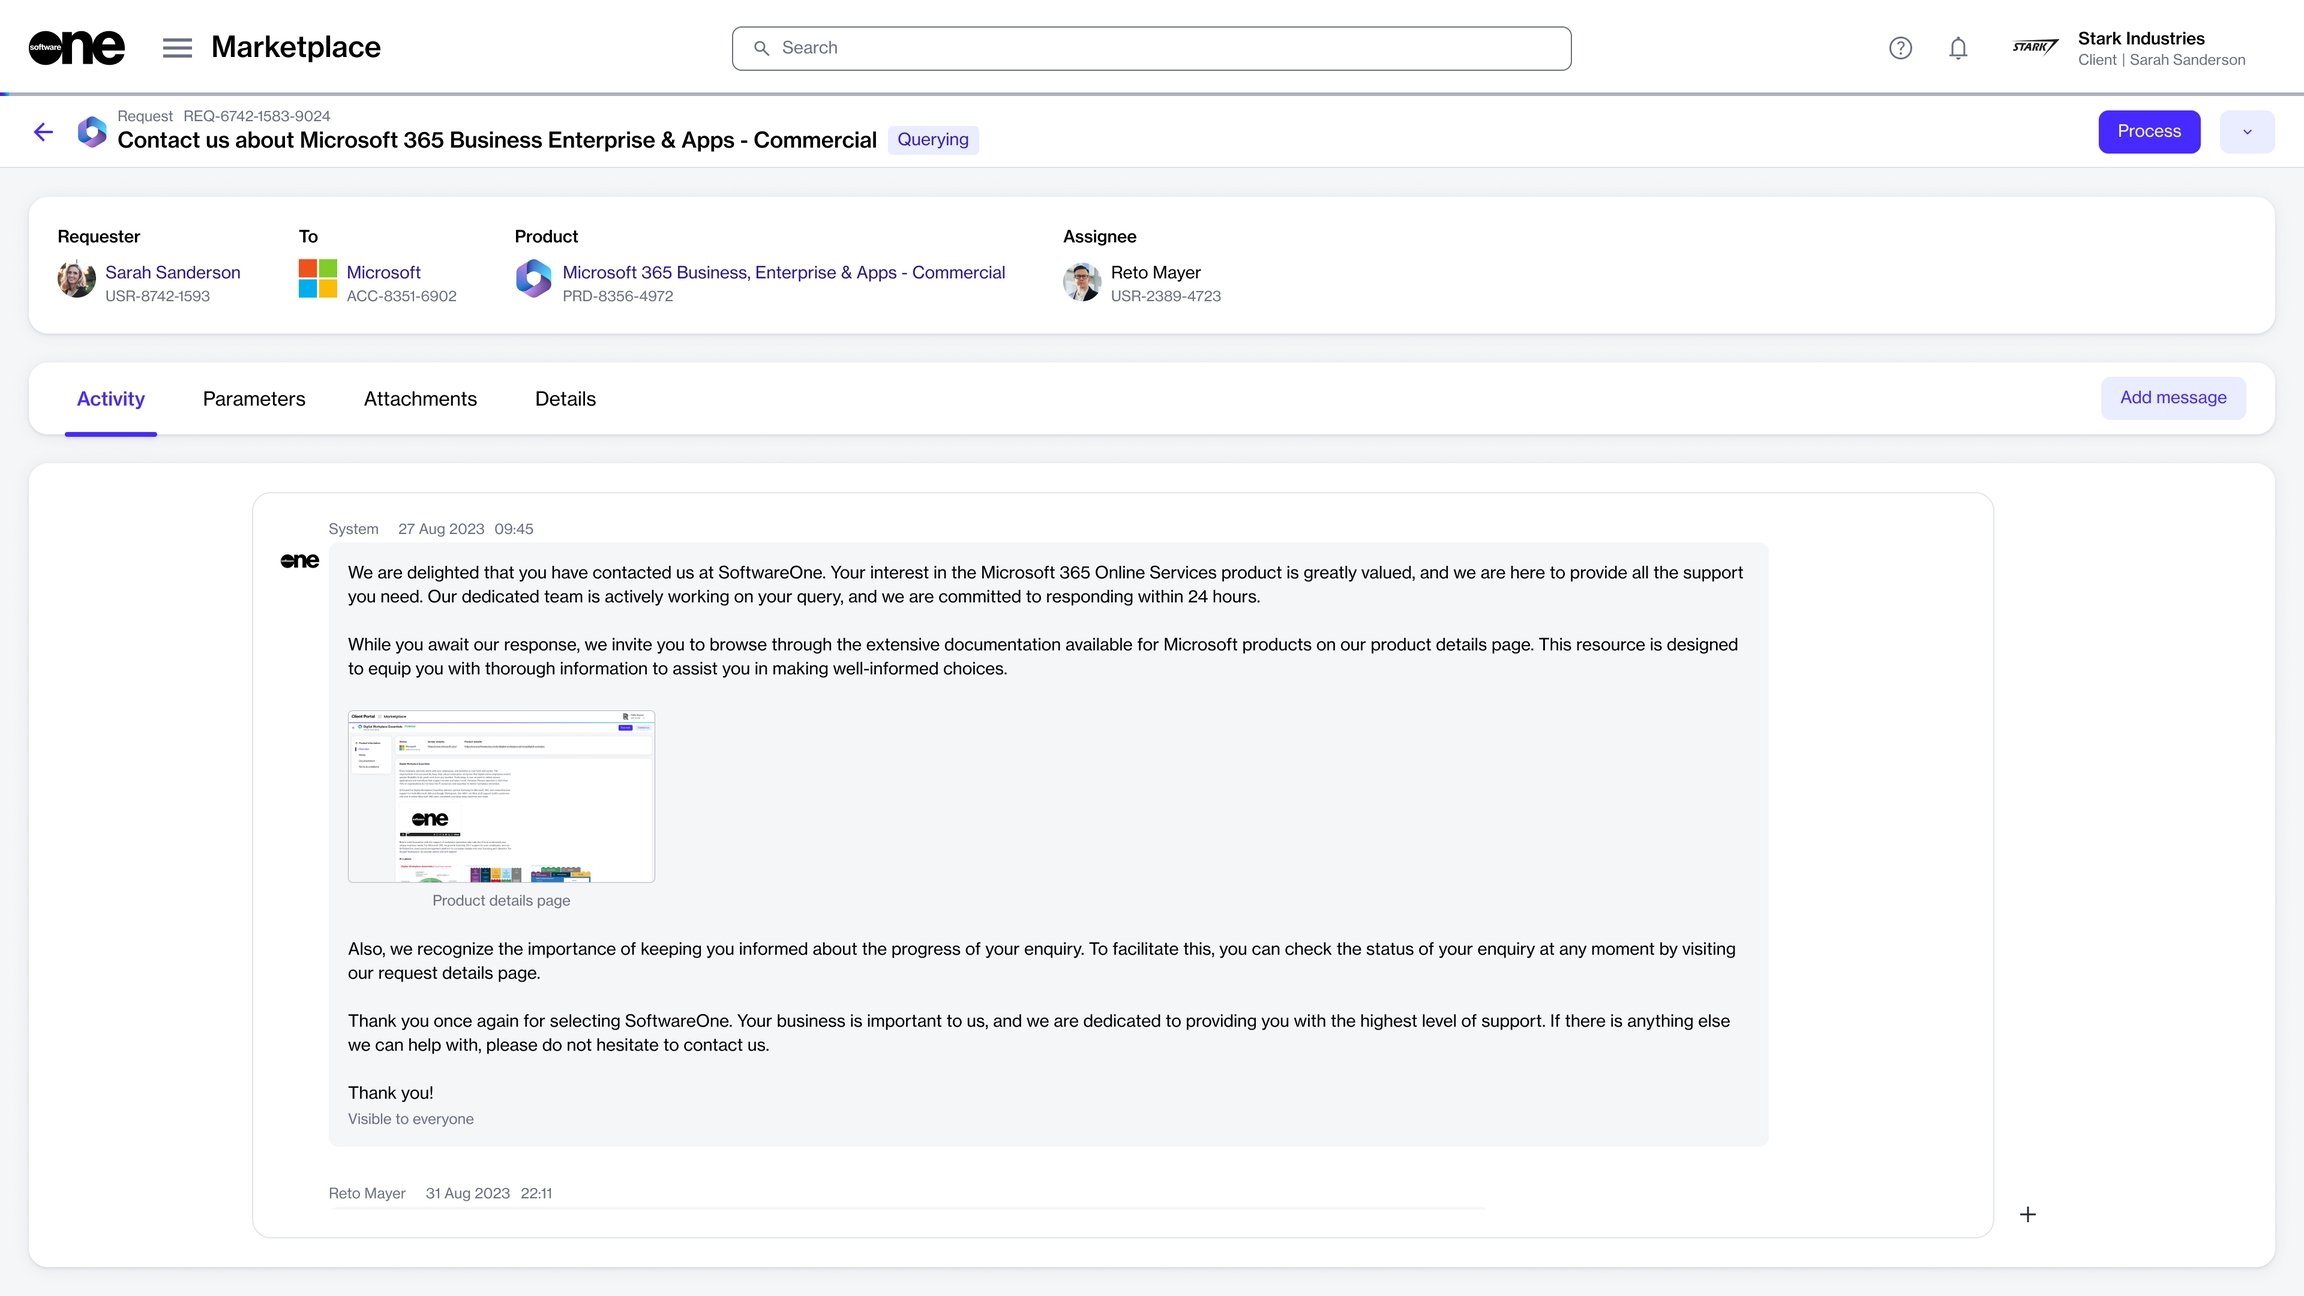
The details page of a request provides all the details about your request. You can open the details page by clicking the request on the Requests page.
When you open the details page, it displays the name of the product against which the request has been raised and the request status. You can also view general information about the request, such as the requester's name, vendor, and assignee.
The request details page is organized into several tabs, each providing specific information. The following tabs are available:
Activity - Displays the activity information, including the message history for the request. From this tab, you can also add a new message to the conversation.
Parameters - Displays all request parameters and their values, if available. The information is for viewing only and cannot be edited.
Attachments - Displays the files attached to the request. You can also add new attachments and manage existing attachments.
Details - Displays the date and time when the request was created. If the request was updated, the tab displays the timestamp when the request was last modified.

