Loading...
Loading...
Loading...
Loading...
Loading...
Loading...
Loading...
Create a reporting period.
A reporting period represents a period that you use to schedule budgets in your organization. For example, financial year, calendar year, quarters, or any custom time period.
Each reporting period is treated as an overall budget for all Custom Groups. Therefore, it carries information like Budget Amount and Budget Owner.
Follow these steps to create a reporting period:
From the main menu of the Client Portal, navigate to Analyze > Budgets.
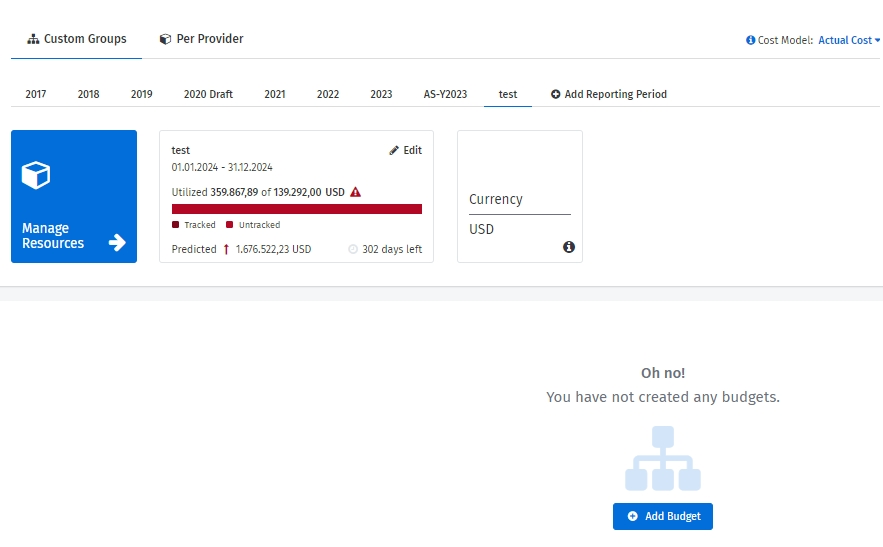
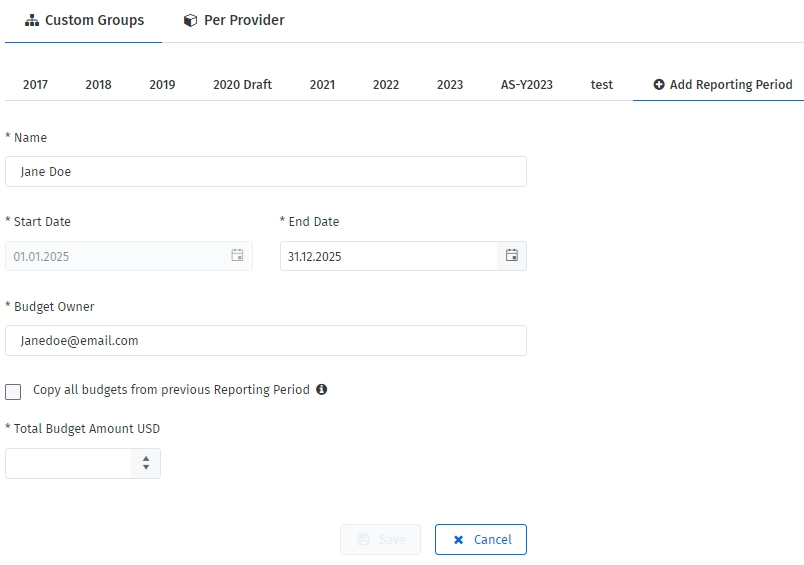
On the Budgets - Custom Groups page, click Add Reporting Period.
Provide a name for the reporting period.
Choose an end date for the reporting period.
Enter the email address of the person who owns the budget and will receive utilization notifications.
Select a currency that will be applied to every Custom Group budget.
Enter the budget amount.
Click Save. Your reporting period is created and a confirmation message is displayed.
Define cloud budgets and assign them to groups within your business or cloud service provider.
Budgets allow you to define cloud budgets and assign them to groups within your business or cloud service provider. You can assign individual budgets in the following two areas:
Custom groups - Allows you to assign individual budgets to Custom Groups defined within Custom Groups. This allows you to manage time period and monetary values for your spending defined by your business.
Service Provider - Allows you to assign individual budgets to Enrollments, Subscriptions, or Tenants (depending on the provider terms). Service provider budgets enable you to manage time period and monetary values for your spending tied to your providers.
To access Budgets, navigate to the main menu of the Client Portal and select Cloud tools > Budgets.
If you have purchased any Reserved Instances, you can choose between the following two cost models:
Actual Cost - Represents Reserved Instance purchase cost as a one-time cost (single spend record).
Amortized Cost - Equally distributes Reserved Instance purchase cost across months of the reservation time period.
When a budget is created or changed by someone other than the budget owner, the owner will receive a notification regarding the change, including when:
A new budget is created.
The budget amount has changed.
The budget name has been changed.
The start date or end date of the budget has been changed.
Create a per provider budget.
Before creating a budget, note that there can be only one subscription budget under an Account budget.
Depending on the provider, you can create a budget for an account and a subscription. Follow these steps to create a per-provider budget:
From the main menu of the Client Portal, navigate to Cloud tools > Budgets.
Select the Per-Provider tab.
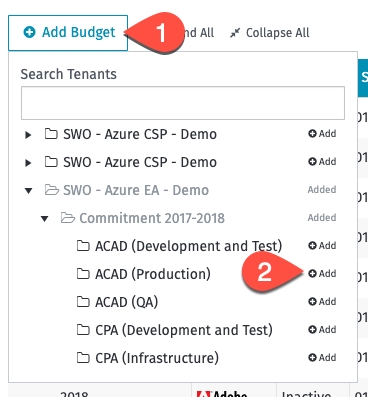
Click Add Budget and then click Add after you've selected the tenant. If you have a long list of tenants, you can use the Search Tenants option to find the tenant.
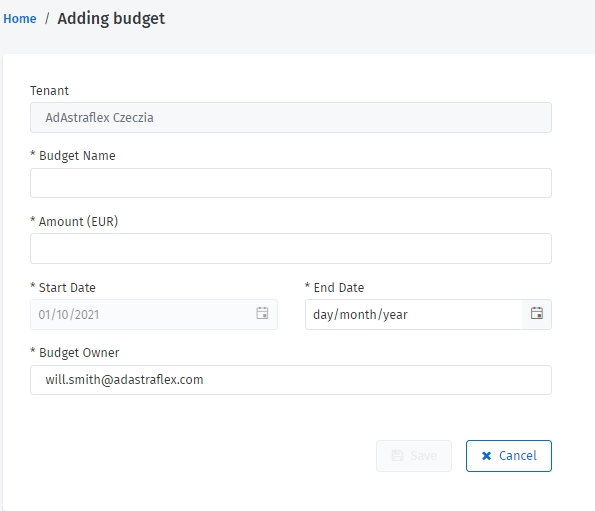
In the Adding budget page, provide the following details:
Budget name - If you are creating a budget for an Account, you'll need to provide a budget name. In the case of subscription budgets, the name is automatically set to the subscription name.
Amount - Add the amount.
End Date - End date of the budget.
Budget Owner - Email address of the person responsible for creating the budget.
Click Save.
Request to create a new budget or update an existing budget.
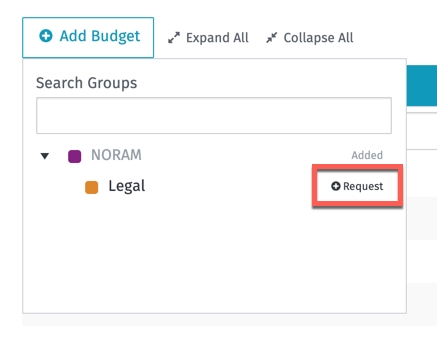
When you have limited access, you can't control budgets for your main Custom Groups or Subscriptions. Instead, you'll see a Request option for both types of budgets.
This means you might only see part of your Custom Groups or Providers, depending on the permissions your administrator has given you. The budgets you can view are determined by your Spend Management access settings.
Follow these steps to request a new budget:
Select the Request option corresponding to the group.
In the Budget Request form, enter the budget amount and then confirm your request. The budget owner of the parent Custom Group will receive your request and create the budget.
Follow these steps to request an update to an existing budget that you're unable to modify directly:
Select the Request Budget Change option.
Provide the amount and then submit your request. The Budget Owner of the parent budget will receive your request.
Create a custom group budget.
Before creating budgets, note the following prerequisites:
Setup the customer-centric view - To assign budgets to individual groups, you must first set up the structure in Custom Groups. Without Custom Groups, you can only see the Per Provider view in Budgets.
Setup a currency - Currency setup is required so you can use your internal reporting currency across all Custom Groups, and manage the budgets and consumption in your currency. This is done for the following reasons:
If you are using multiple providers in different sourcing currencies, the platform will convert them to your set currency.
The configured currency is also the default currency within Consumption Overview (native sourcing currency available at any time).
Consumption values are converted daily based on the Foreign Exchange rates. A currency can only be changed before configuring the first budget. Changing currencies later will require the removal of all budgets.
You can assign a budget to any custom group defined within the Custom Groups. Follow these steps to create a budget:
From the main menu of the Client Portal, navigate to Cloud tools > Budgets.
On the Budgets - Custom Groups page, click Add Budget.
(Optional) Use the Search option to find a specific group.
Select the custom group and click Add.
On the Budget Details page, provide the following details:
Total Amount - The amount that you have budgeted to spend on this group.
Owner Email Address - The email address of the person who owns the budget and will receive utilization notifications.
Click Save.
View custom group and per-provide budgets.
Follow these steps to view a custom group budget:
Navigate to Cloud tools > Budgets.
On the Custom Groups tab, select the reporting period.
Locate the budget you want to view and then in the Actions column, click View. The following details are displayed:
Utilized - Spend generated by resources assigned to the budget group within the budget time.
Final Spend - Prediction calculated until the end of the budget period.
Time Remaining - Days left until the end of the budget period.
Budgeting period - Start and end date of the budget.
Owner - Email address of the person responsible for this budget.
On the details page of your budget, you can also select the following tabs to view additional details:
By default, the budget amount is equally distributed across budget months.
Based on this, the table displays consumption and utilization information for every month. You can Edit Monthly Budgets to adjust the budget amount for each month.
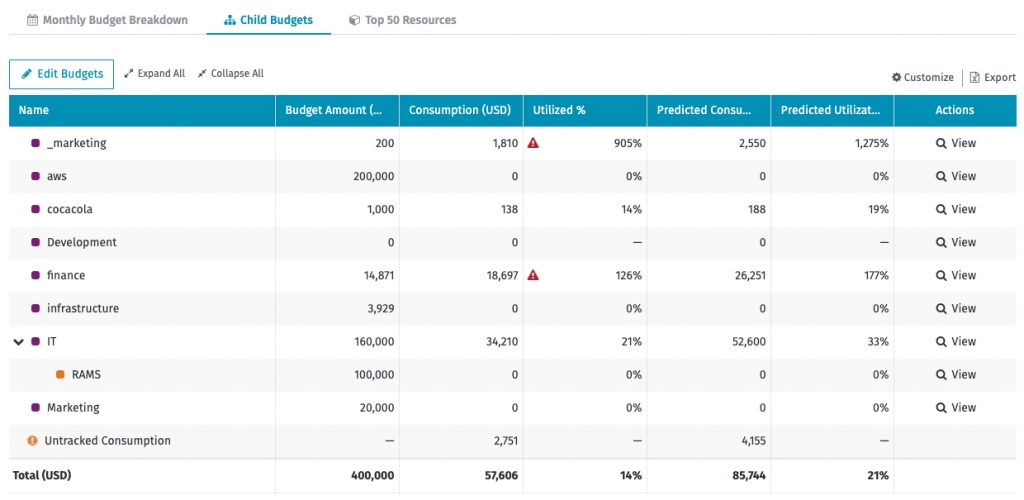
This tab provides information about child budget amounts and utilization.
Consumption in child budgets is included in the parent budget utilization value. You can edit the child budget amounts by selecting Edit Budgets.
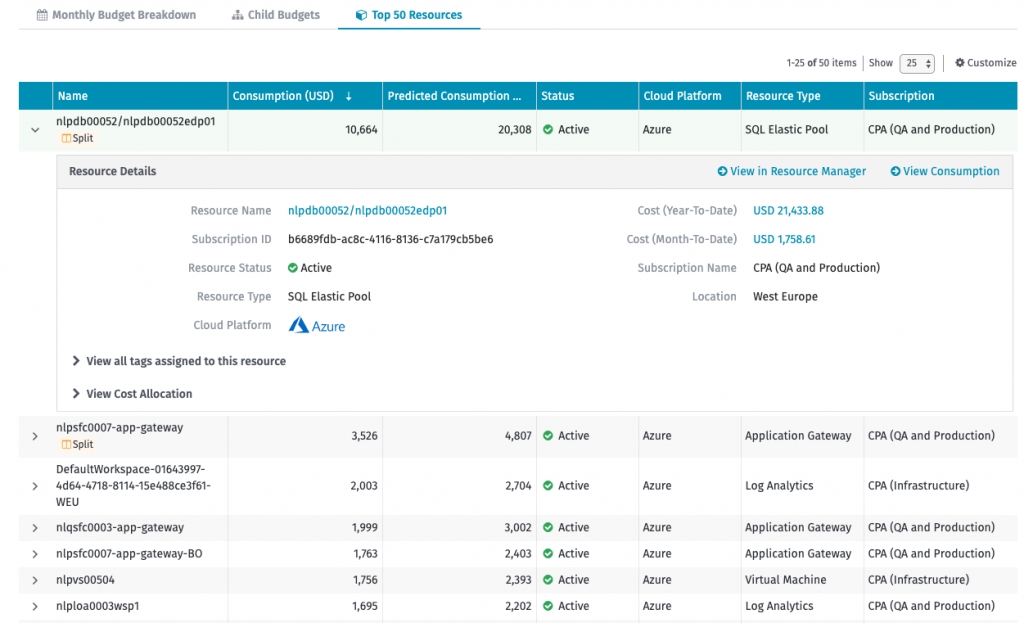
This tab shows the top-consuming resources of the displayed budget. You can expand a resource to view more details.
Select View in Resource Manager to open resource details in Resource Manager.
Select View Consumption to open resource spend analytics.
Follow these steps to view a per-provider budget:
From the main menu of the Client Portal, navigate to Cloud tools > Budgets.
Select the Per-Provider tab.
Locate the budget you want to view and then in the Actions column, click View.
The following details are displayed:
Utilized - Spend generated by resources assigned to the budget group within the budget time.
Final Spend - Prediction calculated until the end of the budget period.
Time Remaining - Days left until the end of the budget period.
Budgeting period - Start and end date of the budget.
Owner - Email address of the person responsible for this budget.
On the details page of your budget, you can also select the following tabs:
Displays the list of subscriptions along with consumption and prediction details. You can add and edit the budget for a selected subscription by clicking on Edit Budgets or Add.
Displays a list of the top resources consuming the most for that budget (Account or Subscription). You can expand the selected resource to view more details and navigate to the Resource page, or the Consumption Details page in Consumption Overview.
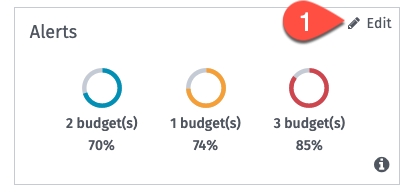
Manage your budget utilization alerts.

