Subscriptions in the Marketplace Platform can be in multiple states (also known as status) during their lifecycle.
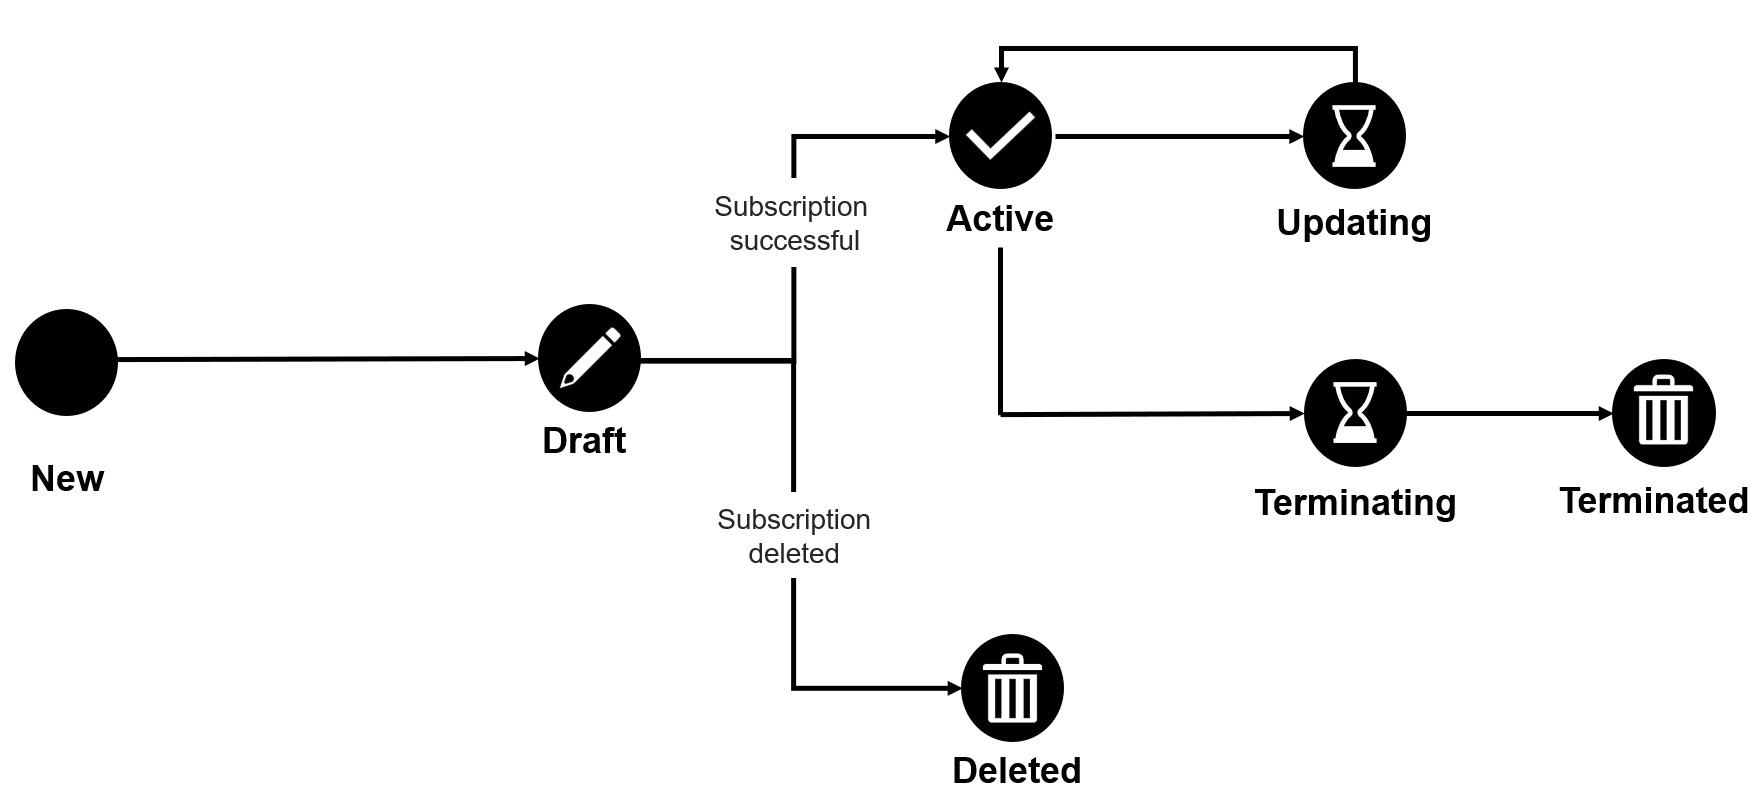
The following diagram shows the possible states and the transition between these states:
The subscription states are visible in the platform as Status. These states are also displayed as an icon beside the name of the subscription and its ID on the details page.
Draft
The vendor has created the subscription but the order is not completed yet.
Active
The subscription is currently in use.
It has items attached to it in positive quantities.
Updating
A business transaction is in progress for the subscription.
This status applies to change orders submitted for at least one item attached to the subscription.
Terminating
A termination order is in progress for the subscription.
Terminated
The vendor has completed the termination order associated with the subscription and terminated the subscription.
Deleted
The draft subscription has been deleted by the vendor.
The Marketplace Platform automatically assigns a default ID to each subscription upon its creation. However, you can modify the default ID and assign a new ID.
You can only change the IDs for the Active, Updating, Terminated, and Terminating subscriptions. For a description of these states, see Subscription States.
Follow these steps to update the subscription ID:
Navigate to the Subscriptions page (Marketplace > Subscriptions). A list of your subscriptions is displayed.
Click the subscription you want to edit. The details page of your selected subscription opens.
Select the Details tab and click Edit.
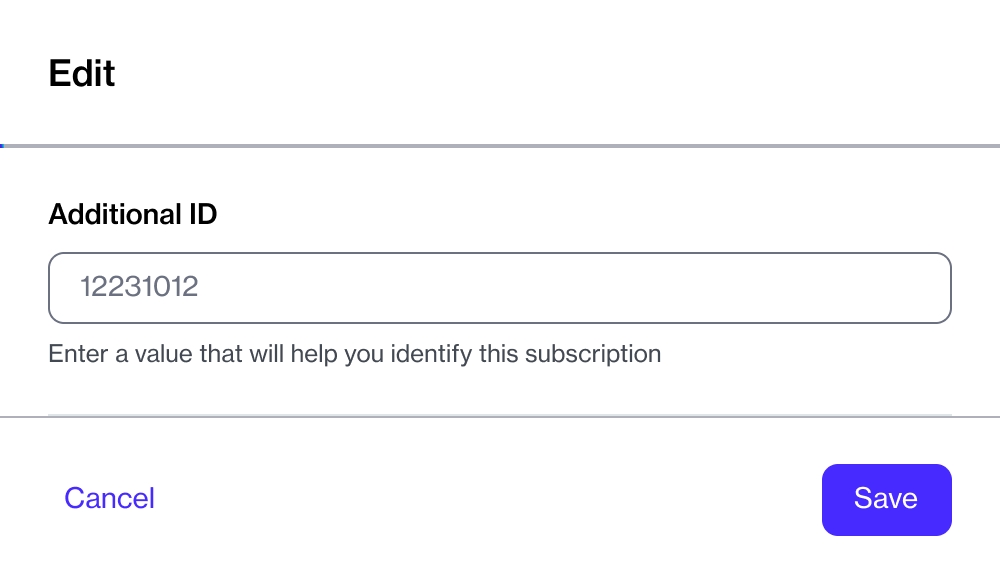
In the Edit dialog, enter the new reference ID and click Save. The subscription ID is updated and the new value is reflected on all pages that display the subscription within the platform.
In some cases, you might need to rename your subscription so you can find it easily in your list of subscriptions. The Marketplace Platform lets you easily change a subscription's name through the user interface (UI).
You can only rename subscriptions in the Active and Updating states. For a description of these states, see Subscription States.
Follow these steps to rename a subscription:
Navigate to the Subscriptions page (Marketplace > Subscriptions). A list of your subscriptions is displayed.
Click the subscription you want to rename. The details page of the subscription opens.
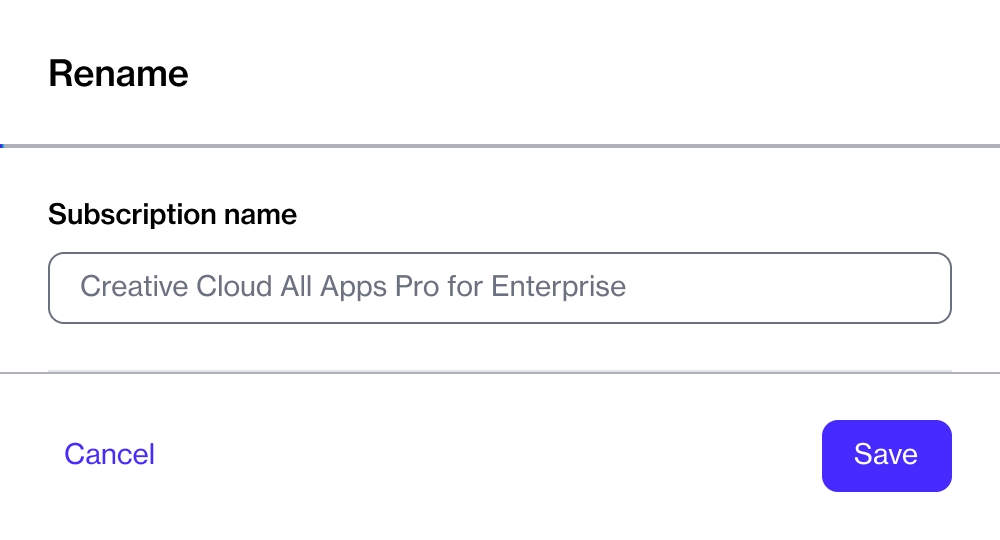
In the Rename dialog, enter the new name and click Save.
Your subscription is renamed and the new name is visible across all pages that feature the subscription within the platform.
Terminate a single subscription in your agreement.
Subscriptions can be terminated if you no longer need them or don't want them to renew automatically. Depending on the number of subscriptions in your agreement, there are different steps to follow:
If your agreement contains several subscriptions and you want to cancel some, but not all, subscriptions, you'll need to place a termination order for the subscription.
If your agreement contains several subscriptions and you want to cancel all of those subscriptions, you'll need to place a termination order for the agreement. To learn more, see Terminate Agreement.
Before terminating a subscription, note the following points:
You can only terminate subscriptions in the Active state. Subscriptions in any other state cannot be terminated.
Creating a termination order doesn't guarantee the cancellation of your subscription. All termination orders are sent to the vendors for approval. Subscriptions are terminated only after they are approved by the vendor.
Follow these steps to terminate a subscription:
Navigate to the Subscriptions page (Marketplace > Subscriptions). A list of your subscriptions is displayed.
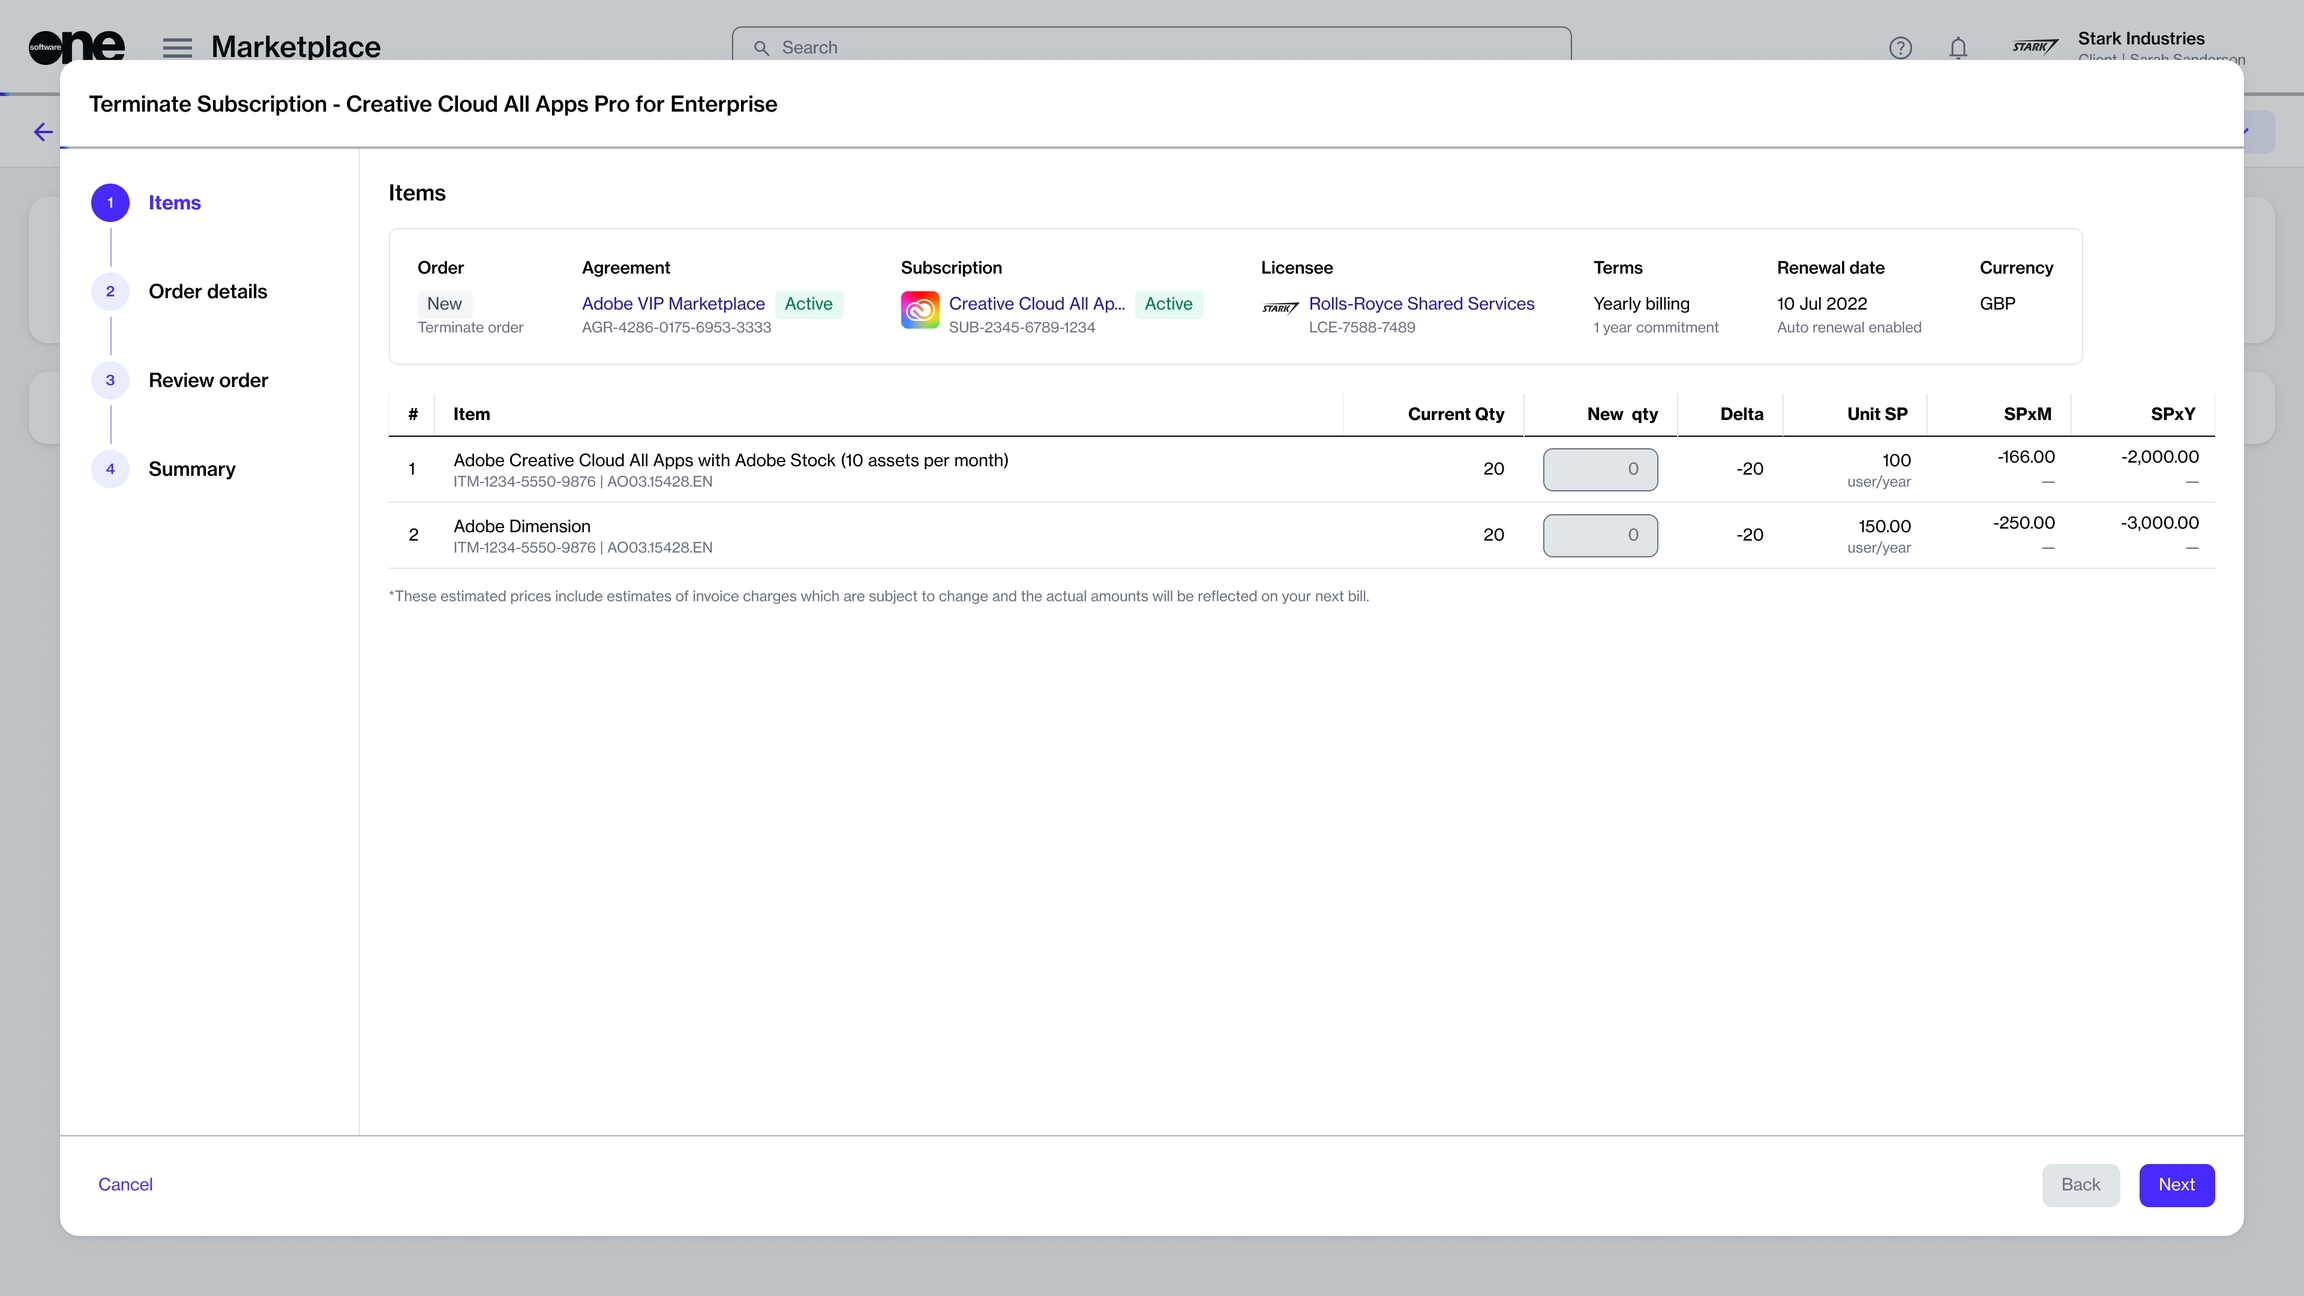
Click the subscription you want to terminate. The details page of your selected subscription opens.
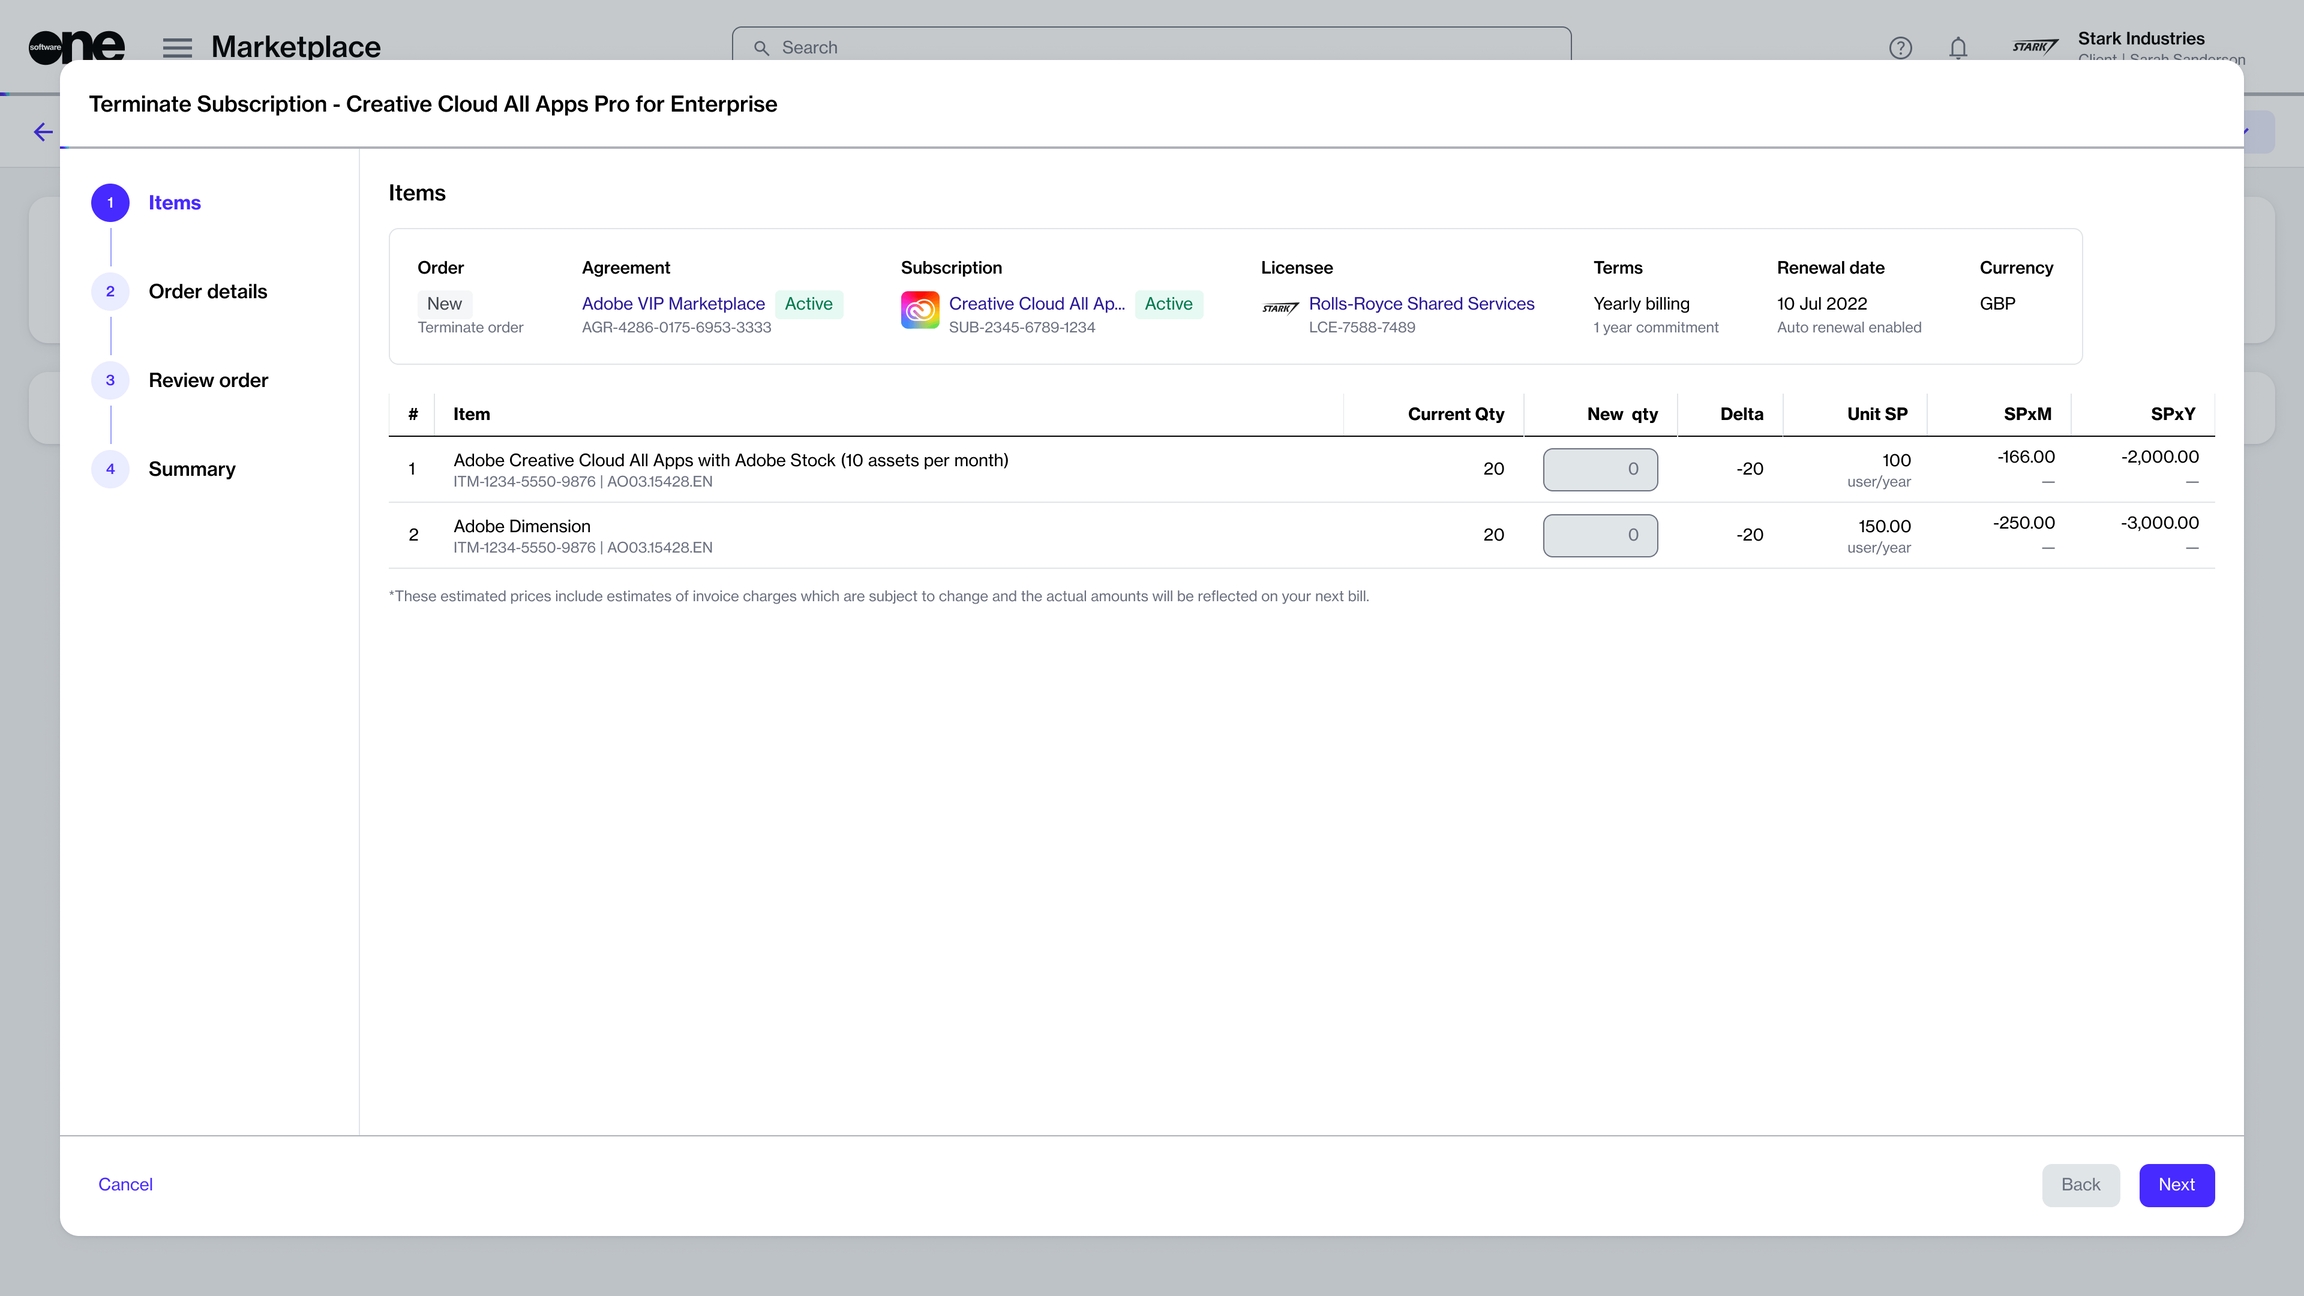
In the Items section, review all the details and click Next.
In the Order details section, add the optional reference number and notes. Click Next to continue.
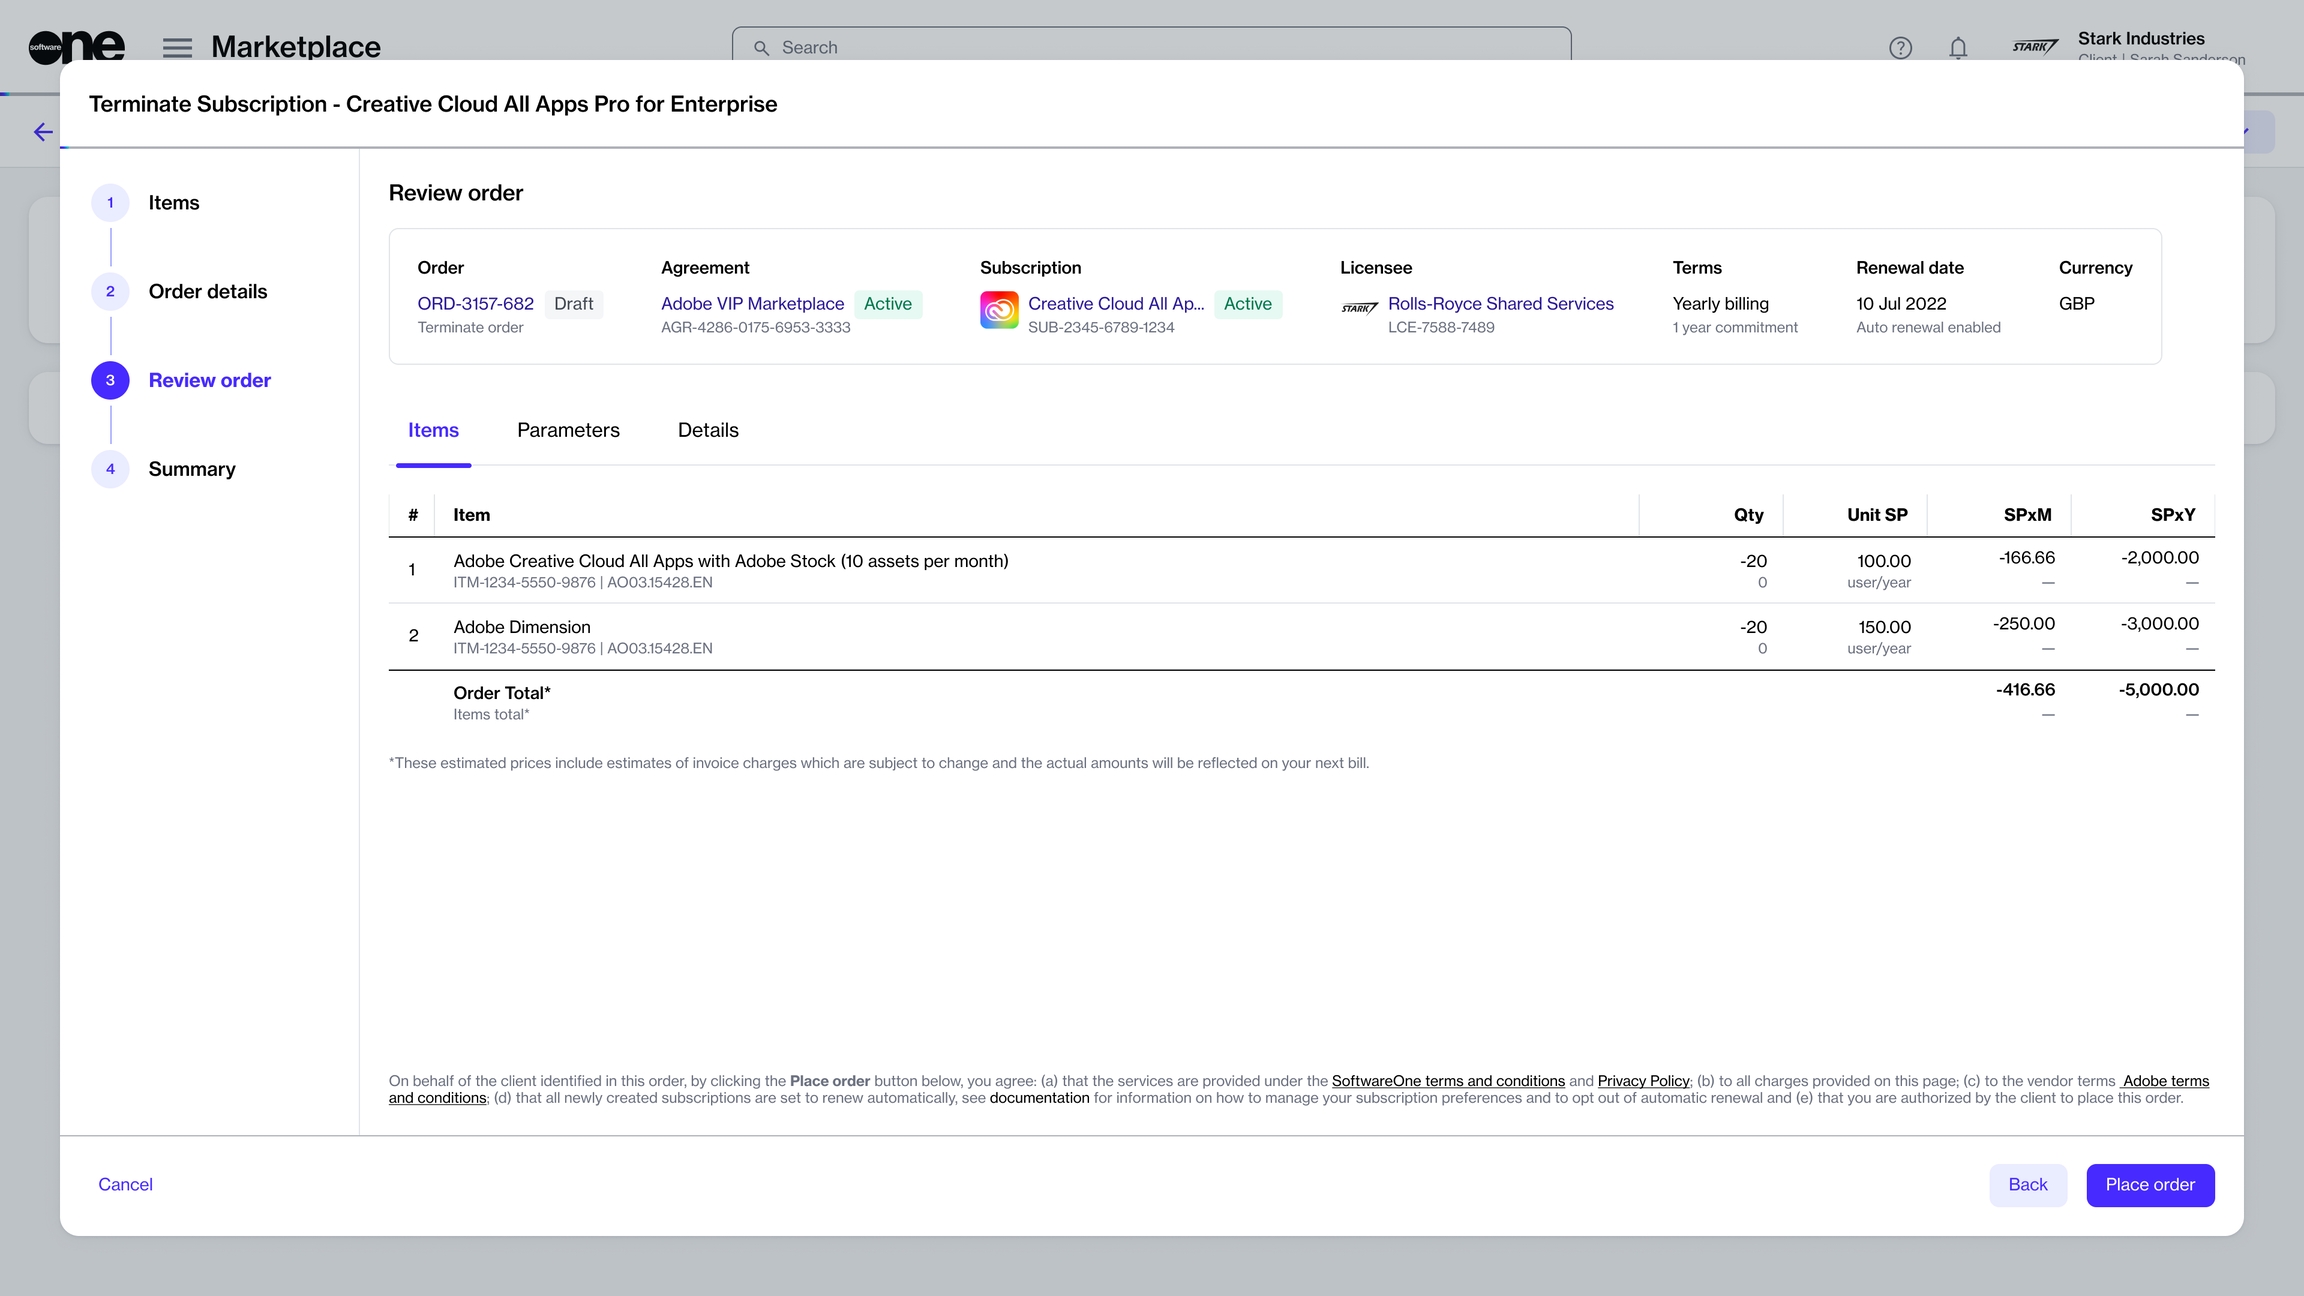
In the Review order section, check all the details and then click Place order to finalize. A termination order is created in the system.
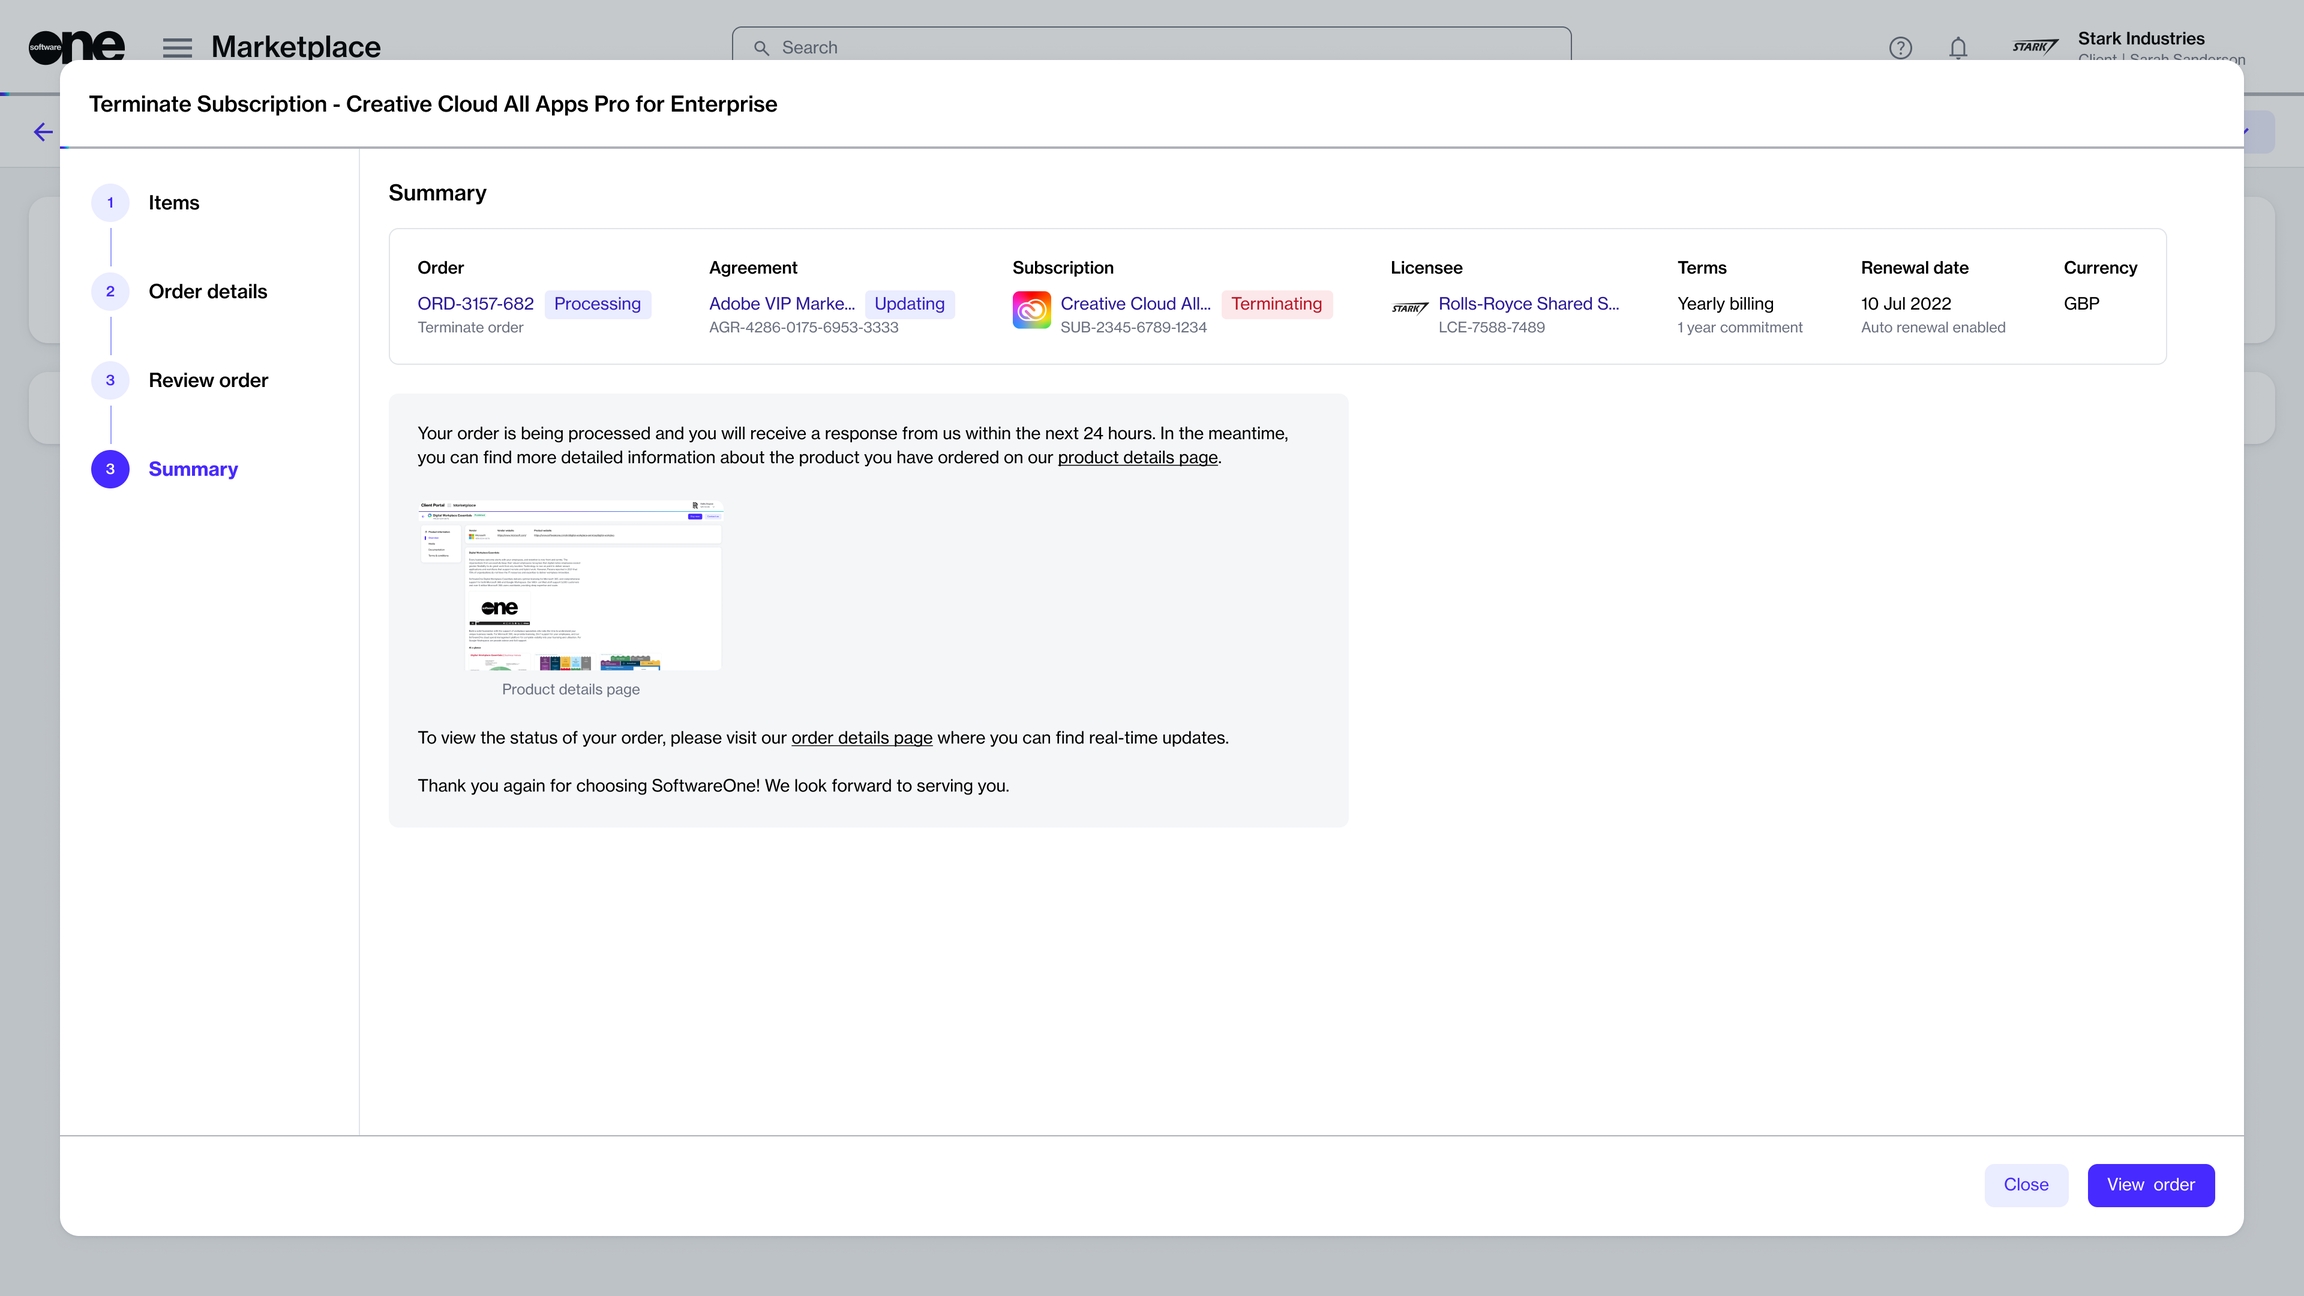
The termination order is placed and the agreement status changes from Active to Updating. Click View order to go to the order details page. Otherwise, click Close.
A subscription refers to the ongoing provision of service under the terms and conditions detailed in your agreement. In the Marketplace Platform, subscriptions are renewed automatically by default, unless they are canceled. To learn about subscriptions, see Key Concepts.
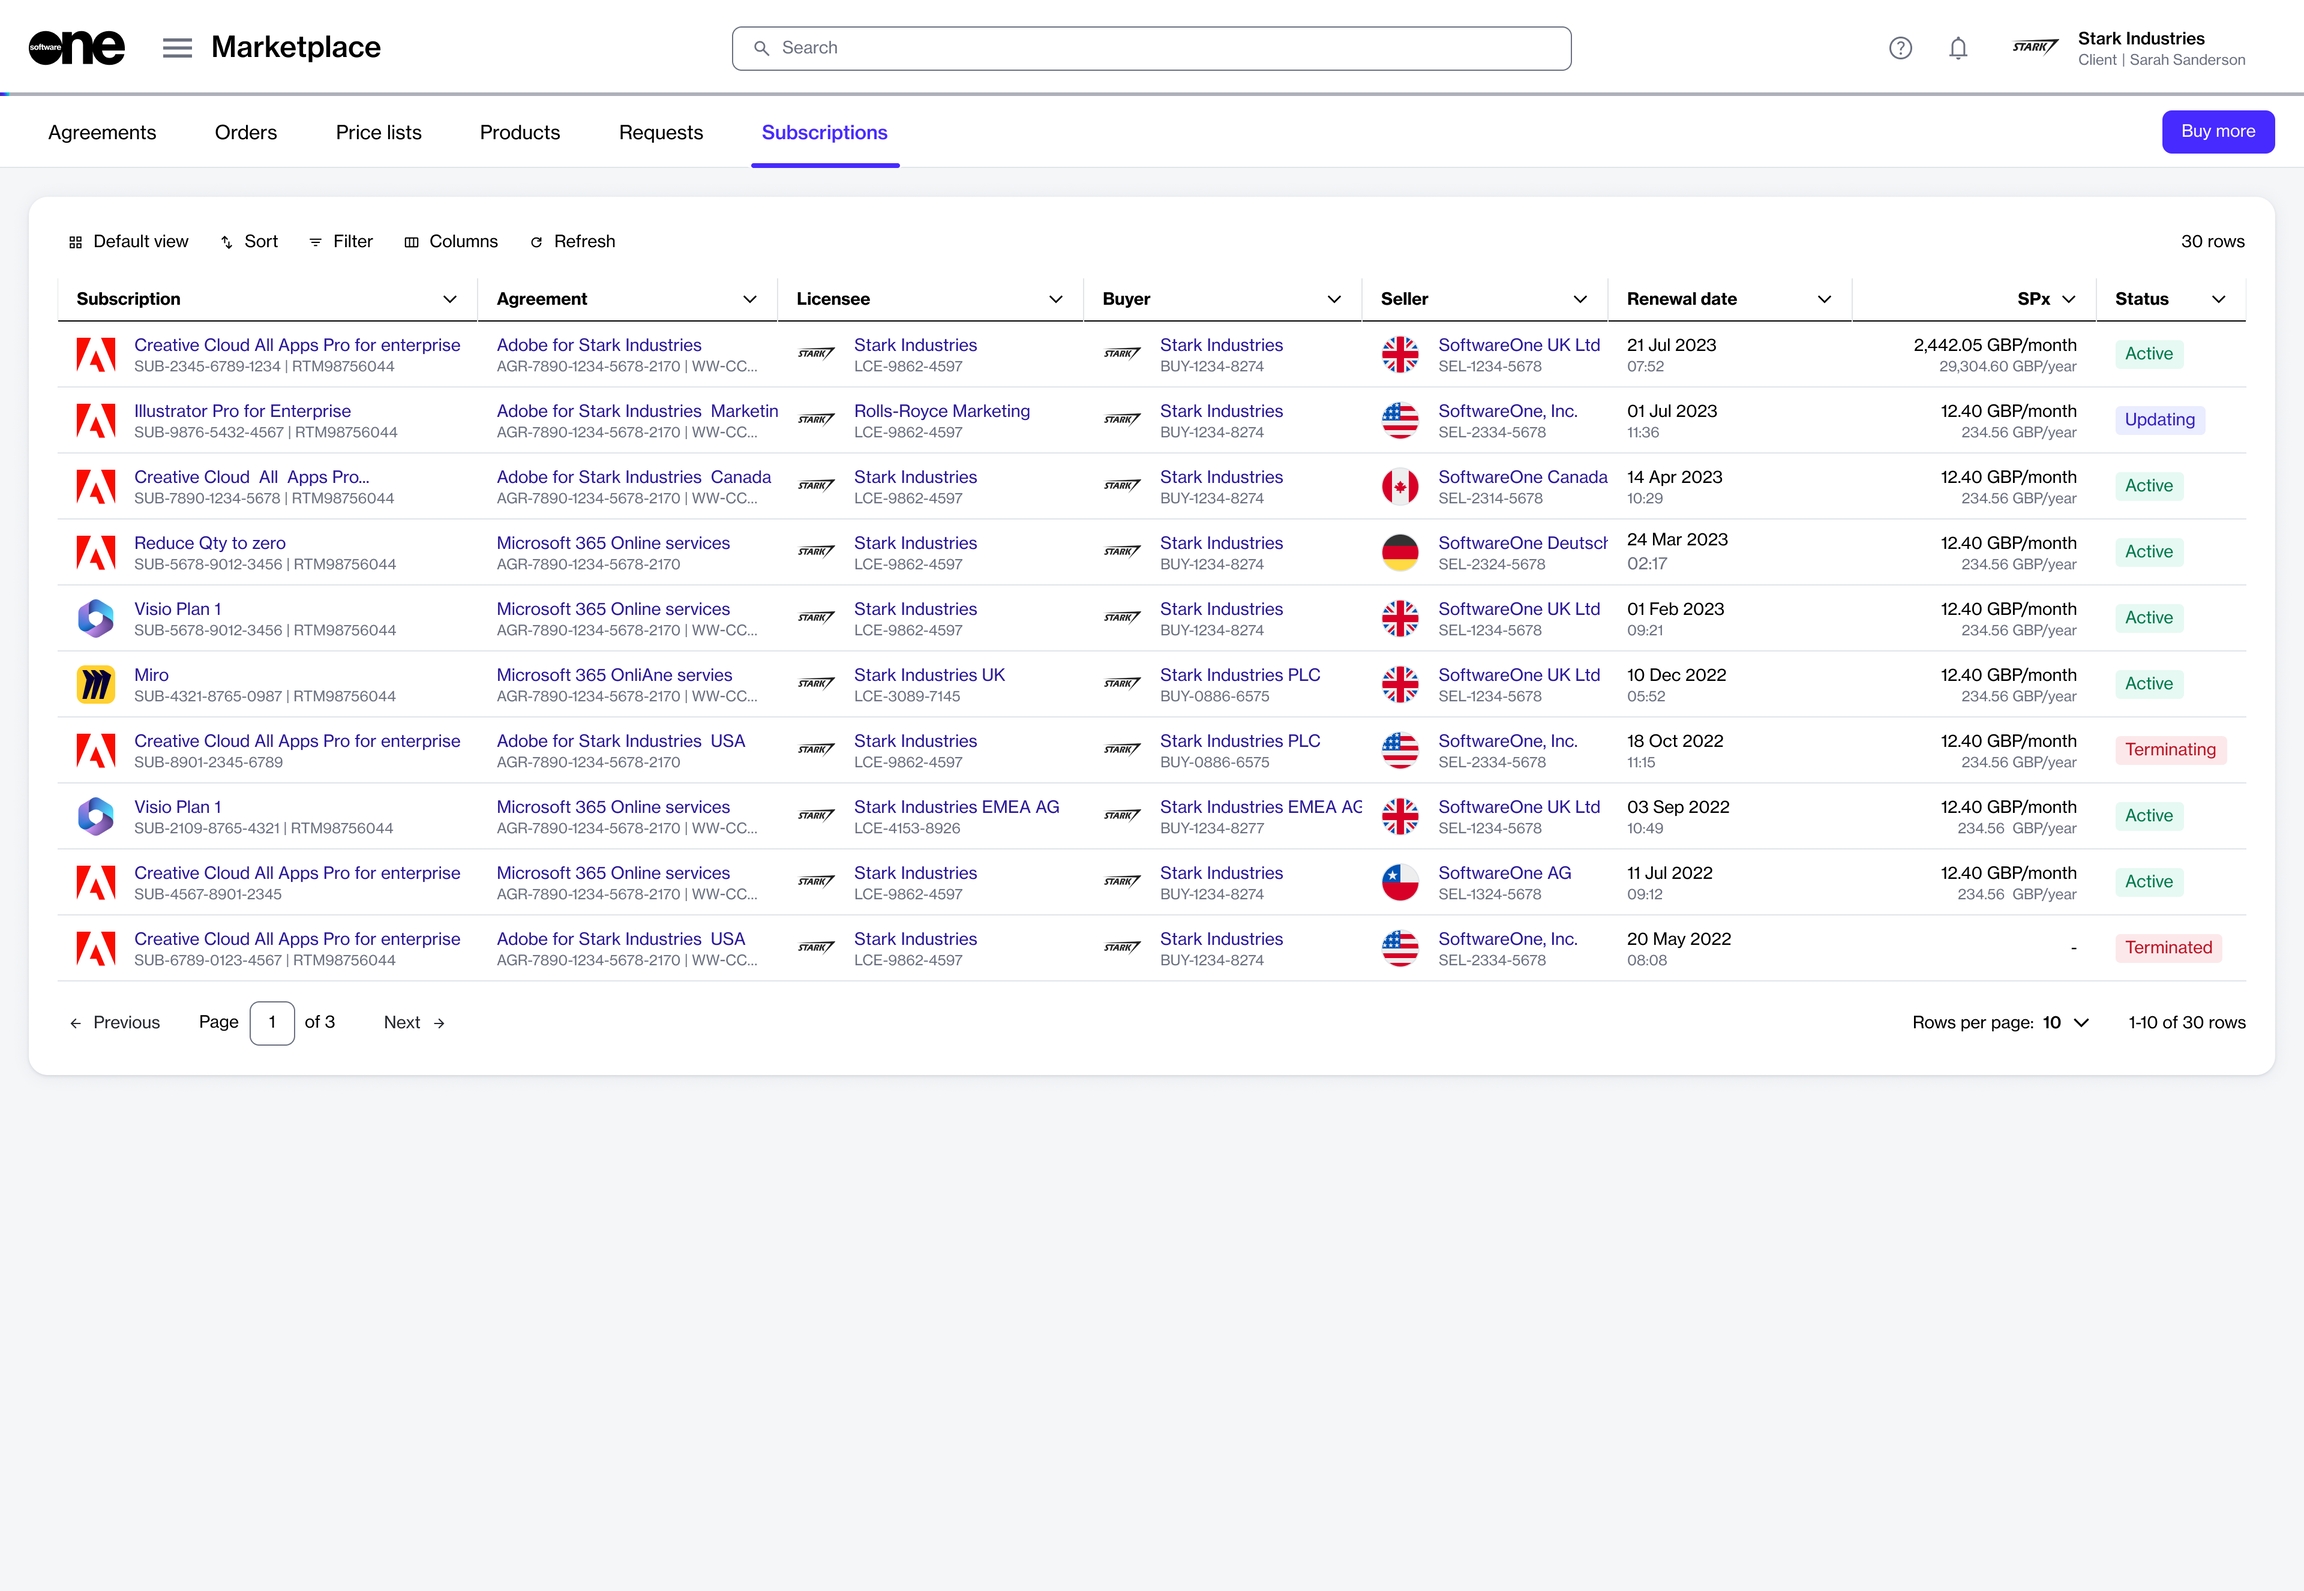
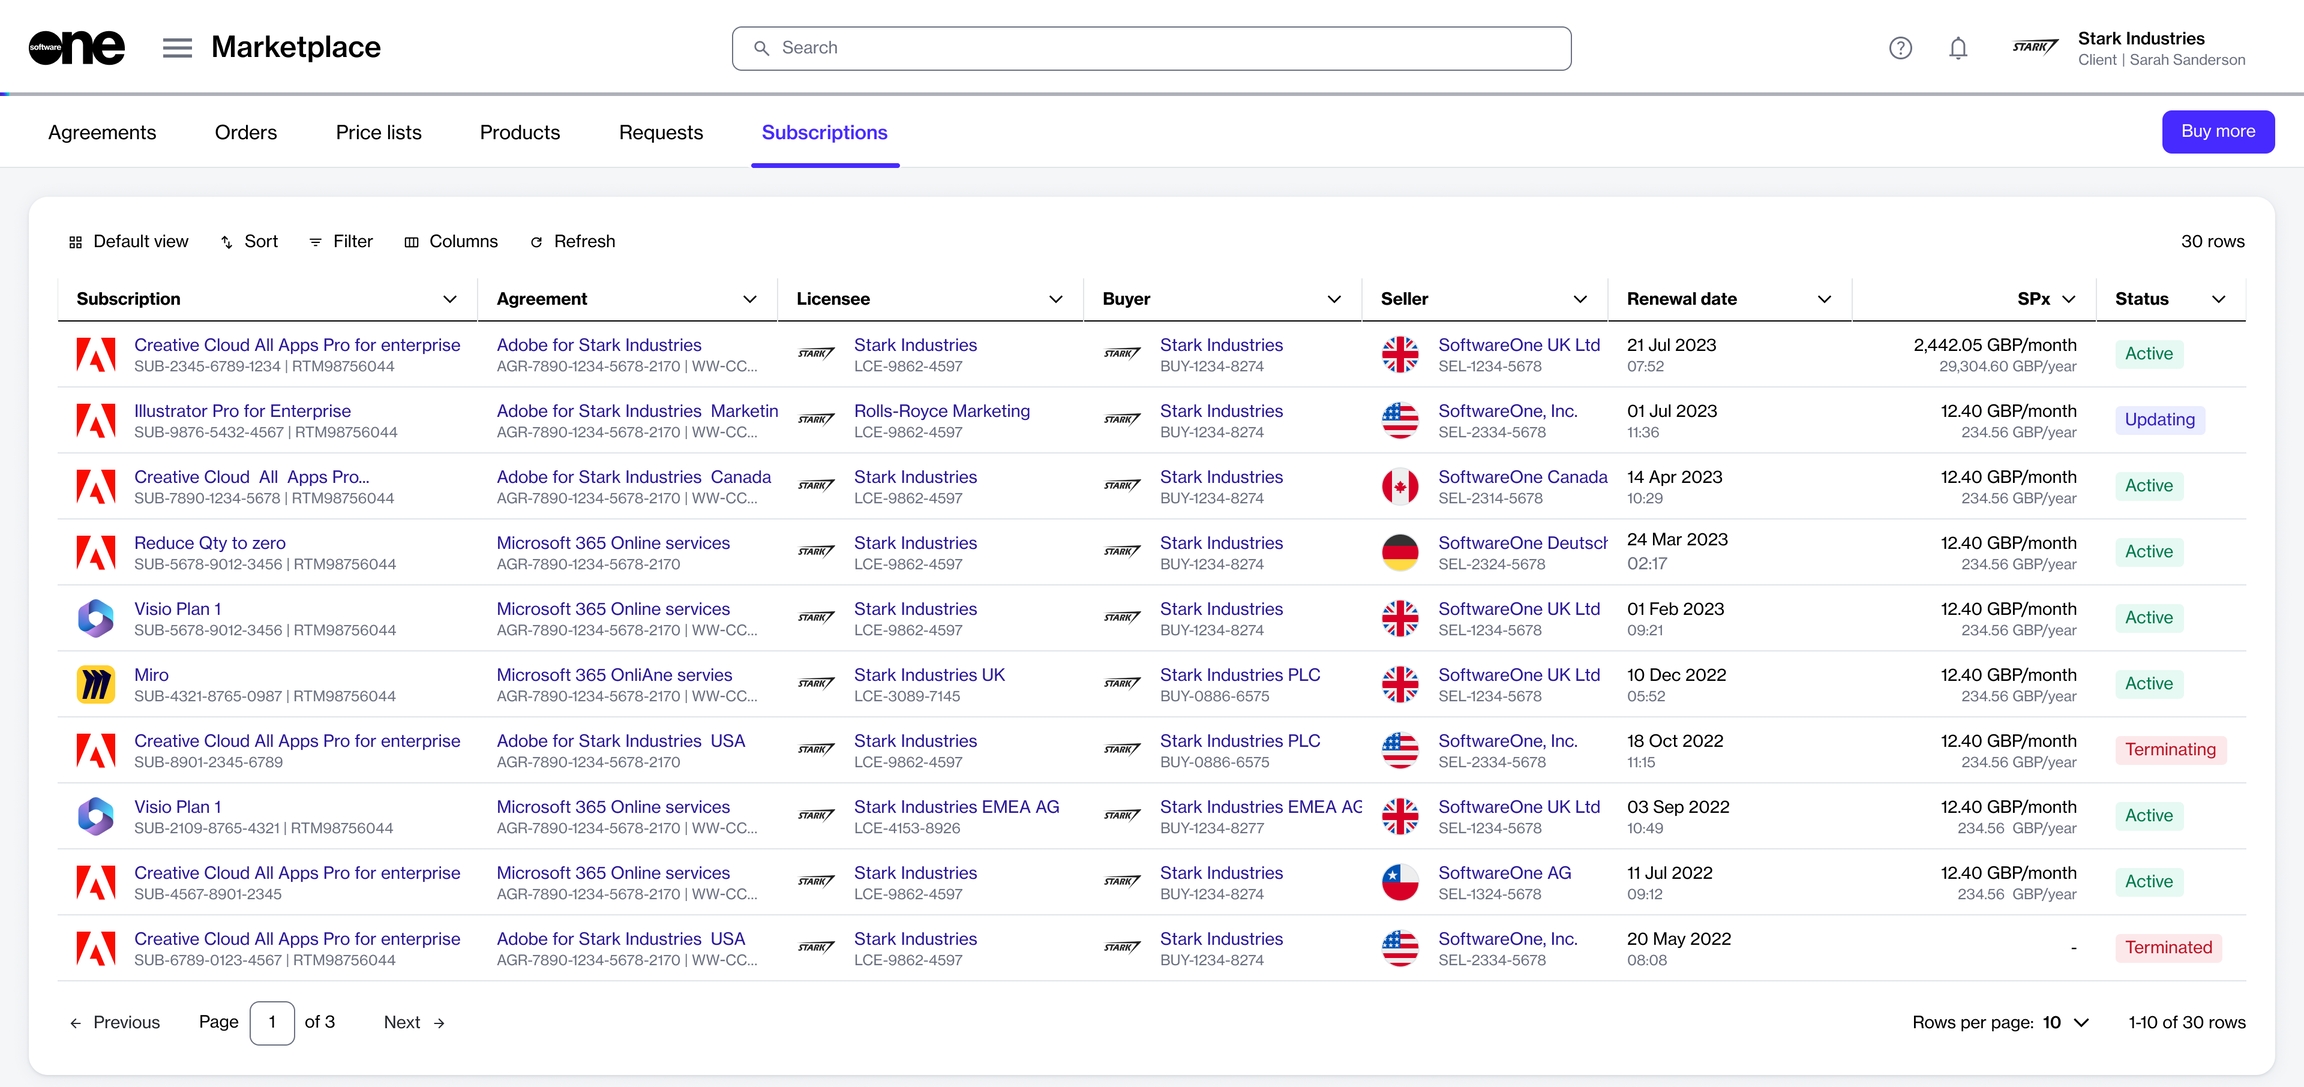
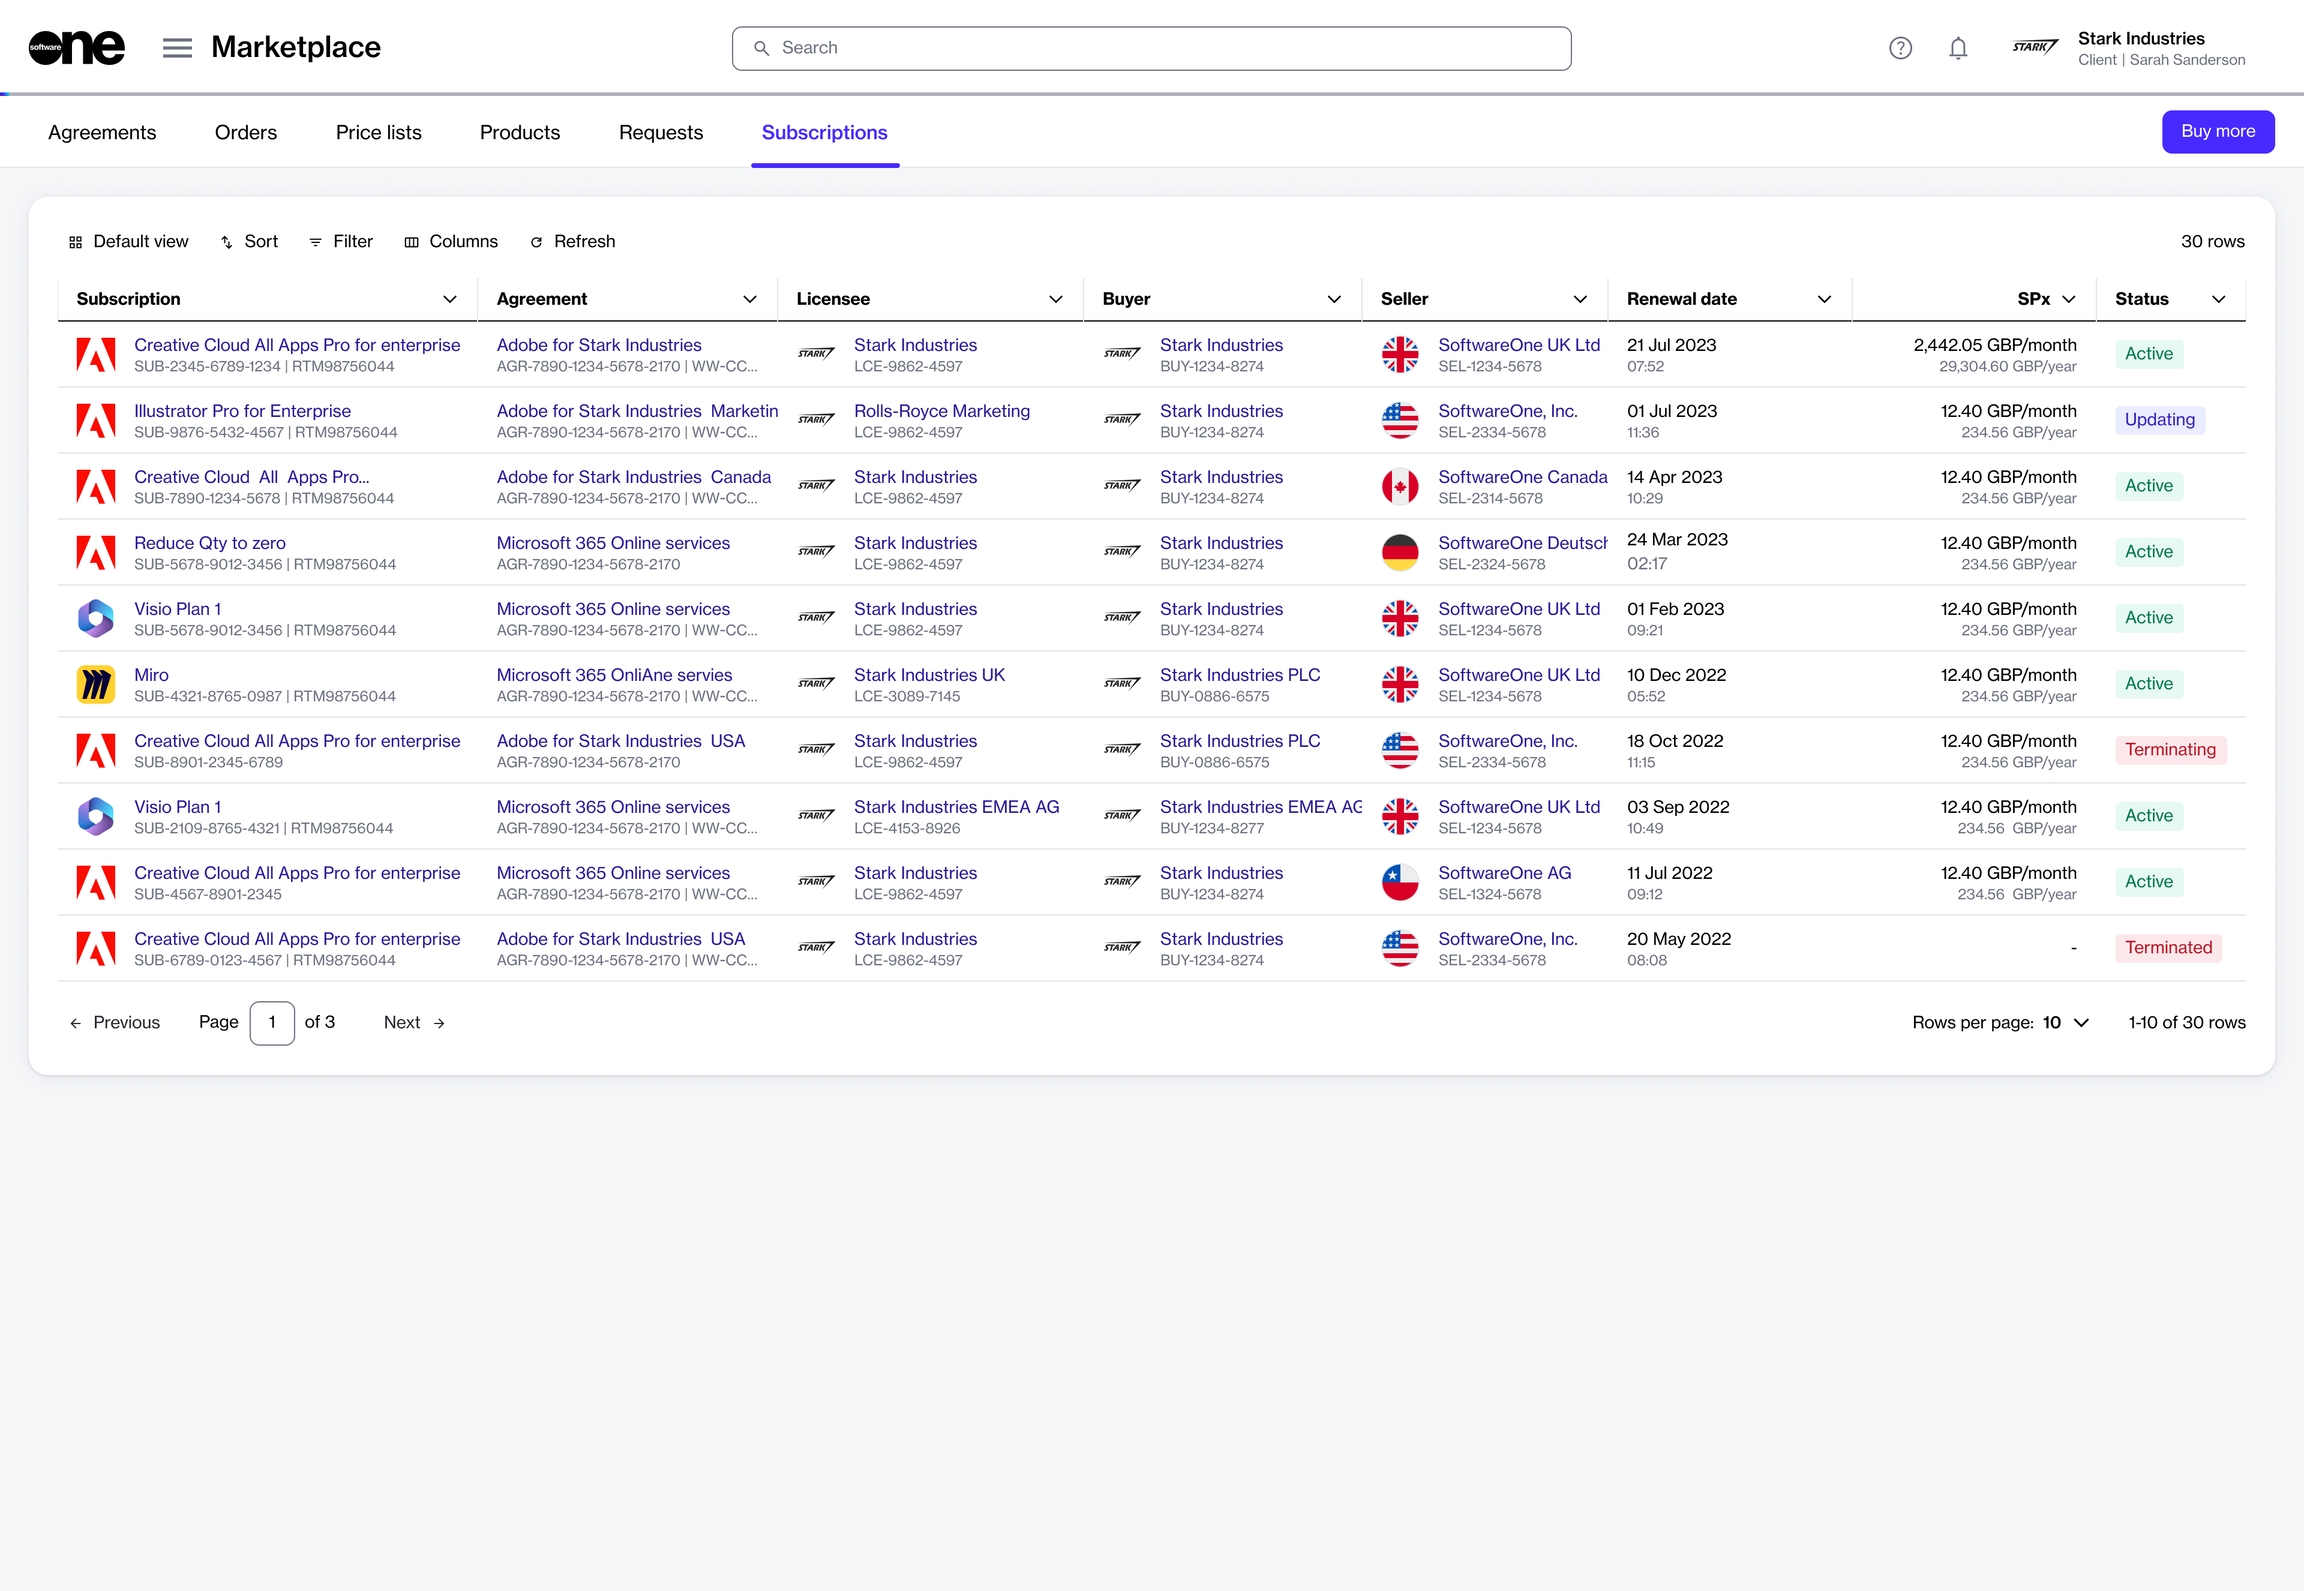
You can access the Subscriptions page by navigating to the main menu and selecting Marketplace > Subscriptions. The page displays all of your subscriptions:
On this page, you can view the following subscription details:
Subscription - Displays the name and D of the subscription.
Agreement - Displays the name and ID of the agreement associated with the subscription.
Licensee - Displays the name of the individual or legal entity to whom the subscription license is issued.
Buyer - Displays the buyer associated with the subscription.
Seller - Displays the SoftwareOne legal entity that fulfilled the order and issued the invoice.
Renewal date - Displays the renewal date of your subscription.
SPx - Displays the estimated sales price of the subscription.
Split Billing - Indicates if split billing is enabled for the subscription. This column is displayed only for certain products in the platform. To learn more, see Split Billing.
Created - Indicates the date when the subscription was created.
Status - Displays the current status of the subscription. For information on statuses, see Subscription States.
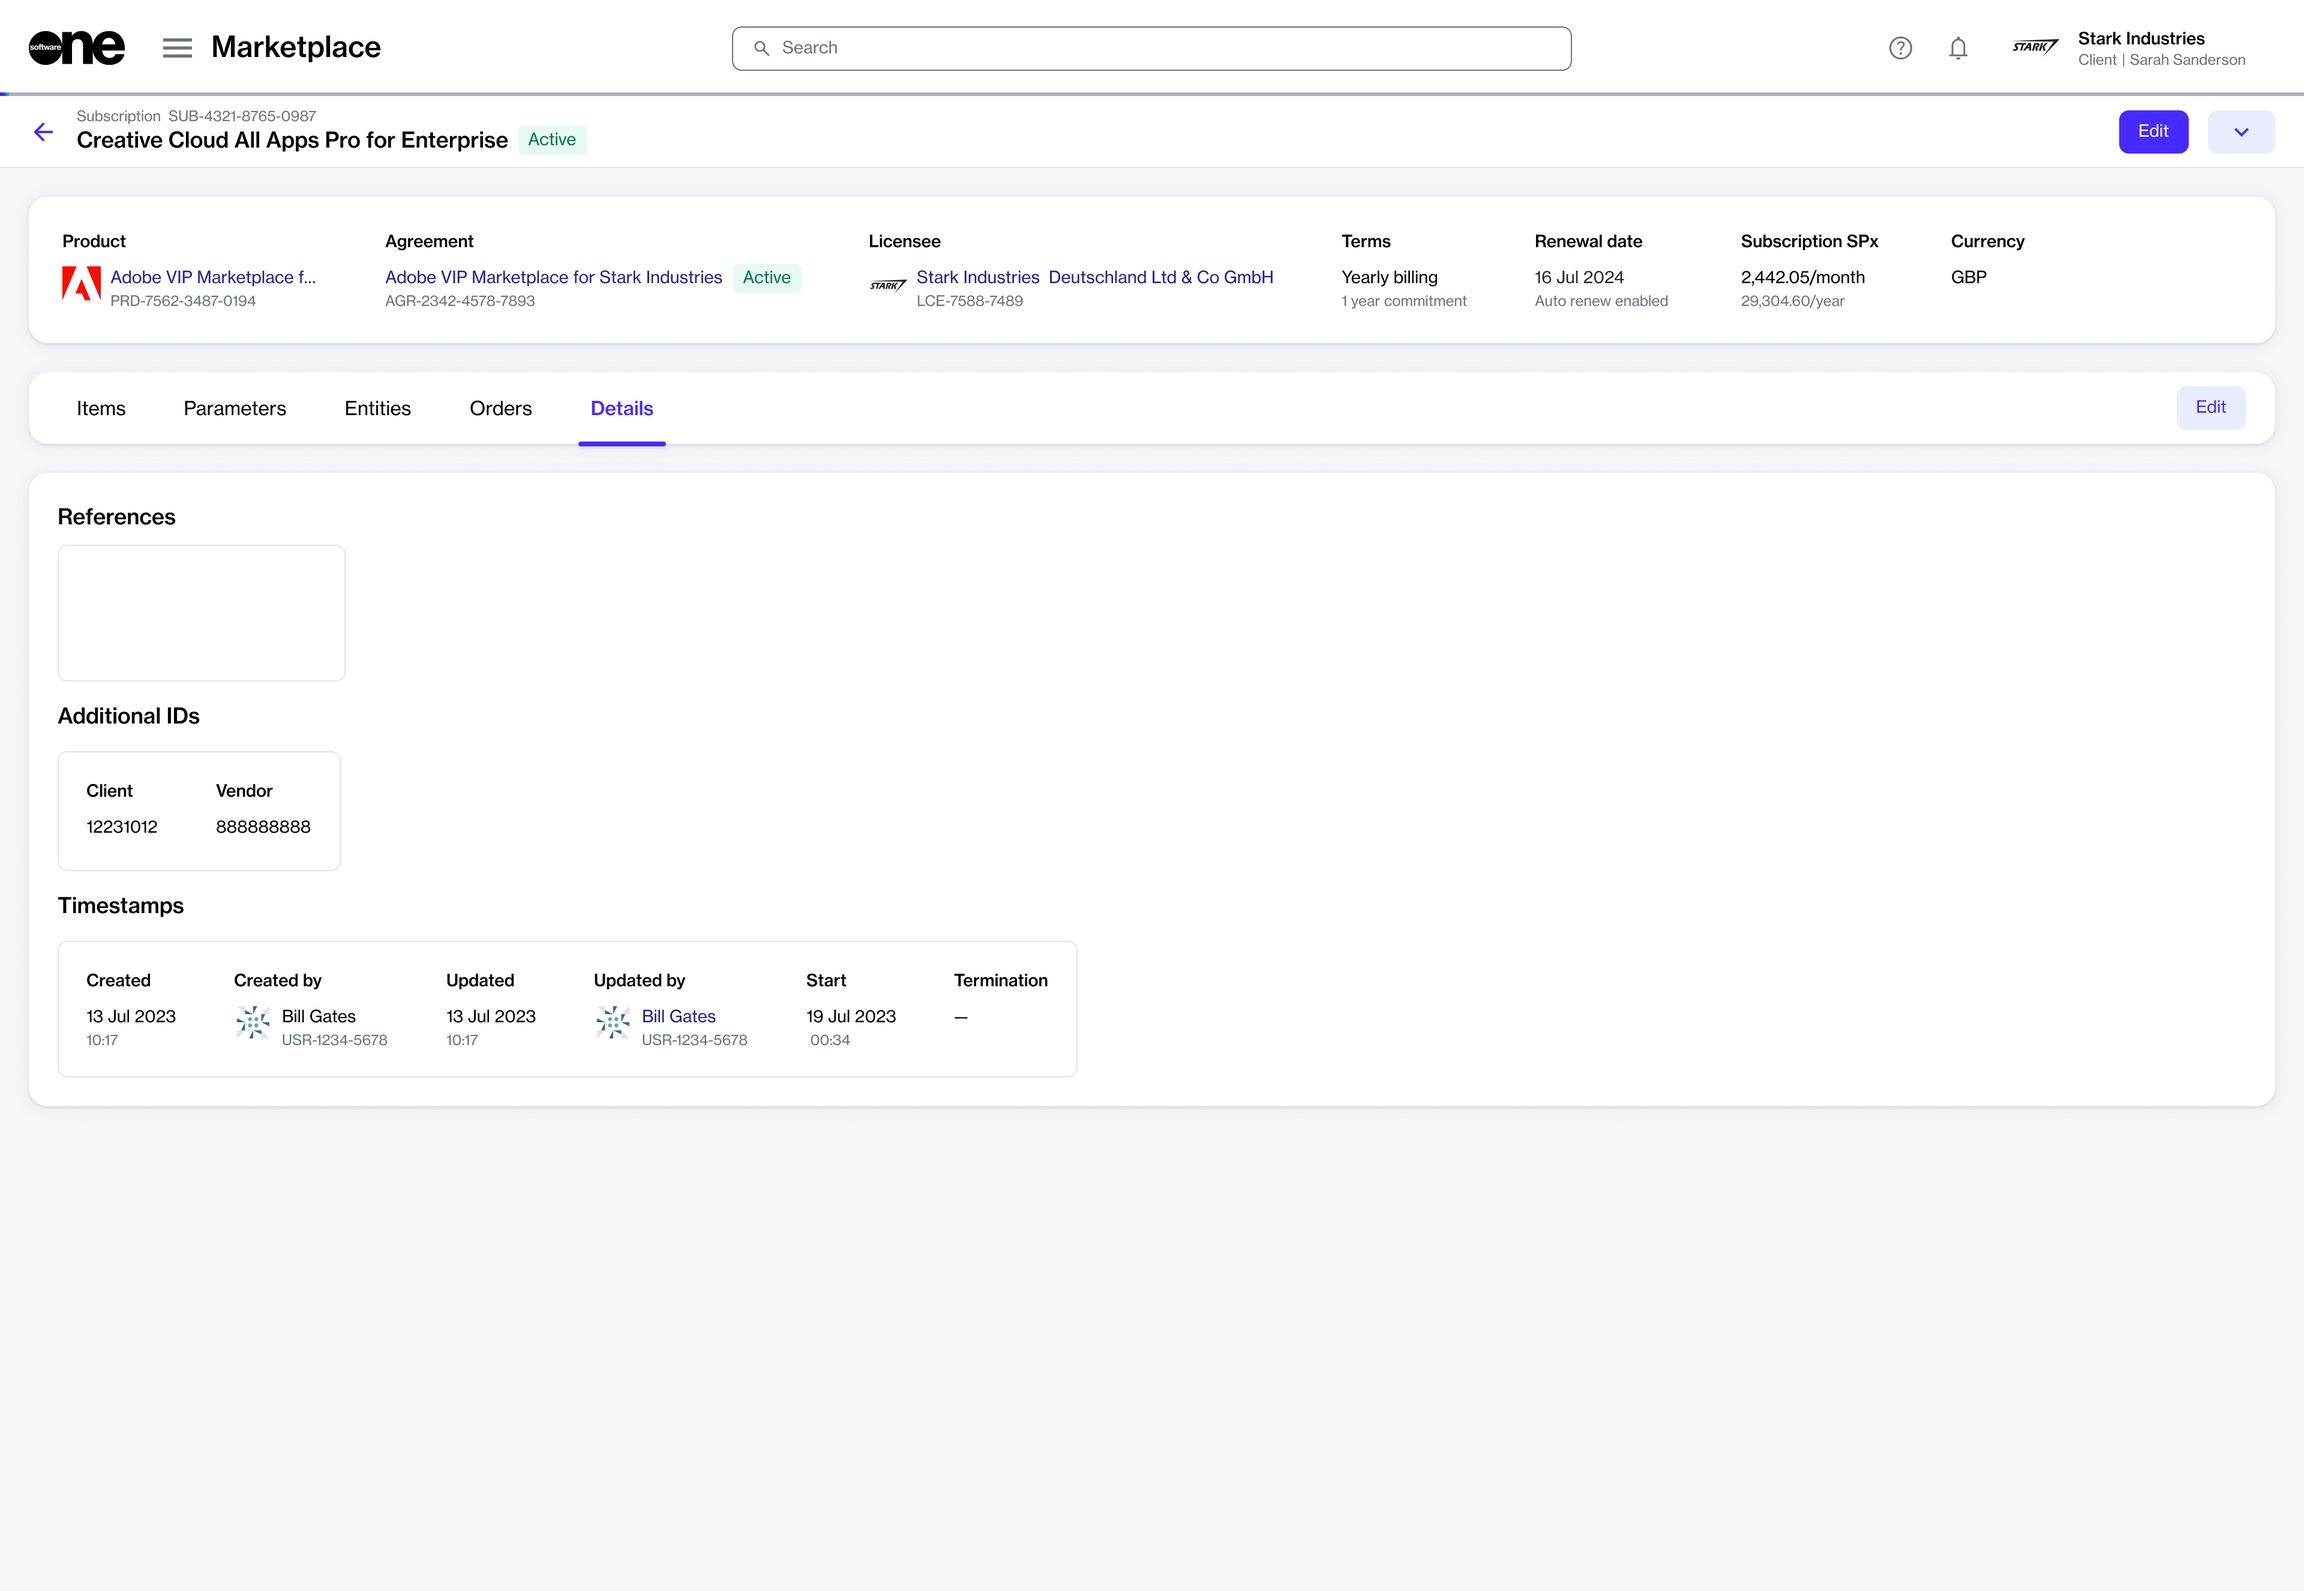
The details page of a subscription gives you in-depth information about your subscription. You can open the details page by clicking the subscription on the Subscriptions page.
The subscription details page is organized into several tabs, each providing specific information. It also contains a highlights panel displaying general information about the subscription, such as the subscription name and ID, vendor, and product. On the details page, you can also view the name of your subscription, its status, and the unique Marketplace ID.
The following tabs are available:
Items - Displays your ordered items. Use the Items tab to view the item-specific details, such as the item name and ID, the quantity of ordered items, and the sales price of each time.
Parameters - Displays the fulfillment parameters linked to the subscription, which can vary based on the parameter options enabled by the vendor.
Entities - Displays the details of the entities related to the subscription. Entities include licensees, buyers, and sellers. For each entity, you can view the name, marketplace ID, and address information.
Split billing - Displays the split billing details for the subscription. This tab is displayed only if split billing has been enabled for the agreement. You can view the owner buyer and any other buyers you've selected along with the allocation information for each buyer. The Edit option lets you update the allocation details.
Orders - Displays all orders associated with your subscription. Use the Orders tab to view the order-specific details, such as the order ID, type of order, date when the order was placed, and the sales price. Clicking an order opens up the details page of the order.
Details - Displays the client and vendor IDs associated with the subscription. You can also use this tab to view the date and time when the subscription was created and updated, along with the start and end date of the subscription. If the subscription fails, the failed date is also displayed.
Audit trail - Displays all events that have taken place within the subscription. For each record, you can view the audit log details and summary. To learn more, see Audit Trail.
Click the down arrow in the upper right and select Rename.
Click the down arrow in the upper right and select Terminate. The Terminate Subscription window opens.

