This topic describes how to create, remove, and manage custom groups.
To create custom groups:
Navigate to Cloud tools > Custom Groups.
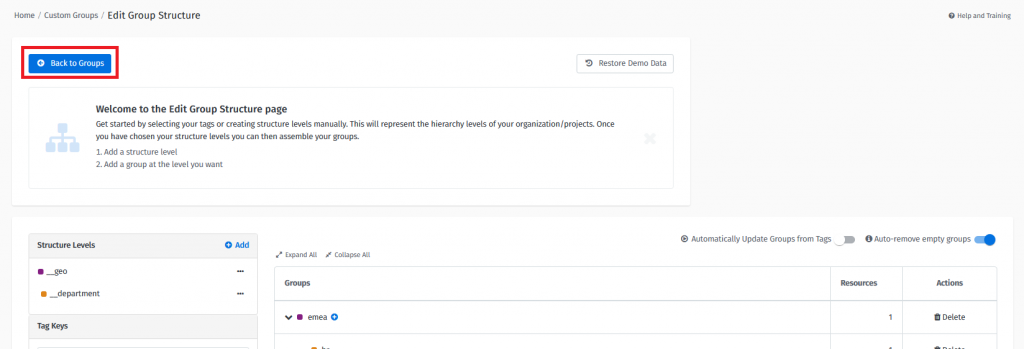
Select Create a group to start building the group structure.
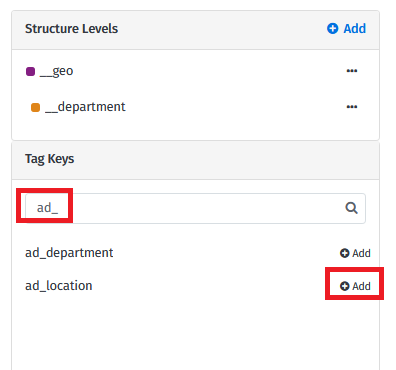
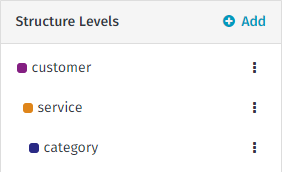
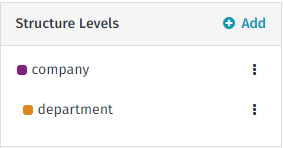
On the Edit Group Structure page, set up the structure levels. Choose Tag Keys as Structure Levels.
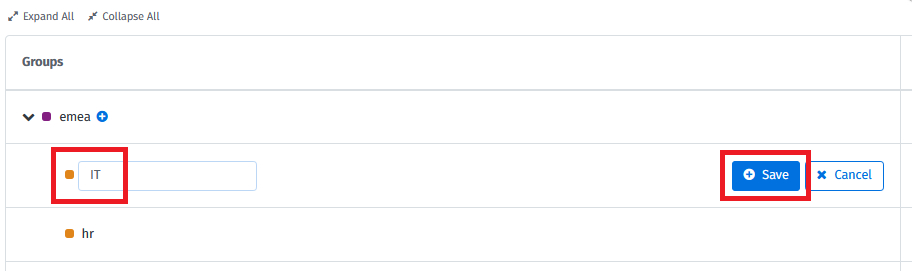
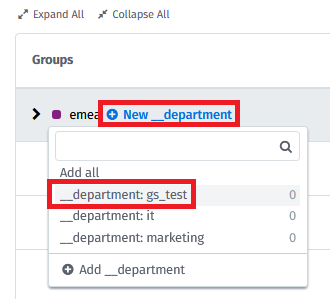
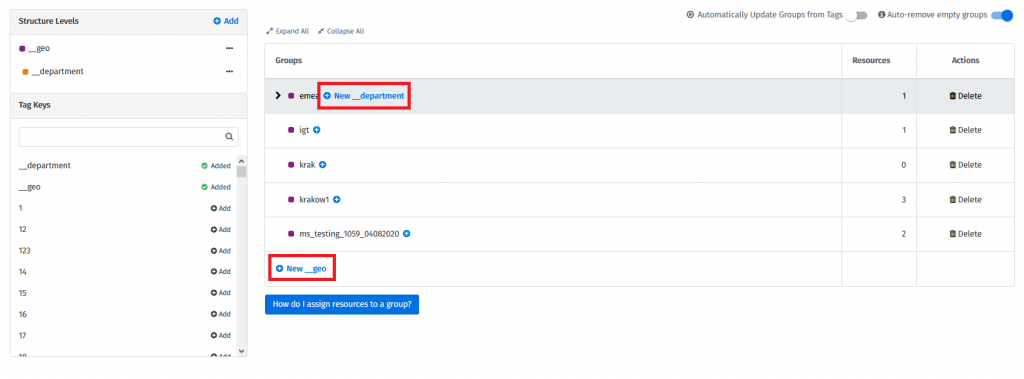
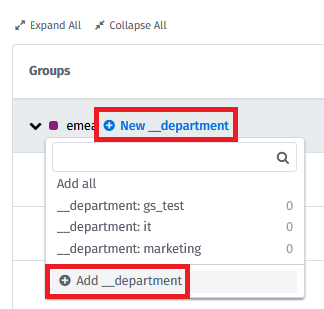
Assign groups to the created structure levels. To create groups, choose New group for the required structure level:
You can create groups using already existing tags or manually.
Example
You can also create Custom Groups automatically. The platform can create groups for you based on existing tag combinations that match the defined structure levels.
Enable the following option when editing the structure for this automation:
If groups don't exist, they will automatically be created if automation is enabled and there is a matching tag combination in your infrastructure. This process constantly runs in the background. The group will also be created once you modify resource tags in Resources or you use Resource Rules. The mechanism does not automatically remove any existing groups.
When the automation is enabled, it's not possible to remove a group with resources assigned. Such a group would immediately be created again.
Enable the following option to allow the system to automatically remove groups without resources and budgets:
Once enabled, the system will periodically scan your structure and remove groups that have no resources assigned and no budgets created.
Consider this setting if you want to have your structure maintained fully automatically.
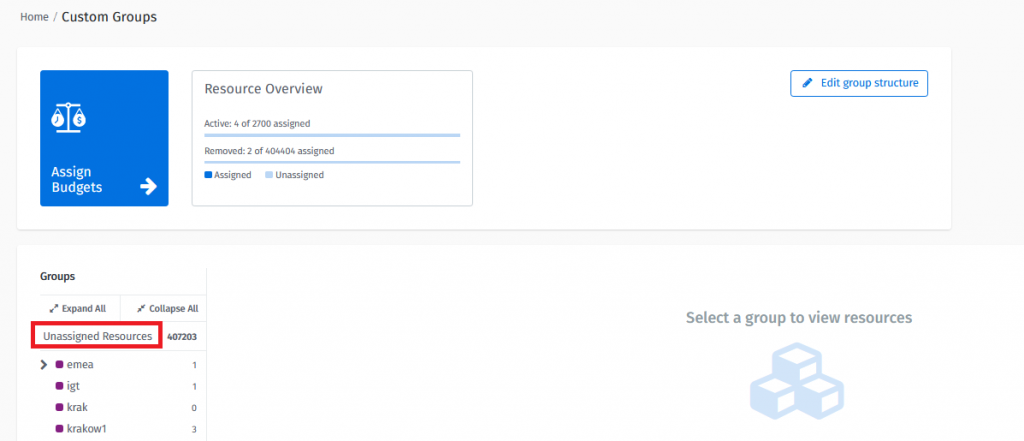
Once the structure has been created, you can go back to Custom Groups to see all resources:
You will see the view shown below. The next step is to navigate to “Unassigned Resources”:
In unassigned resources, you can find all resources that are not assigned to groups. You can use filters to find resources in order to assign them to a specific group.
There are two possible ways to group resources:
Assign resources to a group.
Assign resources to multiple groups.
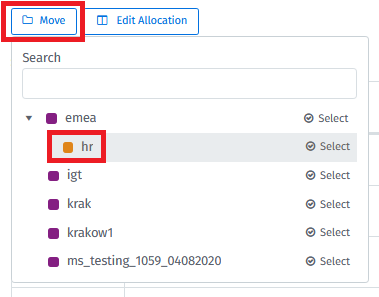
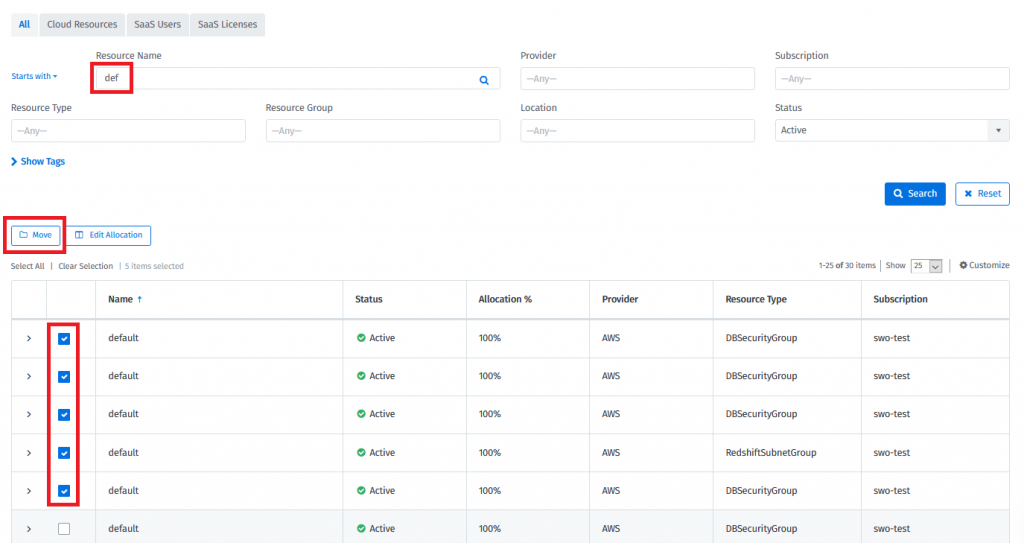
If required, search for the resources. Then select the check boxes of the resources, select Move, and select the group:
Those resources are now assigned to the selected group, and their entire resource spend will be fully associated with this group.
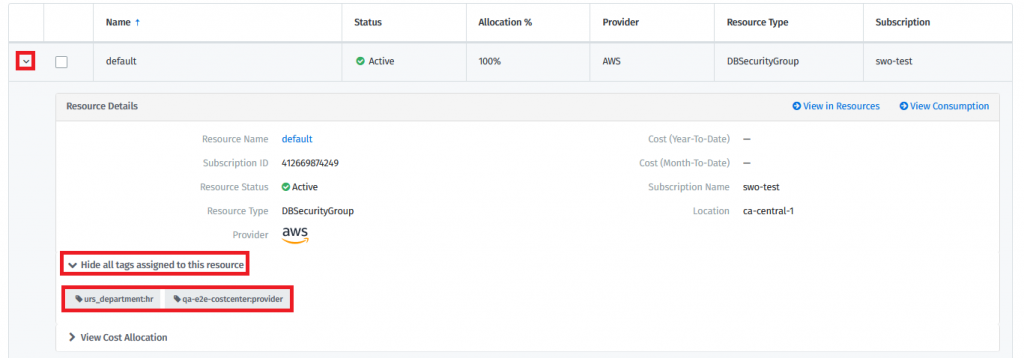
Assigned resources receive tags that reflect the group assignment structure. As an example, the resources assigned to group “Location-A” have the following tags:
Assigning resources to multiple groups means that the spending of such resources is split between selected groups according to the way users specify.
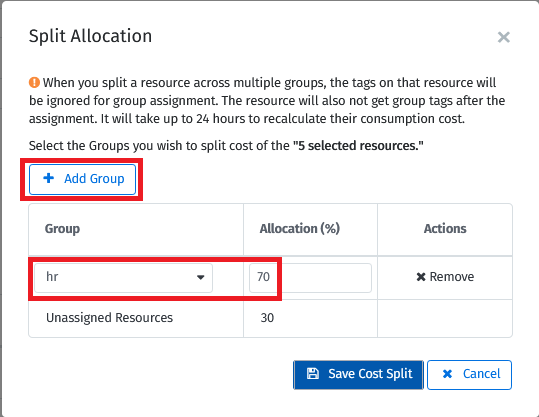
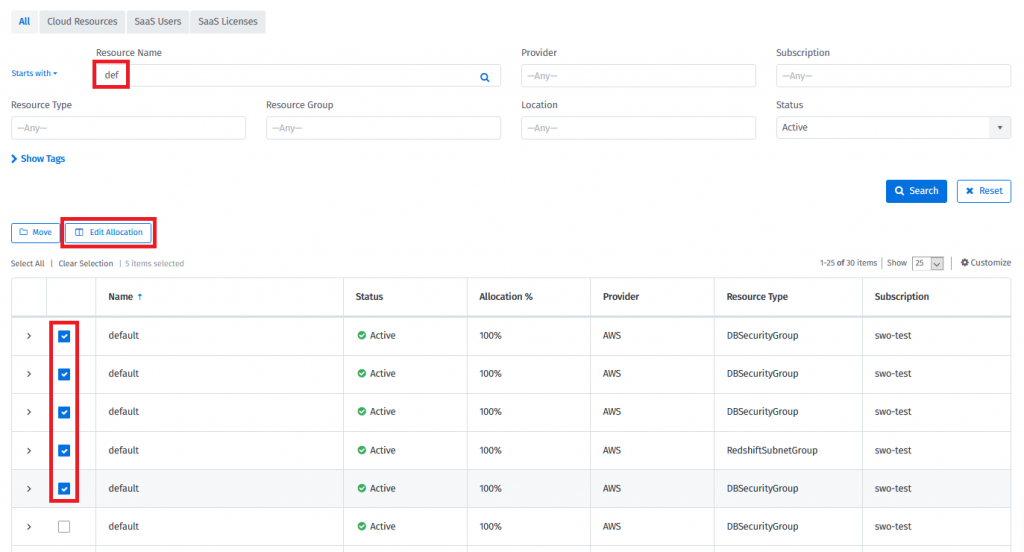
If required, search for the resources. Then, select the checkboxes and select Edit Allocation.
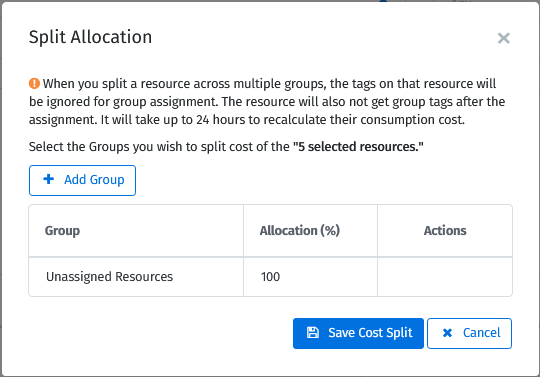
Specify the split details on the Split Allocation page:
Select the groups and provide an allocation percentage for each group.
Repeat the step to select groups and specify the allocation percentages. If this is done, select Save Cost Split:
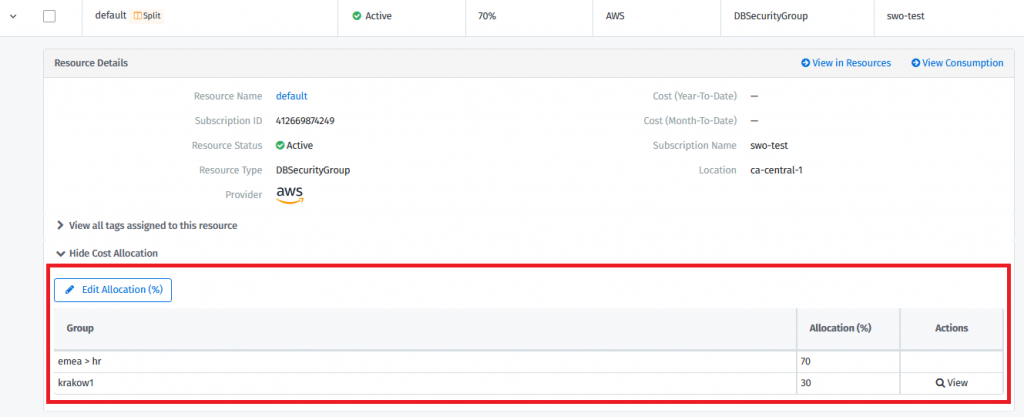
The cost of those resources will be assigned in the following way:
70% of the cost is assigned to the group EMEA> HR
30% of the cost is assigned to the group: krakow1
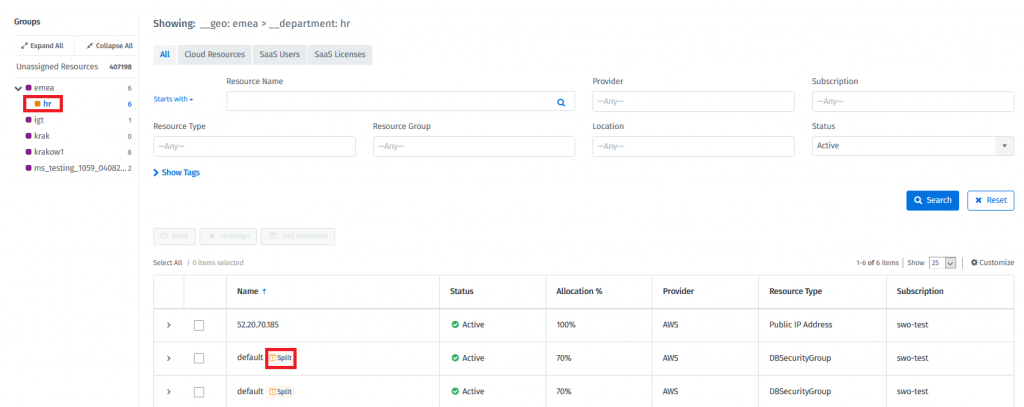
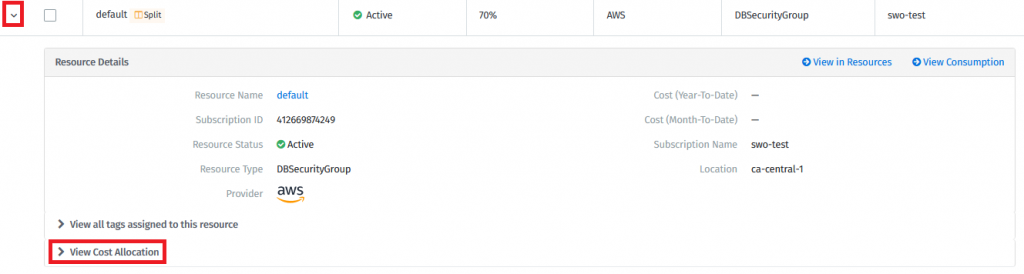
You can see the split resources assigned to the groups provided. They are marked with the “Split” icon.
Resource group assignments can be managed through the following modules:
Custom Groups - Go to the details of a resource and select View Cost Allocation.
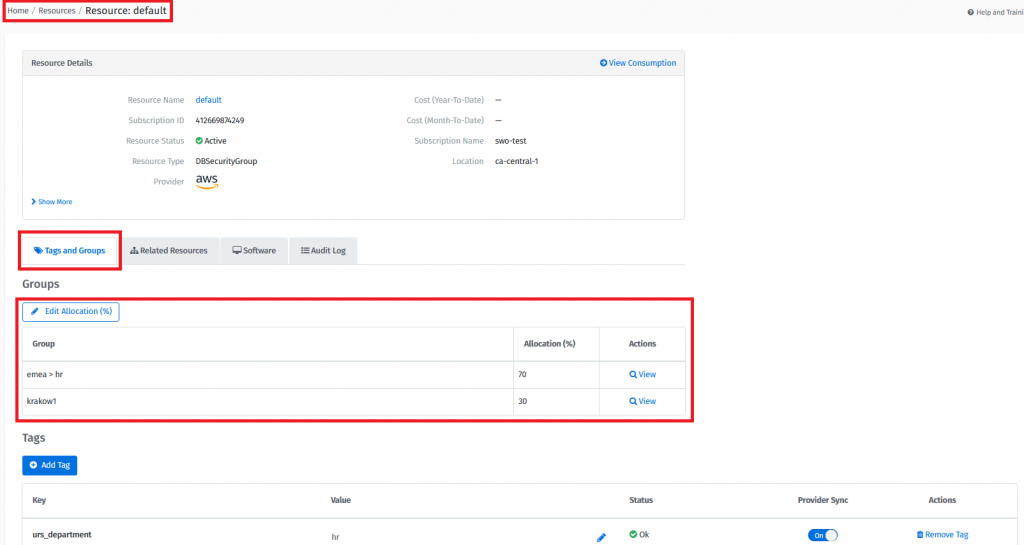
Resources - Go to the selected Resource Details page. Resource group assignment information is provided in the Groups section.
Default Customer
Enterprise Customer
Service Based
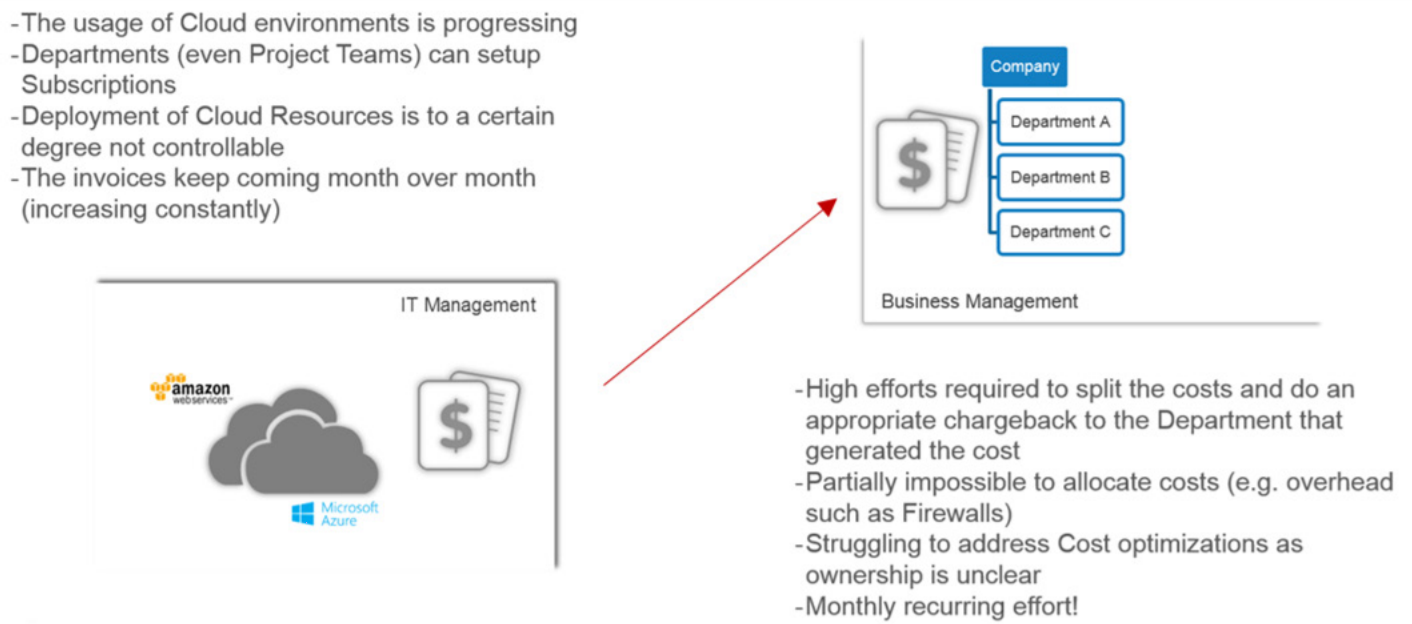
Define your organizational structure and assign cloud resources based on your business requirements.
Custom groups allow you to define an organizational hierarchy (for reporting and budgeting) and govern cloud environments (resources running on Azure, AWS, and Office365 licenses).
With Custom Groups, you can build a hierarchical structure based on custom-defined dimensions, for example, departments, teams, or projects, and map resources.
To keep the organizational assignments of a resource (tag) consistent with the tagging on the cloud provider environment, Custom Groups interfaces with the Tags and Resources. This allows you to ensure data consistency within the portal and within the cloud environments of Azure and AWS.
The built-in functionalities across Custom Groups and Resources allow users to decide how to handle those tag assignments (lock, allow overwrite, and so on) and are included as a framework that can be configured according to your requirements.
Before creating custom groups, ensure that you document the objectives for the structure. The common requirements that influence the setup of Custom Groups include the following:
Custom Groups are structured in a way that they allow almost endless scenarios of an organizational setup. Therefore the horizontal (Groups) and vertical (Group Levels) structure must be defined:
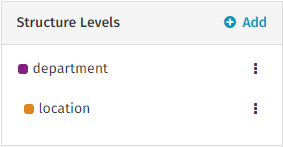
Custom Groups use structure levels to define the levels of an organization, and are used to assign individual groups. Examples of common dimensions are:
Company
Location
Department
Team
These dimensions are directly mapped to Tags and Resources as tag keys. This allows you to directly synchronize between the portal and the Cloud Provider.
Defining the group name is a bit more flexible than defining the dimensions. Group names correspond with the tag values and can be created and deleted at any time. Examples of common group names include:
SoftwareOne (for Company)
Switzerland (for Location)
Marketing (for Department)
Sales Area South (for Team)
You can assign one group across the same parent dimension to allow for cross-vertical reporting. For example:
1st dimension values for Location: Switzerland, USA, Brazil, and so on.
2nd dimension values for Department: Finance, HR, and so on.
This will allow reporting, budgeting, and chargeback by location including the corresponding departments (top-down), and run cross-vertical reporting by department (independent from location).
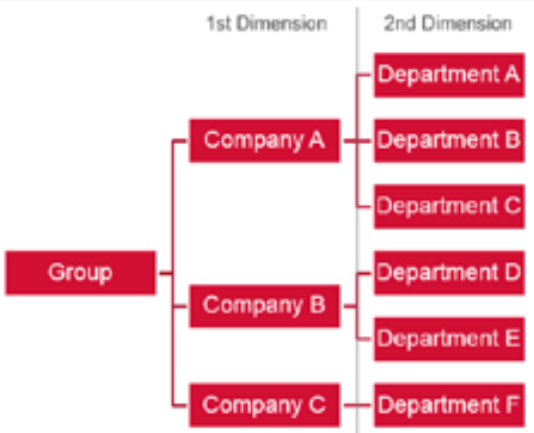
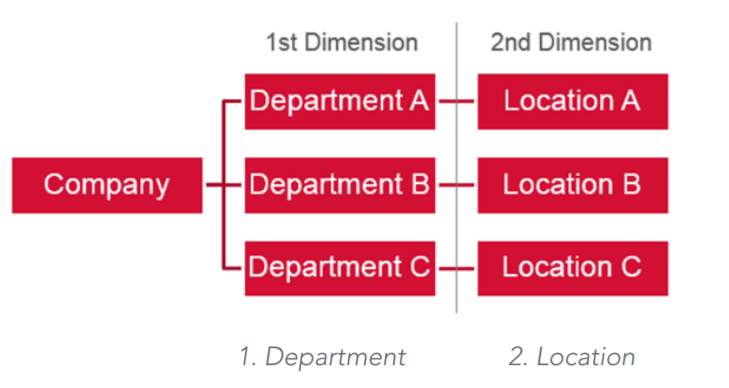
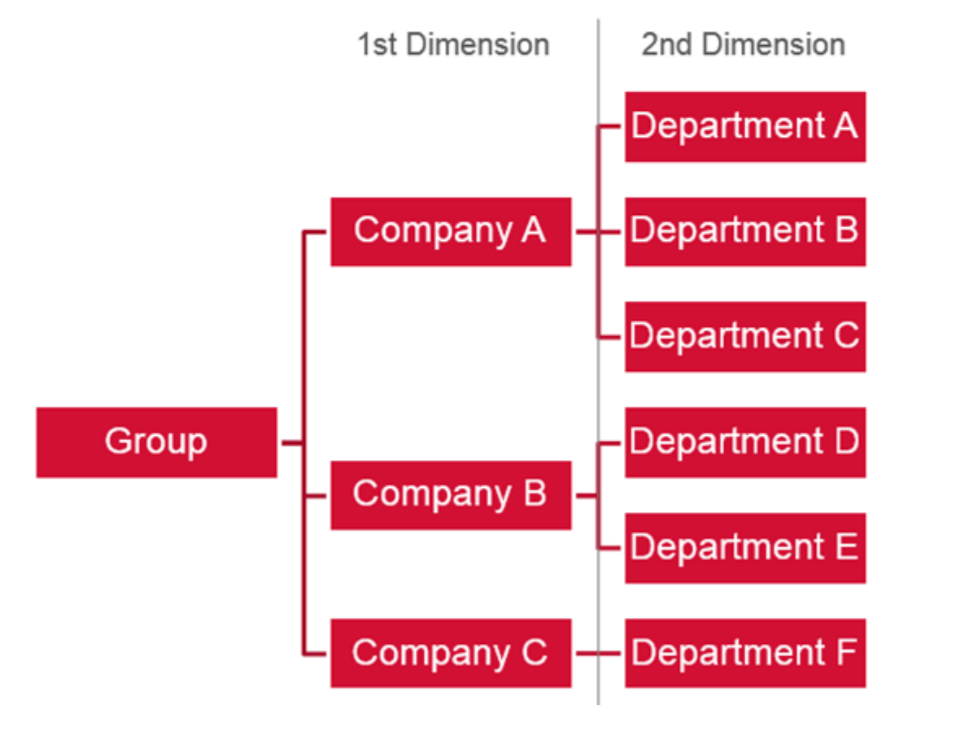
To better outline the link between the organizational requirements and the recommendation on how to structure your groups in Custom Groups, the following customer scenarios will be used throughout the document and reflect 3 examples:
This scenario represents organizations that are:
Single company
Flat structure
Single Country
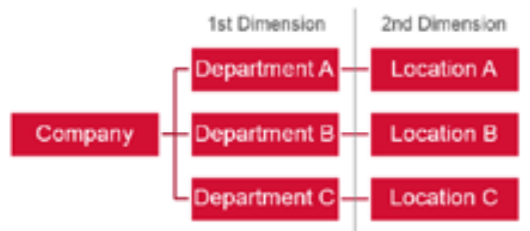
Most likely department's view
In this case, the recommendation is to define two dimensions:
This scenario represents organizations that are:
Group of companies
Requires support for M&A
Multi-country
Fragmented department structure
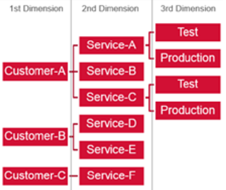
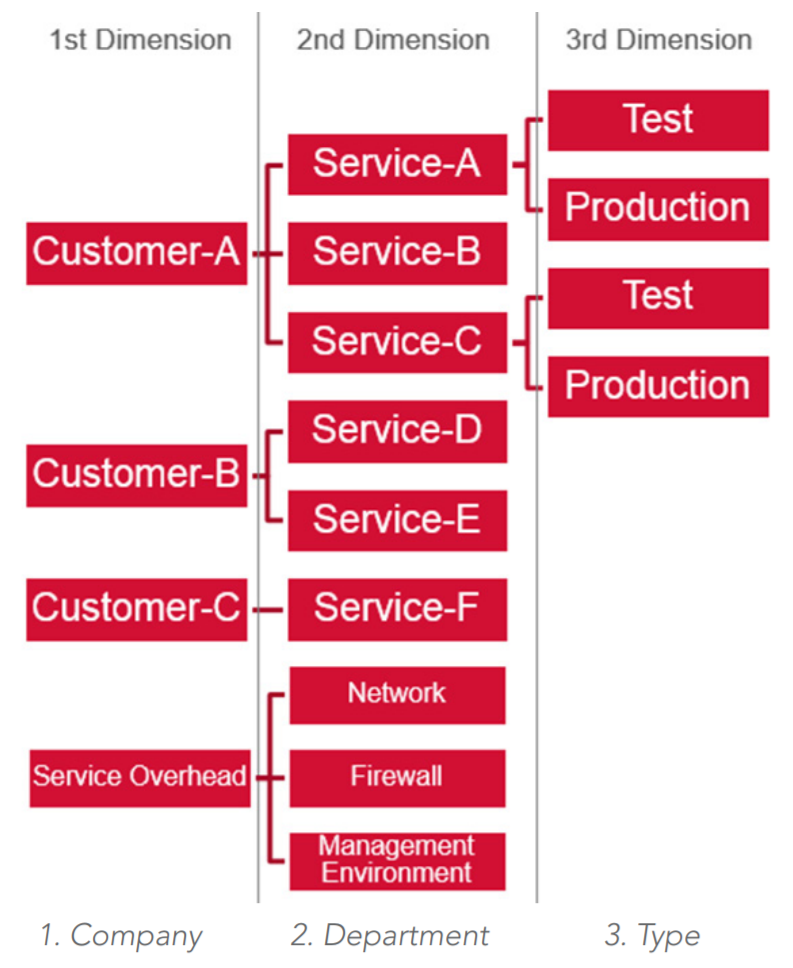
This scenario represents organizations that are:
Services oriented
Multi-customer (internal and external)
Focus on release management
Frequent on-/off-boarding
The recommendation is to define 3 dimensions:
Service
Mail (for Service)
Changes to the organization are unlikely
Organization changes throughout the year
Business related
What is the granularity of chargeback requirements?
What is the granularity of budget requirements?
What are the reporting requirements (e.g. every month the global cost to CIO and department, split by departments)?
IT related
Is tagging already in use and how?
Is it enough to stay high level or is there a need to also report on different stages of the workload (e.g. Test, UAT, Production, etc.)?
Identifying the right setup and sequence of dimensions is critical to keeping flexibility throughout the use of Custom Groups. The dimensions are the predecessor to the hierarchical structure of Custom Groups and changing a dimension requires removing the groups.