The Client Portal supports both legacy Enterprise Agreement and modern Microsoft Customer Agreement models. This topic describes how to add an Azure MCA account to the Client Portal. For information on adding an EA or MPSA account, see Activating an Azure EA or MPSA account.
Before adding an MCA account to the Client Portal, make sure your account has the correct billing account type set up. You can verify the account type in the Azure Portal.
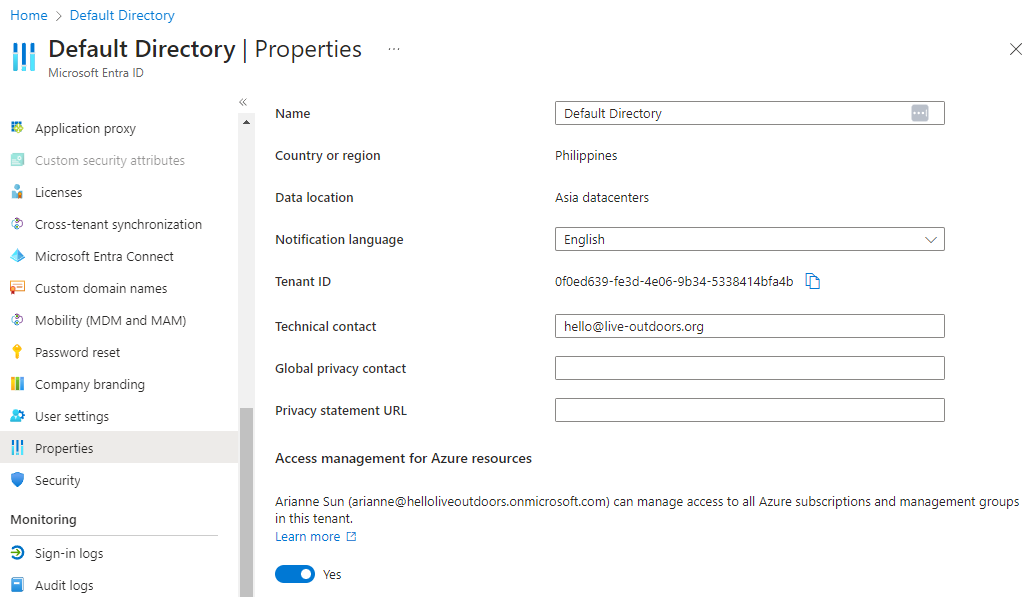
To verify, select Cost Management + Billing and then navigate to Settings > Properties. The account type is displayed in the right pane.
To assign the Billing account reader role to the Client Portal through Azure:
In the Azure Portal, search for Cost Management + Billing.
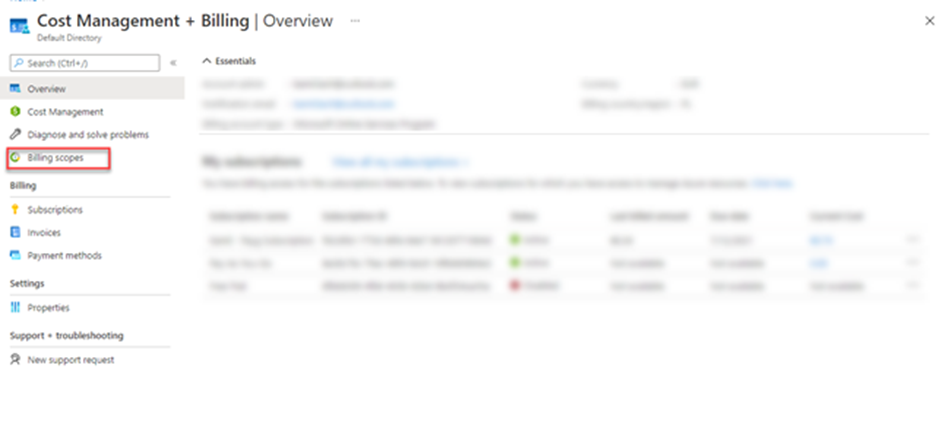
In the left navigation pane, select Billing scopes and then select your MCA billing scope.
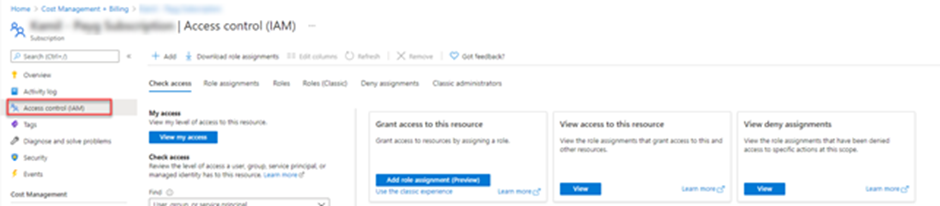
Select Access Control (IAM) to start assigning permissions.
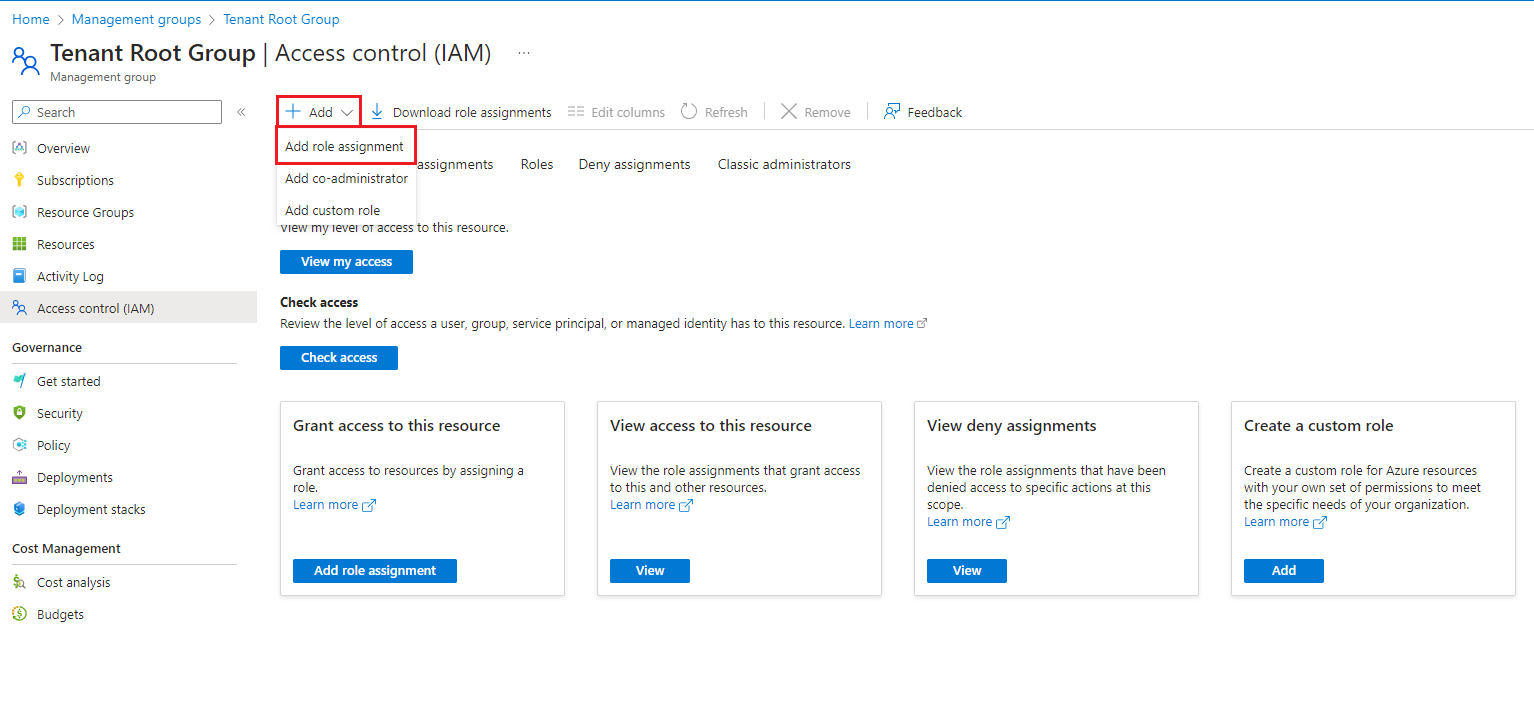
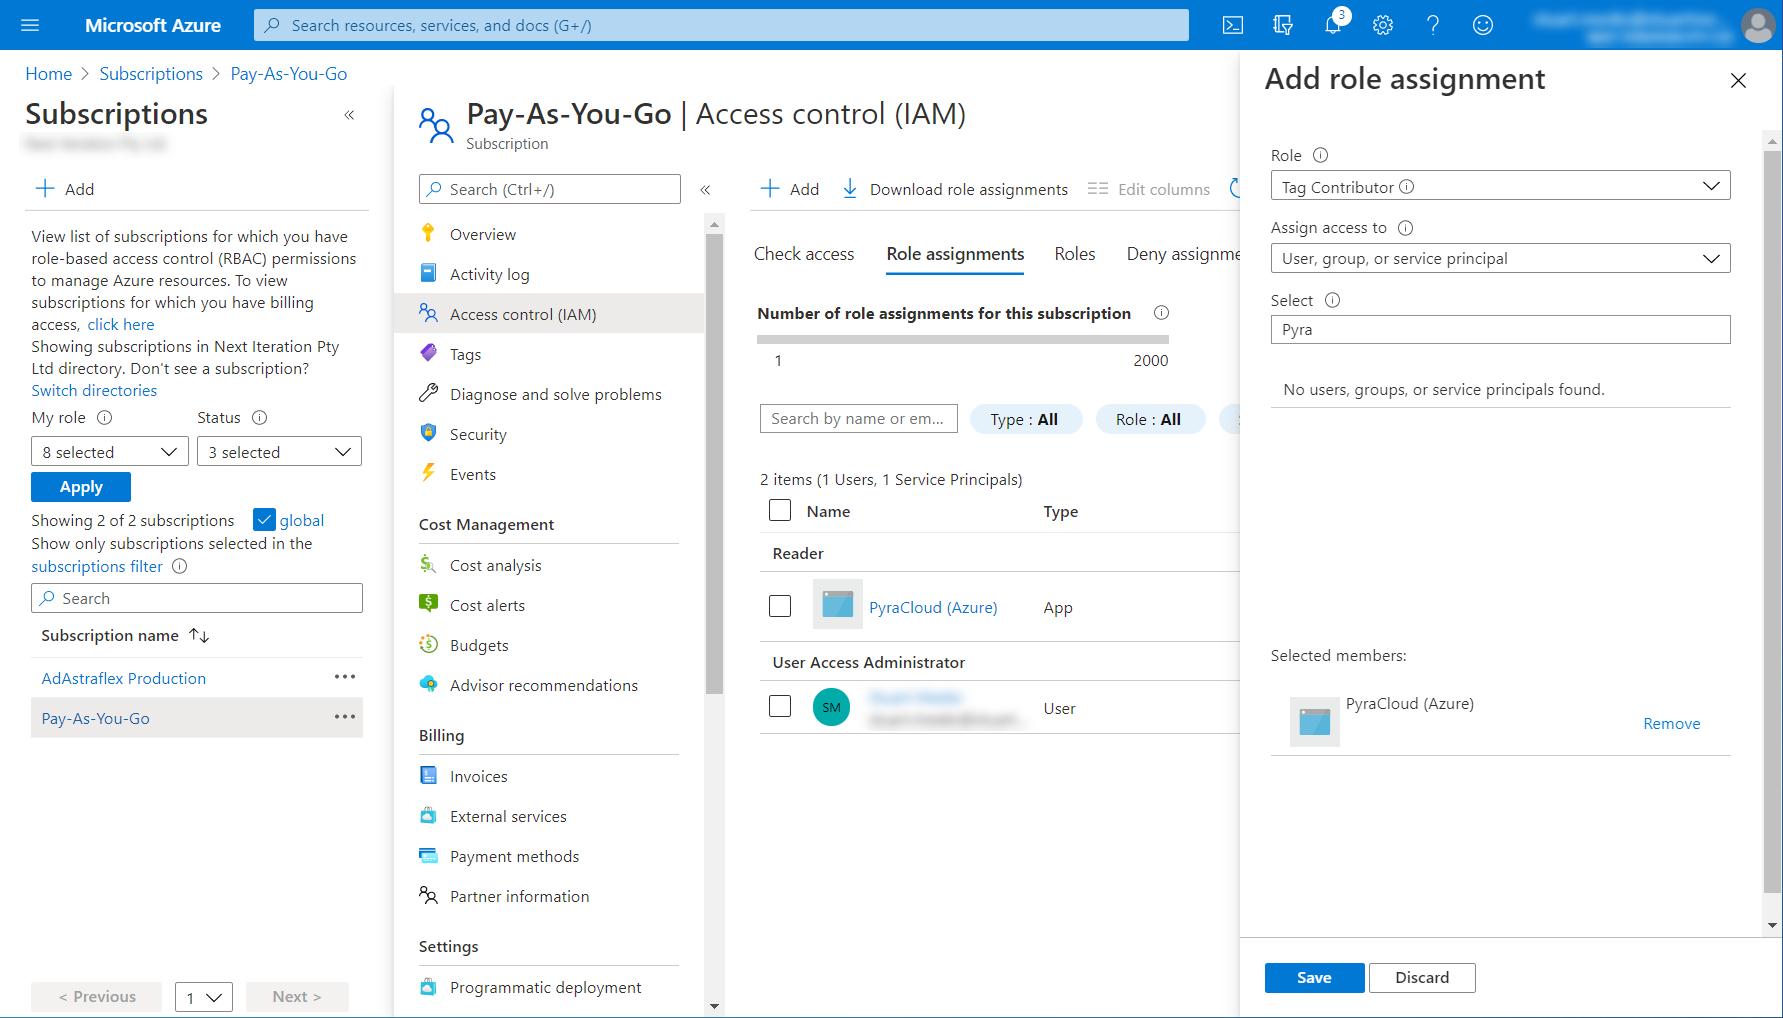
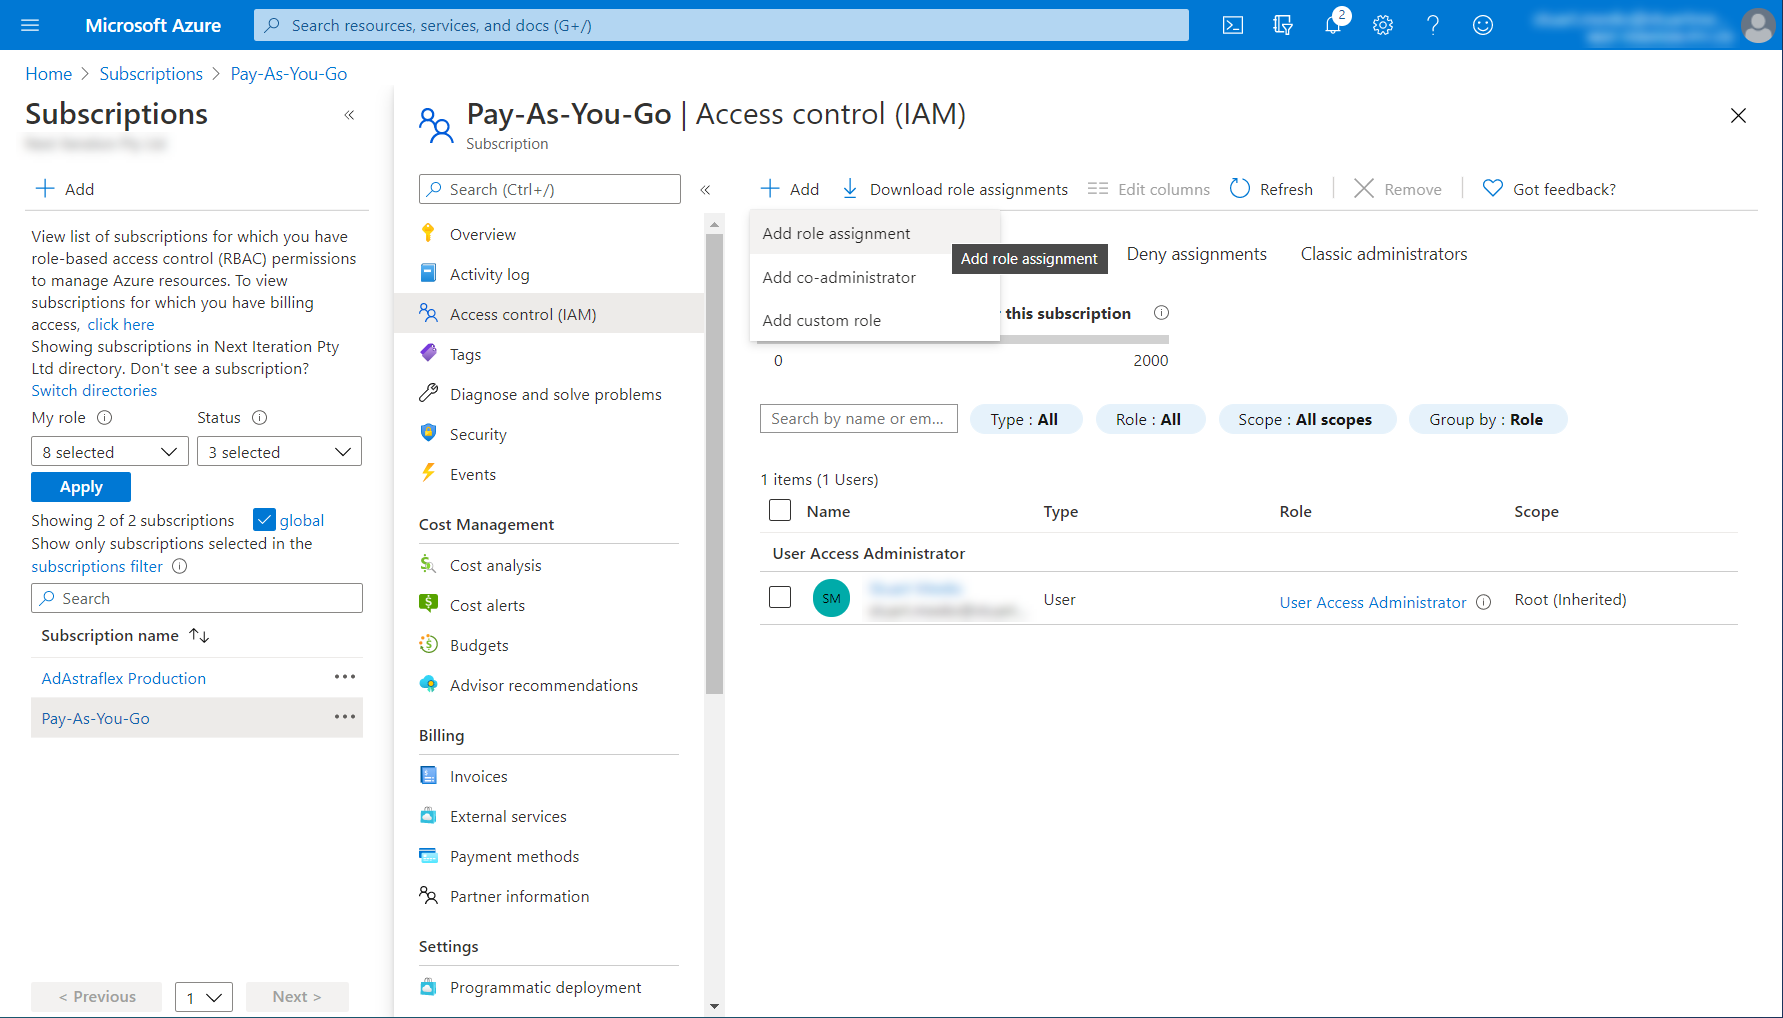
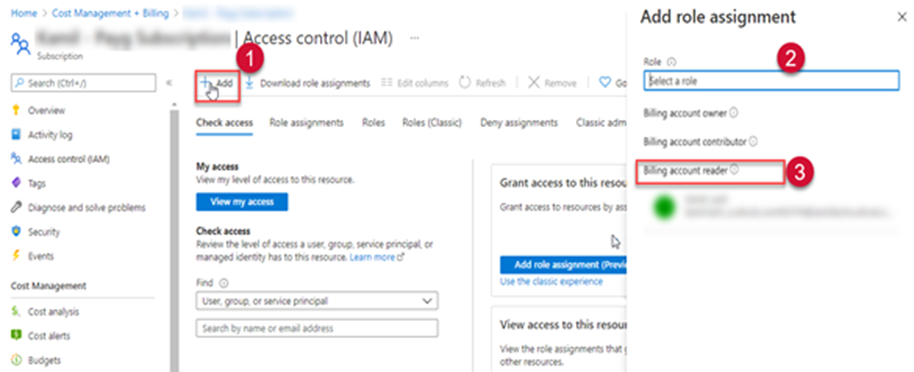
On the Access Control (IAM) tab, select Add > Add role assignment. The Add role assignment pane opens. From the Role list, select the Billing account reader role.
For Members, select SoftwareOne Cloud Consumption (formerly PyraCloud Azure) application to give access to the Client Portal.
SelectSave. Your MCA billing data will be synchronized with the Client Portal after 24 hours.
After assigning permissions to the billing account, you can add the tenant to the Client Portal via Cloud tenant setup, found under Cloud tools in the main menu.
For instructions on how to add the tenant, see .
This topic describes how you can activate an Azure EA or MPSA account.
Before adding an account, make sure that you have the following details:
Account Information - You must have the tenant ID or domain name of the tenant that contains your Azure or Office 365 subscriptions. The tenant ID and domain name are available in your Azure account. For information on how to find these details, see Find IDs and domain names in the Microsoft documentation.
Permissions - You must have sufficient permissions to complete the onboarding process. The setup will fail if the permissions are not configured in the Microsoft Azure Portal.
For an Azure account, you must have owner permission for the subscription you want to add.
For an Office 365 account, you must be a Global Administrator of the tenant that contains the subscriptions.
To add a new cloud account to the Client Portal:
On the page, select Add Cloud Account.
On the Add Cloud Account page, click Azure and provide the following details:
Friendly Name - Provide a name for your Microsoft tenant.
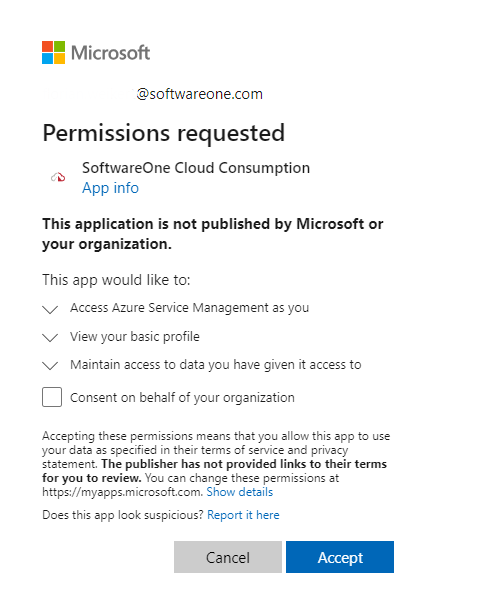
On the consent page, review the permissions required by the Client Portal and click Accept to grant consent.
After clicking Accept, you'll be redirected to the Cloud Tenant Setup details page to view the new tenant and its activation progress. After activating your tenant, you can add subscriptions and allow the Client Portal to write tags back to your Azure resources.
When you return to the Client Portal, you might see a blank page for a few seconds. To learn about the process that takes place after you provide consent, see
Many organizations have several Azure subscriptions in a single Microsoft tenant. In some cases, it's not always the same person who has Owner permissions on all those subscriptions. In such cases, each subscription owner must activate their subscriptions.
Follow these steps to add more subscriptions:
On the Cloud Tenant Setup page, select Manage.
Select Add Existing Subscriptions to add more subscriptions.
In Add New Subscription, choose the type of subscription and select Add.
When you activate your Azure subscriptions for the first time, the Client Portal assigns the Reader role by default. This means that the Tags and Resources feature can import your resources and tags from Azure, but it cannot synchronize any tag changes you make in the Client Portal back to Azure.
For Tags and Resources to synchronize tags back to Azure, you must change the level of access the Client Portal has for your Azure subscription.
To change the level of access:
On the Cloud Tenant Setup page, select Manage.
Select Change Access for the subscription you want to modify.
Select one of the following access levels and click Change:
Microsoft Tenant ID or Tenant Domain - Provide the tenant ID or domain.
License Model - Select the license model (Enterprise Agreement or Microsoft Customer Agreement).
Enrollment Number - Provide the enrollment number. Note that this field is displayed only if you select Enterprise Agreement as your license model.
Select Add Cloud Account.
Sign in to the Microsoft portal using the credentials of a user who has Owner permissions to the Azure subscriptions you want to add.
If you select Office 365, the user performing the consent must be a Global Administrator of the tenant.
Sign in to the Microsoft portal using the credentials of the user with Owner permissions to the Azure subscriptions you want to add.
On the consent page, review the permissions and select Accept to grant consent. After granting consent, you'll be redirected to the Client Portal.
Sync resources and tags – write back of tags disabled - Tags and Resources will download your resources, including the tags currently assigned in Azure. Any changes to tags will be stored in the Client Portal only. Any tags assigned to resources in Azure will overwrite the tags for the corresponding resource in the Client Portal. This setting requires the Reader role in your Azure subscription and will not make any changes to resources or tags in your Azure subscription.
Sync resources and tags – write back of tags enabled - Tags and Resources will download your resources to the Client Portal, including the tags currently assigned in Azure. Any changes to tags will be synchronized back to your resources in Azure. This setting requires the “Tag Contributor” role in your Azure subscription and will only make changes to tags.
Sign in to the Microsoft portal using the credentials of the user with Owner permissions to the Azure subscriptions for which you wish to modify the access level.
On the consent page, review the permissions and select Accept to grant consent. After granting consent, you'll be redirected to the Client Portal to view the updated access level. If you notice a blank screen, refresh the page.
This topic describes how to manually integrate your Azure tenant and assign the Reader and Tag Contributor roles to the Client Portal using Azure Management Groups.
Integrating a Microsoft tenant involves the following steps:
Granting consent to the Client Portal in your Azure tenant.
Assigning the Tag Contributor and Reader access roles to the Client Portal using Azure Management Groups. The Tag Contributor and Reader roles allow the Client Portal to read a list of all the resources in your Azure subscription and read and write tags on those resources. You can control whether you want the Client Portal to write tags back to resources in your Azure subscription. For more information, see .
Providing the details to SoftwareOne to complete your onboarding.
To grant consent through your Azure tenant:
Select one of the following links:
To assign the Tag Contributor and Reader access roles:
Launch the and search for Management groups.
On the Management groups page, select Start using management groups.
Provide the Group ID and a display name for your group. Select Submit. The new group is created and displayed under the Tenant Root Group.
After completing the integration steps, provide the following details so we can complete the onboarding of your tenant:
Your Microsoft Tenant ID (or domain).
A friendly name for your tenant to recognize easily across the Client Portal.
The start and end date of your Enterprise Agreement.
After we have added your tenant, you'll need to provide an access token from the EA Portal.
After granting consent, launch the Azure Portal and navigate to Azure Active Directory > Enterprise applications to make sure that SoftwareOne Cloud Consumption (formerly PyraCloud) is listed in your enterprise applications.
Navigate to Role assignments and select Add > Add role assignment from the dropdown.
Assign the Reader role to the Client Portal:
Choose Reader from the list of roles and select Next.
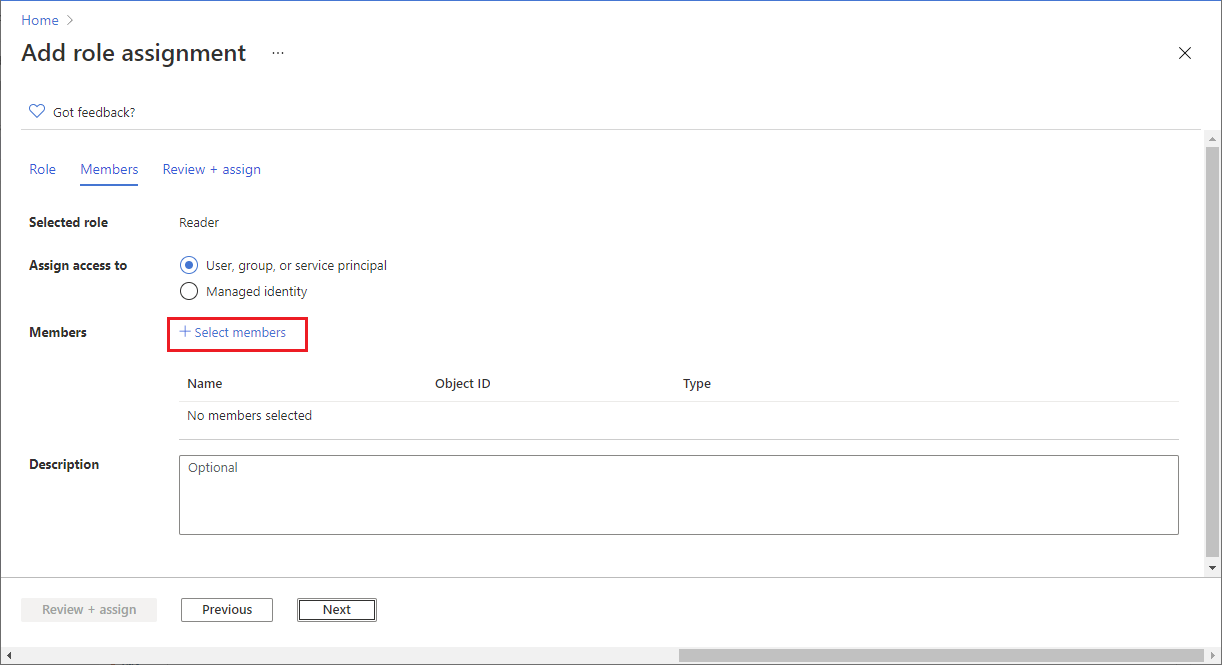
On the Members tab, click Select Members.
Search for SoftwareOne Cloud Consumption (formerly PyraCloud Azure for Azure or PyraCloud Office 365 for Office 365) and then select it from the search results. Click Save.
Assign the Tag Contributor role to the Client Portal:
Choose Tag Contributor from the list of roles. Select Next.
On the Members tab, click Select Members.
Search for SoftwareOne Cloud Consumption (formerly PyraCloud Azure for Azure or PyraCloud Office 365 for Office 365) and then select it from the search results. Click Save.
Select Review + assign and then Review + assign again. The new roles are displayed on the page.
You can use Azure Management Groups to grant the Client Portal access to your Azure subscriptions. This approach has the following benefits:
You can assign access to multiple subscriptions in a single step.
If you create more Azure subscriptions in the future, access will be automatically granted. It means that when you add an Azure subscription to your tenant, activating it in the Client Portal is unnecessary.
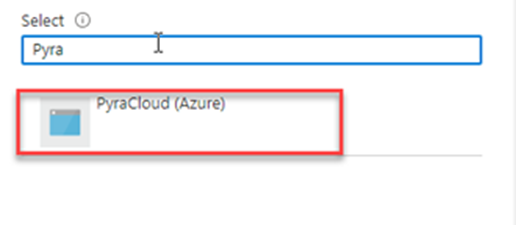
When you onboard your tenant to the Client Portal, an Enterprise Application called SoftwareOne Cloud Consumption (formerly PyraCloud) is created in your tenant. You must then assign the Tag Contributor and Reader roles to the "PyraCloud (Azure)" Enterprise Application:
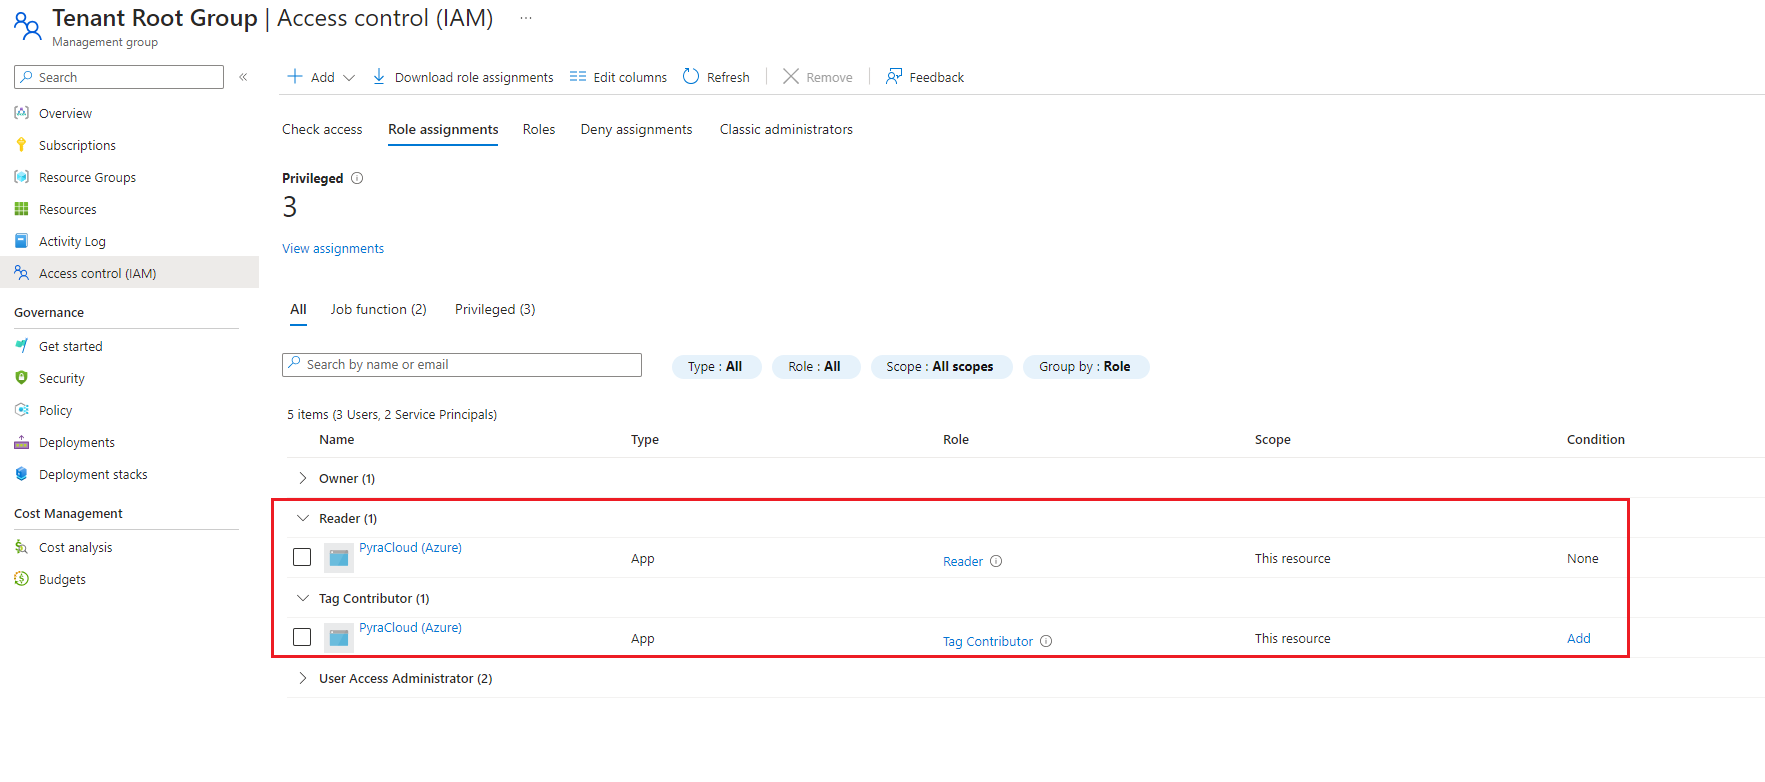
These roles allow the Client Portal to read a list of all the resources in your Azure subscriptions and read and write tags on those resources. You can choose whether you want the Client Portal to write tags back to resources in your Azure subscription using the Cloud Tenant Setup feature.
Use the following commands to onboard your Azure subscriptions:
The following table explains these commands:
Before granting access through the Azure Portal, note the following points:
Ensure that you have .
Ensure that you have the correct permissions to manage access to all Azure subscriptions and management groups in your tenant. For instructions, see in the Microsoft documentation.
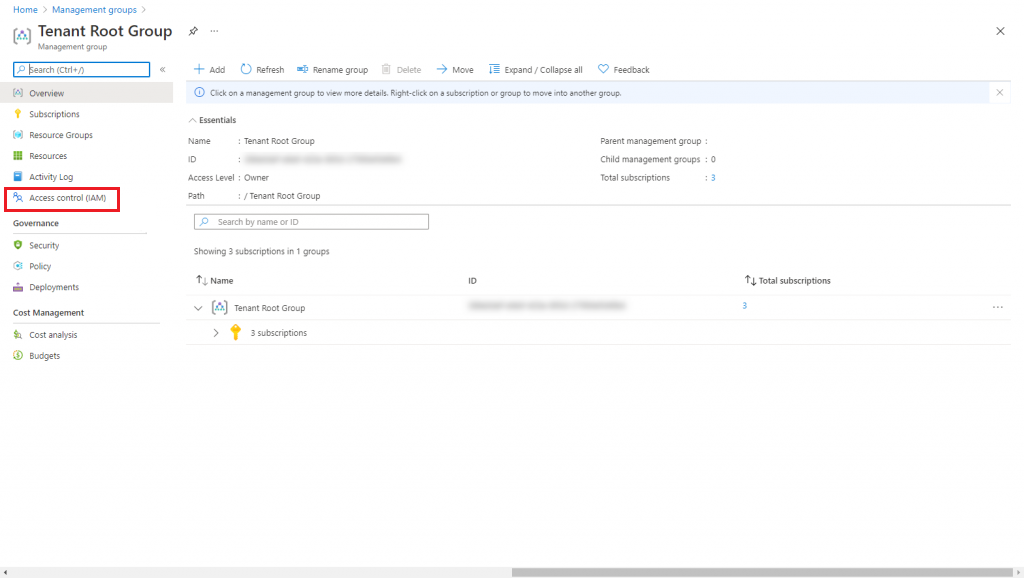
Launch the and search for Management groups.
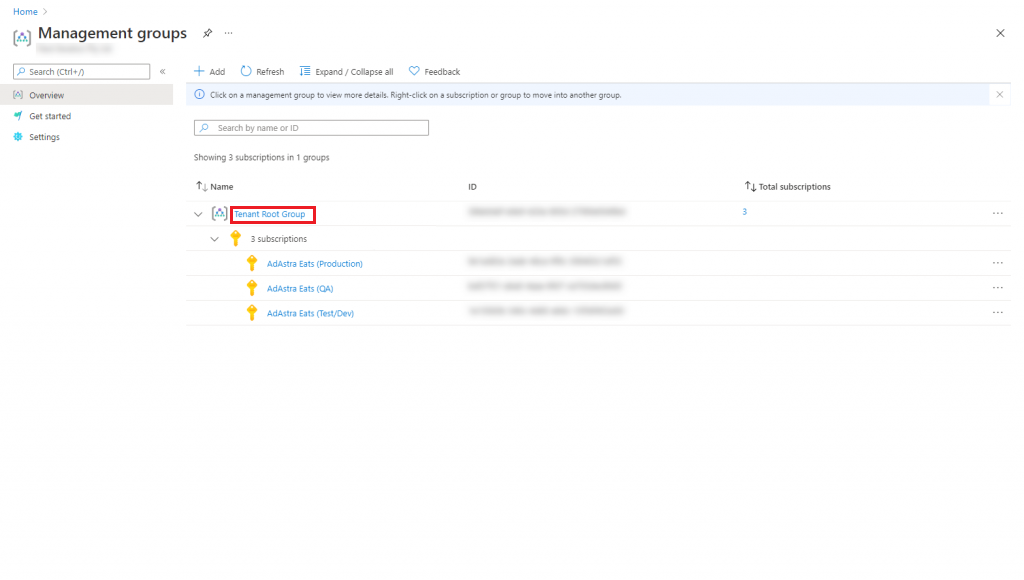
On the Management groups page, select Tenant Root Group. Note that regardless of your organization's configuration, you'll always have a Tenant Root Group. It might have been renamed, but it always appears at the top of the hierarchy.
Create the PyraCloud (Azure) service principal (Enterprise Application) in your tenant.
$root_mg=$(az account management-group list --query "[?displayName == 'Tenant Root Group'] | [0] | id" --output tsv)
Get the ID of your Tenant Root Group.
az role assignment create --assignee "2a4807a4-d9e4-457d-b32f-a455e0d3662a" --role "Reader" --scope "$root_mg"
az role assignment create --assignee "2a4807a4-d9e4-457d-b32f-a455e0d3662a" --role "Tag Contributor" --scope "$root_mg"
Assign the Reader and Tag Contributor roles to the PyraCloud (Azure) application in your Tenant Root Group.
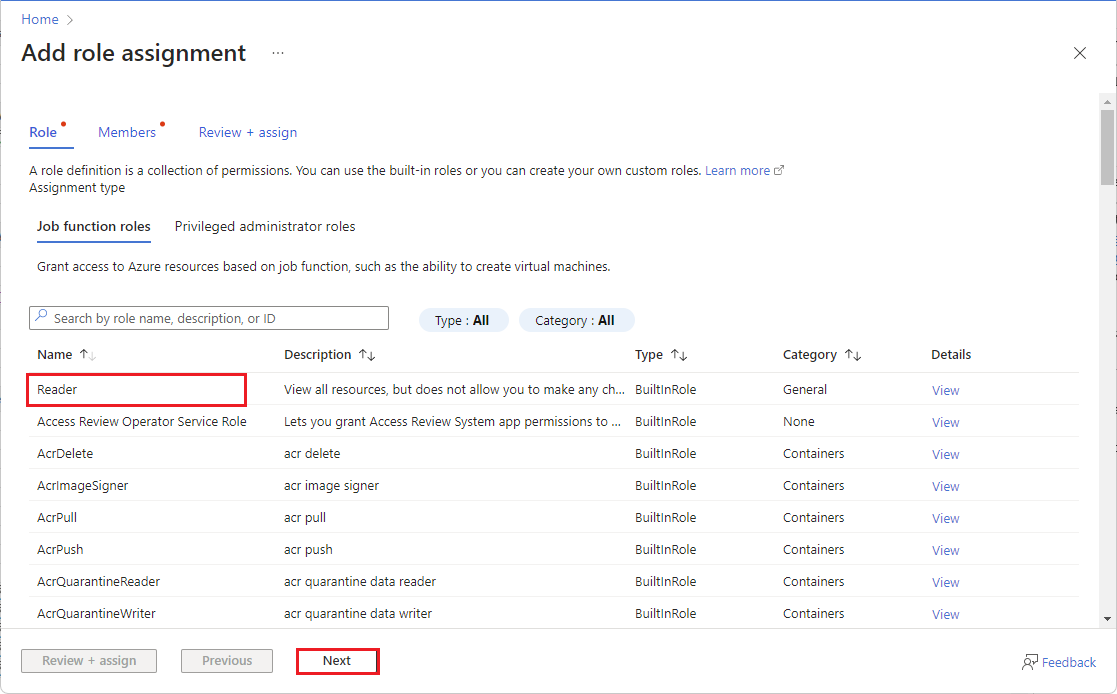
On the Role tab, select Reader as the role and then select Next.
On the Members tab, select User, group, or service principal if it's not selected by default. Then, choose Select members.
In the Select members panel, search for SoftwareOne Cloud Consumption (formerly PyraCloud Azure).
Use Select to add the enterprise application to the Members list. After the app has been added, select Review + assign.
On the Review + assign tab, review the details and select Review + assign to confirm the role assignment.
To assign the Tag Contributor role, follow all the steps in Step 3: Assign the Reader role, but choose Tag Contributor as your role instead of Reader.
After completing the steps, the roles are assigned and displayed on the Role assignments tab.
az login

az rest --method post --url "/providers/Microsoft.Authorization/elevateAccess?api-version=2016-07-01"

az ad sp create --id 2a4807a4-d9e4-457d-b32f-a455e0d3662a

az ad app permission grant --id 2a4807a4-d9e4-457d-b32f-a455e0d3662a --api 00000003-0000-0000-c000-000000000000 --scope "User.Read"

$root_mg=$(az account management-group list --query "[?displayName == 'Tenant Root Group'] | [0] | id" --output tsv)

az role assignment create --assignee "2a4807a4-d9e4-457d-b32f-a455e0d3662a" --role "Reader" --scope "$root_mg"

az role assignment create --assignee "2a4807a4-d9e4-457d-b32f-a455e0d3662a" --role "Tag Contributor" --scope "$root_mg"
az login
Log in to your Microsoft tenant.
az rest --method post --url "/providers/Microsoft.Authorization/elevateAccess?api-version=2016-07-01"
Elevate your permissions to manage all Azure subscriptions and management groups. See Microsoft Documentation.
az ad sp create --id 2a4807a4-d9e4-457d-b32f-a455e0d3662a
az ad app permission grant --id 2a4807a4-d9e4-457d-b32f-a455e0d3662a --api 00000003-0000-0000-c000-000000000000 --scope "User.Read"
Microsoft will retire the legacy Azure Enterprise Reporting APIs on 1 May 2024. Currently, the Client Portal uses these APIs to get your Azure EA consumption data.
If you have an Azure Enterprise Agreement (EA), you must migrate to the new Azure Cost Management APIs to maintain your cost and usage data in the Client Portal.
Before migrating to the new Cost Management APIs, note the following points:
The new APIs don't require access tokens because the authorization is done through Microsoft Entra ID (also known as Azure Active Directory) using service principals.
Only individuals with the Azure EA Enterprise Administrator role permission can carry out the migration steps. If you have trouble finding out who is your EA admin in Azure, see Microsoft's documentation on .
During the consent flow, the SoftwareOne Cloud Consumption app is added to the organization tenant. This enterprise application is granted the EA Reader permission, which allows us to read the consumption data. To add the application to the tenant, you'll need permission to approve an Enterprise Application.
If your EA admin doesn't have access to the Client Portal, you can collaborate with them by sharing your screen, so your EA admin can sign in and complete the authorization required for migration.
During migration, our system automatically assigns the to the service principal.
If you've already onboarded your EA cloud account to the Client Portal and have appropriate permissions to approve Enterprise Applications, follow these steps to transition to the new API:
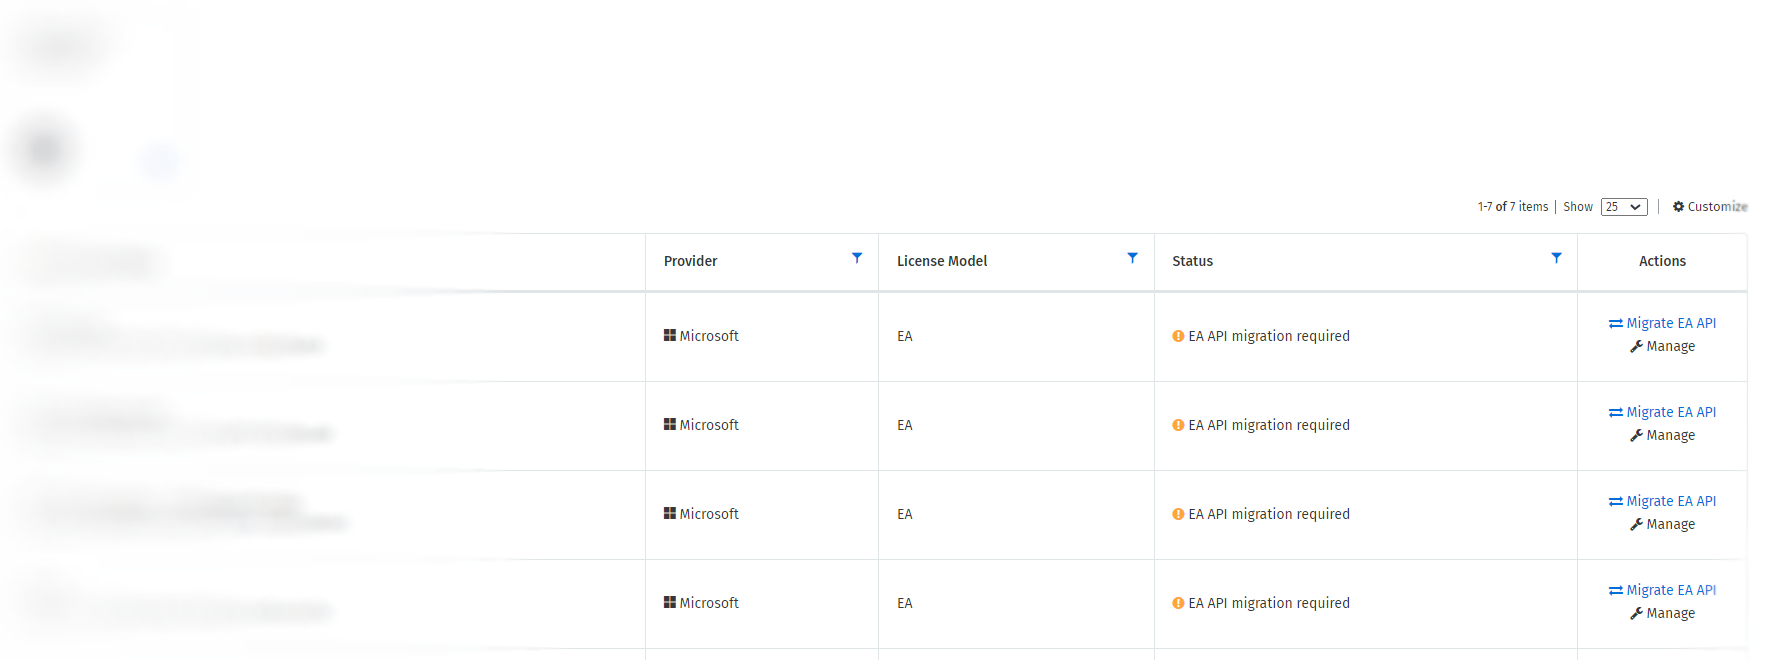
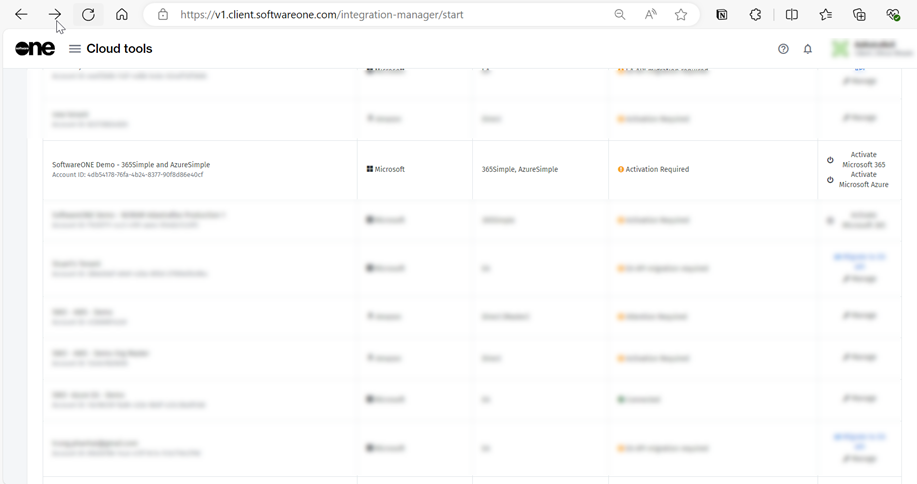
Open the page. EA cloud accounts that haven't been migrated will display EA API migration required in the Status column.
Select Migrate EA API.
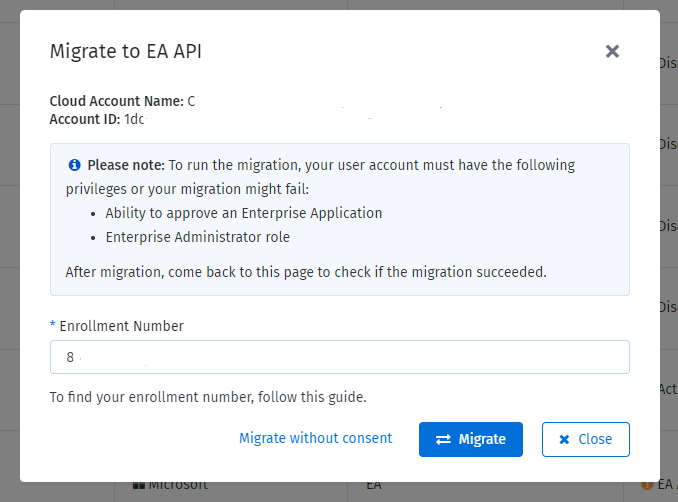
In the Migrate to EA API window, enter the enrollment number and select Migrate.
Sign in to the Microsoft portal using the credentials of a user with Enterprise administrator permission.
On the consent page, review the permissions required by the Client Portal and select Accept to grant consent.
You'll be redirected to the Cloud Tenant Setup details page.
The system will mark the enrollment number you provided as migrated, and automatically assign the Enrollment reader permission to the SoftwareOne Cloud Consumption (formerly PyraCloud Azure) application. When the migration has been completed, the consumption data is fetched from Microsoft.
If you can't provide consent to approve enterprise applications or have environment restrictions, you can follow these steps to migrate and assign permissions manually:
On the page, locate the required EA cloud account with the status EA API Migration required.
In the Actions column, select Migrate EA API.
In the Migrate to EA API window, enter the enrollment number, then select Migrate without consent.
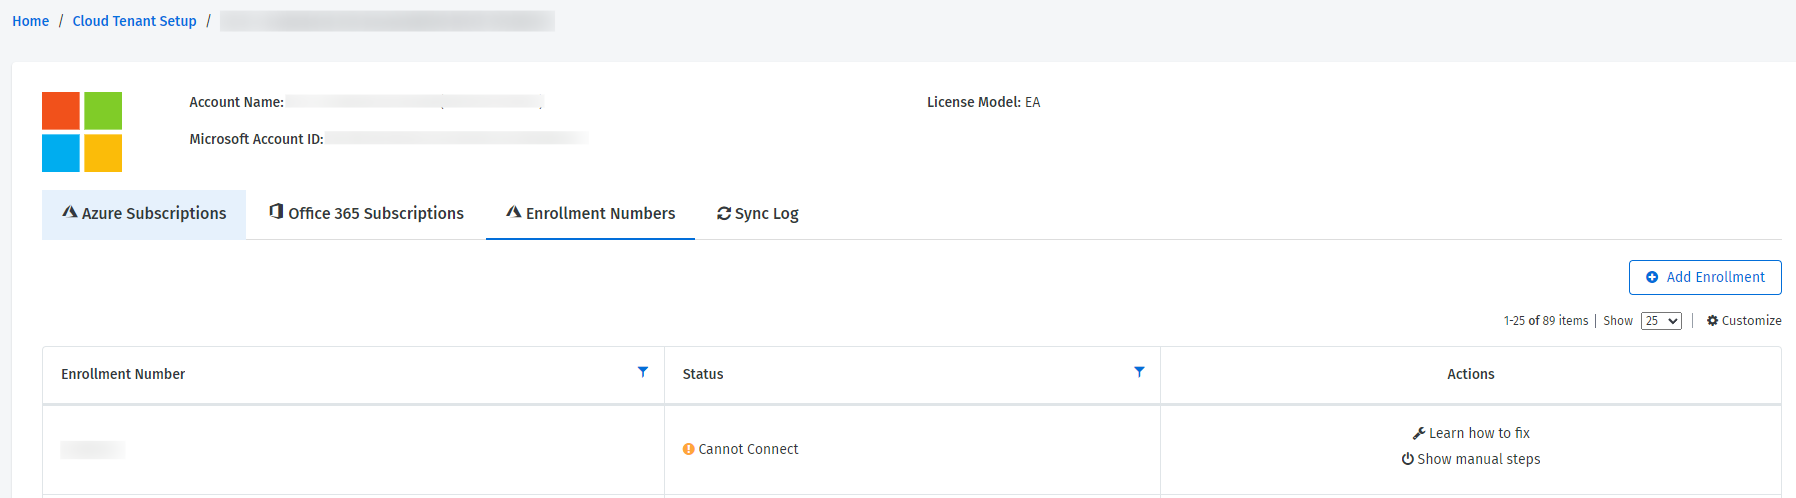
On the details page of the tenant, select the Enrollment Numbers tab and select Show manual steps.
In Manual steps, assign permissions using Cloud Shell or REST API and select Close. Note that you must have the Azure EA Enterprise Administrator role to assign permissions.
The Enrollment Numbers tab on the details page of the cloud tenant displays the enrollment numbers that are migrated to the new API, along with the respective enrollment status:
Connected - Indicates that the system is connected and working as expected.
Cannot connect - Indicates that the Client Portal doesn't have access to the new Azure Cost Management API and the EnrollmentReader permission is missing. You can assign permissions using the Azure Cost Management API or Azure Cloud Shell.
Activation required - Indicates that the Client Portal can access the enrollment data, but the cloud account has not been set up as an EA account type.
If you're adding a new EA cloud account to the Client Portal, you'll need to provide the enrollment number while adding the account. For information on how to add a new EA account, see .
If you purchased SoftwareOne's Digital Workplace Essentials/365Simple, and Azure Essentials/ AzureSimple services, you must activate your cloud account in the Marketplace Platform.
Cloud accounts that require activation are displayed on the Cloud tenant setup page and have the Activation Required status and links to activate Microsoft 365 and Microsoft Azure, depending on the service you purchased.
This topic describes how you can access the Cloud tenant setup page and complete the activation.
To activate Microsoft 365:
Navigate to the Cloud tenant setup using one of the following steps:
Select this link: .
Sign in to the platform. Next, select the main navigation menu and go to Cloud tools > Cloud tenant setup.
On the Cloud tenant setup page, locate the account that needs activation. The status will be Activation Required.
In the Actions column, select Activate Microsoft 365.
On the Microsoft sign-in page, enter your username and password. Note that you must provide your Global Administrator credentials.
Review the permissions and select Accept to grant consent.
To activate Microsoft Azure:
Navigate to the Cloud tenant setup using one of the following steps:
Select this link: .
Sign in to the platform. Next, open the main menu and go to Cloud tools > Cloud tenant setup.
On the Microsoft sign-in page, enter your username and password. Note that you must have the Owner or User Access Administrator role for the account to activate.
Review permissions and click Accept to grant consent.
On successful validation of your credentials, your account is activated, and the Cloud tenant setup page displays the activation status as Connected.
In the Actions column, select Activate Microsoft Azure.
In some cases, you must configure your Azure subscription manually so that the Client Portal can access the resources and tags.
When you onboard your tenant to the Client Portal, an Enterprise Application called SoftwareOne Cloud Consumption (formerly PyraCloud Azure) is created in your tenant. You must then assign the Tag Contributor and Reader roles to the PyraCloud (Azure) Enterprise Application.
These roles allow the Client Portal to read a list of all the resources in your Azure subscriptio, and read and write tags on those resources. You can control whether you want the Client Portal to write tags back to resources in your Azure subscription using the Cloud Tenant Setup feature.
To grant access to individual subscriptions:
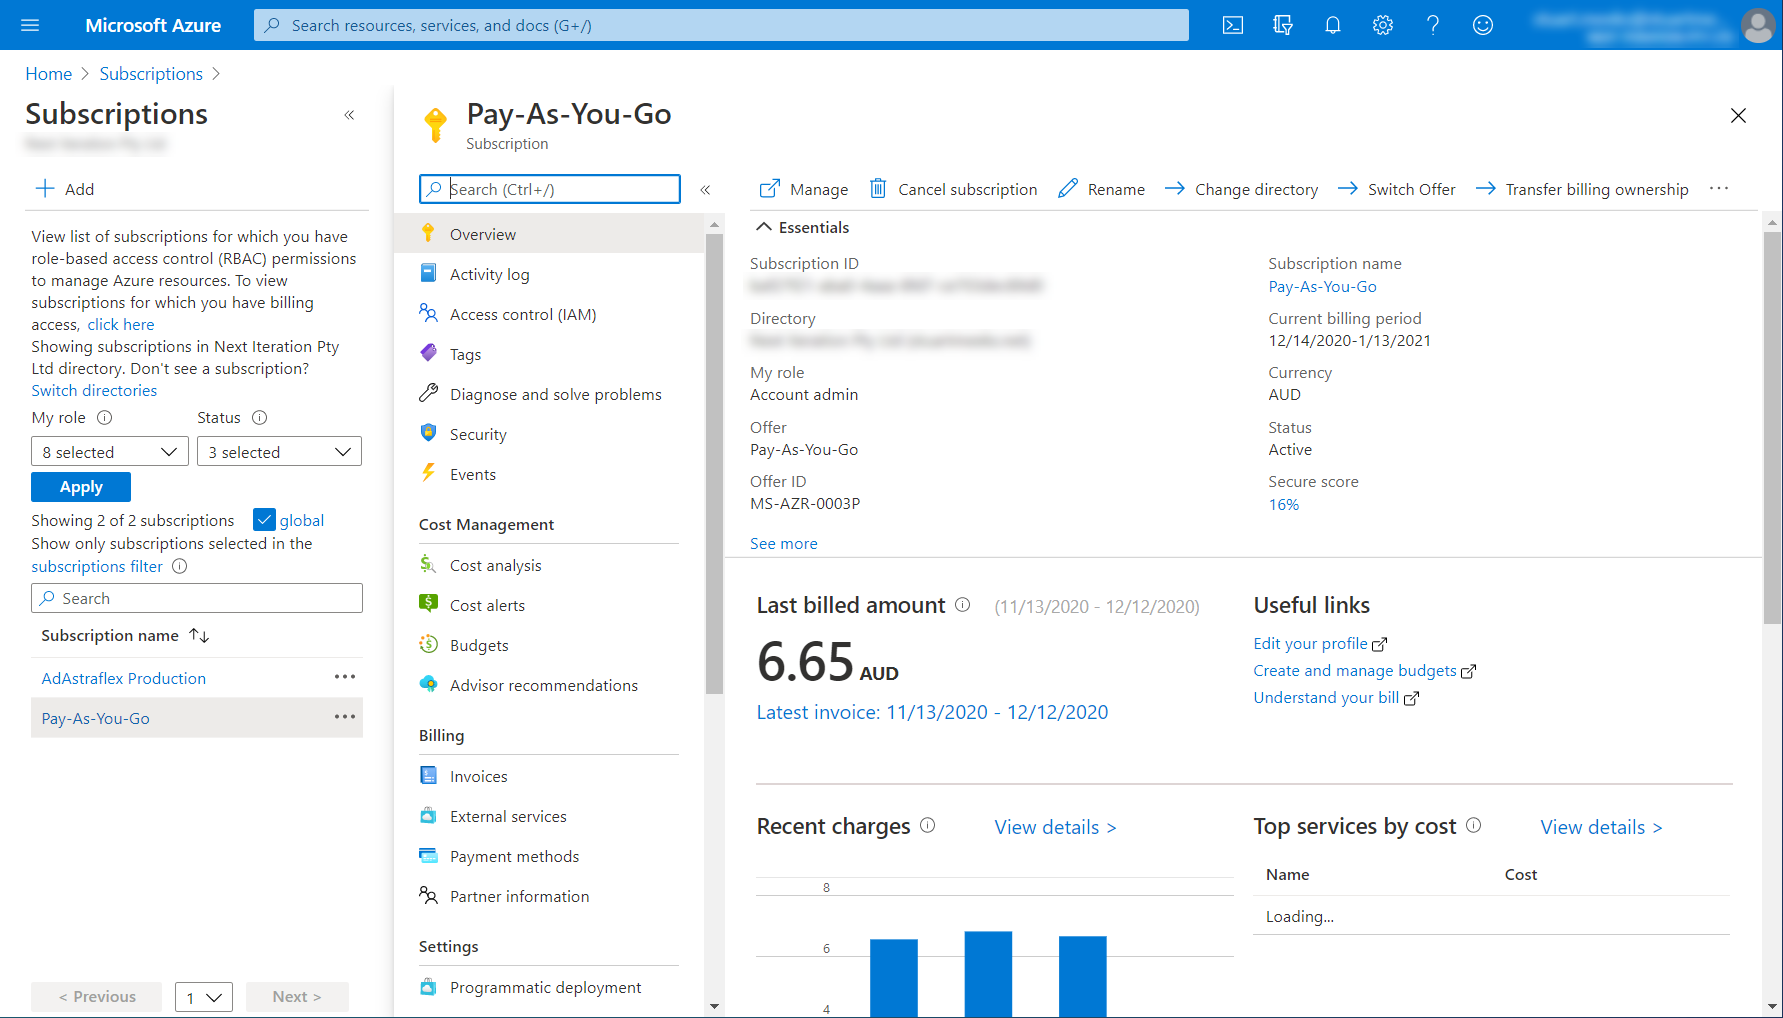
In the Azure Portal, search for Subscriptions.
On the Subscriptions page, choose the subscription you want to integrate with the Client Portal.
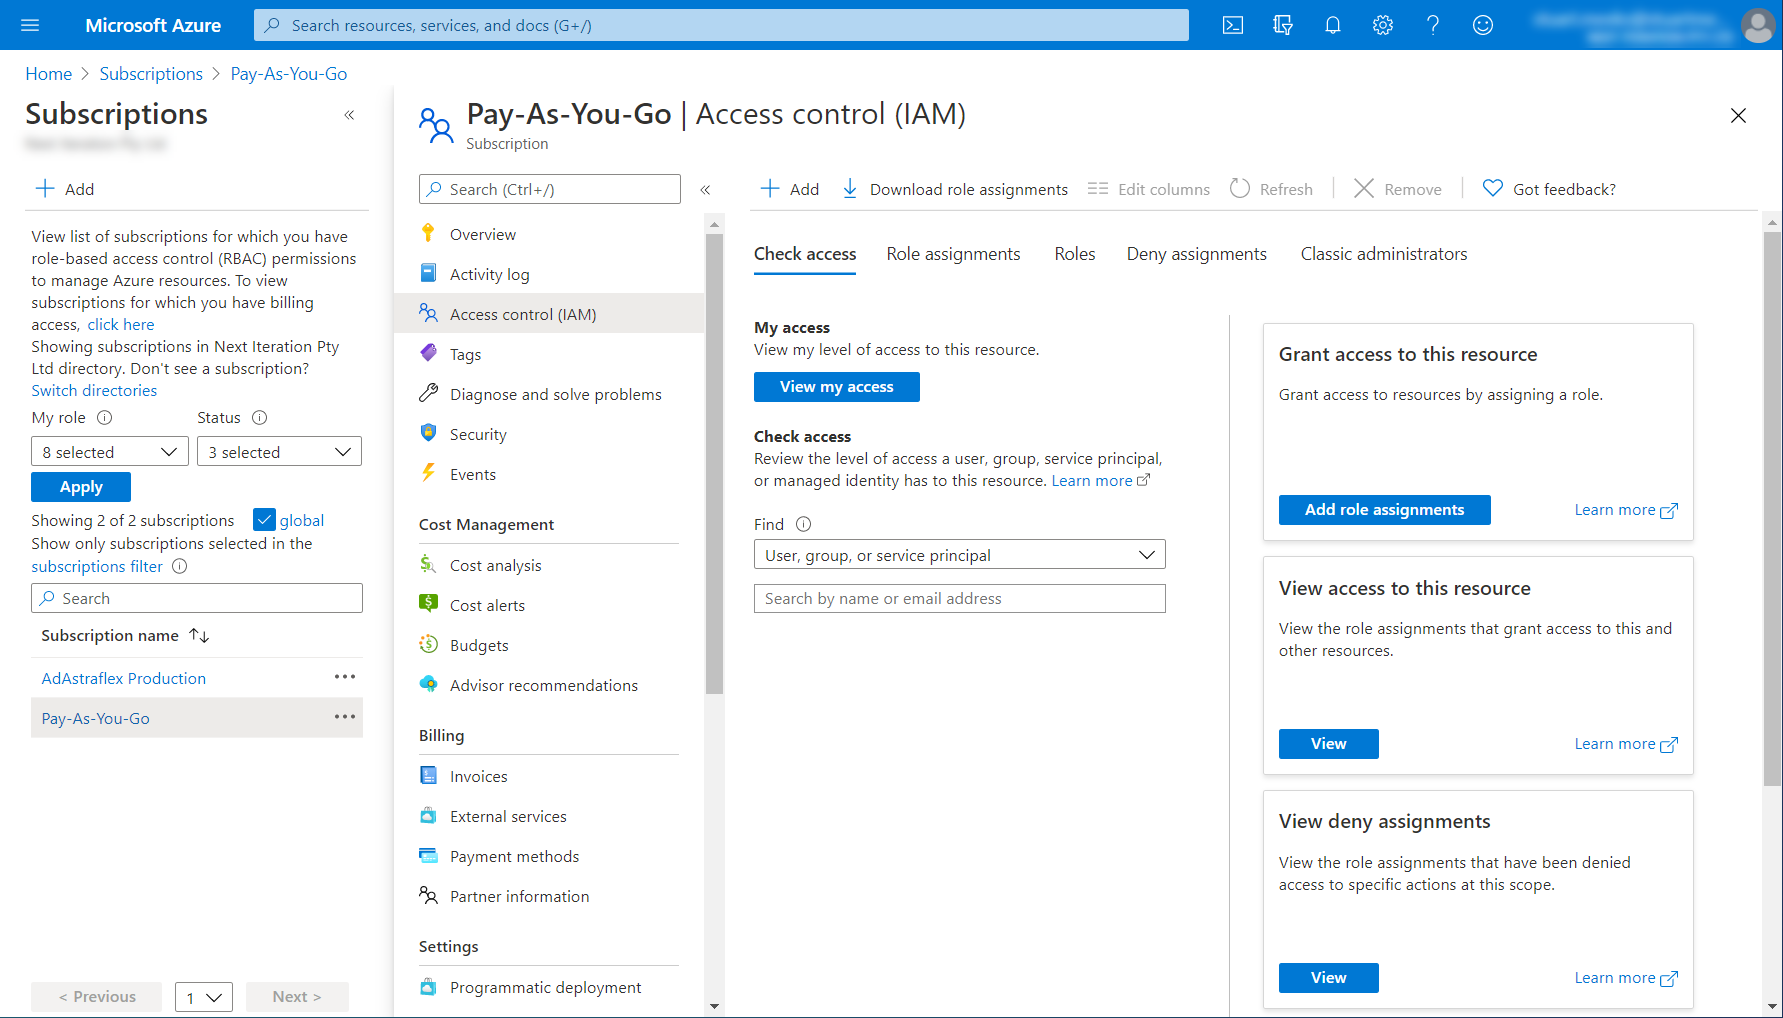
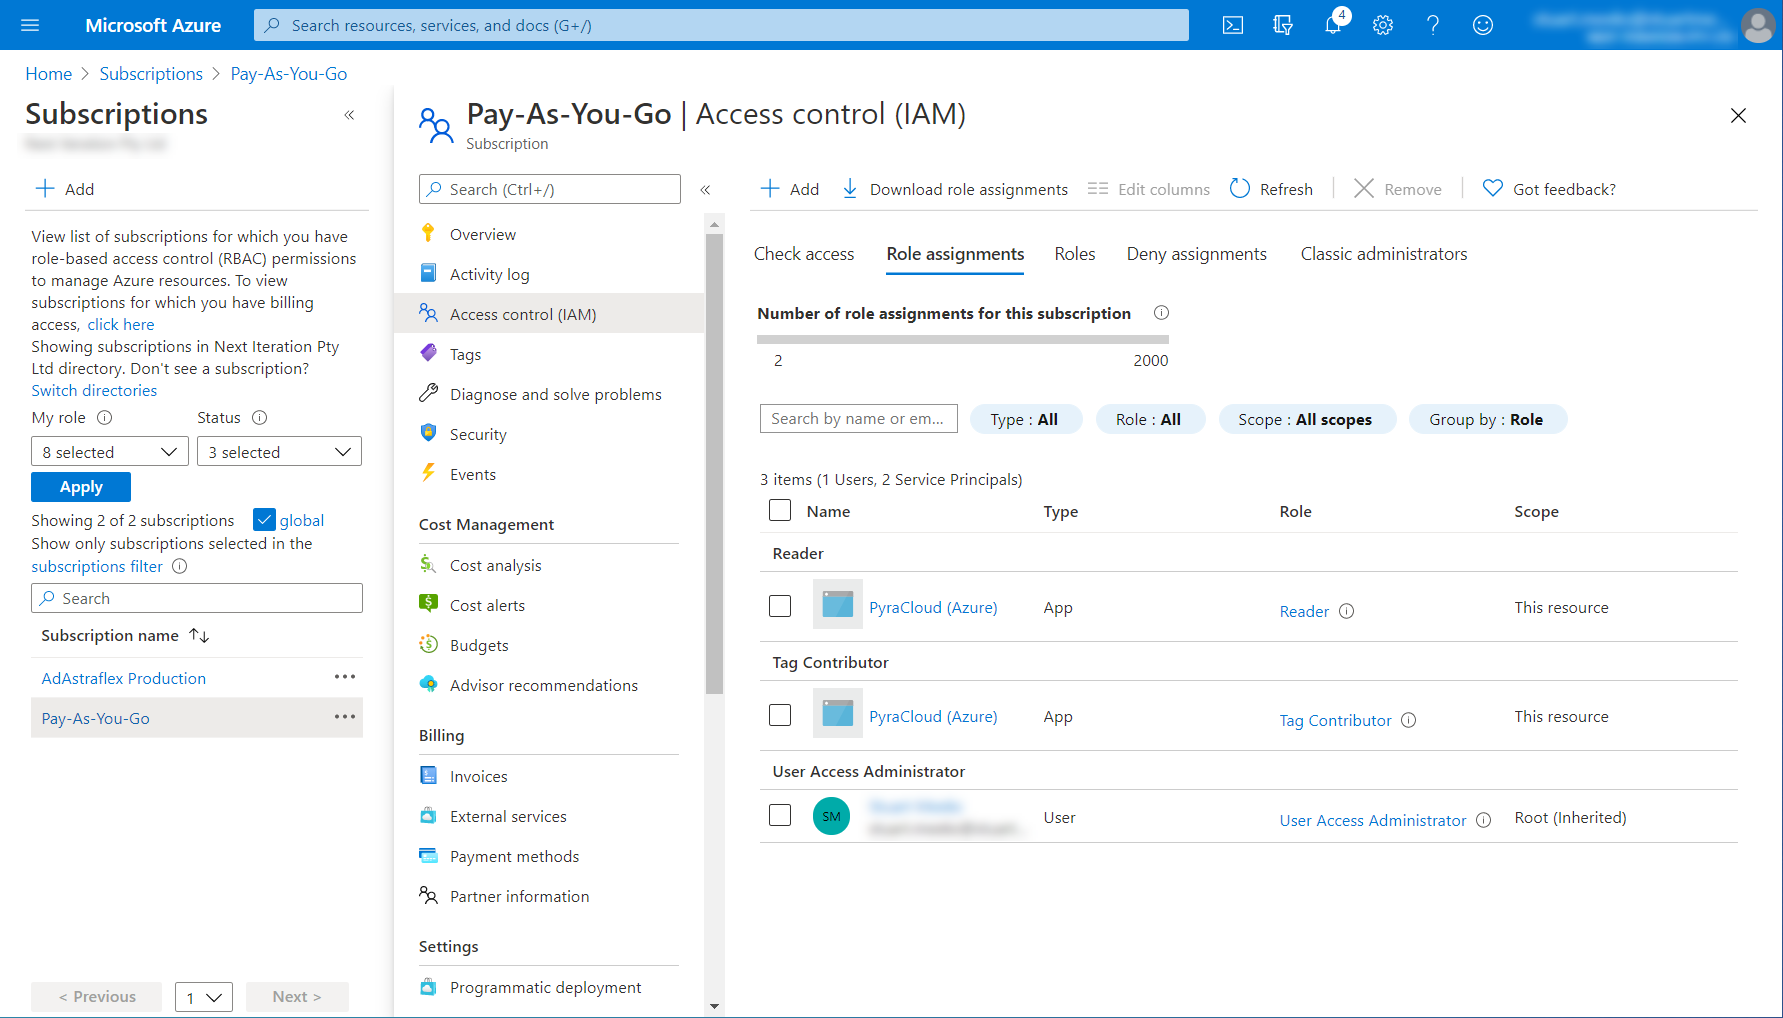
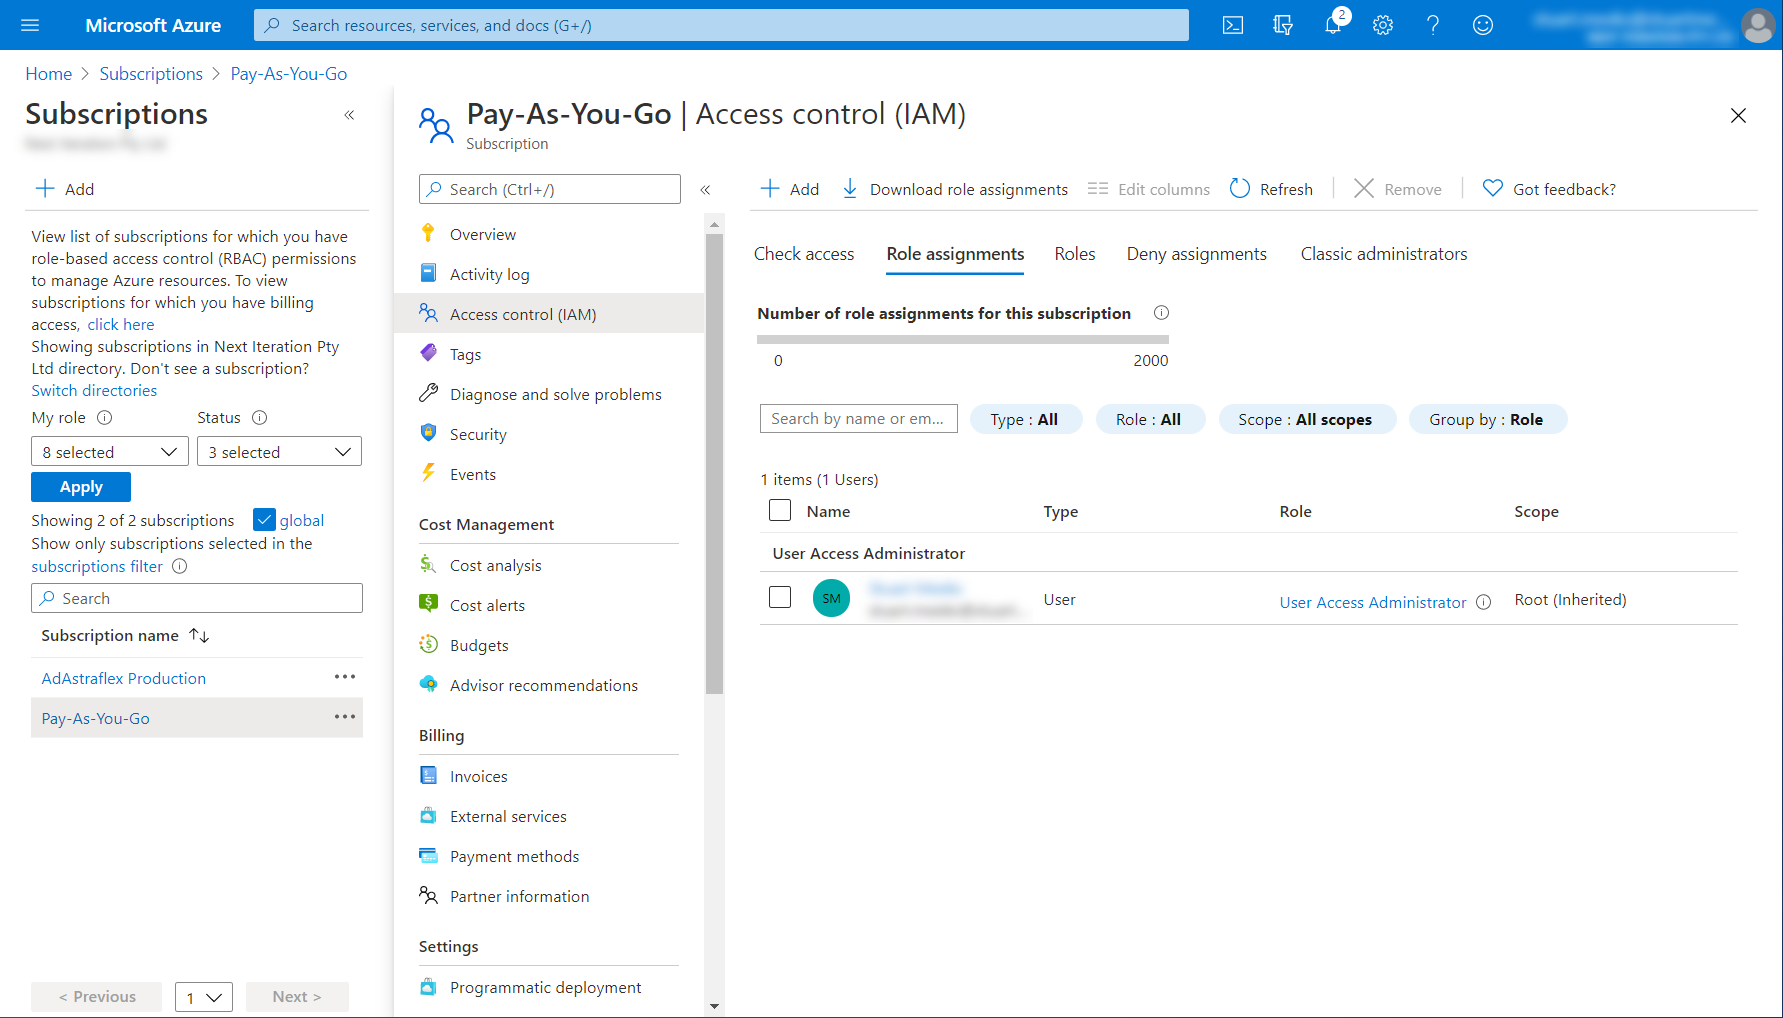
Select Access control (IAM).
Select the Role assignments tab.
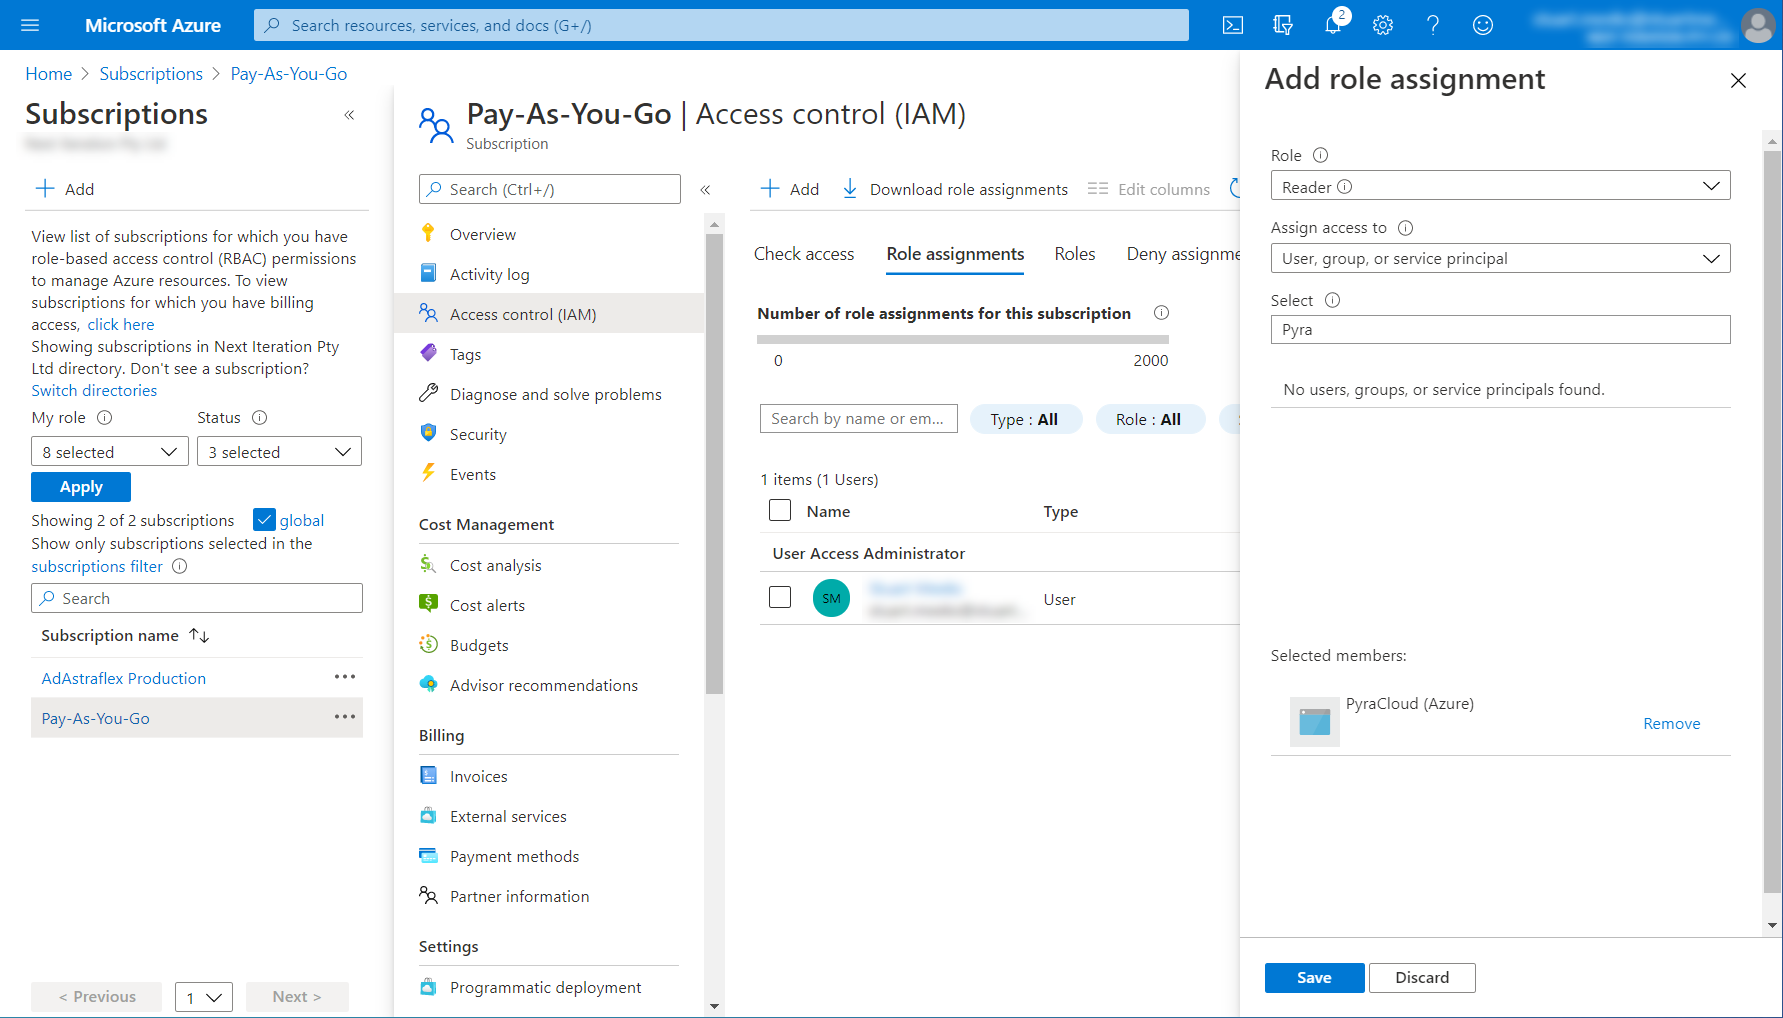
Select Add > Add role assignment.
Select Reader from the Role menu. Then, search for SoftwareOne Cloud Consumption (formerly PyraCloud Azure) and select it from the search results. Click Save.
Select Tag Contributor from the Role menu. Then, search for SoftwareOne Cloud Consumption (formerly PyraCloud Azure) and select it from the search results. Click Save.
Access is granted.
As a Global Administrator, you can manage all Azure subscriptions and management groups in your tenant by elevating your access.
When you elevate your access, you'll be assigned the role in Azure at root scope (/). This allows you to view all resources and assign access to any subscription or management group in the directory.
To elevate access, follow the instructions in Microsoft documentation: , or perform these steps:
Sign in to Azure Portal as a Global Administrator.
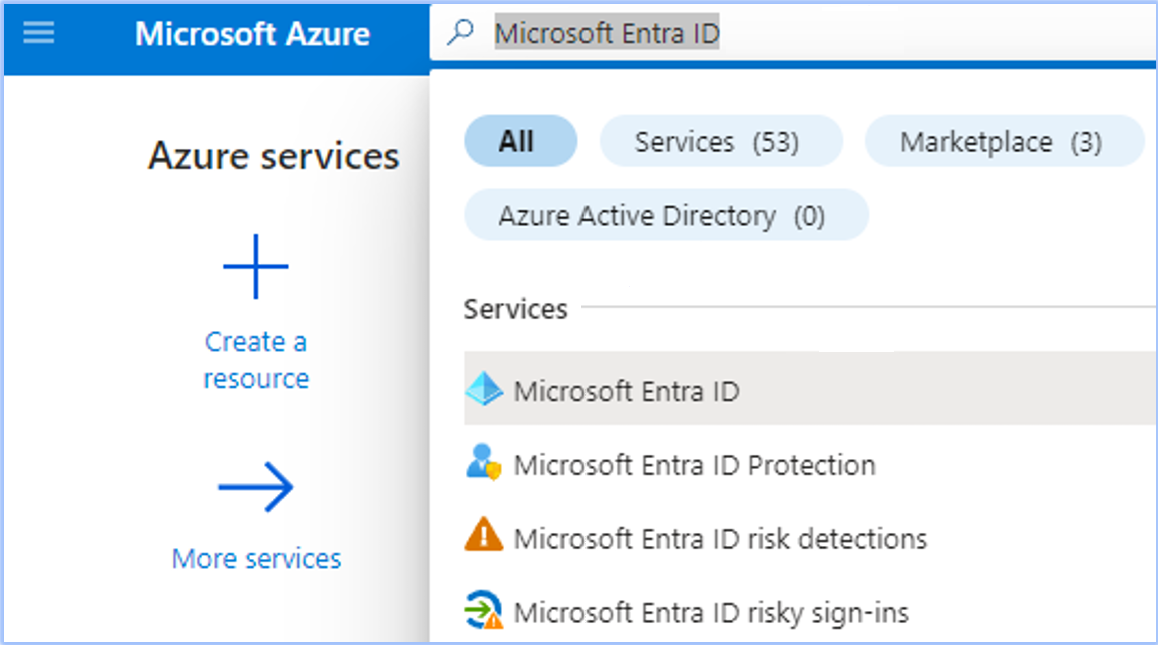
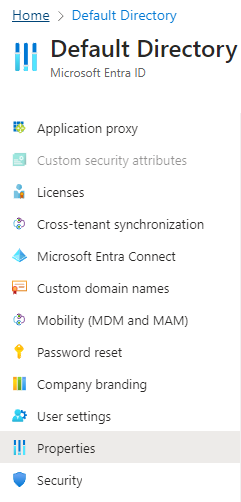
Open Microsoft Entra ID
Under Manage, select Properties.
Under Access management for Azure resources, set the toggle to Yes.
Click Save. This will grant you permission to assign roles in all Azure subscriptions and management groups associated with this Microsoft Entra ID.
If required, sign out and sign back in to refresh your permissions.