Loading...
Loading...
Loading...
Loading...
Loading...
Loading...
Loading...
This tutorial shows how to cancel a Microsoft subscription by placing a termination order for the specific subscription. In this tutorial, we'll terminate a Microsoft 365 subscription, but you can follow these steps for any product.
Before starting this tutorial, make sure that the subscription you want to terminate is active. You can check the subscription status on the Subscriptions page.
You must also be familiar with how to navigate the platform to view and manage your subscriptions.
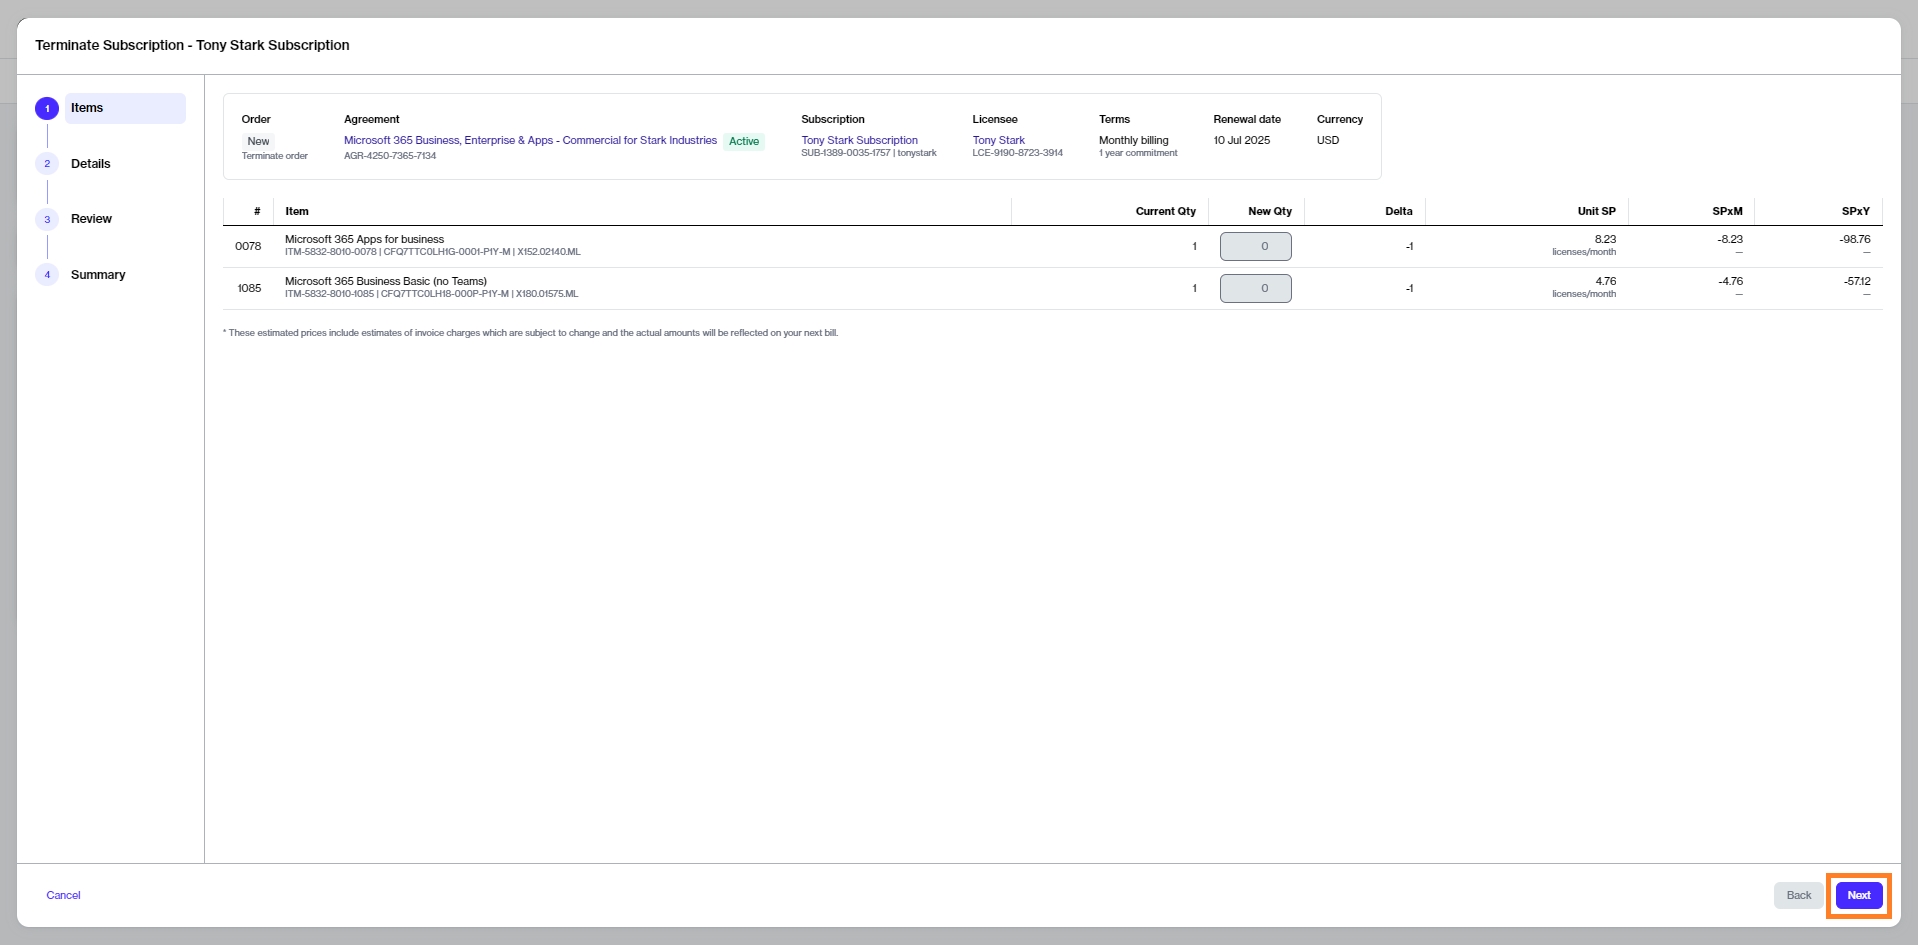
In this step, do the following:
Review the details in the Items step to ensure that the quantity of the subscription you want to terminate is zero. Click Next.
In the Details step, enter the reference information as needed and then click Next.
In the Review step, click Place Order to place your termination order for the subscription.
Click View Order to navigate to the order details page. Otherwise, click Close to close the Summary page.
The termination order is submitted to the vendor for processing. You can view the latest status message on the details page of the termination order.
This tutorial guides you through the steps to order a Microsoft 365 subscription by creating a new agreement.
When establishing a new agreement with SoftwareOne, you can either establish a new Microsoft account or use an existing one. In this tutorial, you'll be setting up a new Microsoft account.
Before starting this tutorial, make sure you have the following:
A licensee in the active state or permission to create a new licensee if you don't want to use an existing active licensee. Licensee selection is required when setting up a new agreement.
Your company details, like the company name, registration ID, and address. These details are required for creating a new Microsoft tenant.
The contact details of the person who will manage your Microsoft account.
In this step, select a licensee and click Next to continue.
In this tutorial, we'll select an existing licensee. If you wish to add a new licensee, you can do this by clicking Add licensee and following the instructions in Create Licensee.
In this step, do the following:
Enter the tenant name you want to use on the onmicrosoft.com domain. Make sure that the name doesn't include punctuation marks or spaces. To check whether your tenant name is still available, use Access tenant name availability tool.
Click Next. The platform validates the details you entered.
Fill out the contact form and click Next. You'll need to provide the following details:
Company name.
Company registration ID or tax number.
Company address, including city and zip/postal code.
Contact details of the person who will manage your account.
These fields are enabled only after the platform validates your Microsoft tenant details.
If your organization is a state-owned entity, select the I confirm the Company is a State Owned Entity checkbox. Otherwise, leave it cleared.
A company is classified as state-owned if it is either controlled by the government or performs functions that the government considers its own.
In this step, do the following:
Choose the items you want to order and then click Add items. You can select multiple items. When the items are added, the Select items section is displayed.
Review and adjust the license quantity as required.
If applicable, read the offer attestation. The offer attestation is only displayed for Windows 365 Business with the Windows Hybrid Benefit.
Click Next to continue.
Once you have placed your order, we'll verify the order details, including the Microsoft tenant ID and create your new subscription. If there are issues with your order, the order details page will provide information about the problem and any actions you may need to take.
This tutorial shows how you can order additional licenses for a Microsoft 365 subscription using an existing agreement. Additional licenses can be ordered by placing a change order through the platform.
Before starting this tutorial, make sure that the agreement you want to use is in the Active state.
Once you have placed your order, we'll verify the order details. If there are issues with your order, the order details page will provide information about the problem and any actions you may need to take.
This tutorial walks you through the steps required to add a new Microsoft product to your CSP agreement.
In this scenario, we’ll be adding Microsoft Power BI, but you can follow these instructions to add any Microsoft product to your existing agreement.
Before starting this tutorial, make sure that the CSP agreement you want to add the product to is Active. You can check the agreement status on the Agreements page as well as its details page.
You should also know how to navigate the platform to access your agreements and orders, and apply filters.
In this step, do the following:
Sign in to your account and go to the Agreements page.
Select the required CSP agreement. Make sure that the agreement's status is Active. The details page of your selected agreement opens.
Click Buy more in the upper right. The purchase wizard starts and the Items step of the wizard is displayed.
In this step, add the new product to your order by following these steps:
Click Add items. A new window (also called Select items) will open displaying the available products that are available for you to order under this agreement.
Use filters to find the product you need. In this example, we'll search for Power BI using the following steps:
Click the Filter option in the grid.
Click Add another condition and then use the dropdown to make the following selections:
Select Product Item Name.
Set the filter to Contains.
Type the name of the required product (in this case, Power BI).
Close the filter box.
Select all the individual items you need from the list. You can select multiple checkboxes.
When selecting items, be sure to verify the billing terms and the duration of the subscription.
Click Add items. Your selected items are added to the agreement, and the Select items step is displayed again.
Set the quantity of your newly added items in the New qty field and click Next.
In this step, you can also increase the quantities of your existing subscriptions.
Complete the remaining steps in the purchase wizard as follows:
In the Details step, add the additional ID and notes for your order and click Next. Note that it's optional to provide these details.
In the Review order step, verify the information and click Place order to finalize placing your order.
Click View details to go to the order details page or click Close to close the page.
You can check the status of your new order on the Orders page or in the Orders tab on the agreement details page.
Note that once you place the order, the agreement status changes from Active to Updating. You will not be able to place any additional orders under this agreement until your current order has been processed and the agreement status is changed back to Active.
Microsoft 365 is a software product that gives you access to different apps and cloud-based services. With Marketplace Platform, you can easily order new Microsoft Office 365 subscriptions and manage the existing ones.
Browse the following topics to learn about Microsoft Office 365 subscriptions.
This tutorial guides you through the steps to order a Microsoft 365 subscription by creating a new agreement.
When establishing a new agreement with SoftwareOne, you can either establish a new Microsoft account or use an existing one. In this tutorial, you'll connect your existing cloud account.
Before starting this tutorial, make sure you have the following:
Your Microsoft tenant name.
A Marketplace licensee in the active state or permission to create a new licensee (if you don't want to use an existing licensee). You'll need to select the licensee when you are creating the agreement.
In this step, choose the licensee you want to use and click Next.
In this tutorial, we'll select an existing licensee. However, you can add a new licensee by clicking Add licensee and following the instructions in Create Licensees.
In this step, do the following:
Enter the name of your existing tenant.
Fill out the contact form. You'll need to provide the first and last name, email address and phone number of the person who will manage your account.
Click Next. The platform will validate your Microsoft tenant details. If no tenant is found, a message is displayed. You'll need to fix the error to proceed.
If your organization is a state-owned entity, select the I confirm the Company is a State Owned Entity checkbox. Otherwise, leave it cleared.
A company is classified as state-owned if it is either controlled by the government or performs functions that the government considers its own.
In this step, do the following:
Choose the items you want to order and then click Add items. You can select multiple items. When the items are added, the Select items section is displayed.
Review and adjust the license quantity as required.
If applicable, read the offer attestation. The offer attestation is only displayed for Windows 365 Business with the Windows Hybrid Benefit.
Click Next to continue.
Once you have placed your order, we'll verify the order details, including the Microsoft tenant ID and create your new subscription under your existing tenant. If there are issues with your order, the order details page will provide information about the problem and any actions you may need to take.
In this tutorial, you will learn how to terminate all of your Microsoft subscriptions that are associated with a specific agreement.
As subscriptions are tied to agreements, the only way you can cancel all the subscriptions is by placing a termination order for that agreement.
Before starting this tutorial, make sure that the agreement you wish to terminate is active. Agreements in any other state cannot be terminated.
You must also be familiar with how to navigate the platform to find and access the required agreement.
In this step, do the following:
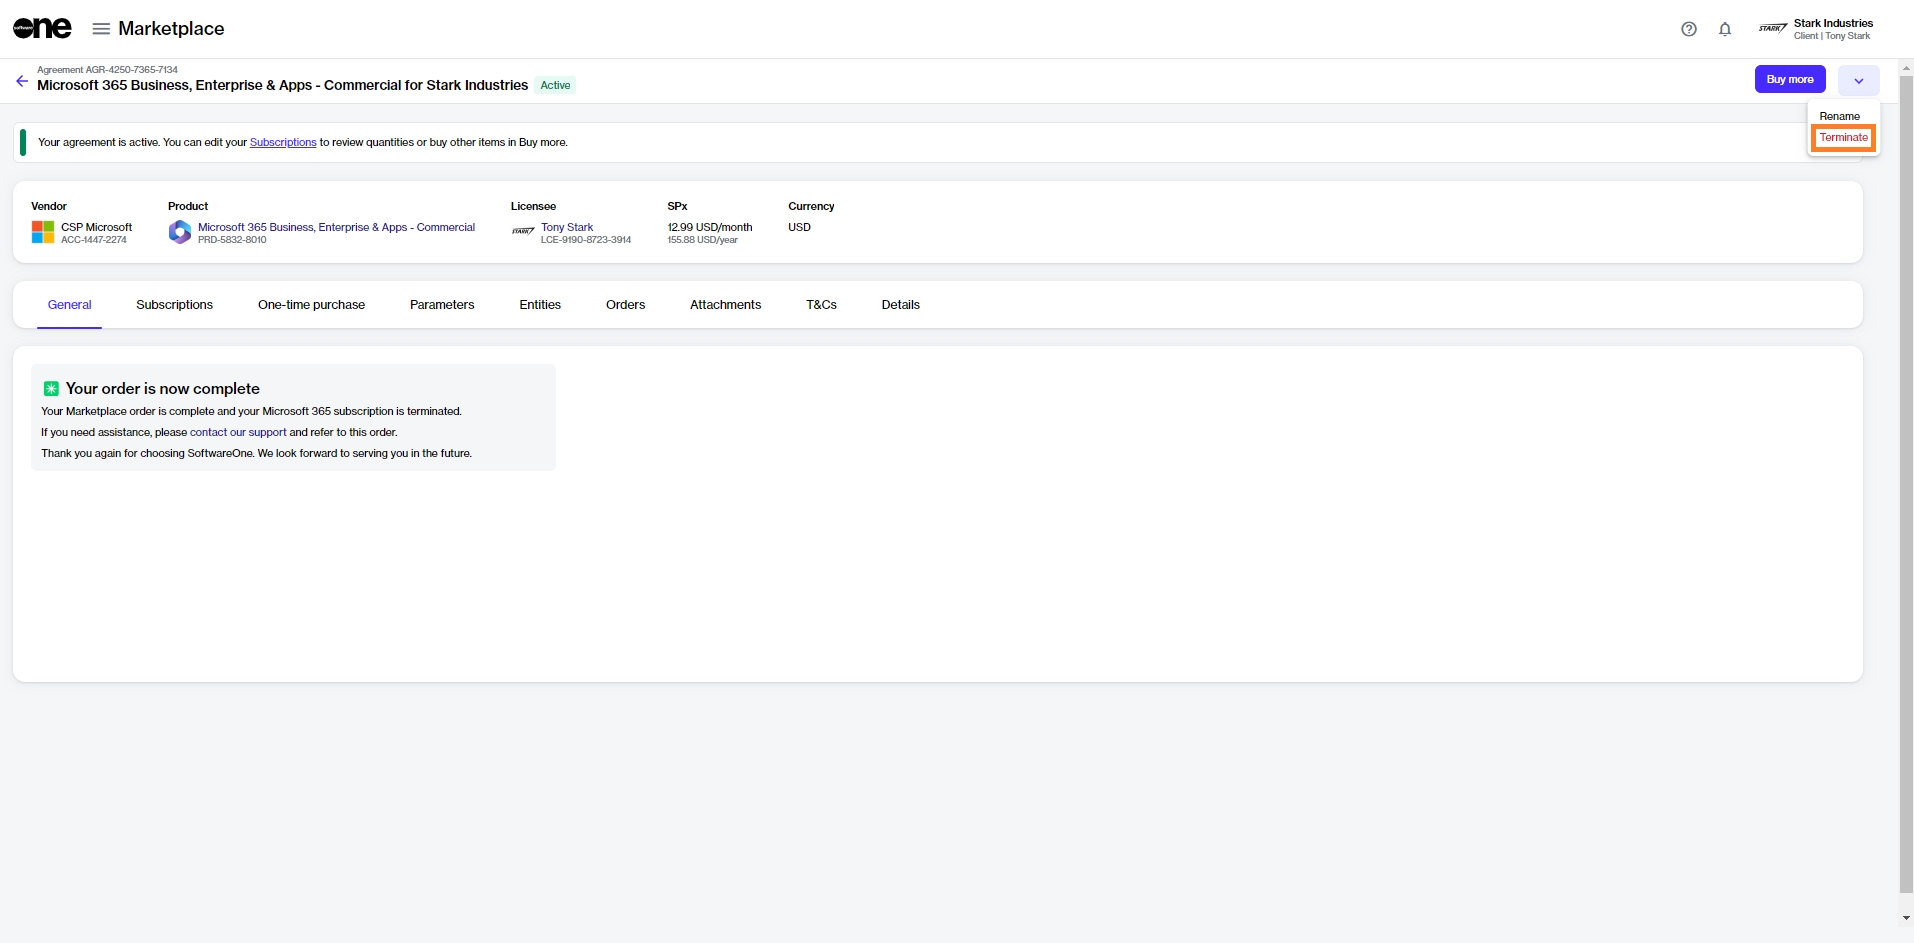
On the agreements page, locate the agreement containing the subscriptions you want to terminate.
Click the agreement name.
Click the down arrow in the upper right and select Terminate. The Terminate agreement wizard launches and the Items step of the wizard is displayed.
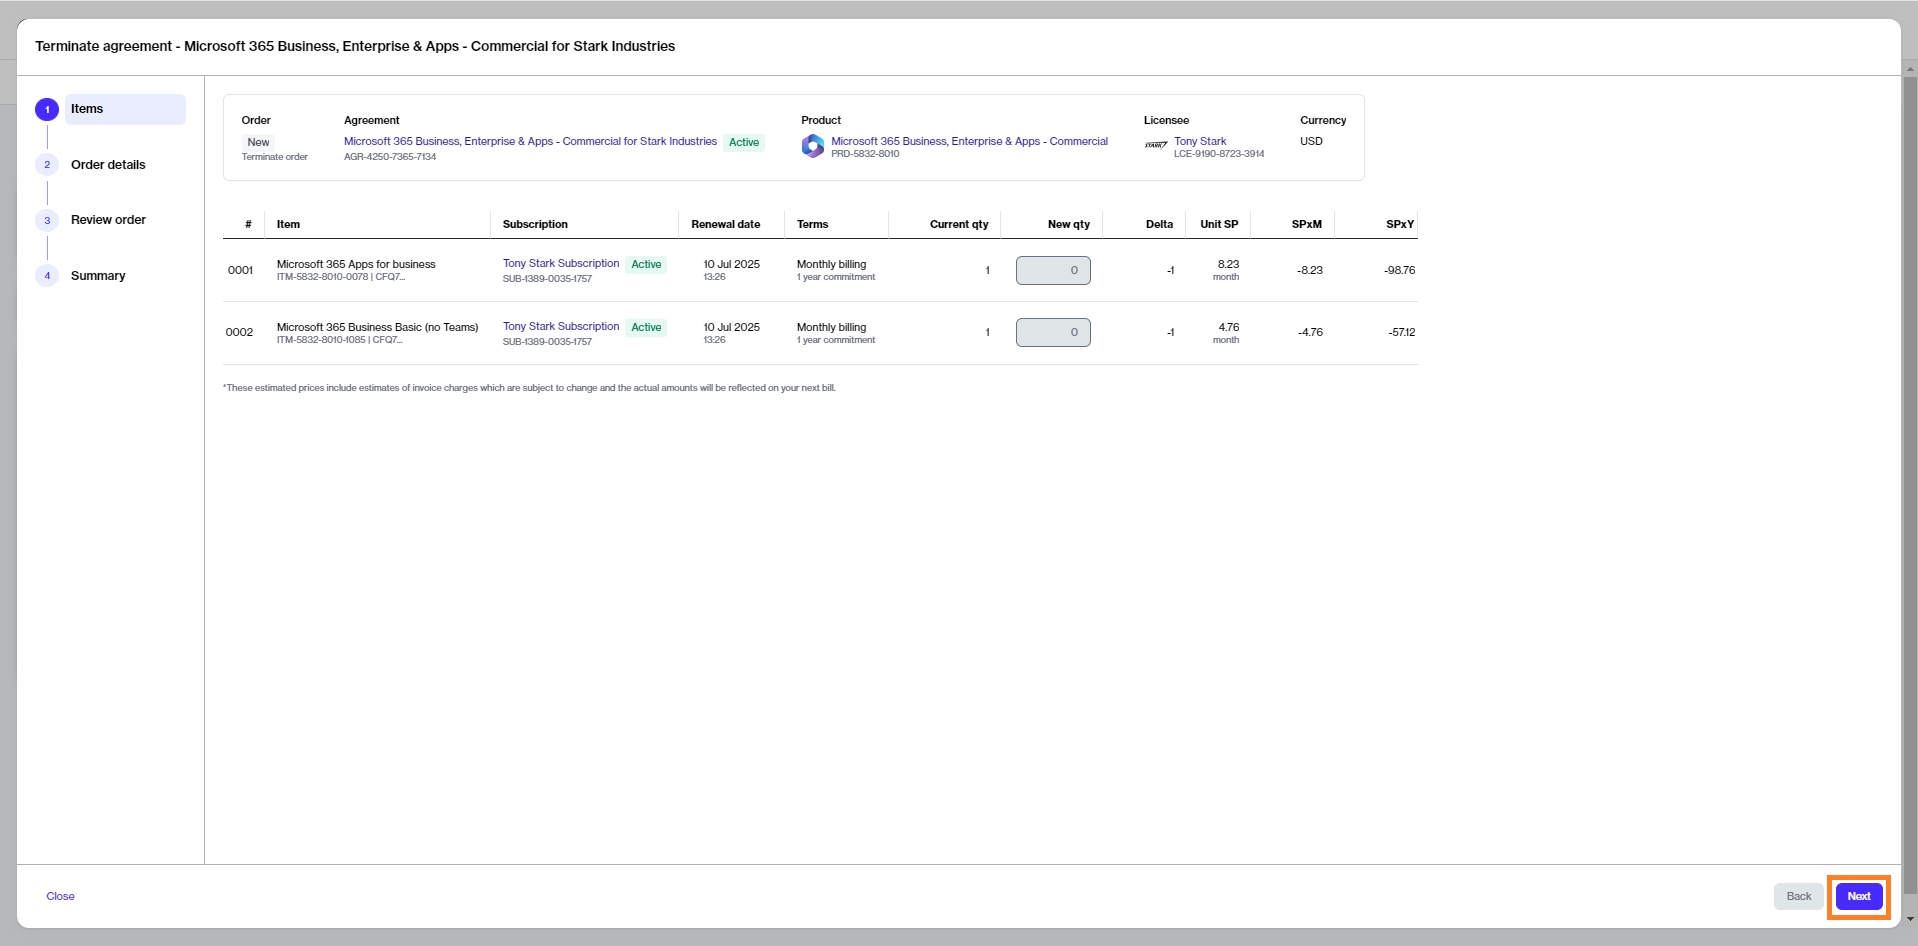
In the Terminate agreement wizard, do the following:
Review the details to make sure that all subscriptions have zero quantity. Click Next.
Enter the optional reference information and click Next.
Review the details of your order and click Next to place the termination order for the agreement.
Click View order to navigate to the order details page. Otherwise, click Close to close the Summary page.
A termination order is created for the agreement and submitted to the vendor for processing.
After you place the order, the agreement status changes from Active to Updating. You will not be able to place any additional orders under this agreement.
Once the termination order is processed, the status of the agreement and all subscriptions within the agreement will change to Terminated.
Order Microsoft 365 Subscription (New Tenant)
Order a Microsoft 365 subscription for a new Microsoft tenant.
Order Microsoft 365 Subscription (Existing Tenant)
Order a 365 subscription for an existing Microsoft tenant.
Buy More Licenses for Microsoft 365 Subscription
Buy more licenses for your 365 subscription.
Add New Product to Your CSP Agreement
Add a new Microsoft product to your CSP agreement.
Terminate All Subscriptions
Cancel all subscriptions and terminate your agreement.
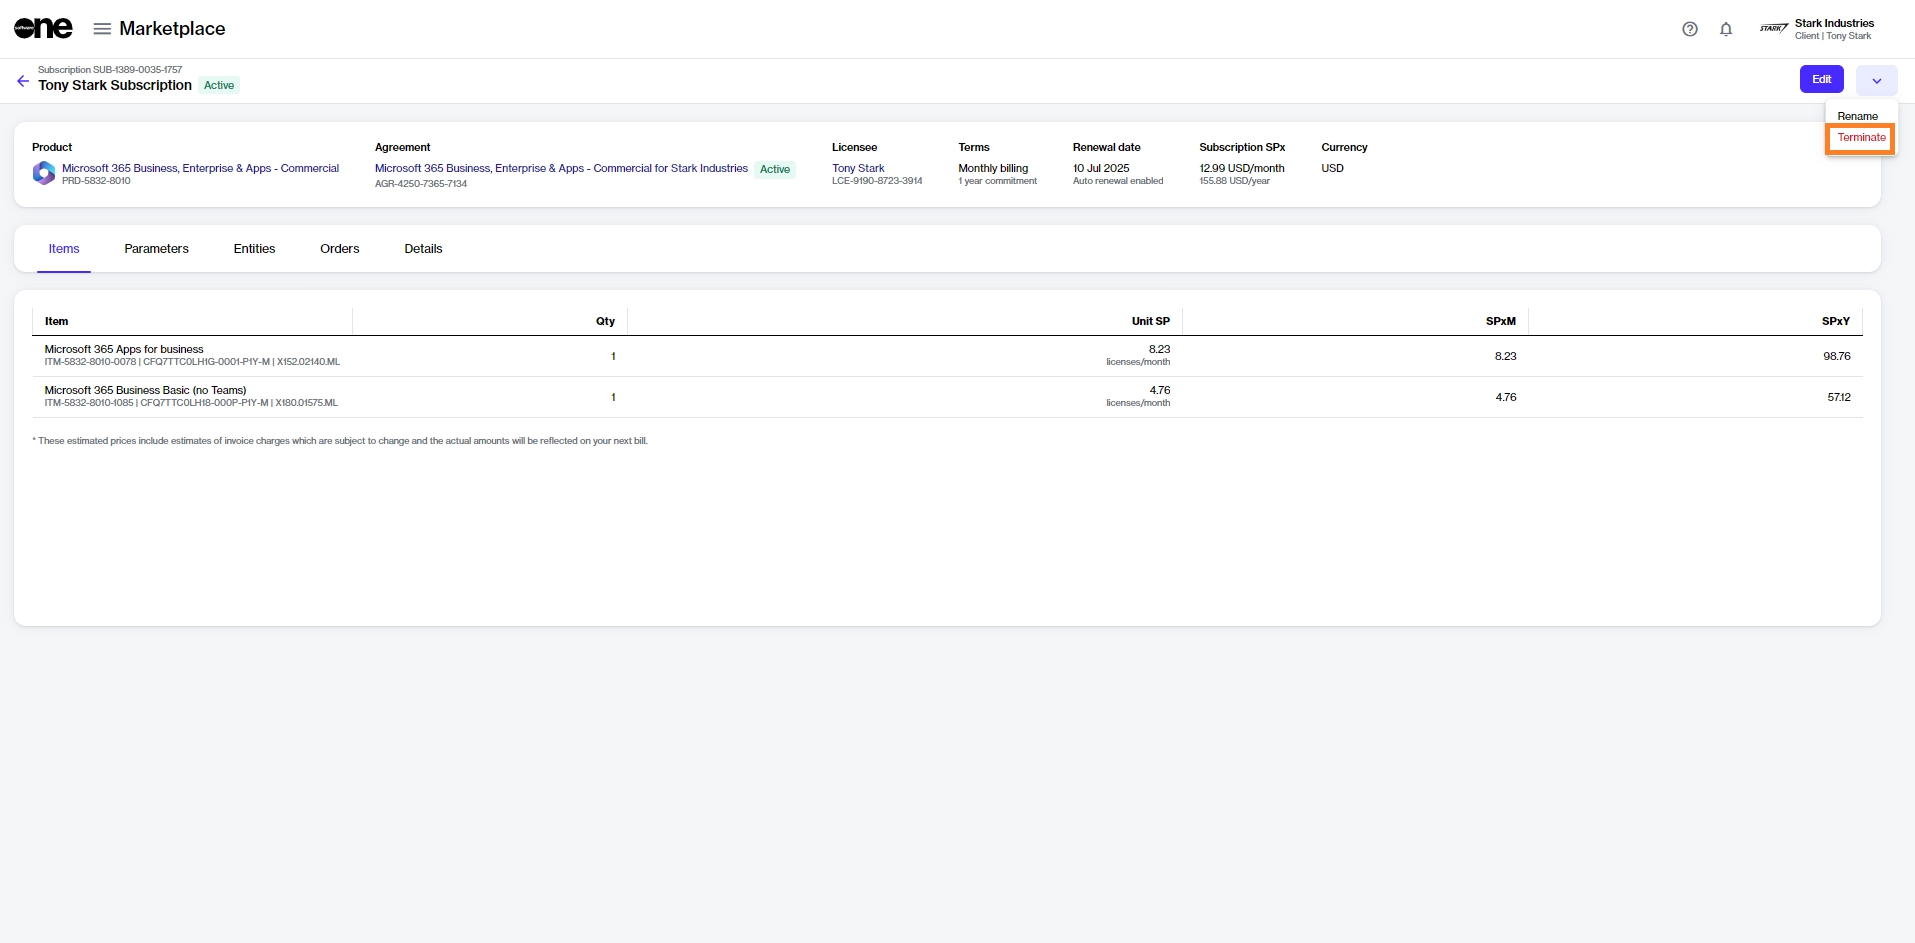
Terminate a Single Subscription
Cancel a subscription within an agreement.