A licensee represents a specific person or a department within your account that receives the license to use the product.
Licensees are linked to the buyers and sellers in your account. There can be multiple licensees in an account, however, a licensee can only be linked to one buyer and one seller. You can learn about licensees in Key Concepts.
Initially, the licensees are created by SoftwareOne and mapped to the different buyers and sellers within your account. However, you can easily manage the licensees and create new ones through the interface.
Account administrators can access the Licensees page by selecting Settings > Licensees from the main menu.
The page displays all licensees that exist in your account. For each licensee, you can view the following details:
Licensee - Displays the name and unique identifier of the licensee. The name can be the name of a user, a company name, or a department name.
Address - Displays the address of the licensee.
Contact person - Displays the contact person associated with the licensee.
Buyer - Displays the buyer that has been mapped to the licensee.
Seller - Displays the SoftwareOne entity that is responsible for facilitating the procurement of products and licenses.
Status - Displays the licensee's status in the platform. To learn about the possible states, see Licensee States.
Actions - Displays options that allow you to manage your licensees. Depending on your permissions, you can update licensee information, and enable or disable a licensee.
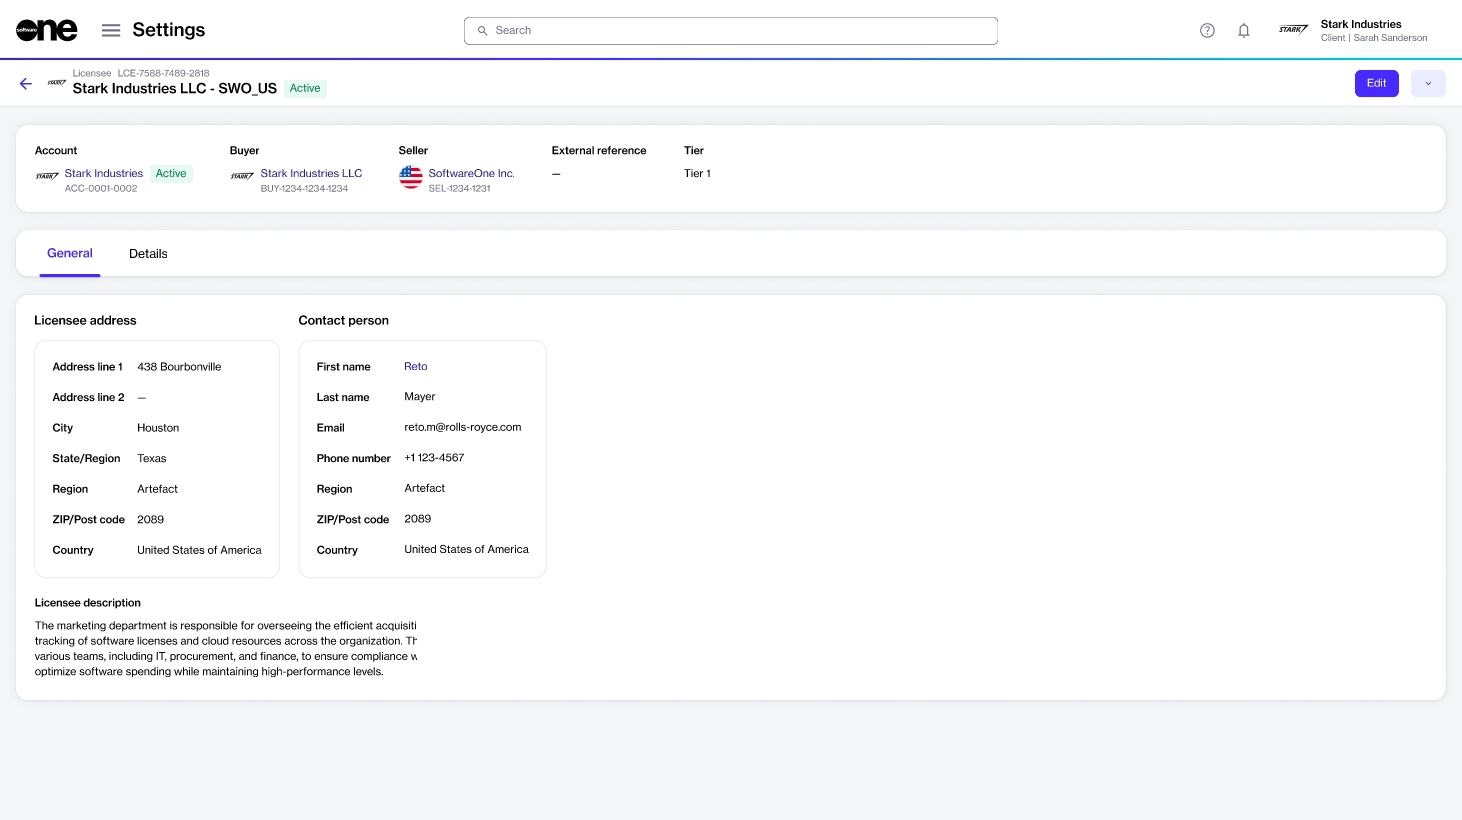
The details page of a licensee displays the additional information about the licensee. You can open the details page by clicking the licensee name on the Licensees page.
The details page shows the licensee's name, marketplace ID, and status. It also shows the associated buyer and seller entities, and contains the following tabs:
General - Displays the licensee's mailing address and contact person details.
Details - Displays date and time information for the licensee, for example, the date and time when the licensee was created in the system and so on.
Audit trail - Displays an audit trail of all changes made in the scope of the licensee. For each audit record, you can view the log details and summary. To learn more, see Audit Trail.
If you need to modify licensee details, like their name, description, address, you can update the information through the interface.
Note that the platform only supports updating basic details. You can't update the buyer or seller entities that are mapped to a licensee.
Follow these steps to edit a licensee's general details:
On the Licensees page (Settings > Licensees), find the required licensee.
Click the actions icon (•••) for the licensee and select Edit. Alternatively, click the name of the licensee. When the details page of your selected licensee opens, click Edit in the upper right.
In General, update the following details as necessary:
Logo - Upload the licensee's logo in the JPG or PNG format. The maximum file size is 5MB. You can upload an image by clicking Select file or by dragging the image into the field.
Licensee name - Update the licensee name.
External reference - Add or update the reference number associated with the licensee. You can also remove the number, if provided during licensee creation.
Licensee description - Add or update the licensee description.
In Contact person, update the contact person for the licensee.
In Address information, adjust the address as necessary. You can update the existing address or choose the option to use the same address as that of the buyer.
Click Save. A message is displayed stating that the licensee information has been updated.
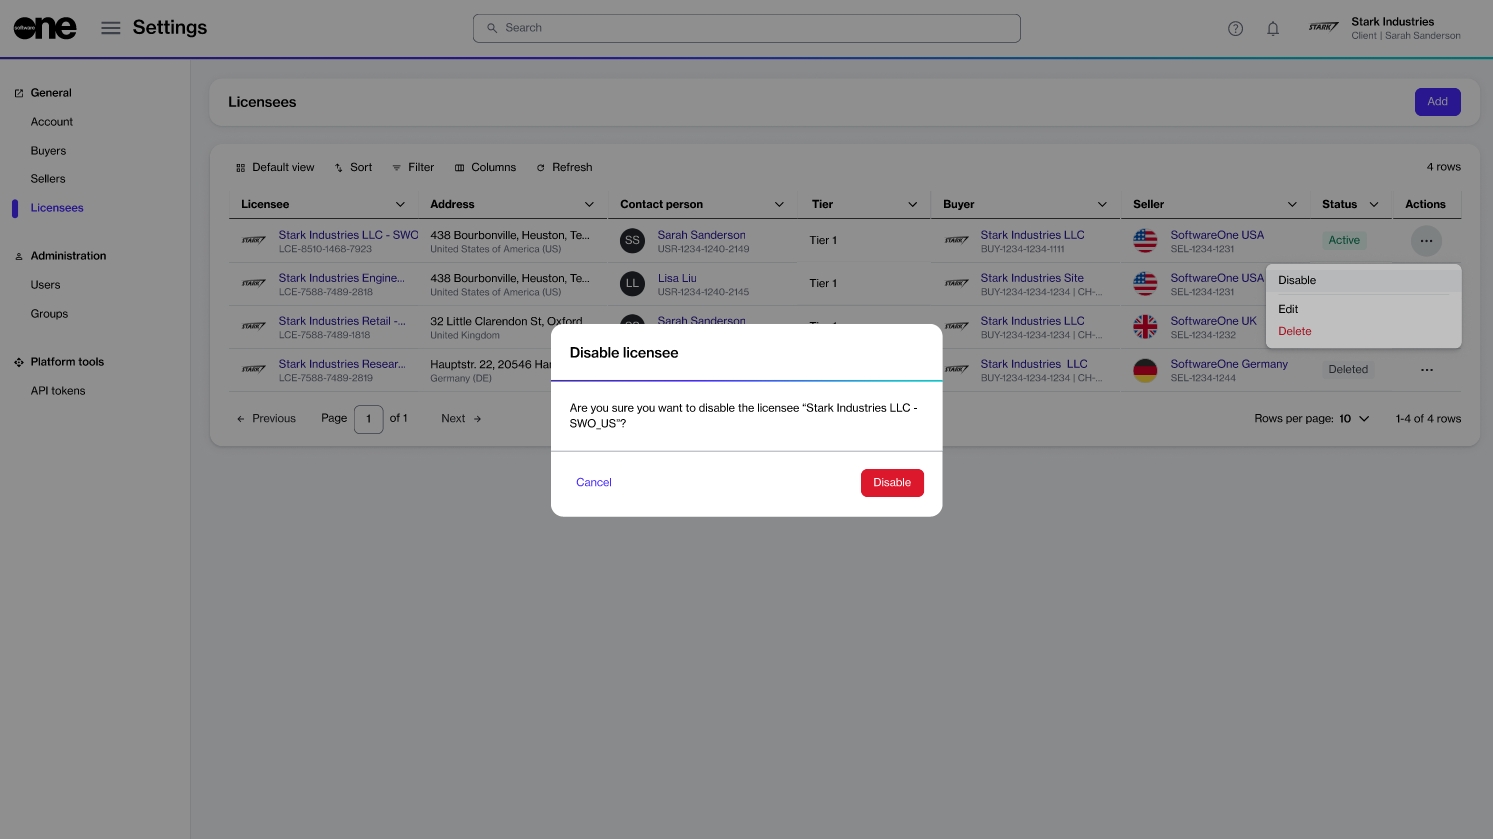
You can manage existing licensees and enable or disable them through the interface. After a licensee has been disabled, you will no longer be able to select it when creating agreements or ordering subscriptions.
Follow these steps to enable or disable a licensee:
On the Licensees page (Settings > Licensee), find the required licensee.
Click the actions icon (•••) and select Enable or Disable.
Alternatively, click the licensee's name. When the details page of your selected licensee opens, click the down arrow in the upper right and select Enable or Disable. The following image shows the Disable option.
The licensee is enabled or disabled, depending on your chosen action, and a confirmation message is displayed. The Licensees page displays the updated status of the licensee.
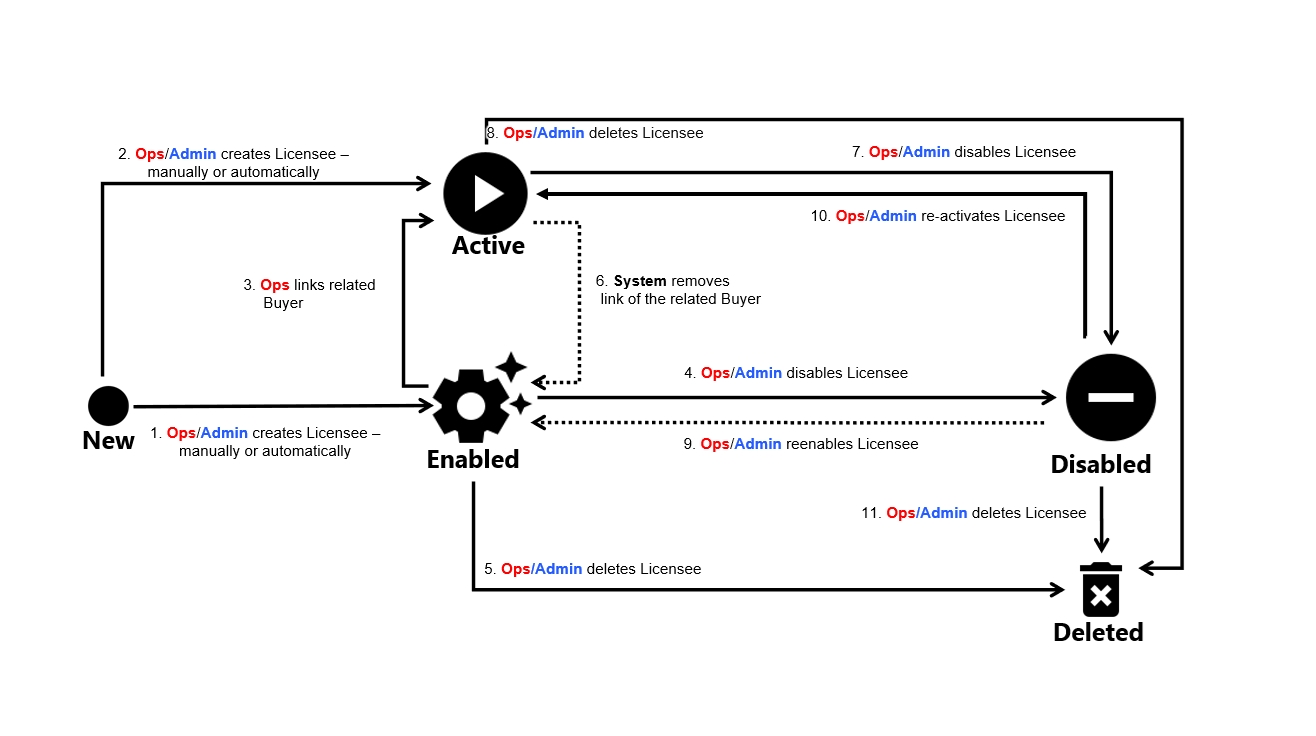
Licensees in the Marketplace Platform can be in multiple states (also known as status).
The following diagram shows the possible states and the transition between these states:
Active
The licensee is active and can be used when buying products in the platform.
Enabled
The licensee has been set up in the system, but can't be used for transactions.
Disabled
The licensee has been disabled and can no longer be used.
Deleted
The licensee has been deleted.
You can create new licensees and map those licensees to the buyers and sellers in your account. Licensees are used when establishing agreements and ordering software products.
Before creating a licensee, ensure that your account contains buyers and sellers. Also make sure that you have the first and last name, and email address of the licensee to add.
Follow these steps to create a new licensee:
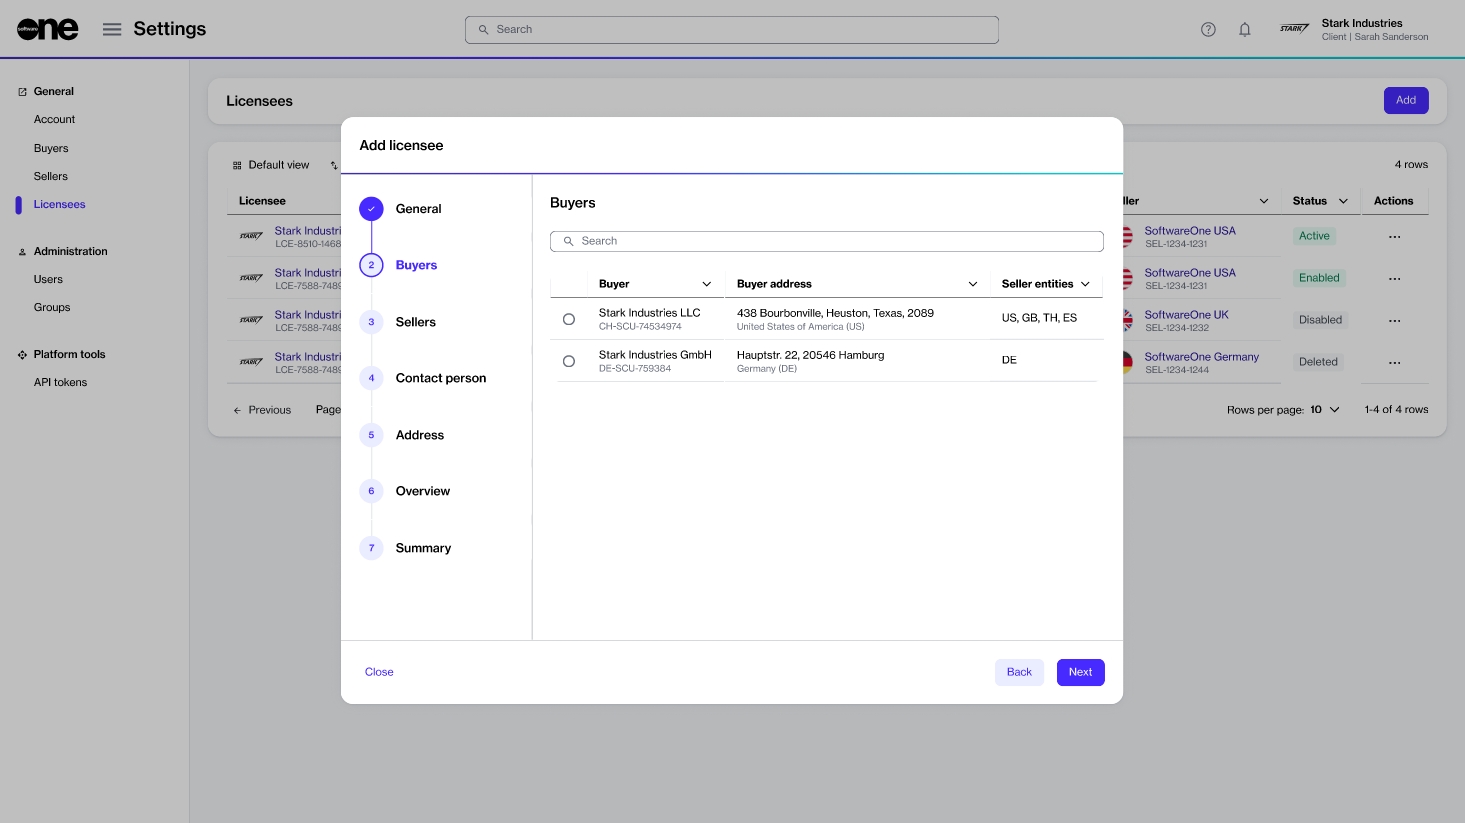
On the Licensees page (Settings > Licensee), click Add. The Add licensee page opens.
Do the following and then click Next:
Logo - (Optional) Add a logo representing the licensee. You can upload an image by clicking Select file or by dragging the image into the field.
Licensee name - (Required) Provide the licensee's name. This can be your company name, department name, or username.
External reference - (Optional) Provide a reference number or identifier for the licensee.
Licensee description - (Optional) Add a description for the licensee.
Choose the buyer for your transactions. Note that you can link a licensee to one buyer only. If you have several buyers, use the Search bar to find the required buyer. Click Next.
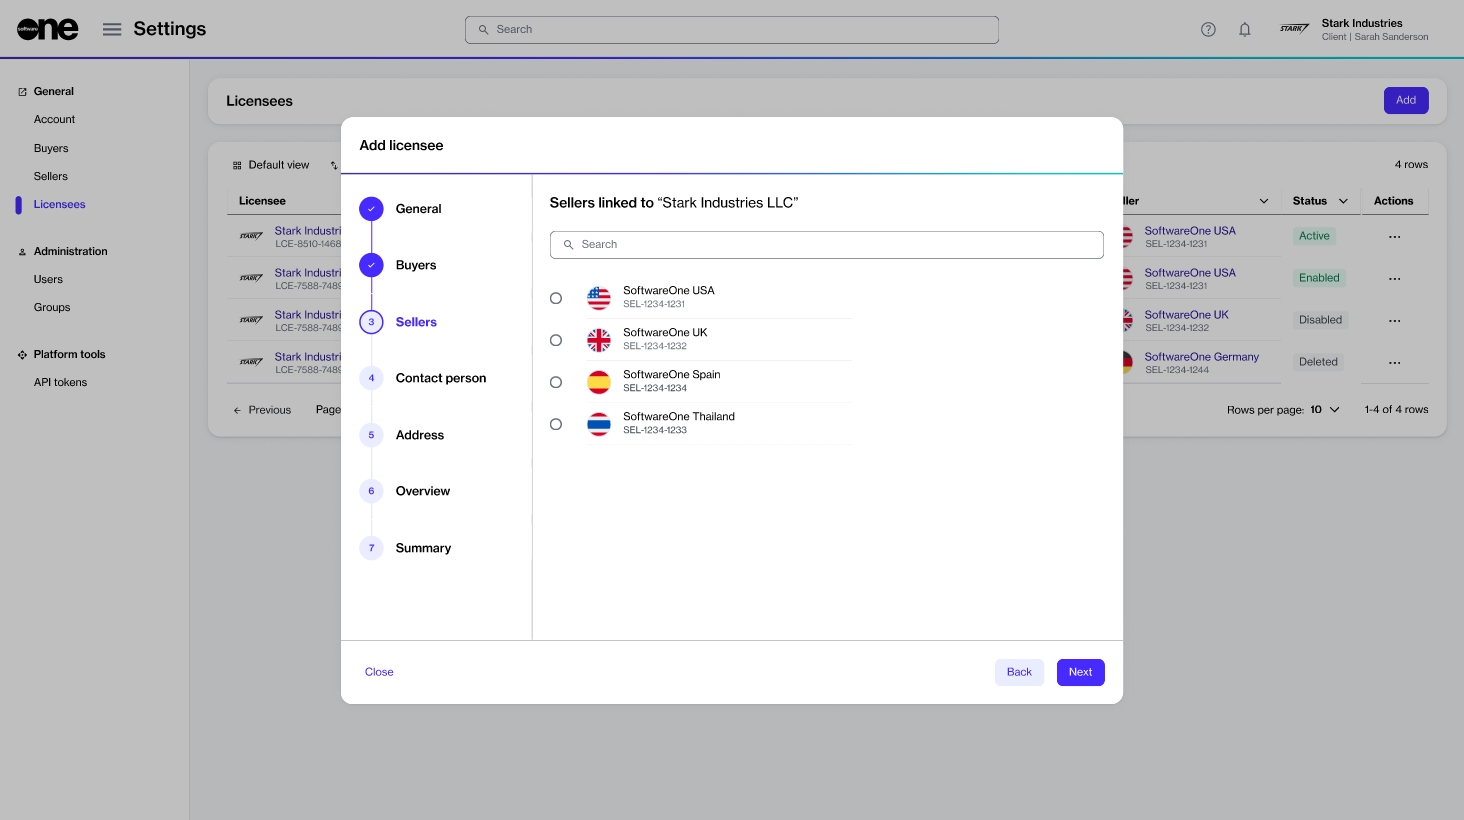
Select the SoftwareOne entity that will facilitate transactions. Click Next.
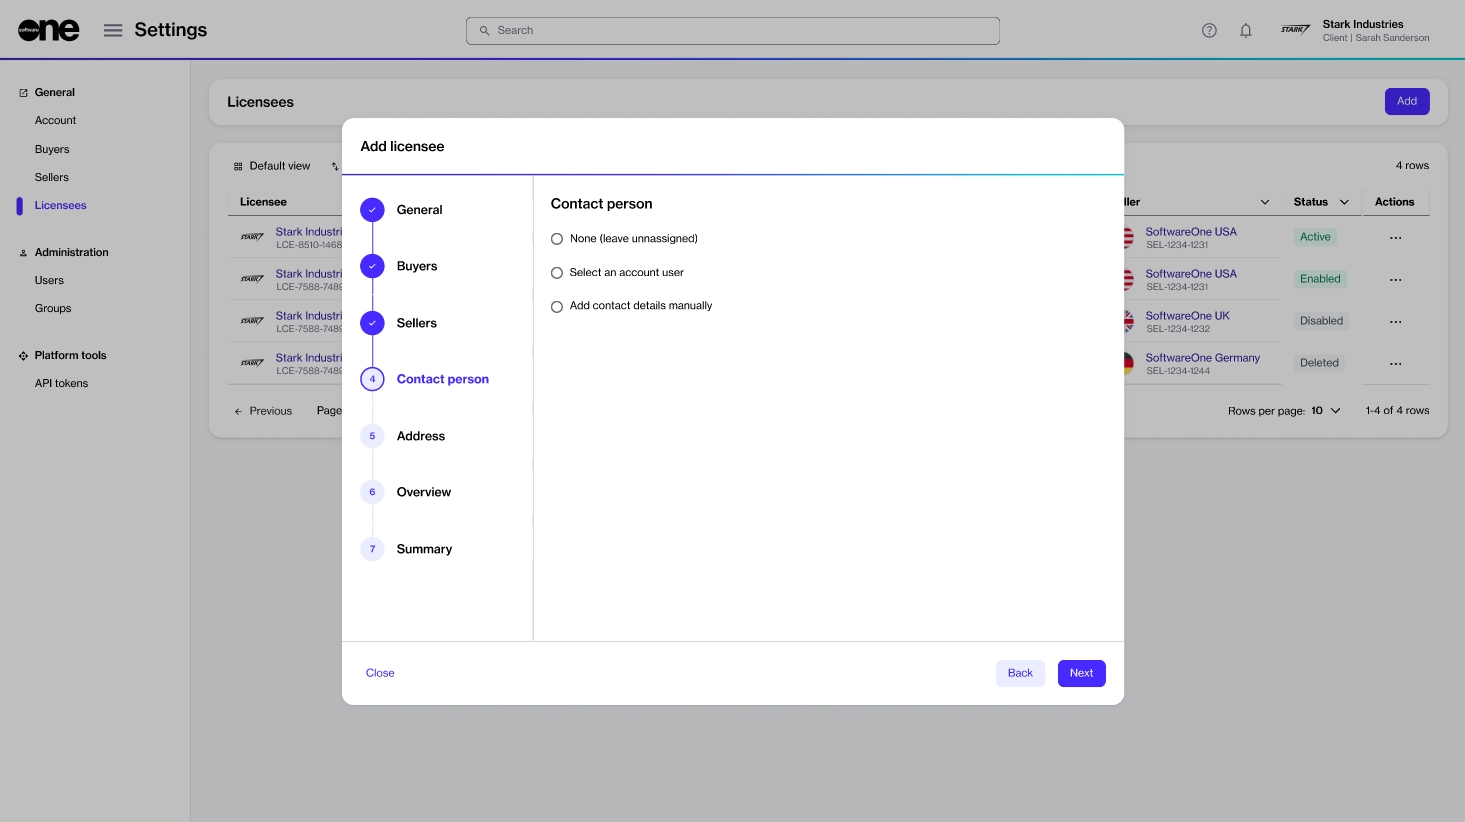
Choose a contact person for this licensee and click Next. The following options are available:
None (leave unassigned) - Select to leave the contact person unassigned.
Select an account user - Select to choose an existing user. When you select this option, all active users that exist in your account are displayed. If your account contains several users, use the Search option to find the user easily.
Add contact details manually - Select to add the contact person's details manually. You'll need to provide the person's first name, last name, email address, and the optional contact information.
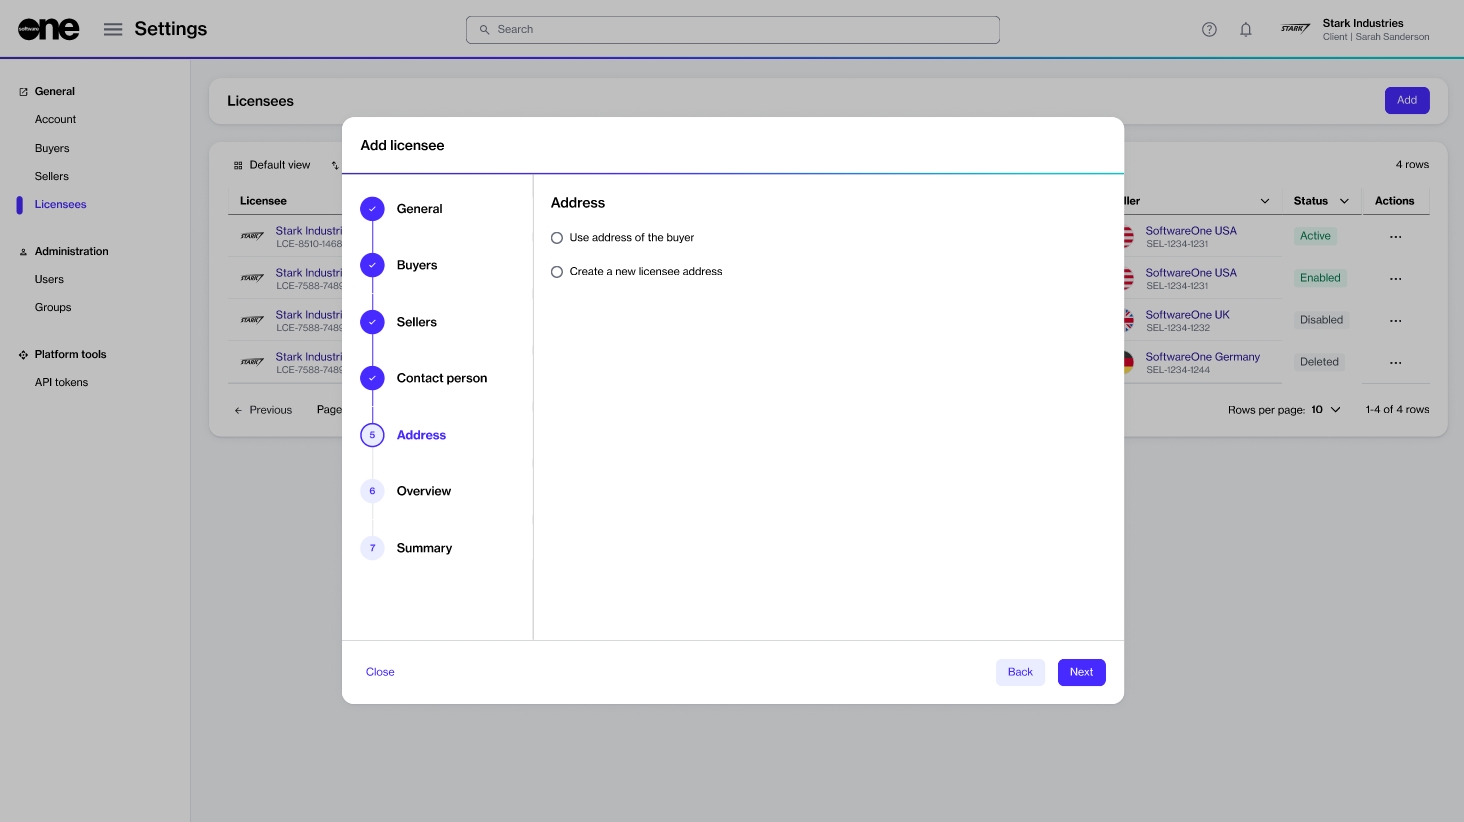
Choose the licensee's address. You can use the same address as that of the buyer, or provide a new address by selecting Create a new licensee address.
Review the details and click Add to add the new licensee. The new licensee is created and the Summary section displays the details of your newly created licensee.
Click View details to open the details page of the licensee. Otherwise, click Close to close the page and return to the Licensees page.


