Loading...
Loading...
Loading...
Loading...
Loading...
Loading...
Loading...
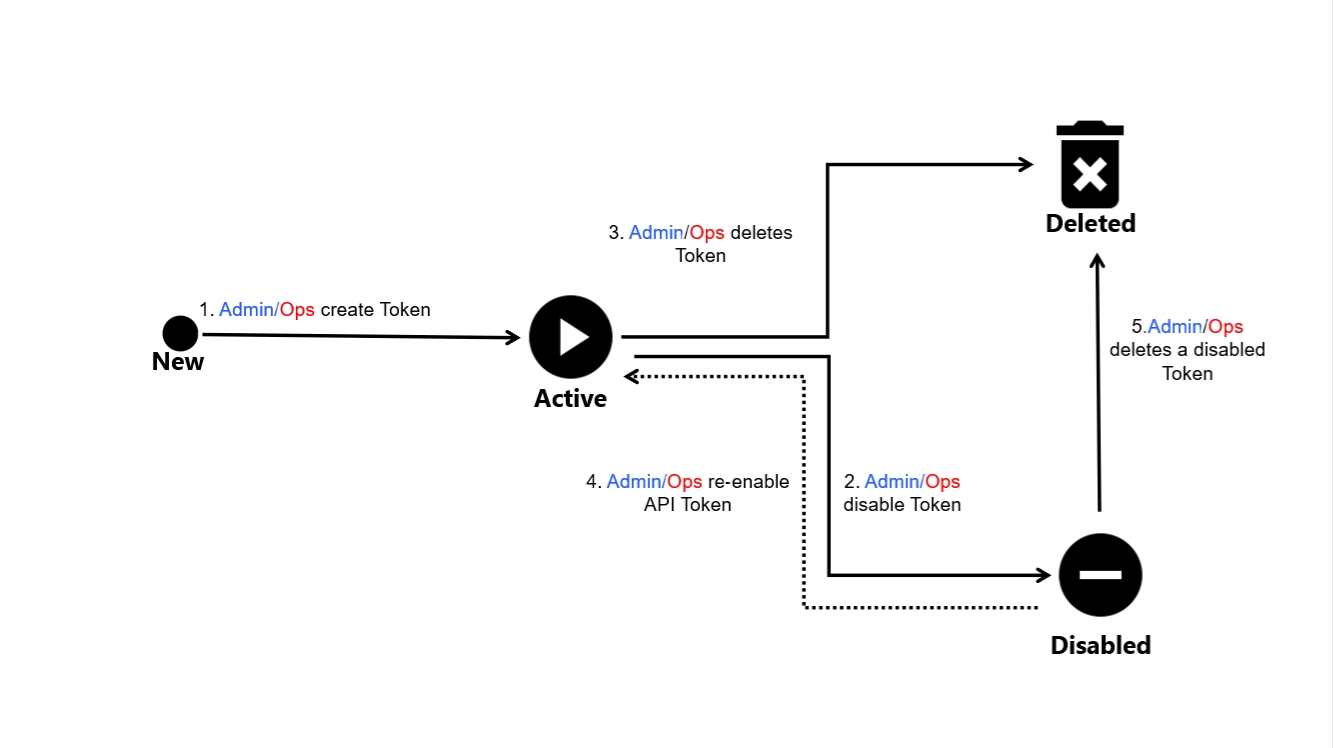
A token can have multiple states during its lifecycle in the Marketplace Platform.
The following diagram shows the possible states and the transition between these states:
These states are displayed as Status within the platform. They are also displayed as an icon beside the token name and ID on the details page.
Active
The token has been authenticated in the account.
It will allow access to the endpoint.
Disabled
The token has been temporarily deactivated.
Any attempts to access the endpoint will return an error.
Deleted
The token has been permanently removed from the system.
This state is not visible to the client or vendor account users.
You can easily copy an API token if you need to use it in your application.
Follow these steps to copy a token:
On the API token page (Settings > API tokens), find the token to copy.
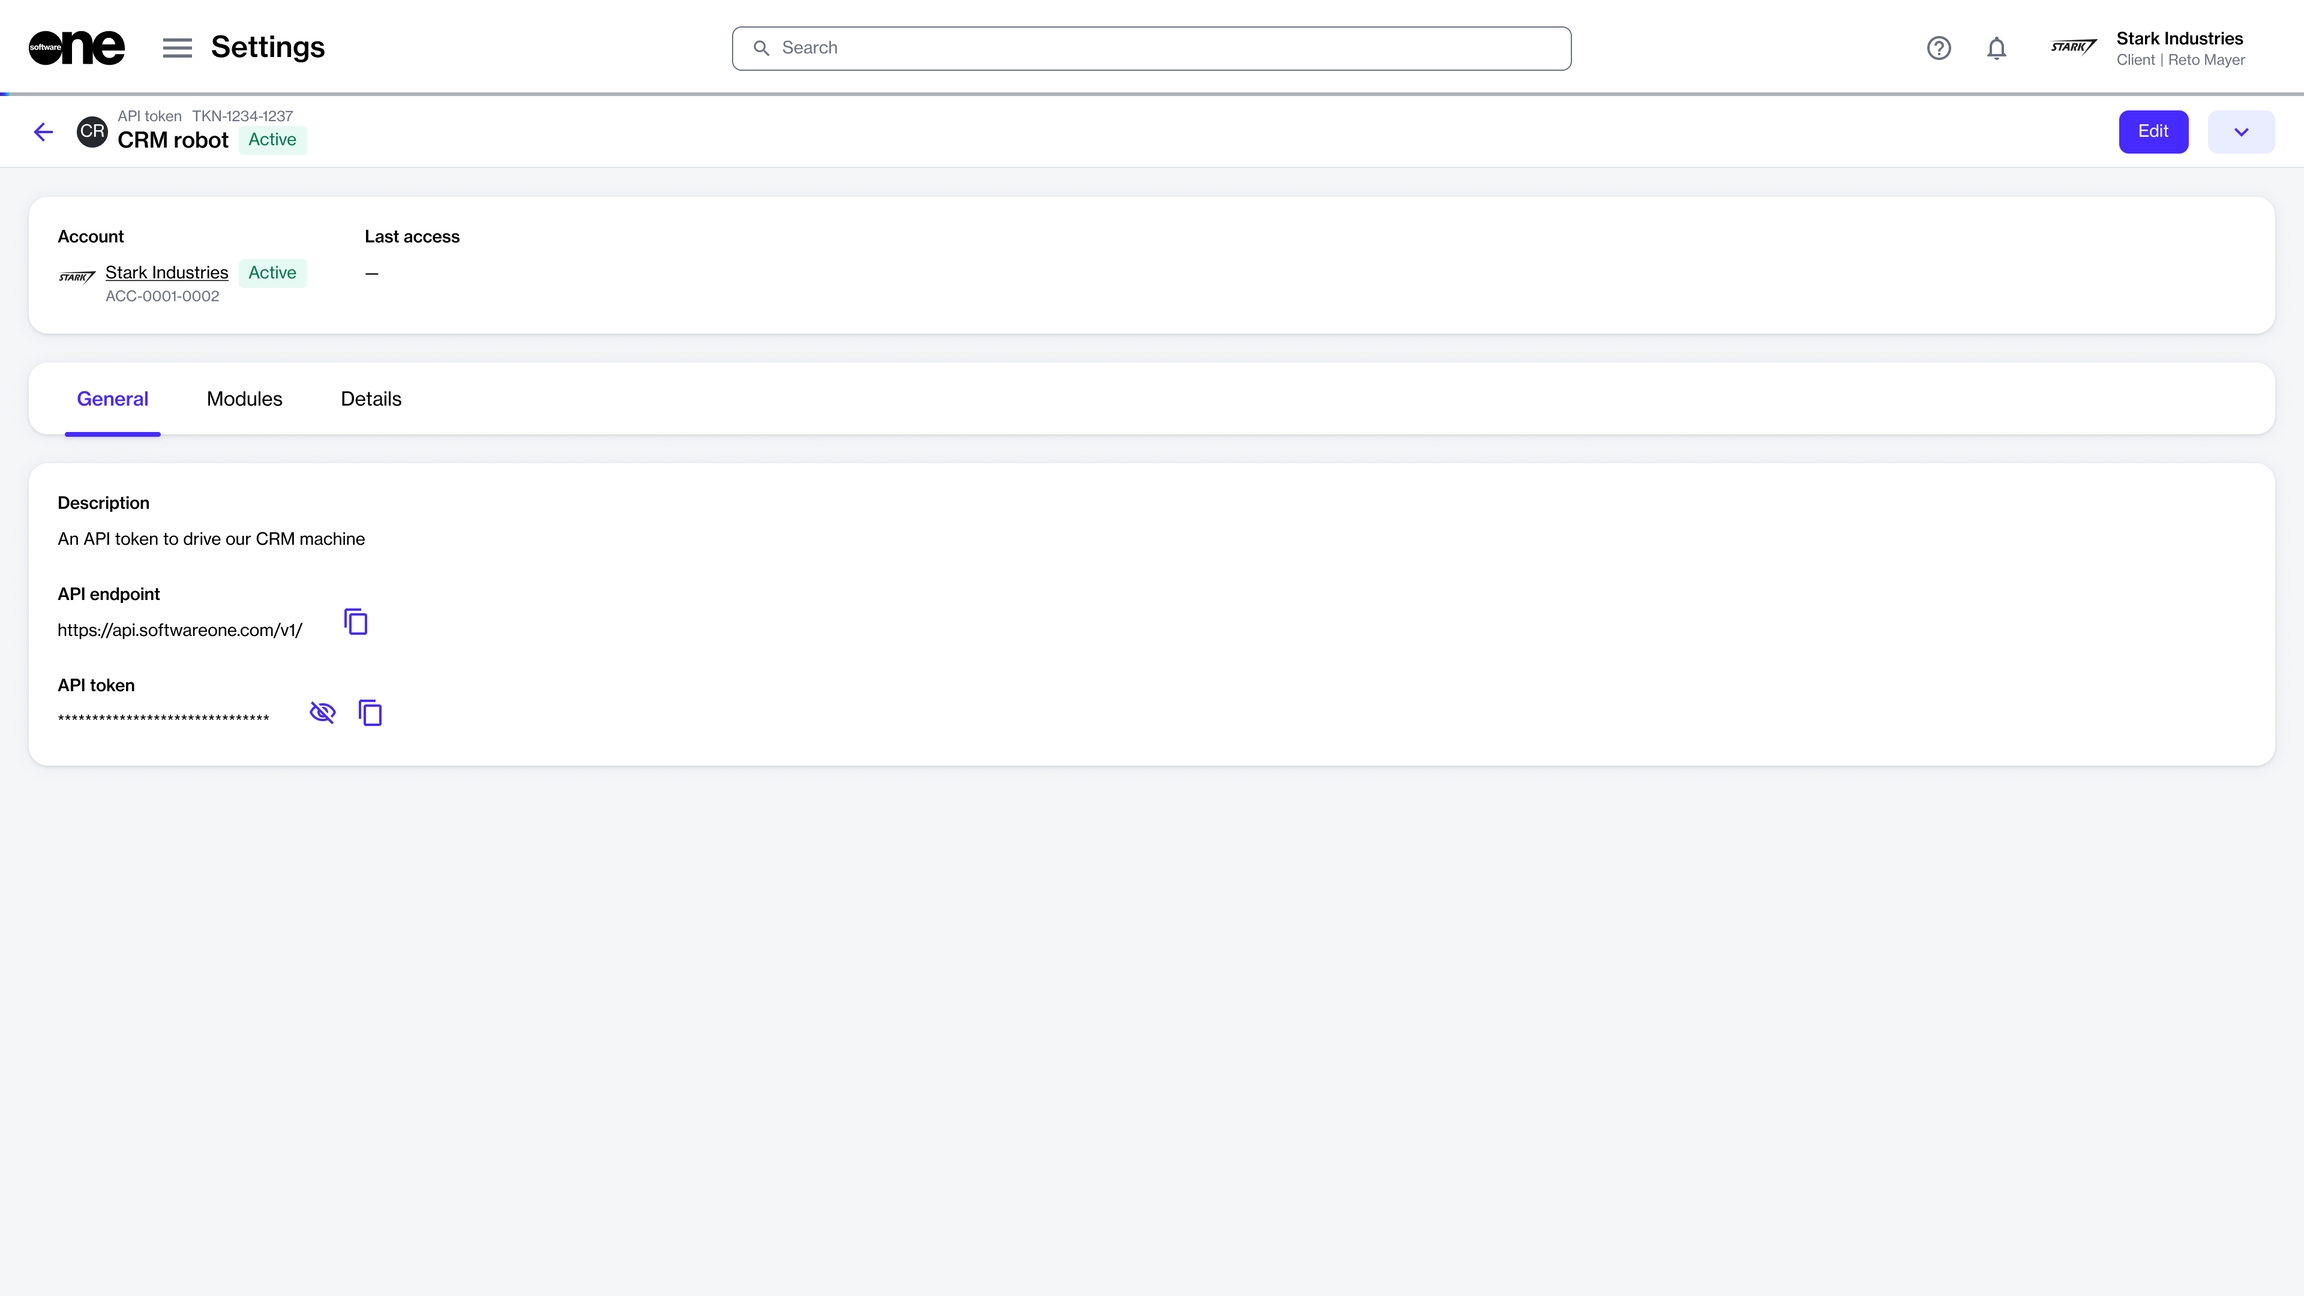
Click the token name. The details page of your selected token opens.
From the General tab, do the following as needed:
A confirmation message is displayed when the values are copied successfully.
The Marketplace Platform lets you create API tokens through the user interface (UI).
Follow these steps to create a token:
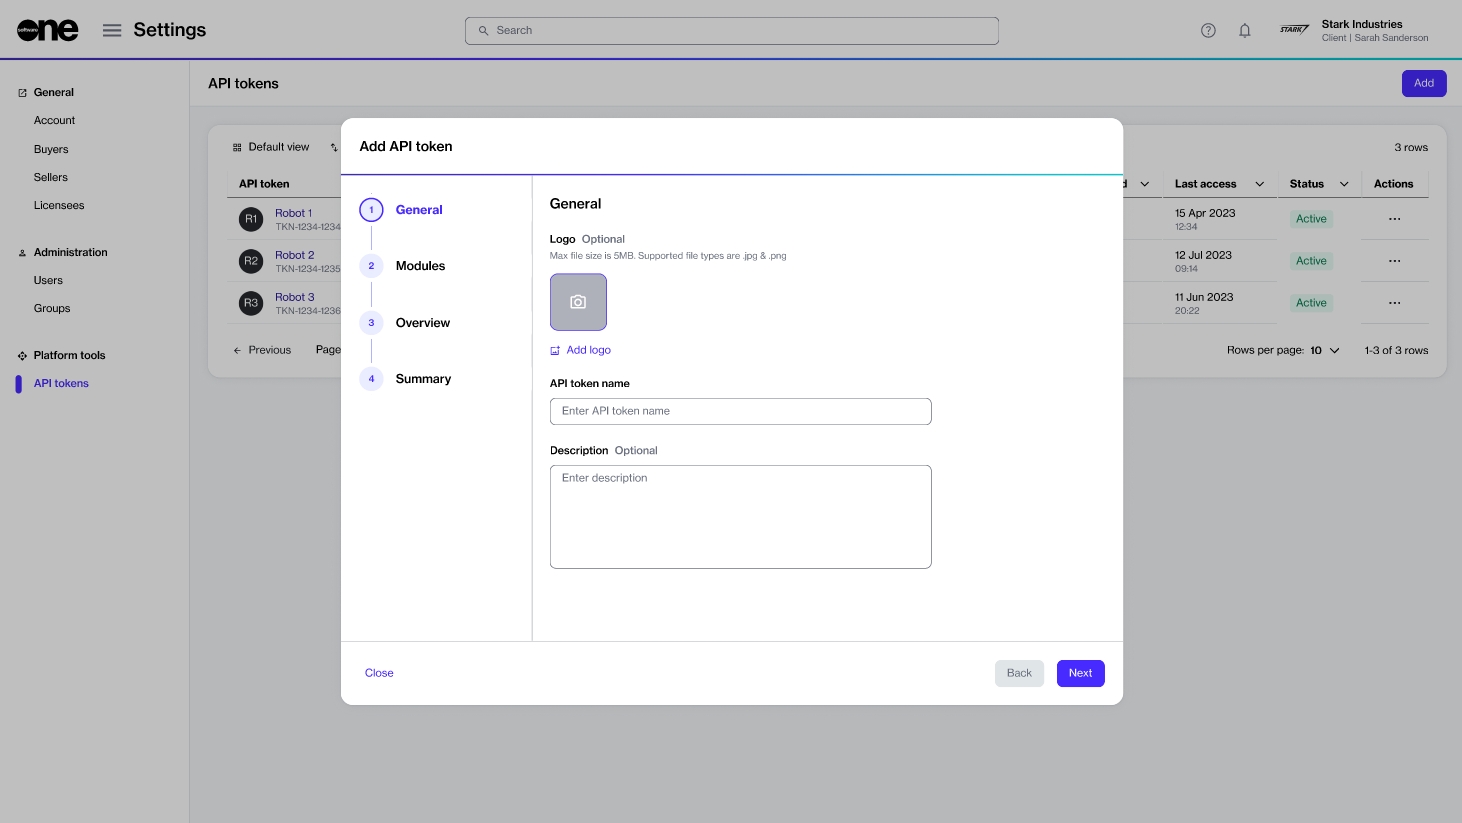
On the API token page (Settings > API tokens), click Add. The Add API token page opens.
In General, provide the following details and click Next.
Logo - (Optional) Add an image for your token. You can select a file to upload or drop your file to the selection area. By uploading an image, you can easily identify your token from the list of tokens.
Name - (Required) Enter a name for your token.
Description - (Optional) Add the token description.
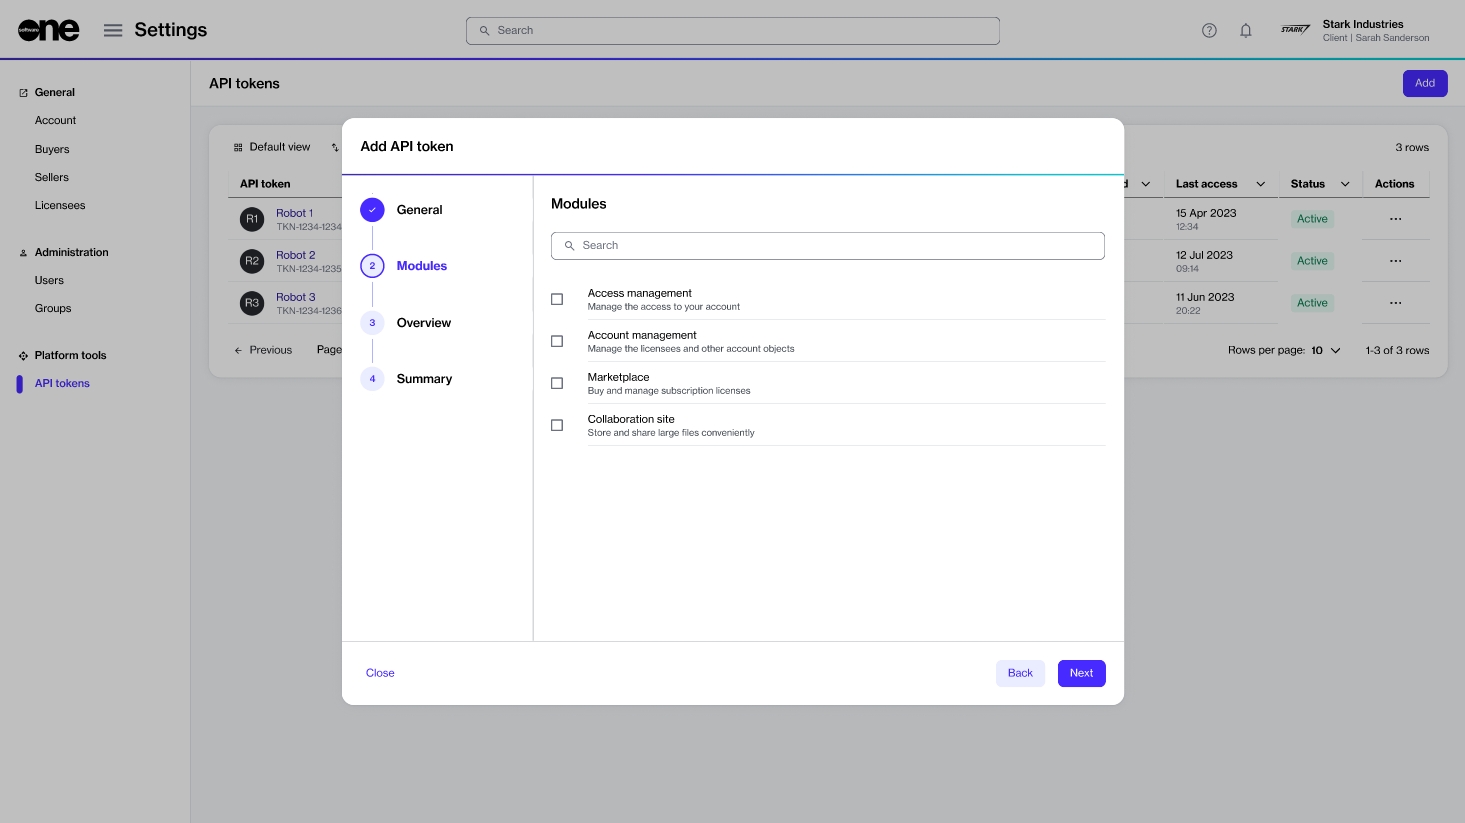
In Modules, select the modules which the token will allow access to and click Next. Note that only the modules that SoftwareOne has enabled for your account are displayed in this section.
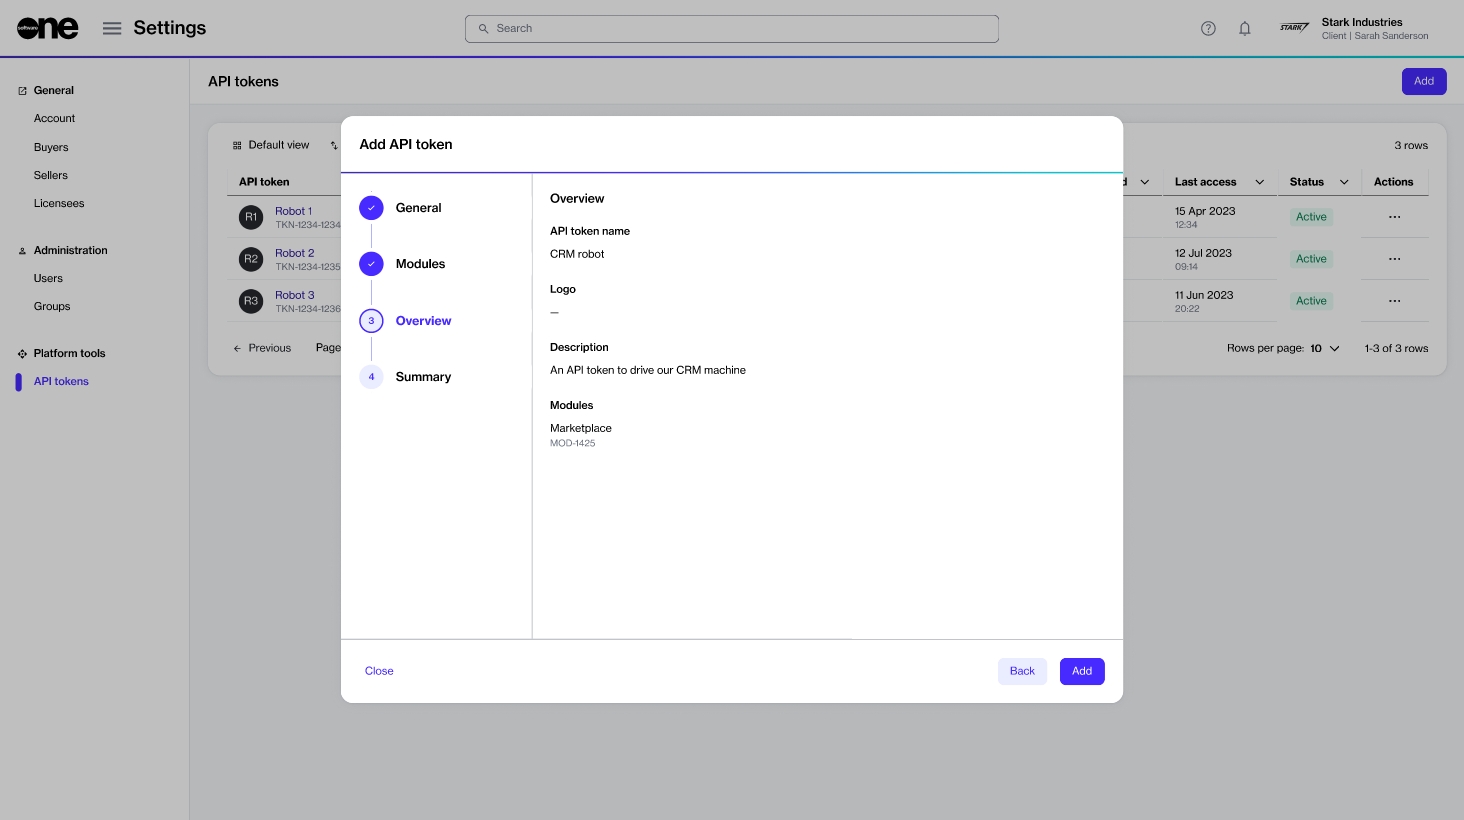
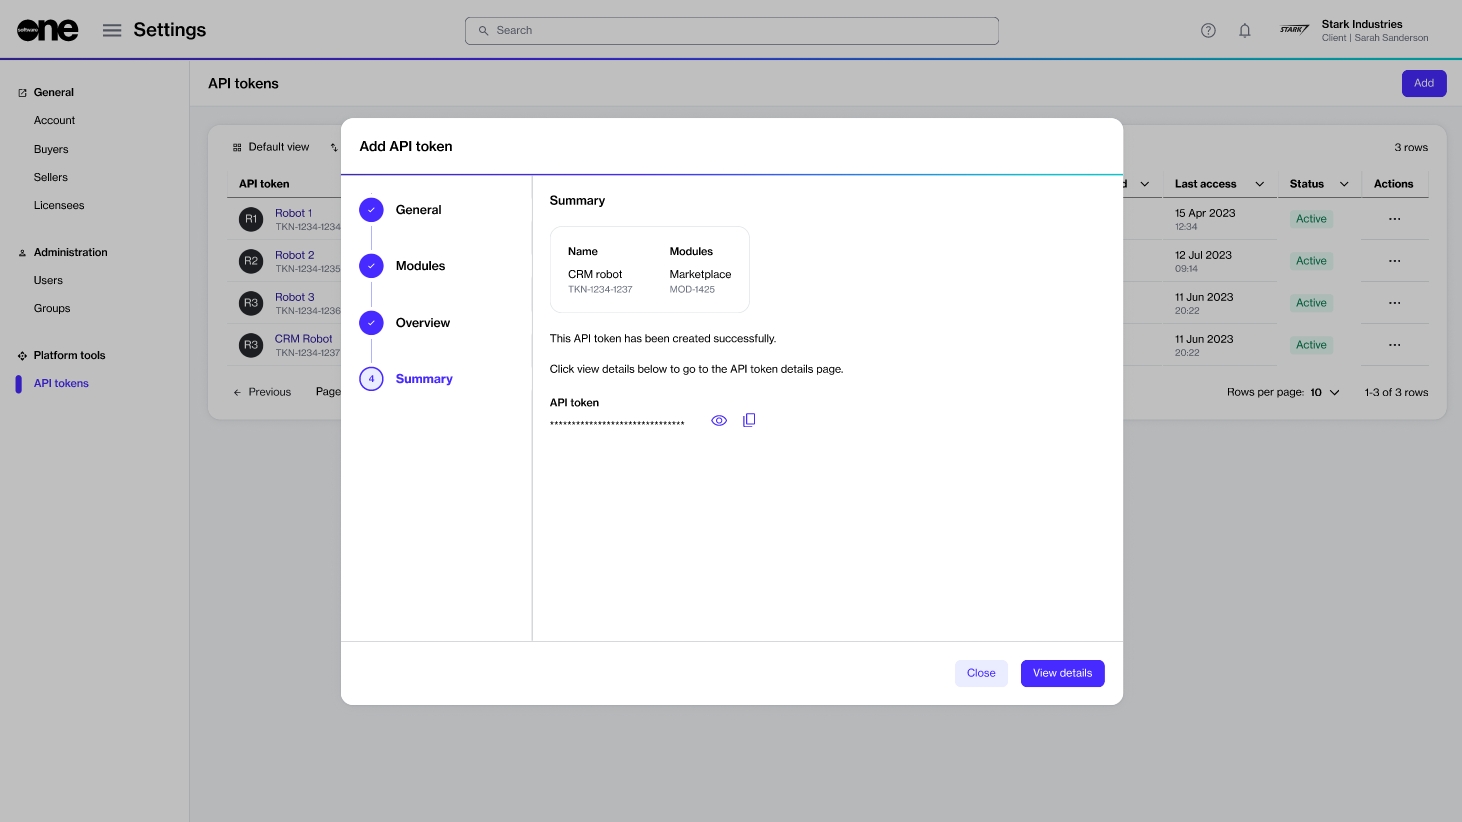
In Overview, review the details and click Add. Your token is created and the token summary is displayed.
Click View details to open the details page of your newly created token. Otherwise, click Close to close the page and return to the API tokens page.
To copy the endpoint, click the copy option for the API endpoint.
To copy the token value, click the copy option for the API token.
To show the token value, click the visibility icon . To hide the value, click the icon again.
You can disable an API token temporarily and enable it again when required easily through the platform. Before disabling a token, note the following points:
Disabling doesn't delete a token but makes it inactive until it's enabled again. When a token is disabled, any attempts to access the endpoint return an error.
The Enable option is shown only if you've disabled the token previously.
Follow these steps to enable or disable the token:
On the API tokens page, find the token you want to manage.
Click the actions icon (•••) and select Enable or Disable. The following image shows the Disable option:
Confirm that you want to change the status of your token.
A message is displayed stating that the operation is successful. You can view the updated status of your token on the API token page.
Alternatively, click the token name. When the details page of your selected token opens, click the down arrow in the upper right and select Enable or Disable.
You can update an API token’s description and change the access scope through the Edit option on the token's details page.
Follow these steps to update the token details
On the API token page (Settings > API tokens), find the token you want to update.
Do one of the following:
Click the actions icon (•••) and select Edit.
Click the token name. When the details page opens, click Edit in the upper right. The Edit API token page opens.
Update the General settings as necessary:
Name - Update the token's name.
Description - Update the token description.
Update the access scope for the Modules as necessary. Use the checkboxes to select or clear the modules as required.
Click Save. A confirmation message is displayed stating that your token has been updated.
If you no longer need a token, you can delete it using the Delete option on the API tokens page. Before deleting a token, note the following points:
A deleted token can't be reinstated or reused.
Deleting a token removes it from the account, which means that the token is no longer displayed on the API tokens page.
Follow these steps to delete a token:
On the API token page (Settings > API tokens), find the token you want to delete.
Click the actions icon (•••) and select Delete.
In Delete API token, confirm that you want to delete the token. A message is displayed stating that the API token has been deleted successfully.
The Marketplace Platform uses API tokens to authenticate requests to the REST API.
Your API token must be included in the Authorization HTTP header with the Bearer prefix for authentication. For example, the following request could be used to retrieve a list of buyers:
Your API keys have permissions assigned to them, so keep them secure. Do not share your secret API keys in public areas like GitHub or client-side code.
All API requests must be made over HTTPS. Calls made over plain HTTP will fail. API requests without authentication will also fail.
Account administrators can access the API tokens page by selecting Settings > API tokens from the main menu.
The page displays all tokens that have been created in your account. For each token, you can view the following information:
API token - Displays the name of the token and its marketplace identifier.
Modules - Displays the total number of modules that the token has access to. In cases where only one module is within the scope, the module name is displayed.
Created by - Displays the name and marketplace ID of the person who created the token.
Date created - Displays the date and time when the token was created.
Last access - Displays the date and time when the token was last used.
Status - Displays the current status of the token. For more information on the status, see Token States.
Actions - Displays options that allow you to manage the API token. Depending on the status of the token, you can enable or disable a token, delete the token permanently, or edit token details.
The details page of a token displays additional information about the token. You can open the details page by clicking the token name on the API tokens page.
When you open the details page, it shows the token's name, marketplace ID, and status. The page also contains the following tabs that display corresponding information:
General - Displays the token's description and allows you to show, hide, and copy the values.
Modules - Displays the modules that the API token has been granted access to within the scope of an account.
Details - Displays the date and time information for your selected token, for example, the date and time when the token was created.
Audit trail - Displays an audit trail of all changes and events within the token account. For each audit record, you can view the log details and summary. To learn more, see Audit Trail.
Alternatively, click the token name. When the details page of your selected token opens, click the down arrow in the upper right and select Delete.


