Loading...
Loading...
Loading...
Loading...
Loading...
Loading...
Loading...
In certain situations, you might need to remove a person from your account. If you are an account administrator, you can use the Remove option on the Users page to remove an individual.
Before removing an individual from your account, note the following points:
Ensure that you've reviewed the individual's permissions and assigned groups. This is necessary to prevent accidental removal.
Removing an individual doesn't delete them from the system, allowing you to add them to your account again.
Removing someone only removes them from the respective account. If the individual is associated with several accounts on the platform, they can still access those accounts.
You cannot remove yourself from an account. The platform shows a message when you try to remove yourself.
If you remove an individual who has the Invited status, their invitation link will no longer be valid.
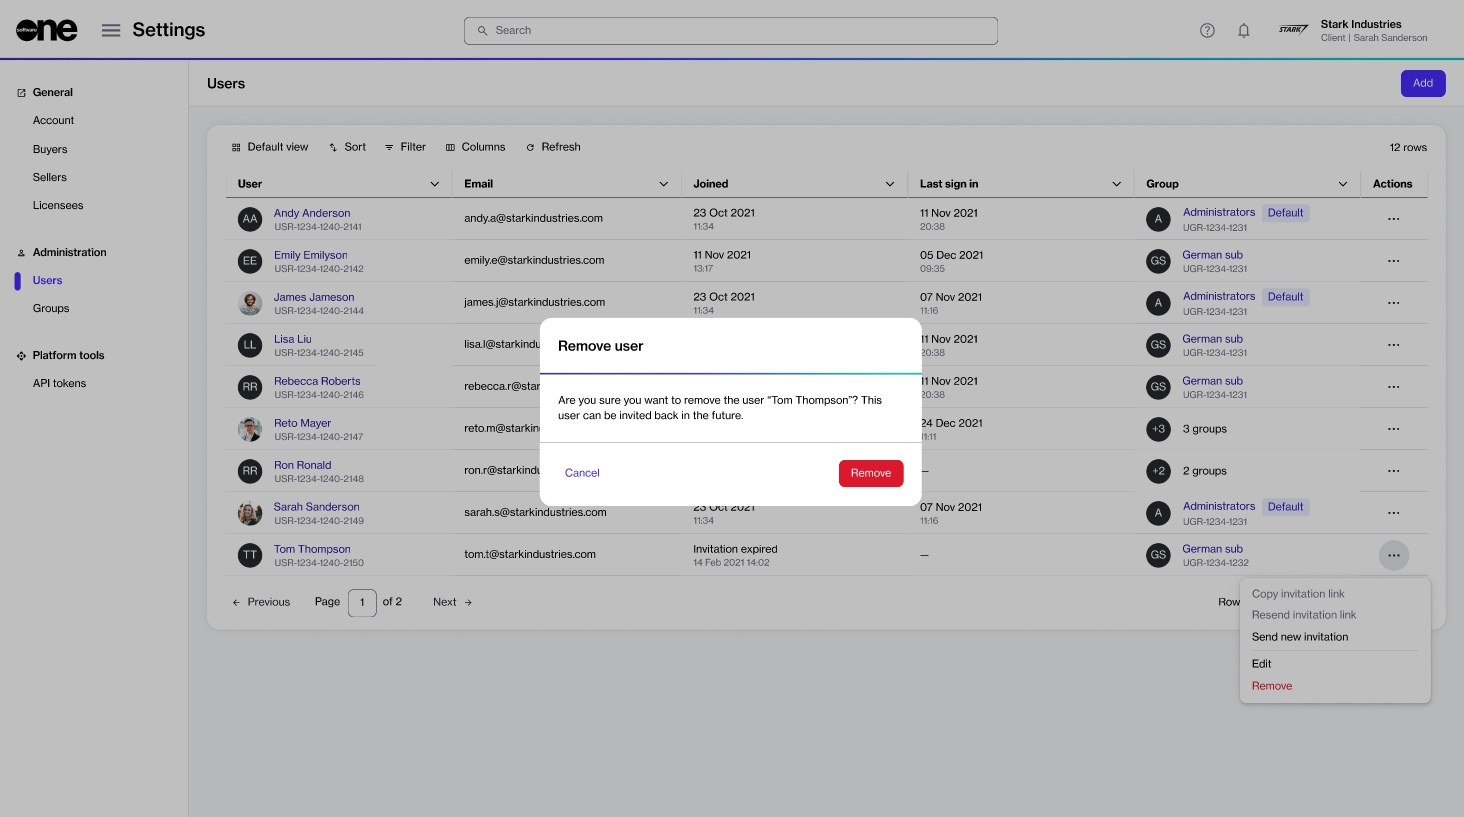
Follow these steps to remove an individual from your account:
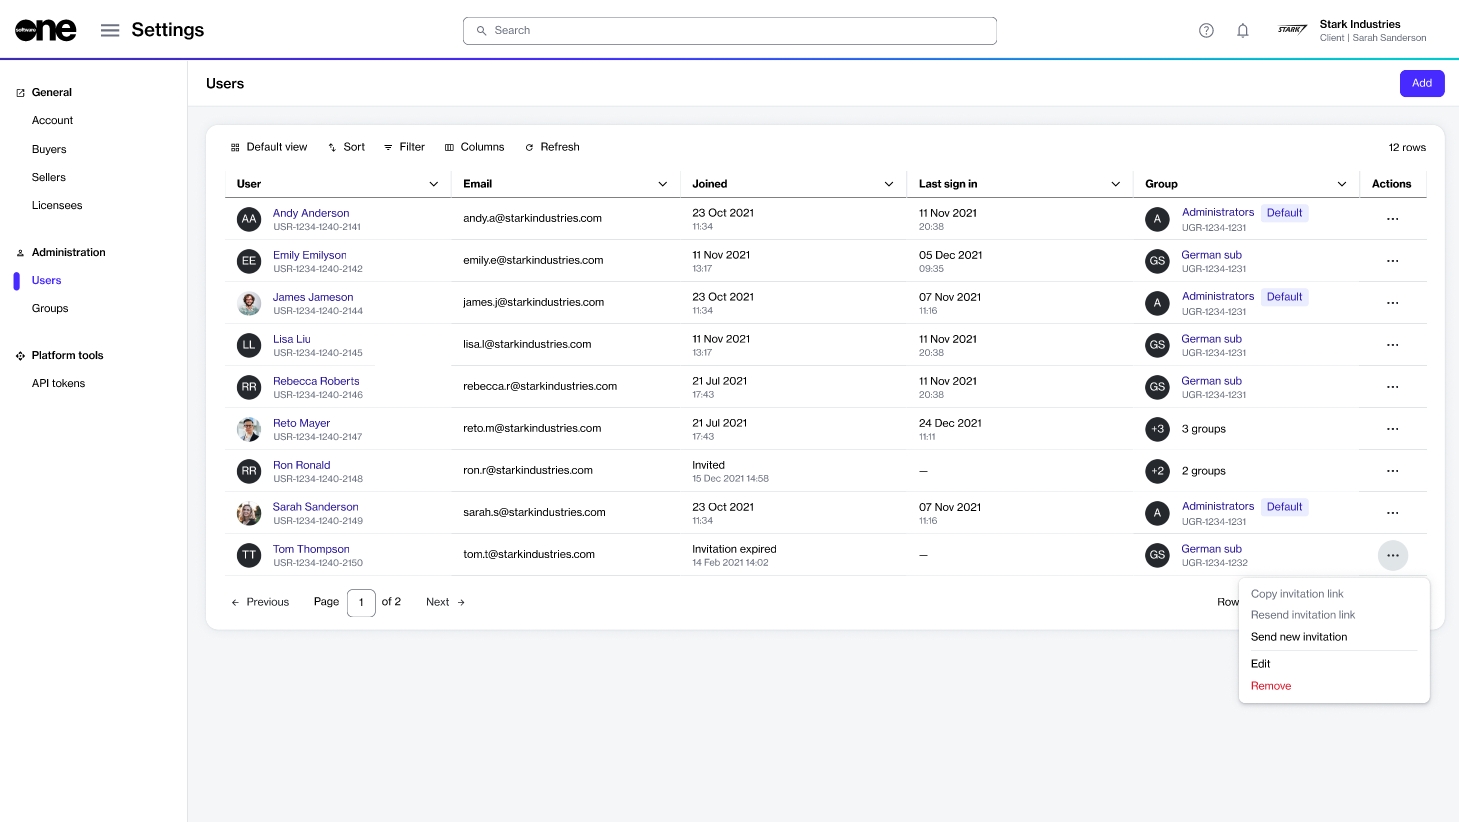
On to the Users page (Settings > Users), find the person you want to remove.
Click the actions icon (•••) and select Remove.
In the Remove user dialog, click Remove to confirm the action.
A message is displayed stating that the user is removed.
After the user is removed, they'll receive an email stating that they have been removed from the account and the associated groups.
The Edit option on the Users page lets you update an individual's group membership.
Using this option, you can only update the groups that the individual belongs to. Details (such as name, email address, or contact details) cannot be updated. If such details require updating, the individual must update the details themselves through the My Profile option in the profile menu. To learn more, see Manage Your Profile.
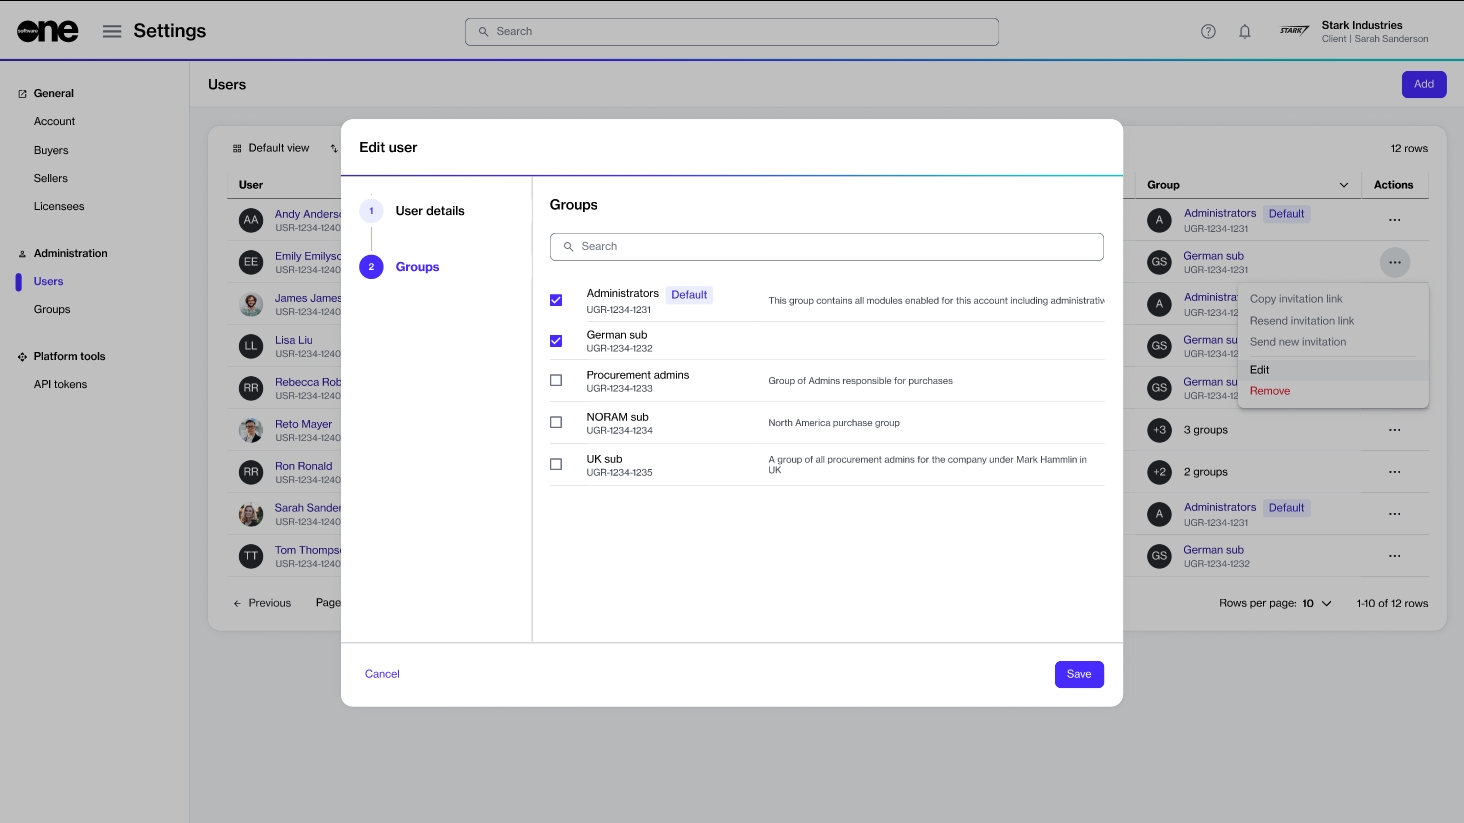
Follow these steps to update a user's group membership:
On the Users page (Settings > Users), find the required user. You can use filters to find the user based on their ID, name, email address, and other conditions.
Click the actions icon (•••) and select Edit. The Edit user page opens.
Select Groups and make the changes as necessary:
To add the user to a group, select the checkbox for that group.
To remove the user from a group, clear the checkbox.
Click Save. A confirmation message is displayed stating that the user has been edited successfully.
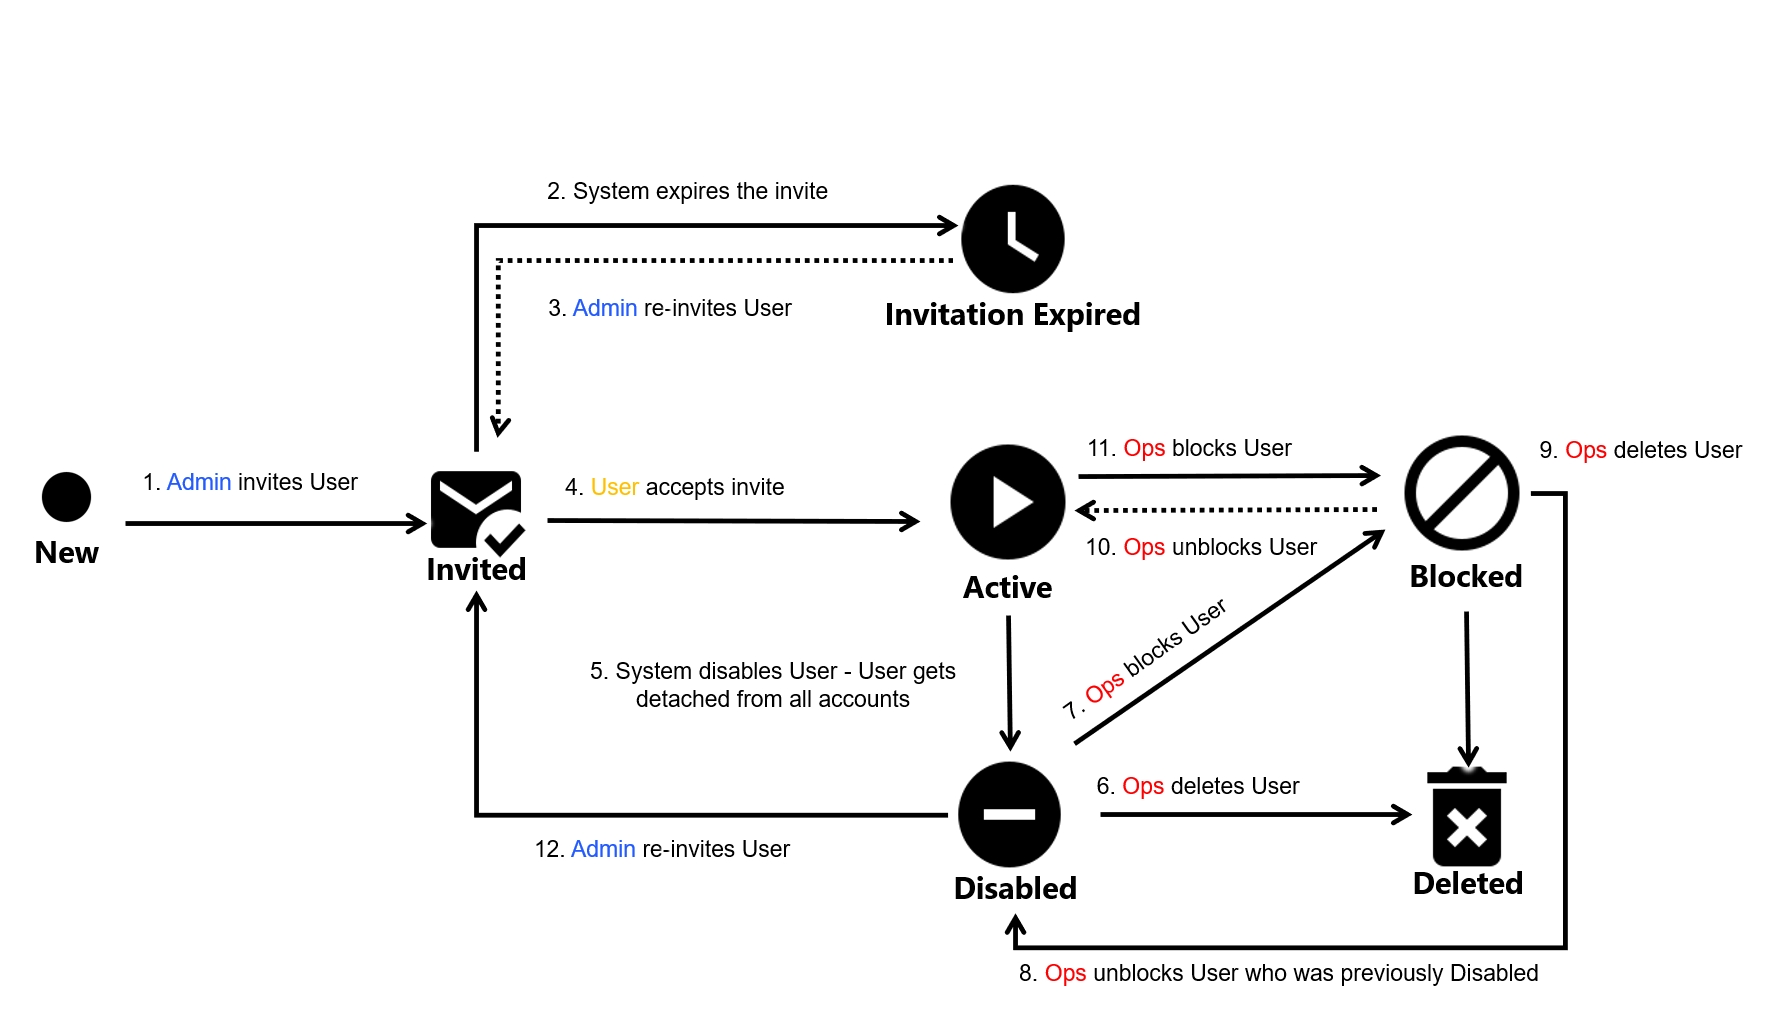
The Marketplace Platform supports various states (also known as status) for users in the system.
The following diagram shows the possible states and the transition between these states:
Note that the Marketplace Platform supports various account types, including vendor and client, so not all states might be visible to you.
Invited
The user has been invited to join the account but has not accepted the invite yet.
This status remains in place until the invitation is accepted.
Invitation expired
The user's invitation has expired because they didn't accept it within 7 days from the send date.
Active
The user can access the account and perform operations based on their permissions.
Blocked
The user has been restricted from accessing the account.
This could be due to terms and conditions violations, security concerns, or at the administrator's discretion.
Disabled
The user has been removed from the account. They cannot perform any operation in the account.
Deleted
The user no longer exists in the system.
A user is an individual who interacts with the In the Marketplace Platform through a unique username and password. Each user has a profile consisting of attributes and settings (such as email address, name, profile image, and more). To understand more about users and their role in our platform, see Key Concepts.
Here are some important points about users:
Users can belong to one or more accounts, or none at all.
Users associated with an account have tailored access to modules and functionalities, depending on their permissions.
Users belonging to multiple accounts can also switch between those accounts without signing out of the platform.
Users who don't belong to any account have limited capabilities. Such users can only sign in to the platform and adjust their profile settings. They cannot access any module.
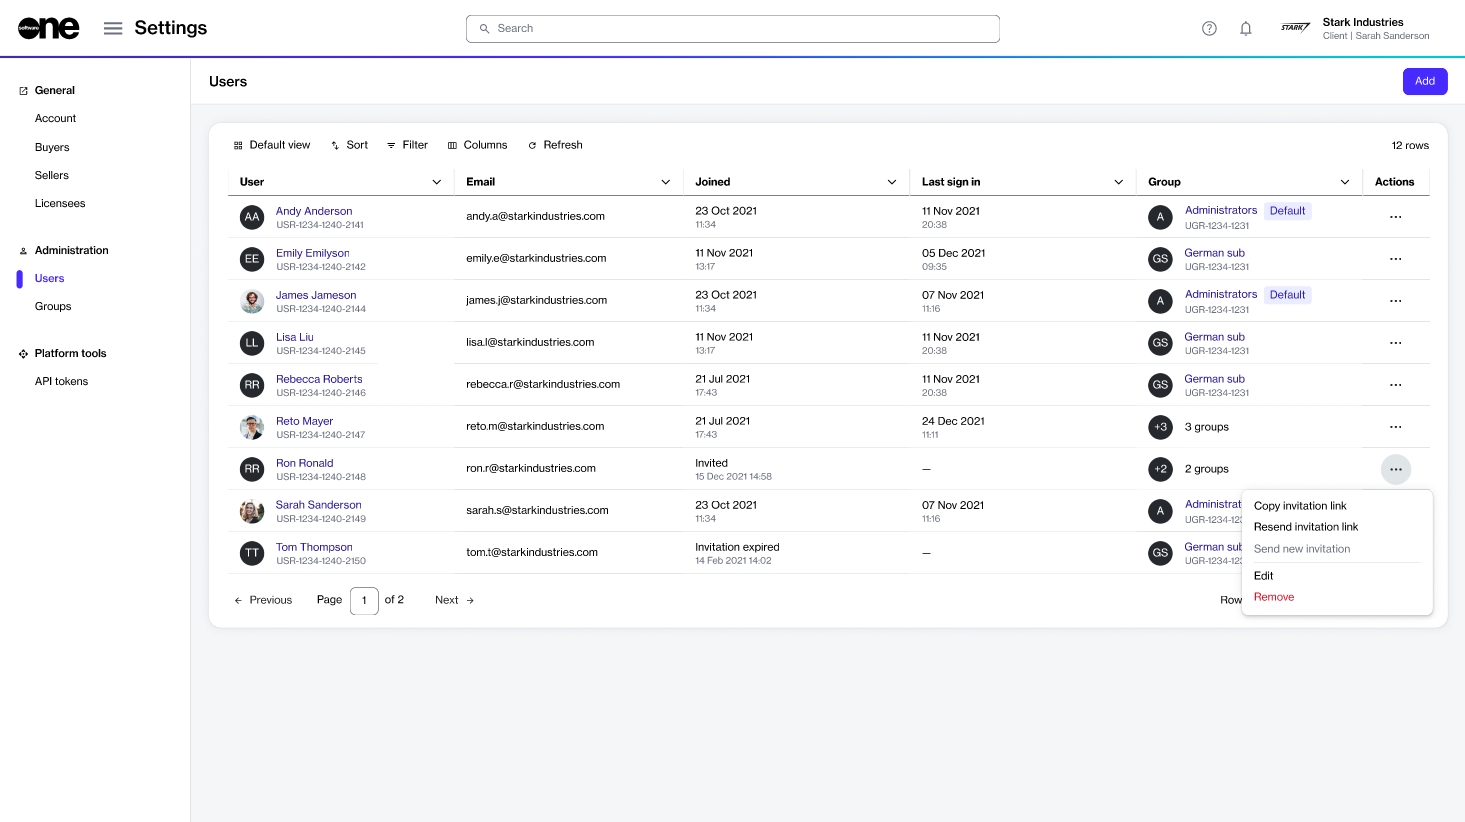
Account administrators can access the Users page by selecting Settings > Users from the main menu.
The page displays all users in your account. You can use filters to search for a user and manage users through the Actions column.
For each user, the Users page displays the following details:
User - Displays the user's name and their Marketplace identifier.
Email - Displays the email address used to create the account.
Joined - Displays the date when the user accepted the invite.
If the user accepts the invite and joins your account, the user's status is displayed.
If the user hasn't accepted the invite, only the invite status is displayed. See User States for information on the possible user states.
Last sign-in - Displays the date and time the user signed in to their account.
Groups - Shows the groups that the user belongs to. If the user belongs to multiple groups, the total number of groups is displayed.
Modules - Displays all modules that the user has access to.
Buyers - Displays buyers that are visible to the user.
If the user can access the Account Management module, All buyers is displayed. Users who can access Account Management can view all buyers in the account.
If the user can only access the Marketplace module, the total number of buyers is displayed.
If the user doesn't have access to either of these two modules, a dash - is displayed.
Actions - Displays options that allow you to edit or remove a user from your account.
The user details page provides all information for your selected user. You can open the details page by clicking the user name on the Users page.
The details page shows all properties associated with the user's profile. It also contains the following tabs:
General - Displays the general user details.
Groups - Displays the user's group memberships and the modules they have the access to.
Contact entities - Displays the buyers and licensees mapped to the user. Clicking the buyer or licensee name displays the details page of the selected entity.
Details - Displays a history of events associated with the user, for example, the date and time when user was invited to the platform and so on.
Audit trail - Displays a detailed audit trail of all changes. For each audit record, you can view the log details and summary. To learn more, see Audit Trail.
Account administrators can invite new users to the account from the Users page.
When you add a user, an invitation email containing a unique link is sent to the individual. To join the account, the individual must accept the invitation and complete the registration process within 7 days. Otherwise, the invitation will expire and must be resent.
Before adding an individual to your account, note the following points:
Ensure you have the individual's first and last name and email address.
Verify that an account with the same email address doesn't already exist. If an email address already exists, the platform displays a message.
Make sure to add the individual to the correct group before inviting them. For information on how to create or update a group, see .
Follow these steps to add a new user:
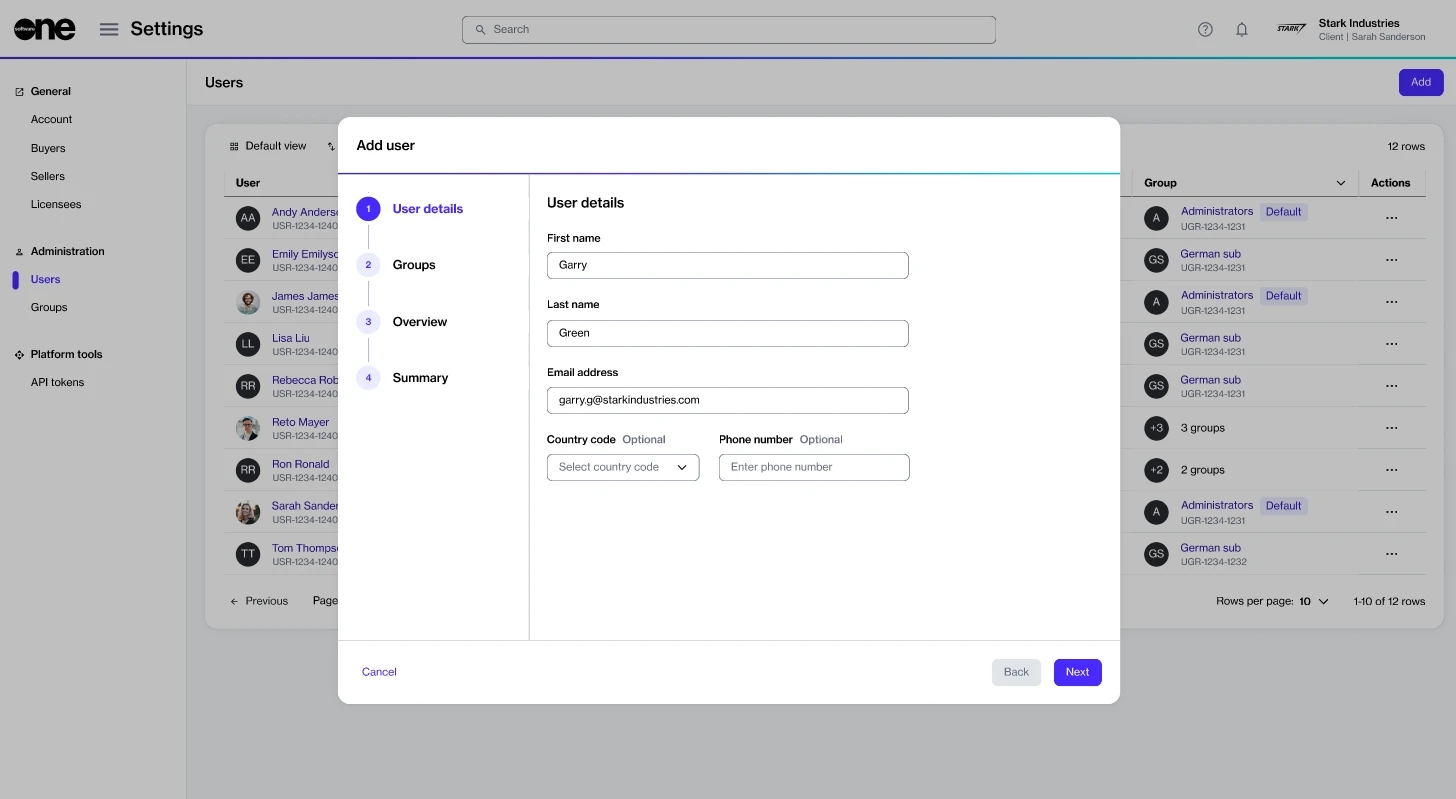
On the Users page (Settings > Users), click Add. The Add user page opens.
In the User details section, provide the following details and click Next:
First name - (Required) The first name of the individual associated with the account.
Last name - (Required) The last name of the individual associated with the account.
Email address - (Required) The email address the individual will use to sign in to the account.
Country code - (Optional) The country code associated with the individual's phone number.
Phone number - (Optional) The individual's phone number.
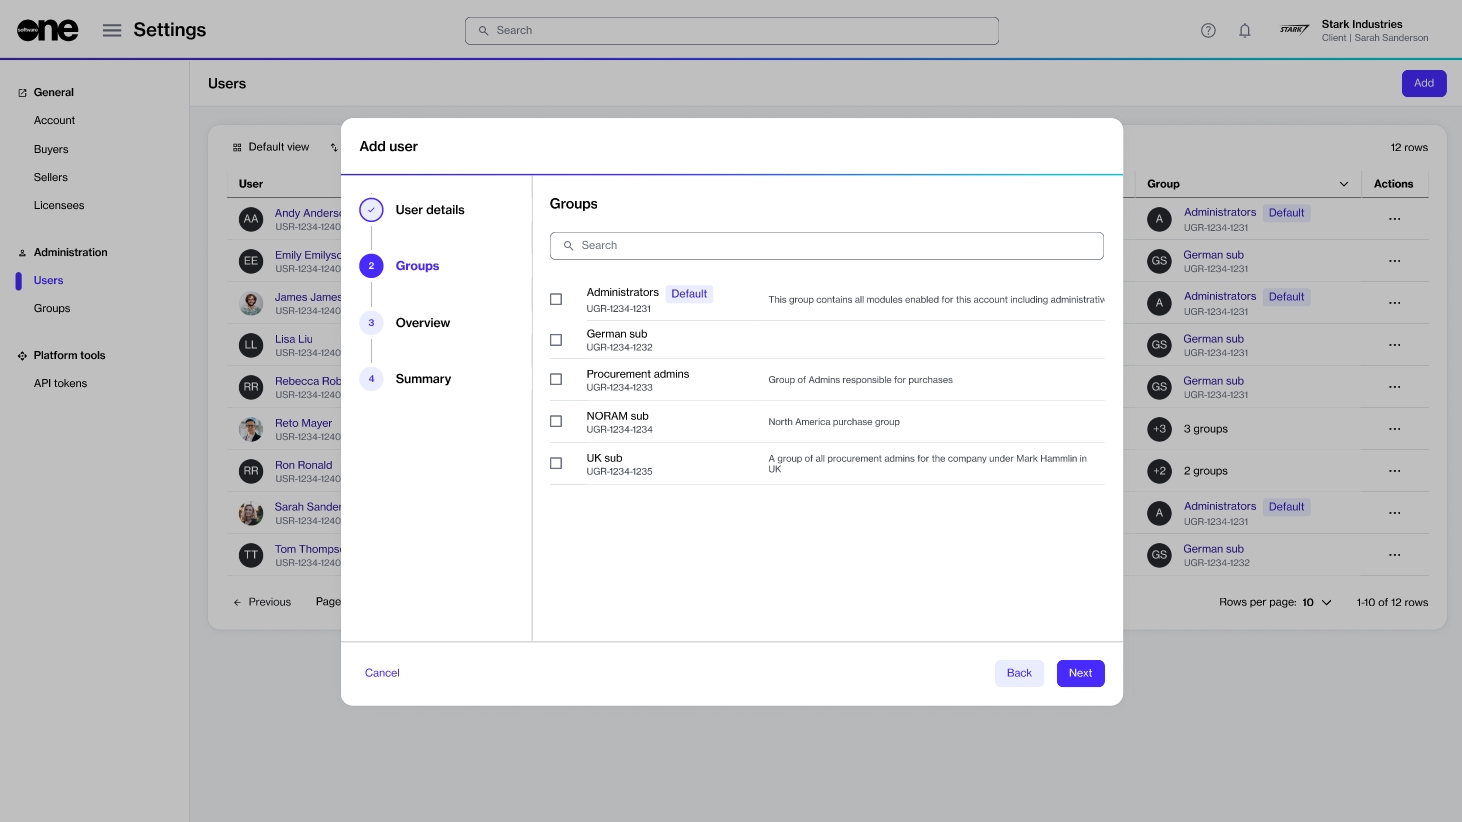
In the Groups section, select the groups to add the individual to and click Next. You must choose at least one group. If you have several groups, use the Search bar to find the required group.
In the Overview section, review the details and click Add. The user is added and an invitation email is sent to them.
Click View details to go to the user's details page. Otherwise, click Close. To share the invite link directly with the individual, click .
We recommend checking the Spam or Junk folder. Administrators can also copy the invitation link from the interface and share it with the individual, or send the invitation again. To learn more, see .
The administrator must generate a new invitation. To learn more, see .
When you've been invited to the Marketplace Platform by the SoftwareOne Operations team or your account administrator, you'll receive an invitation to join the account.
You must action the invitation after being invited to the platform.
Follow these steps to accept the invitation:
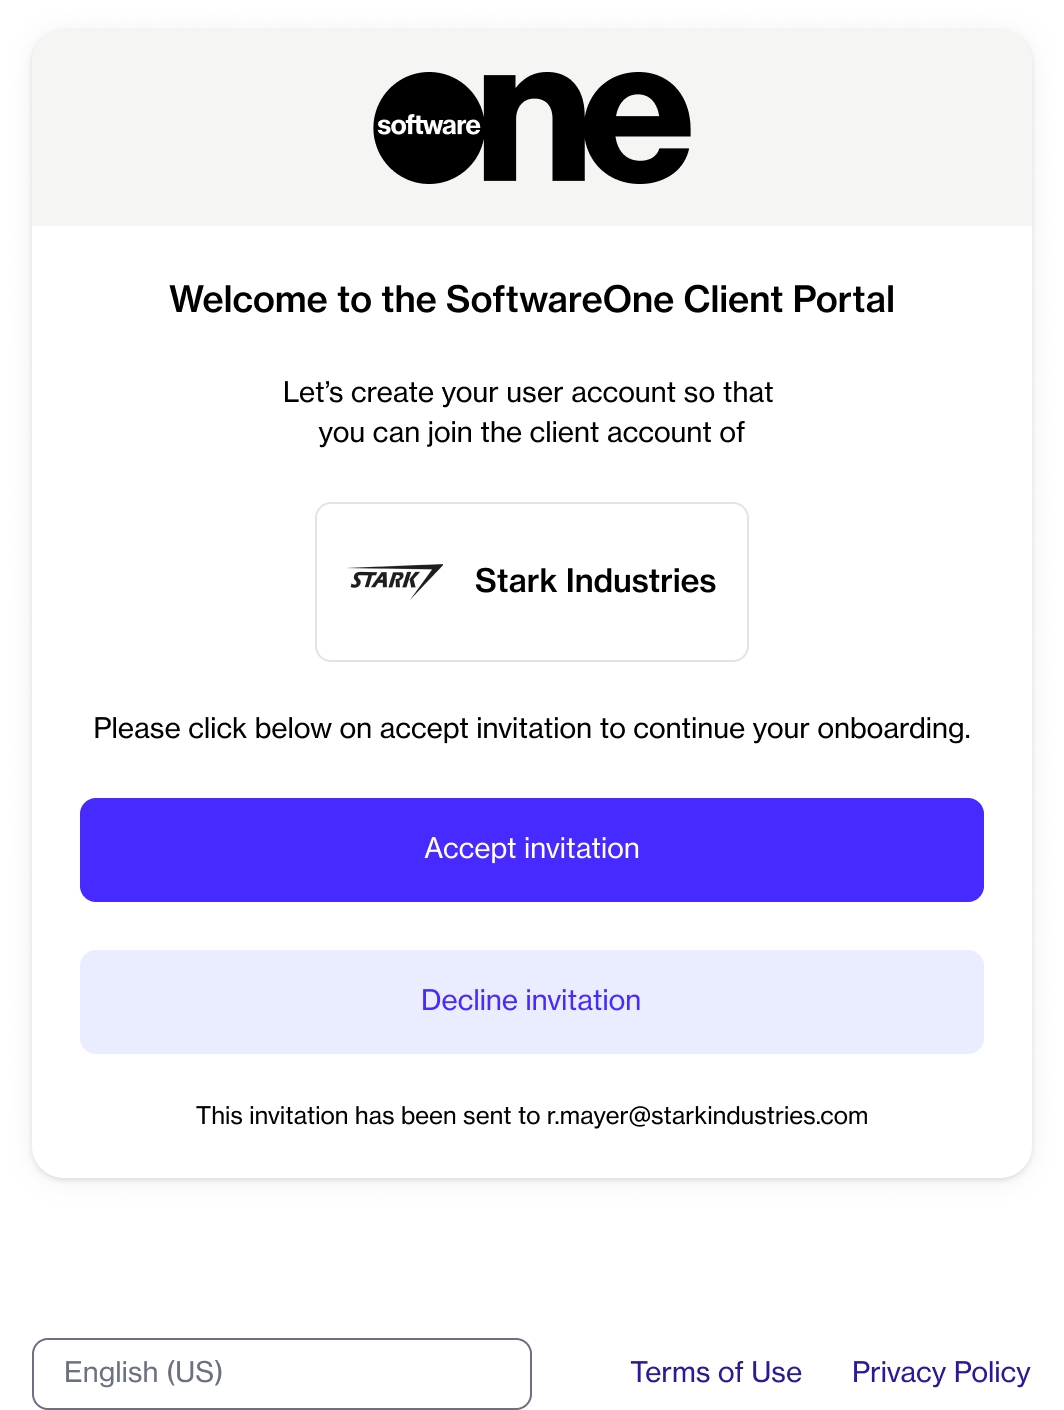
Click the invite link in your email. The following page is displayed:
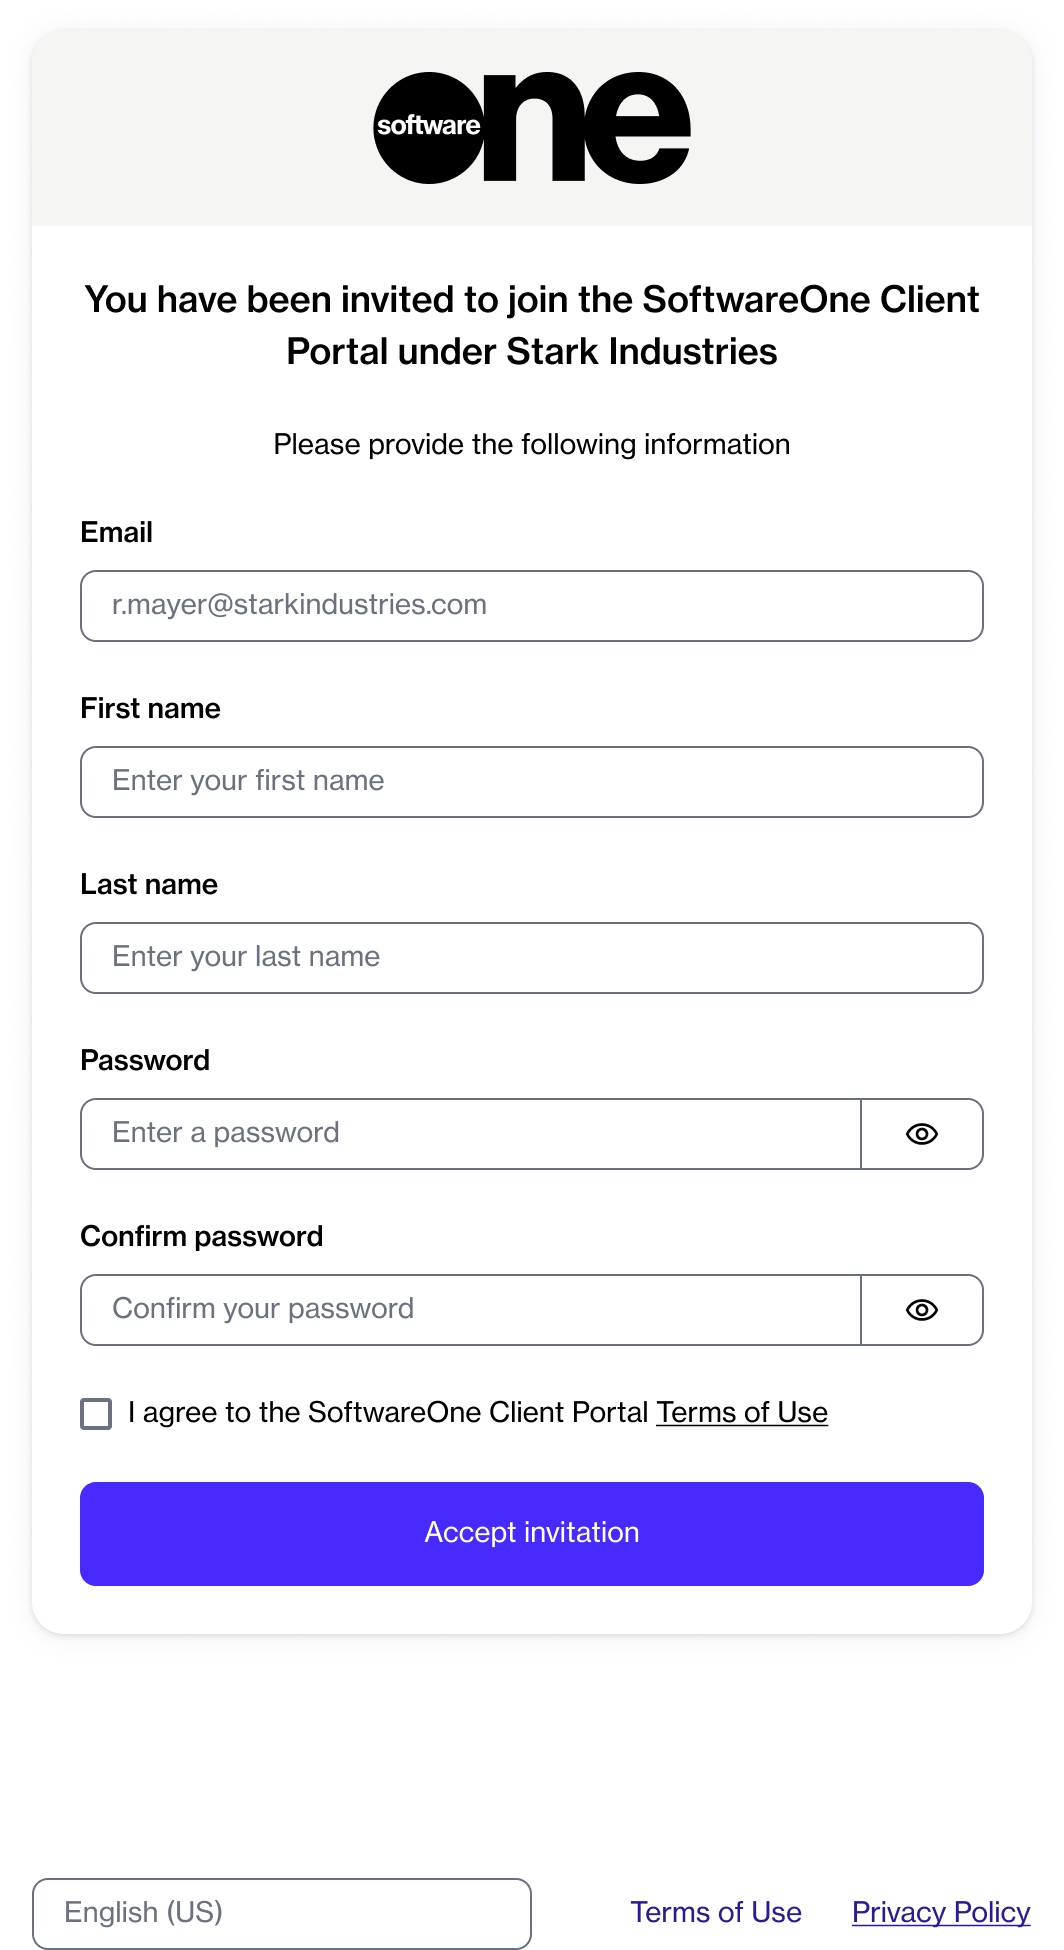
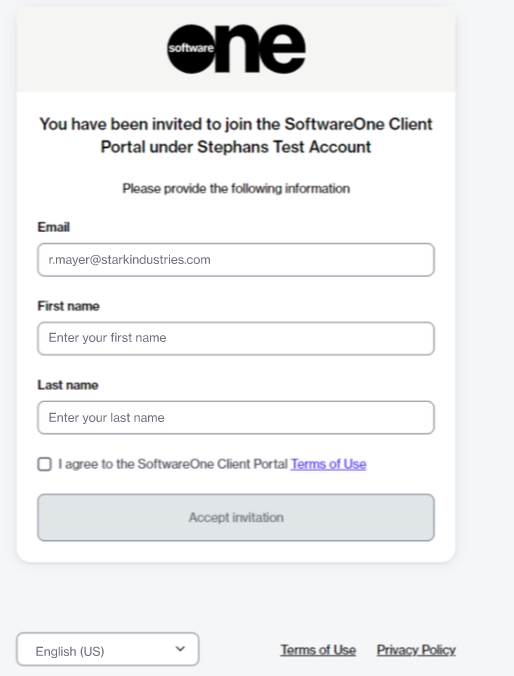
Click Accept invitation. The registration page is displayed:
On the registration page, do the following:
Enter your first name and last name.
Enter a new password and then confirm that your new password matches the one you entered in the Password field. Passwords must be at least eight characters long, and must contain at least one lowercase (a-z) and one uppercase letter (A-Z), a number, and a special character. When you enter a new password, our password validation checks whether your password meets the criteria.
Select I agree to the SoftwareOne Client Portal Terms of Use.
Click Accept invitation.
If single sign-on (SSO) is configured, you'll be automatically redirected to your provider to authenticate. Once authenticated, you only need to enter your first and last name.
Sign in to your account using your email address and password.
After signing in, you are redirected to the Home page from where you can access platform modules and perform different operations depending on your group membership. To familiarize yourself with the platform navigation, see Platform interface.
Invite link not working?
An invitation link will not work if it has expired. Invite links are unique and must be accepted within 7 days from the send date. If your invite link has expired, the account administrator must create a new link. For instructions, see Manage User Invitations.
You can decline an invitation if it was sent to you in error or if you choose not to join the account.
To decline, open the invitation link and click Decline invitation.
After you've invited an individual to join your account, you can manage their invitation through the platform.
For example, you can reinvite the person if they didn't receive the invitation email or have difficulty accepting your invitation. Additionally, if the person's invitation has expired, you can create a new invitation and send it to them by email.
If the person you invited didn't receive the invitation email or has difficulty accepting your invitation, you can share the invite link with them directly, or send the invitation email again.
Follow these steps to reinvite a user to your account:
On the Users page (Settings > Users), find the user you wish to reinvite.
Click the actions icon (•••) and do the following:
Copy invitation link - Select to copy the invite as a link and share it directly with the individual.
Resend invitation link - Select to resend the invitation to the user's email.
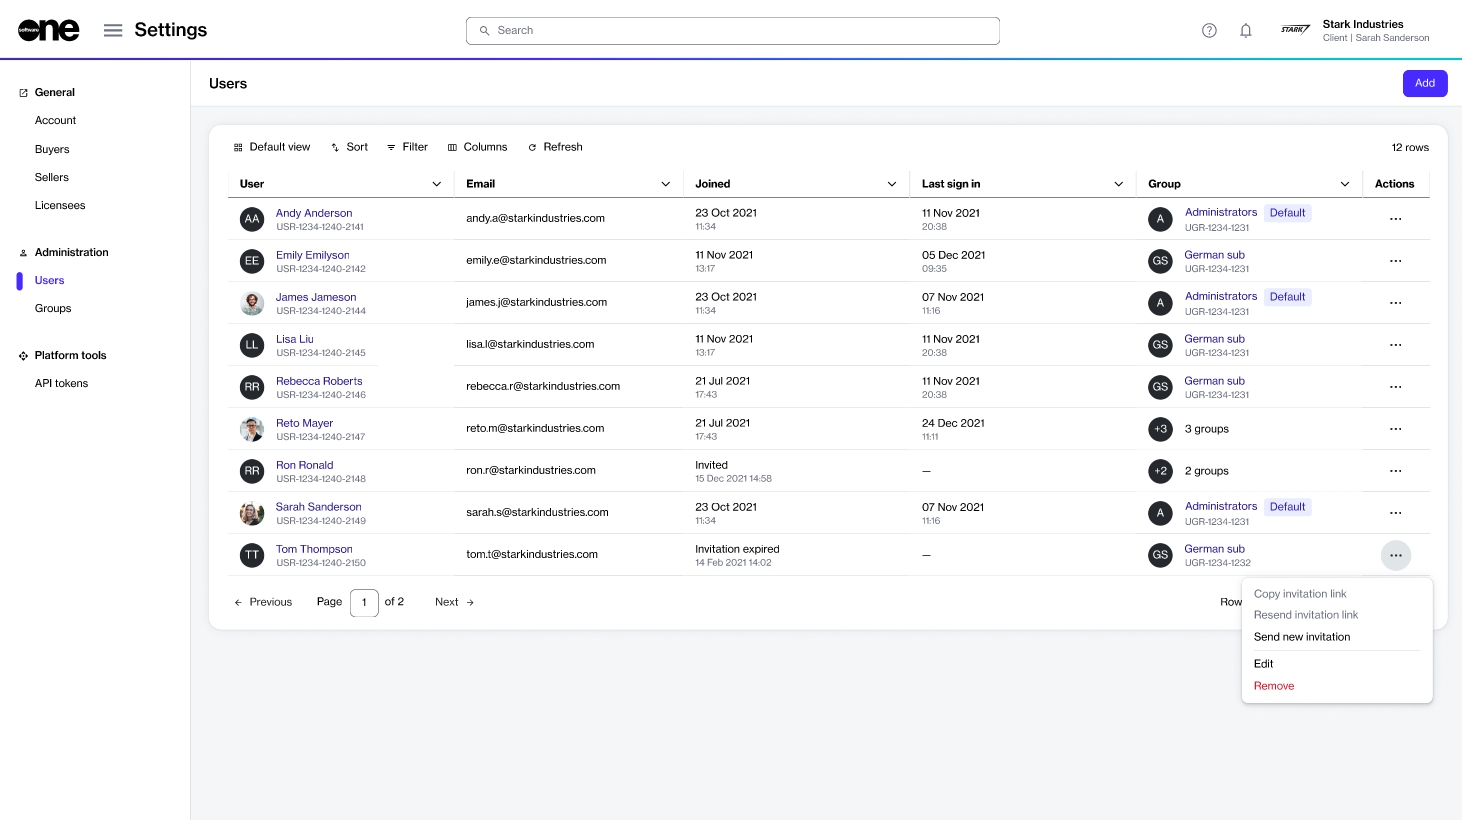
If an invitation is not accepted within 7 days from the send date, it expires.
Account administrators can create a new invitation and resend it to the individual. The option to send a new invitation is only enabled for users who have the Invitation expired status in the platform.
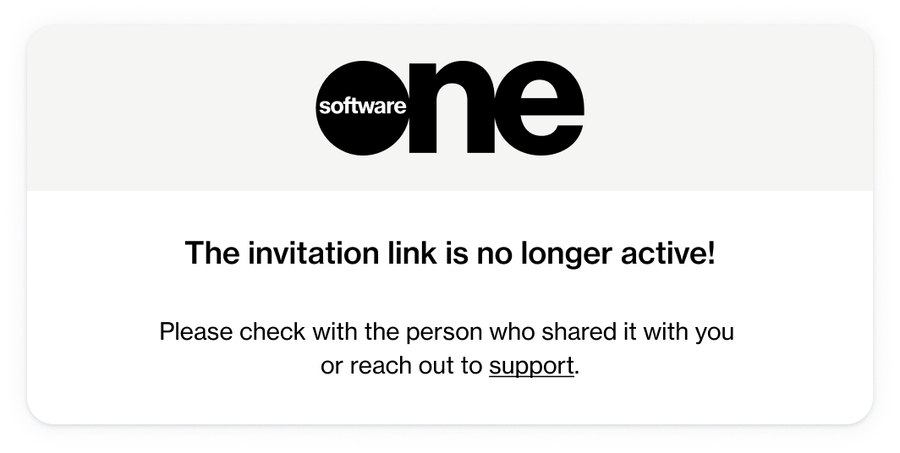
Follow these steps only if the individual's invitation has expired and they see the following message when selecting the invite link:
If the original invitation is still valid, you can resend the original invitation or copy the invite as a link and share it with the person directly.
Follow these steps to send a new invitation email:
On the Users page (Settings > Users), find the required user.
Click the actions icon (•••) and select Send new invitation. A new invitation email is sent to the individual and a confirmation message is displayed.