Loading...
Loading...
Loading...
Loading...
Loading...
Loading...
Loading...
Loading...
Loading...
Loading...
Loading...
Loading...
Loading...
Learn about the Microsoft Cloud Solution Provider (CSP) program.
The Microsoft CSP program is designed to provide businesses with easy access to Microsoft's cloud services, such as Microsoft 365, Dynamics 365, and Azure, through certified partners.
Working with a CSP provider like SoftwareOne offers numerous benefits and ensures a smooth onboarding process. These benefits include:
Tailored Solutions - SoftwareOne can bundle Microsoft cloud services with additional offerings and services, creating customized solutions that meet specific business needs.
Expert Support - Gain access to dedicated support from SoftwareOne's experts, who can help with everything from initial setup to ongoing management and technical issues.
Simplified Billing - Enjoy the convenience of monthly billing and invoicing, making it easier to manage budgets and expenses.
Strategic Guidance - SoftwareOne provides strategic guidance to help businesses optimize their use of Microsoft cloud services, ensuring they get the most value from their investment.
Scalability and Flexibility - Easily scale services up or down based on business needs, with the flexibility to adapt to changing requirements.
The Marketplace Platform enables you to manage your onboarding process for Microsoft cloud services, from creating a Microsoft organization tenant to accepting the Microsoft Customer Agreement, and more.
You can track your Microsoft subscription purchases and manage the entire subscription lifecycle through the Marketplace Platform.
In the CSP program, various product types (or service types) are available, each with unique benefits and constraints.
Licenses for products such as Office 365 E3 are User Subscription Licenses; you need one license for each user. These products are also known as seat-based offers or license-based services and include all the Office 365, Microsoft 365, Dynamics 365, and Windows 365 products.
When an order for a seat/license-based service is placed, a subscription is created. This is essentially a container that holds the licenses that have been ordered.
A subscription may only contain a single license type (for example, Office 365 E3) associated with a single commitment term (for example, 1 year) and a single billing frequency (for example, annual).
Software Subscriptions are available for Windows Server and SQL Server and for a fixed subscription term of either 1 or 3 years.
They give access to the Azure Hybrid Benefit, which means that you may install the products on-premises or use them to license the products within an Azure virtual machine.
Consider the Server Subscription as the best friend of Azure Reserved Instances since they now offer the most cost-effective way to license predictable Windows and SQL Server workloads in Azure through the CSP program.
Perpetual software licenses are licenses for on-premises Microsoft products that you acquire in perpetuity. In the CSP program, the software is license-only (L-only) and does not include the option to add Software Assurance (SA).
Software licenses available in CSP include desktop tools such as Word, Excel, Project, and Visio; infrastructure servers that include Windows Server, SQL Server, Biztalk Server; and productivity servers that include Exchange, SharePoint, Skype for Business, and Project Server.
The Azure Plan new commerce experience gives CSP providers access to Azure services at pay-as-you-go (PAYG) rates for CSP clients under the Microsoft Customer Agreement. This plan simplifies the purchase experience.
You can have multiple Azure subscriptions in an Azure plan. In this new commerce experience for Azure, Microsoft has aligned to a single global pricing principle enabling CSP providers to offer Azure at the published prices.
You can execute each step of the onboarding process through the Marketplace Platform.
Consultation - SoftwareOne begins with a consultation to understand your business needs and goals.
Setup - SoftwareOne creates a Microsoft organization tenant for your business. This tenant acts as a dedicated instance within Microsoft's cloud, housing all users, resources, and data.
Configuration - SoftwareOne configures the tenant to align with your business requirements, ensuring optimal setup for security, compliance, and performance.
Understanding Terms - SoftwareOne guides you through the Microsoft Customer Agreement, explaining the terms and conditions for using Microsoft’s cloud services.
Agreement Acceptance - SoftwareOne assists you in accepting the agreement, which simplifies the purchasing process and provides clear terms regarding service usage, data privacy, and compliance.
Service Activation - Once the tenant is set up and the agreement is accepted, SoftwareOne provisions the required Microsoft cloud services for your business.
Integration - SoftwareOne integrates these services with your existing systems, ensuring seamless operation and minimal disruption to your business activities.
Customization - SoftwareOne can further customize the services to meet specific needs, such as setting up user roles, permissions, and additional configurations.
Training - SoftwareOne provides training to ensure your team can effectively use the new services.
Continuous Support - SoftwareOne offers ongoing support to address any issues and provide updates, helping your business adapt and grow with the evolving cloud landscape.
Optimization - Regular reviews and optimization services are provided to ensure you continue to get the most out of your Microsoft cloud investment.
For SoftwareOne to provide support to our customers, we require access to your workloads.
Granular delegated admin permissions (GDAP) is a security feature that provides CSP providers with least-privileged access following the Zero Trust cybersecurity protocol. It lets SoftwareOne configure granular and time-bound access to our customers' workloads in production and sandbox environments. This least-privileged access needs to be explicitly granted to SoftwareOne by our clients.
With GDAP, SoftwareOne can provide services to clients who might be uncomfortable with the high levels of partner access. GDAP also helps customers who have regulatory requirements to provide only the least-privileged access to partners.
New Commerce Experience (NCE) is a specific update within the CSP program that introduces changes to the pricing, licensing, and billing of Microsoft’s cloud services.
Overall, the NCE is a more flexible and predictable option for clients looking for a longer-term commitment to Microsoft cloud services.
NCE’s primary objectives are to simplify transactions, enhance customer purchasing experiences, and offer flexible pricing options. It aims to provide greater transparency and predictability in costs. This enables organizations to scale their services seamlessly based on their evolving needs.
The move to NCE for seat-based offers took place in 2022 following the move to NCE for Azure (Azure Plan), Azure Reserved Instances, and Server-based Software Subscriptions in October 2019 and the launch of Perpetual Software in CSP in 2020/21.
Starting 1 March 2024, the new commerce system launched education and non-profit offers.
Existing Commercial legacy seat-based offers can still be managed (quantity changes) and will continue to renew as legacy offers (until further notice).
When a subscription is created, it can have several states throughout its lifecycle.
NCE subscriptions can be in one of these states: Active, Cancelled, Suspended, Expired, Disabled, or Deleted.
Legacy subscriptions can be in one of these states: Active, Suspended, or Deleted.
The following table shows how the Microsoft subscription states are represented in the Marketplace Platform:
For further information on CSP, contact your account team.
Buy more licenses for your Microsoft 365 subscription.
If you already have an active agreement and want to buy more licenses for your 365 subscription under the same agreement, you can place a change order.
Before starting this tutorial, make sure that the agreement you want to use is in the Active state.
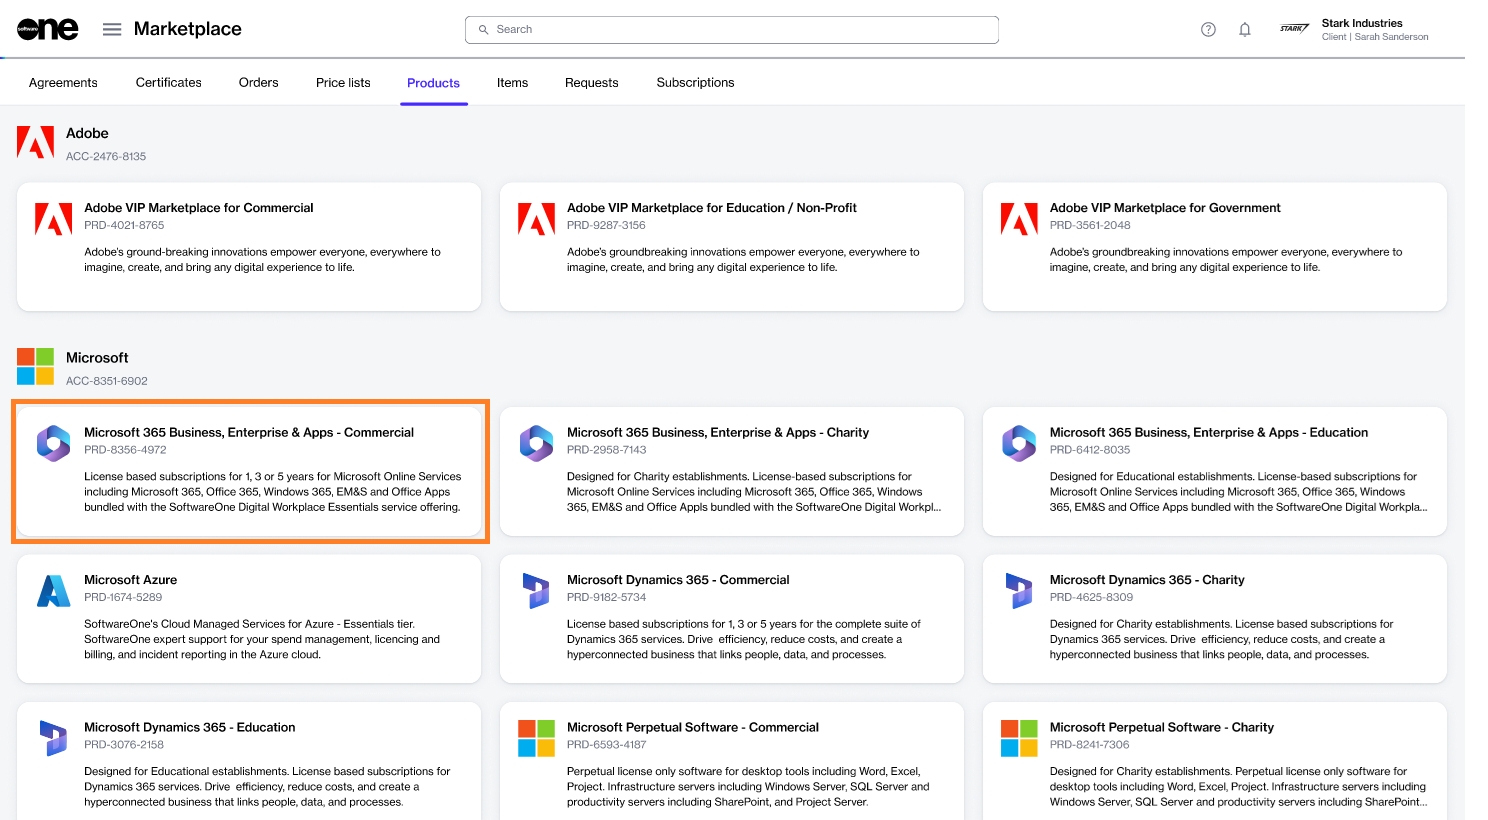
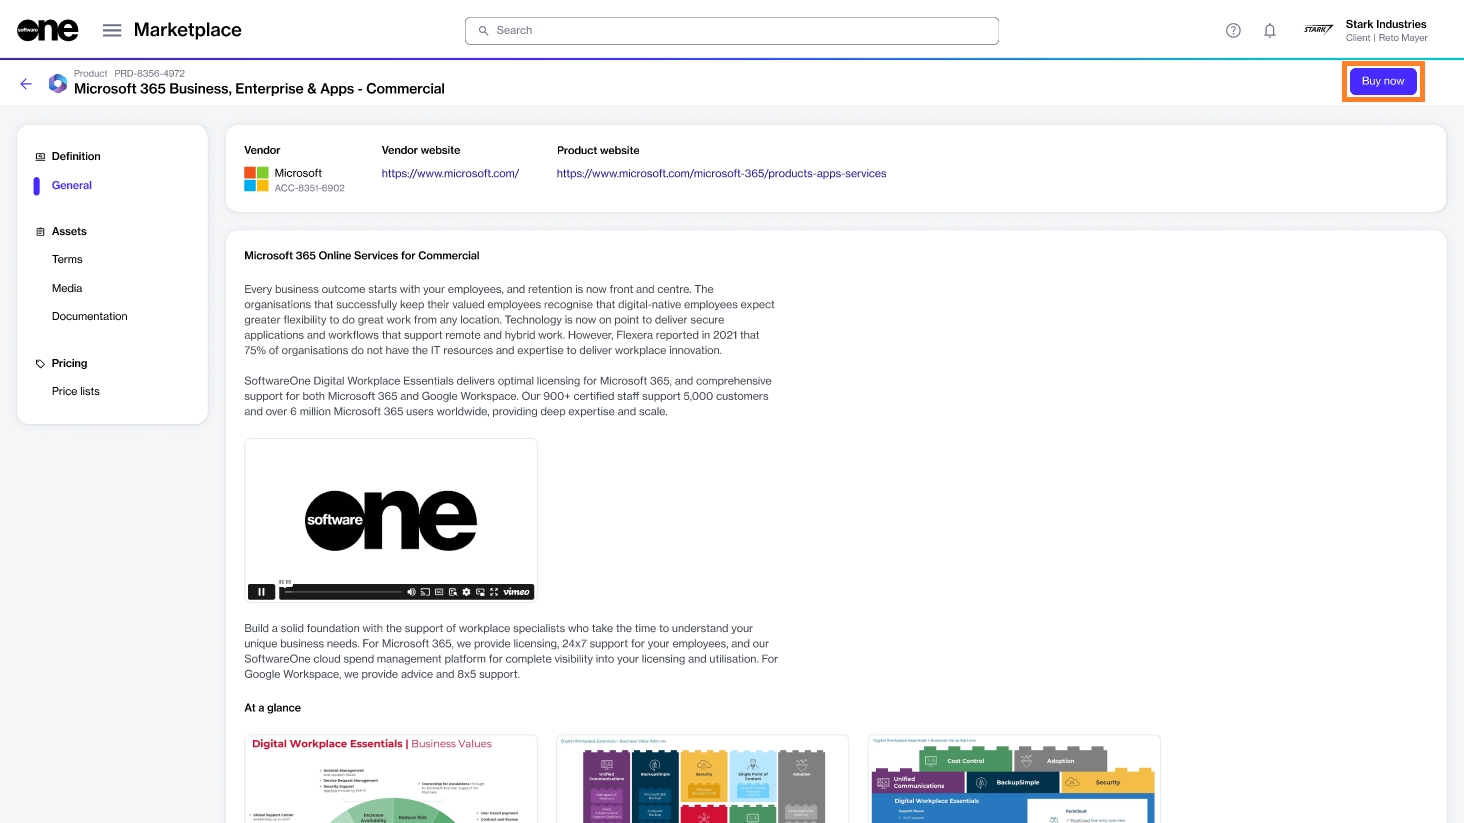
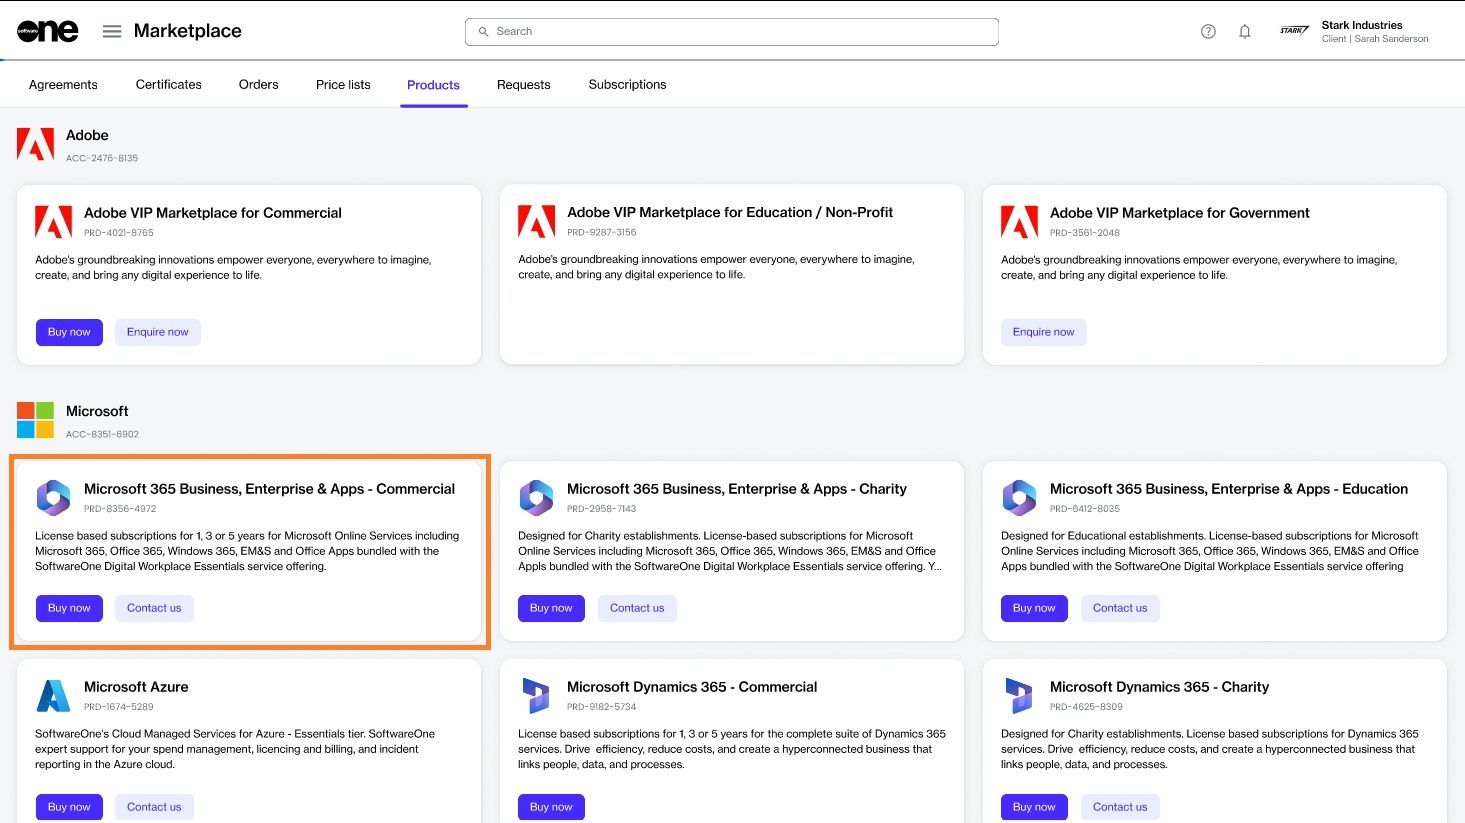
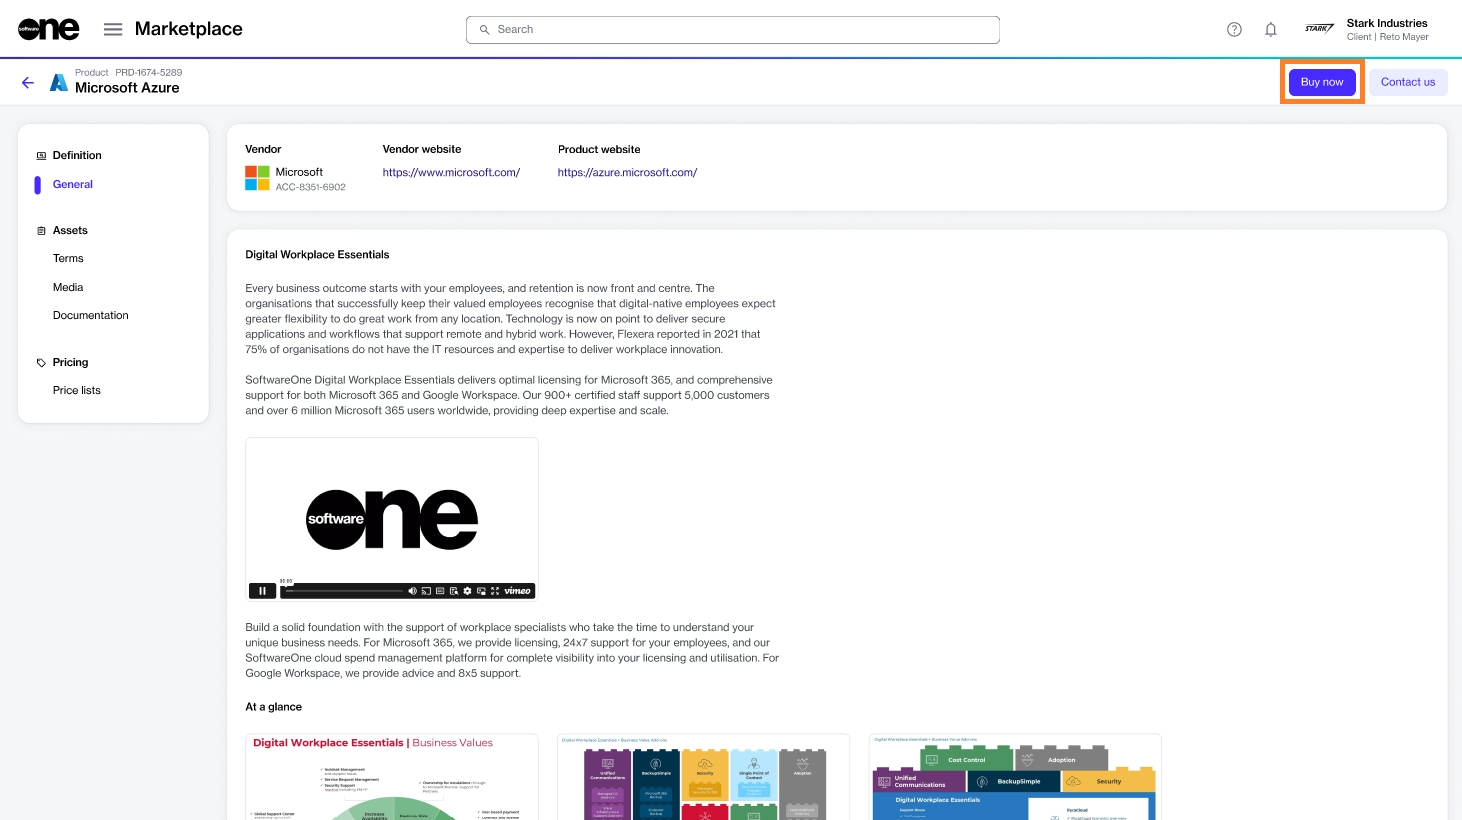
Navigate to the Products page (Marketplace > Products) and select Microsoft 365 Business, Enterprise & Apps - Commercial.
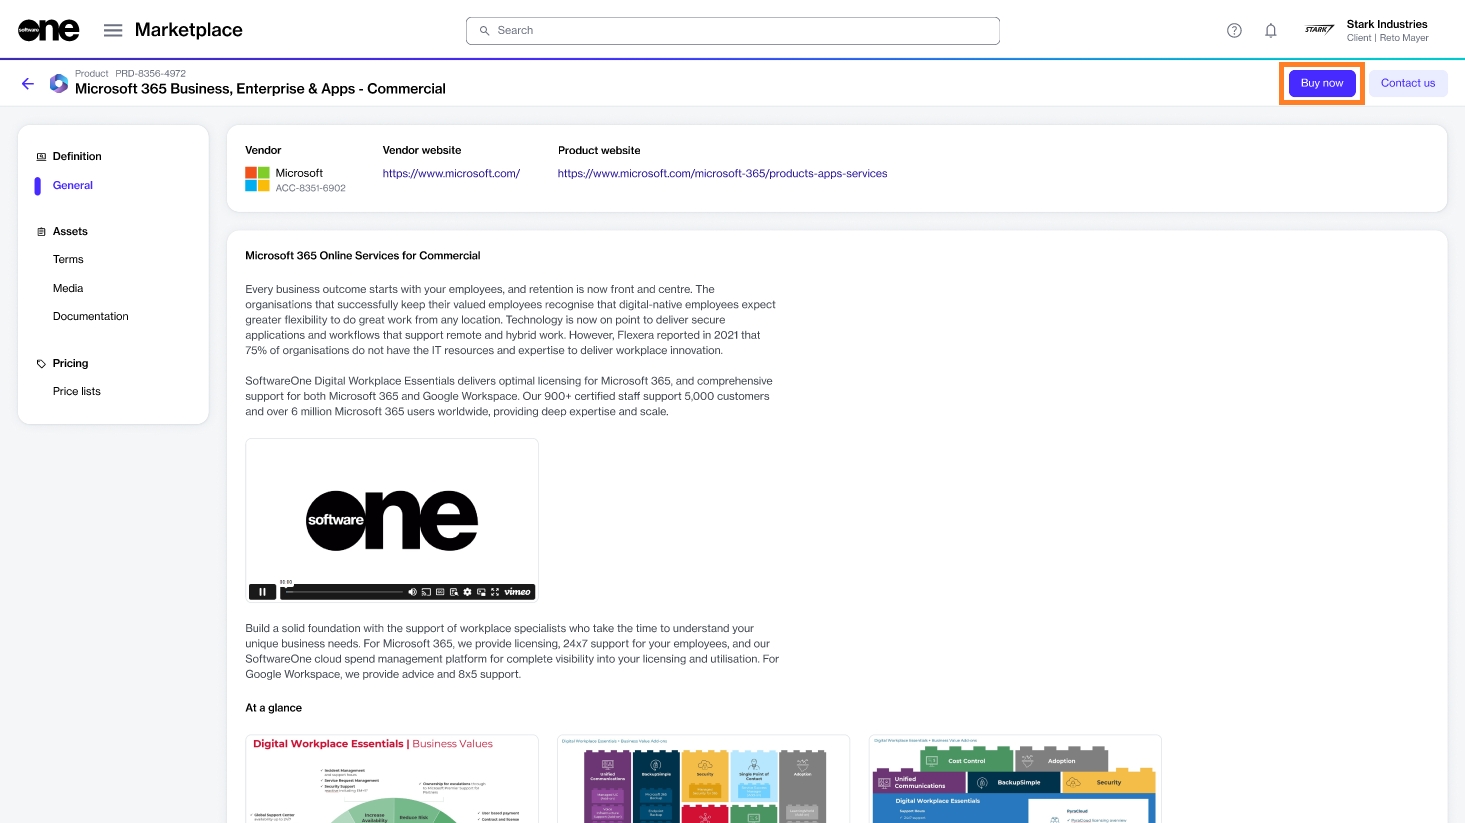
Click Buy now on the details page.
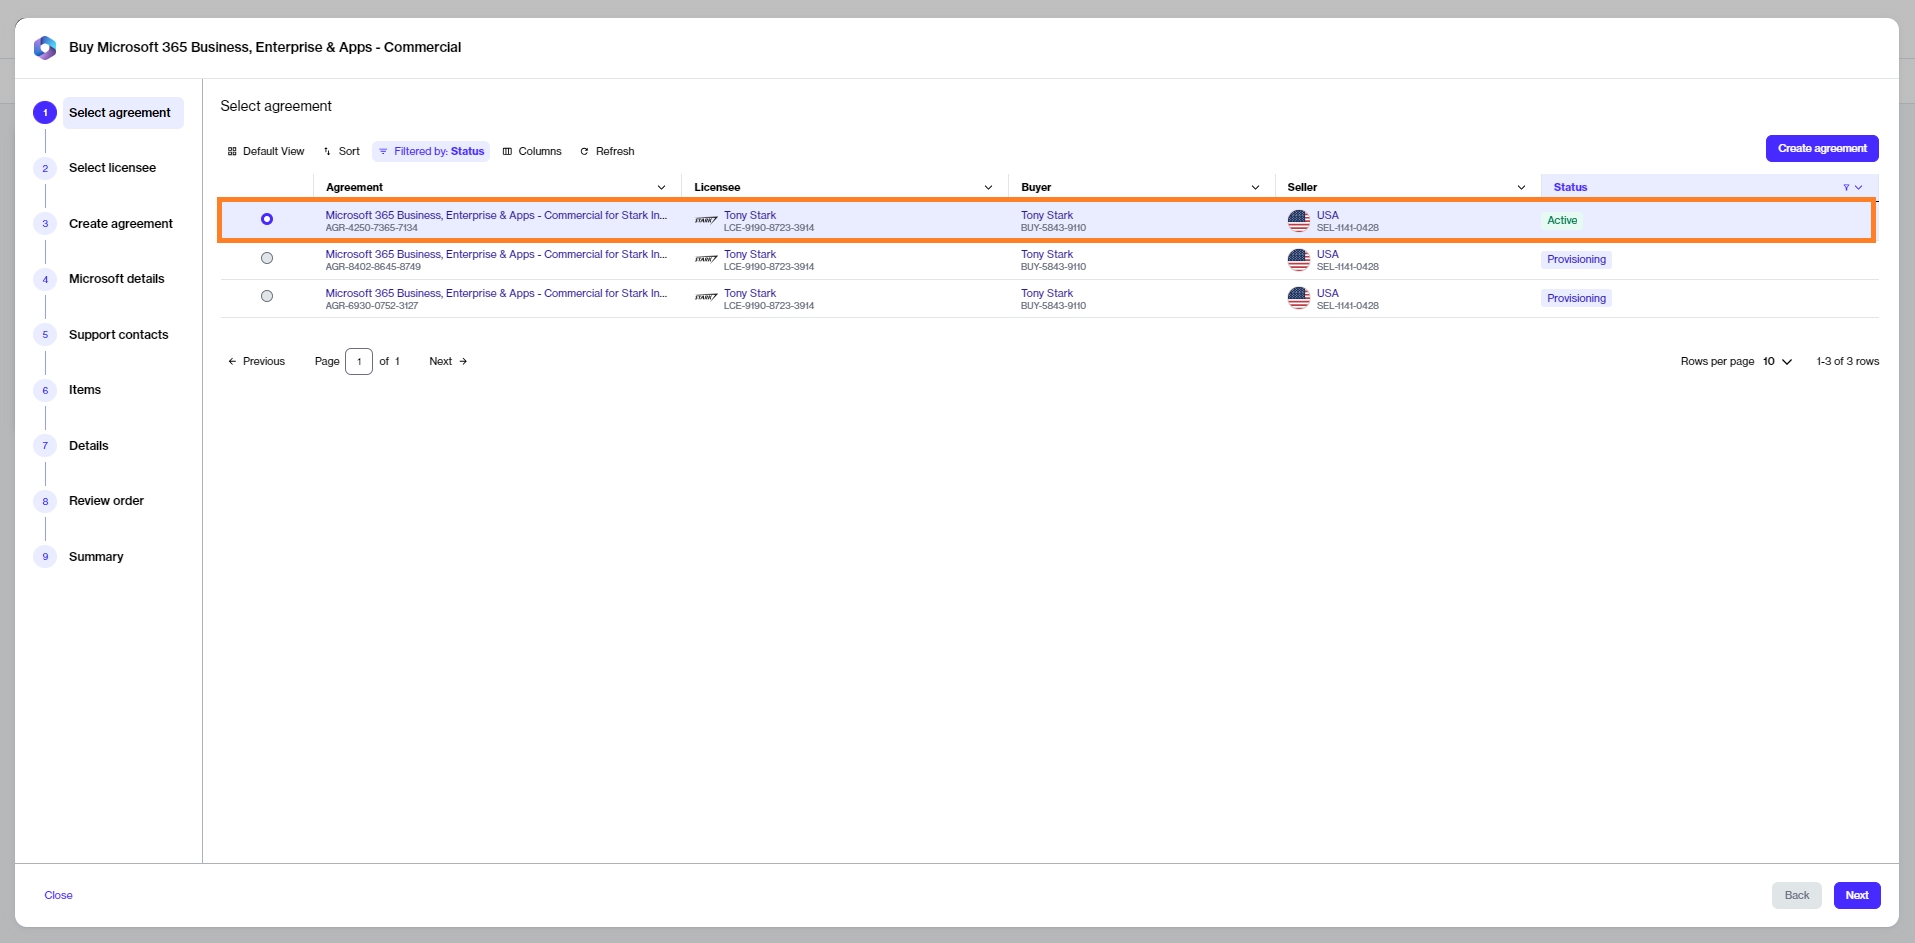
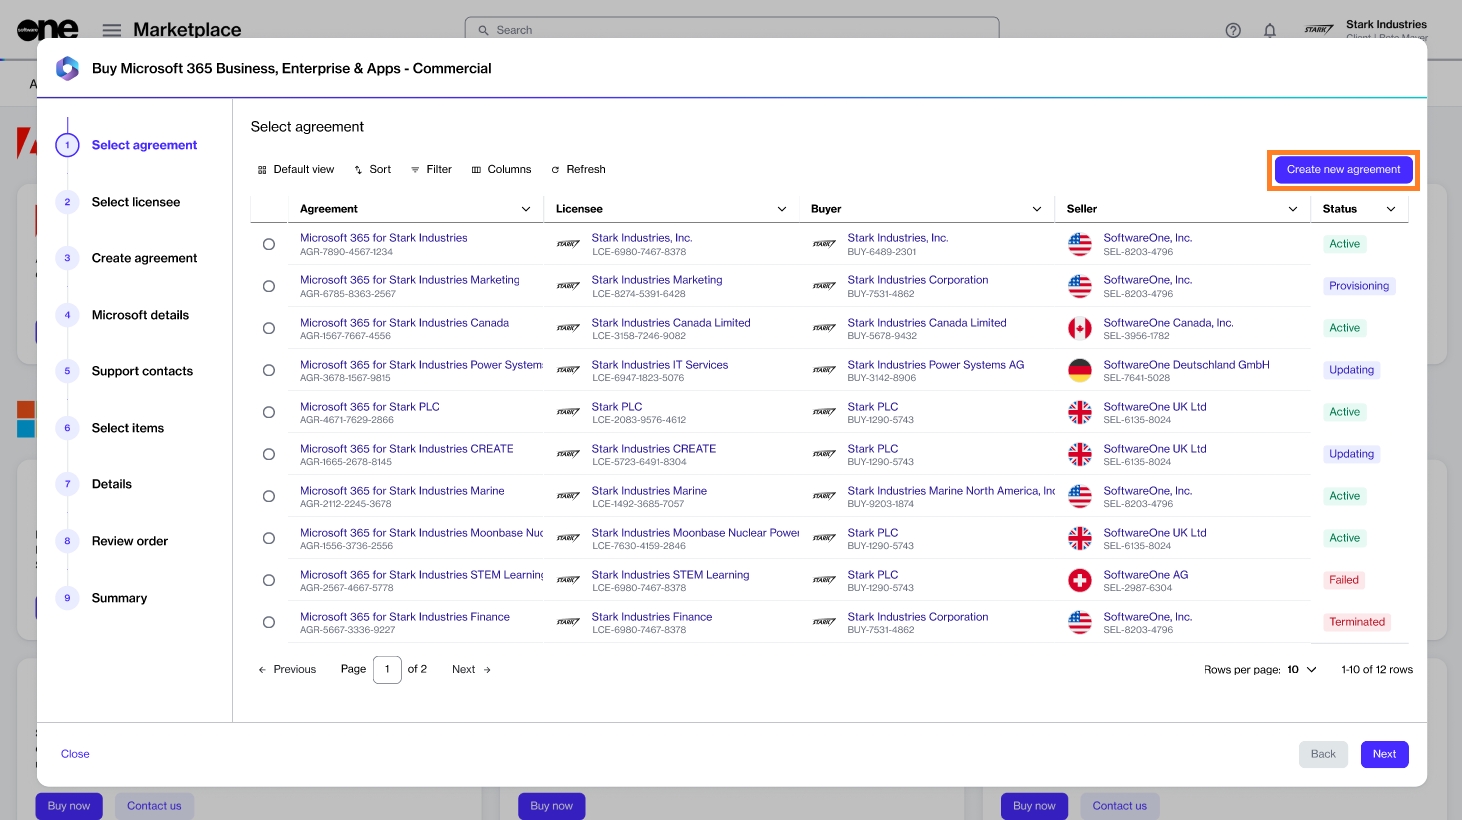
Select an active agreement from the list of your agreements and click Next.
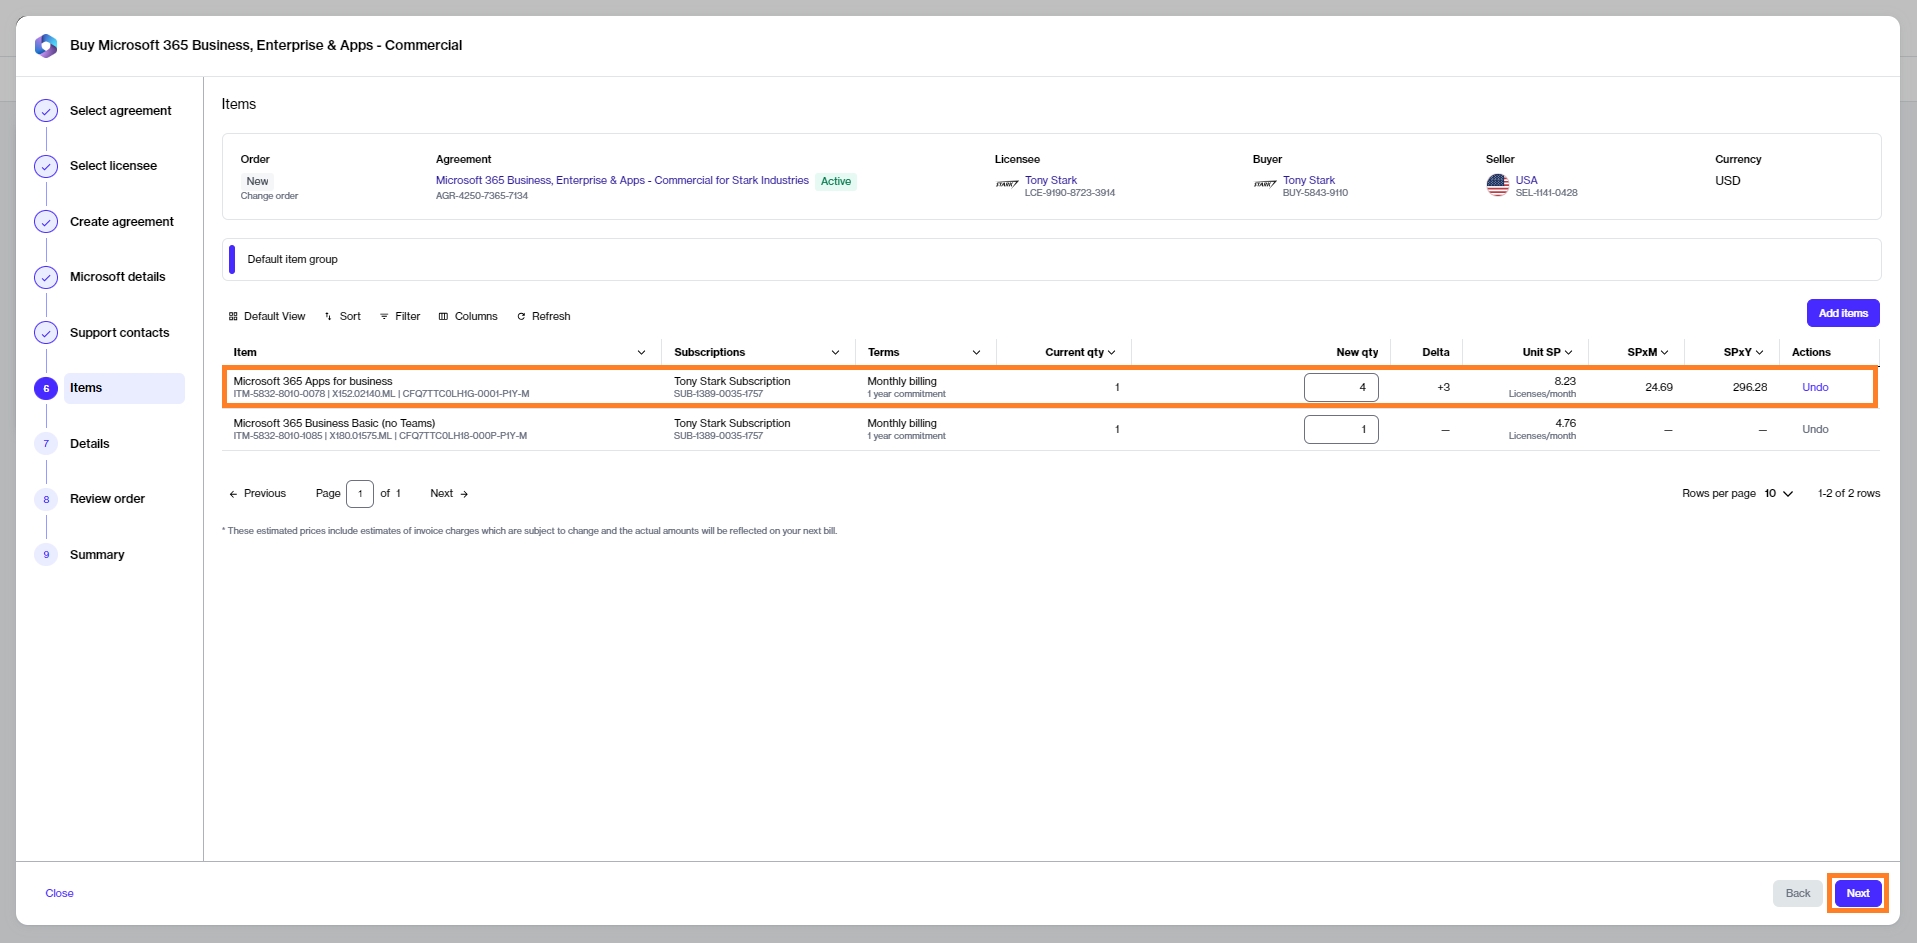
You'll be directed to the Items section of the purchase wizard.
To change the number of licenses, under New qty, enter the total number of licenses you want. For example, if you have 1 license and you want to add 3 more, enter the new quantity as 4.
Click Next to continue.
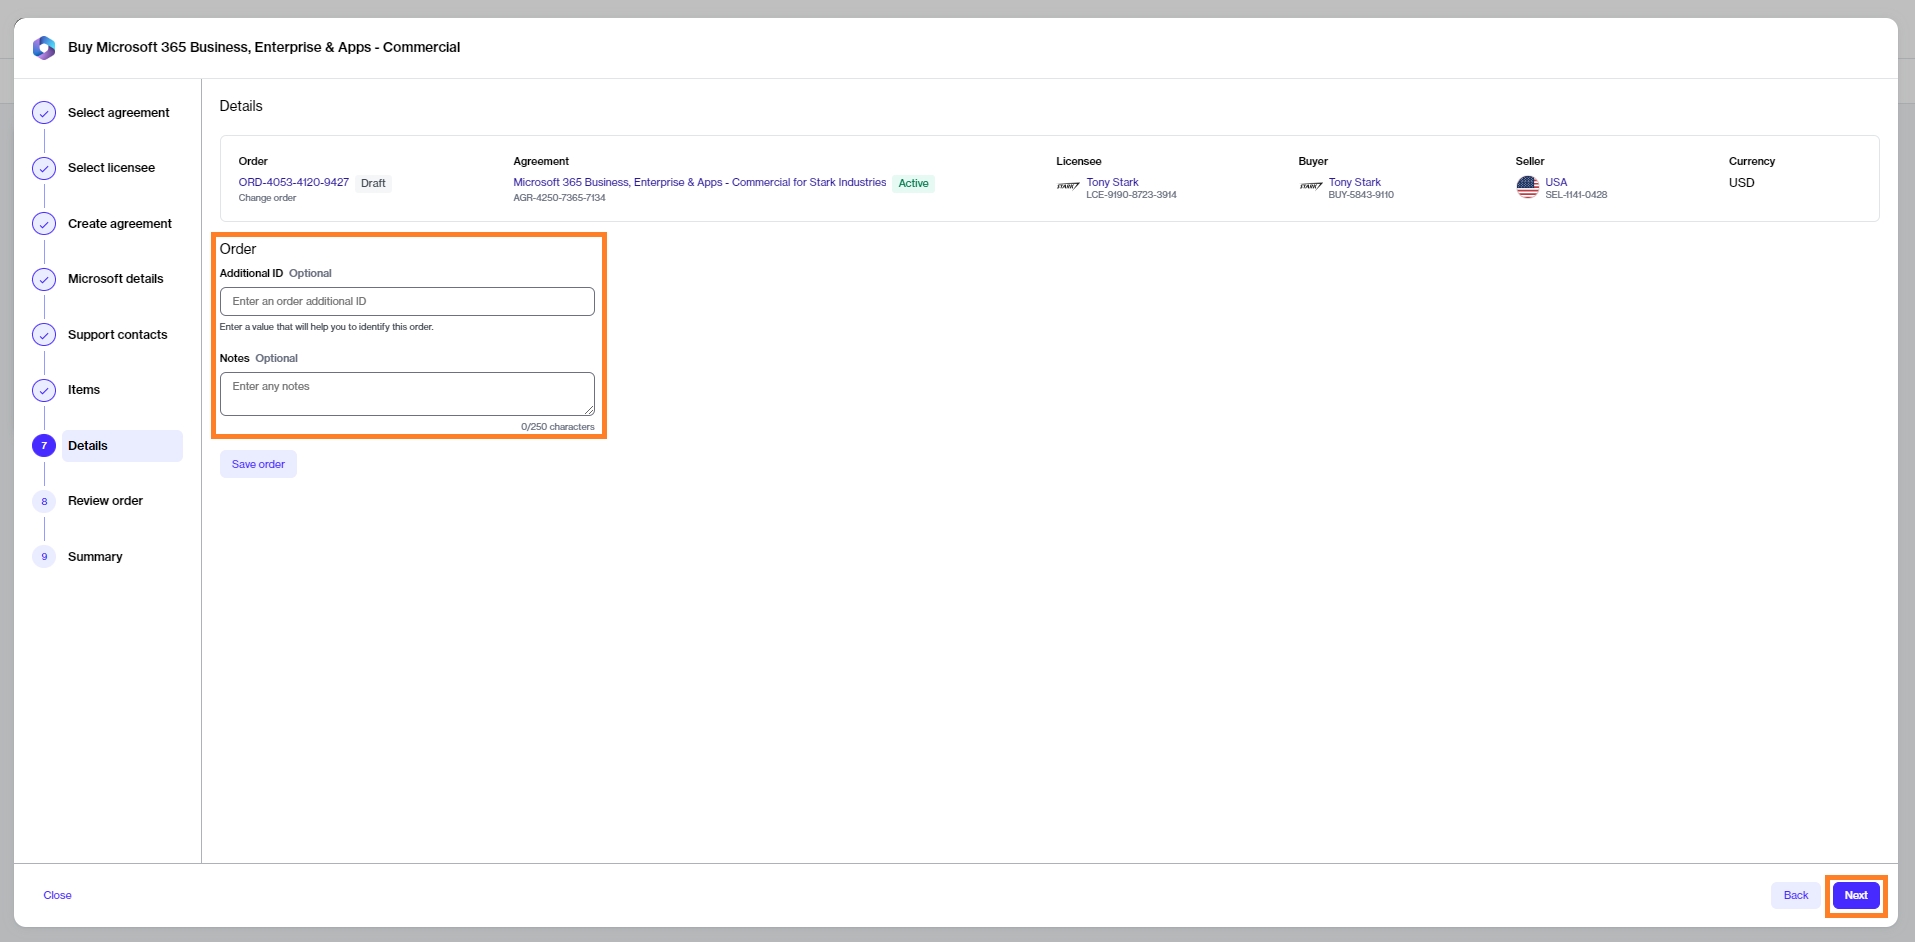
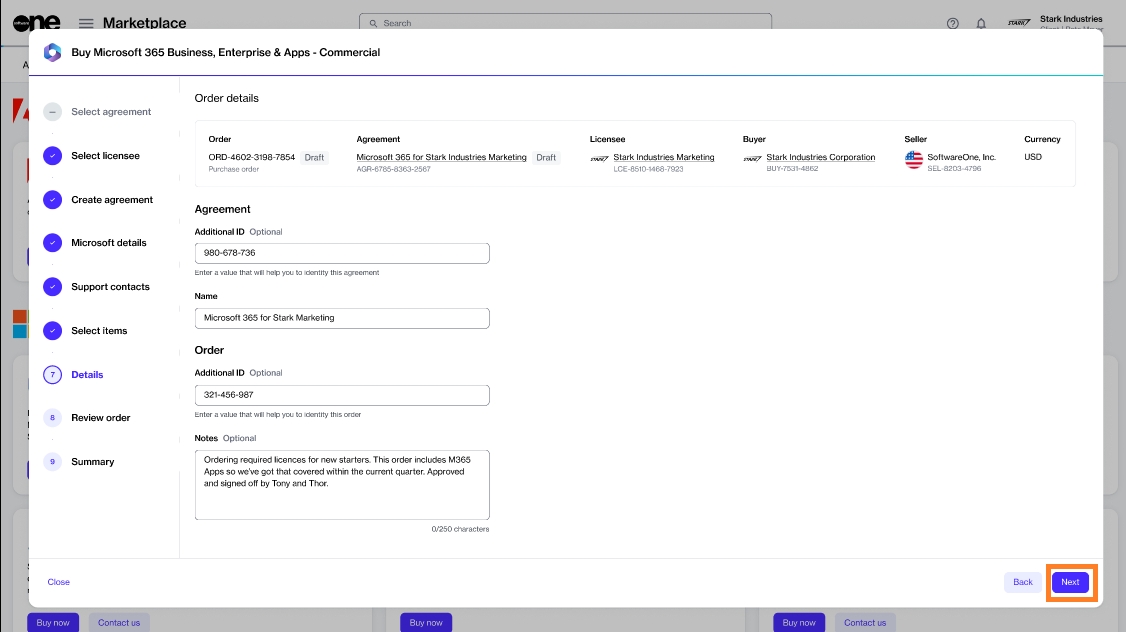
Enter additional details and click Next. It's optional to provide these details.
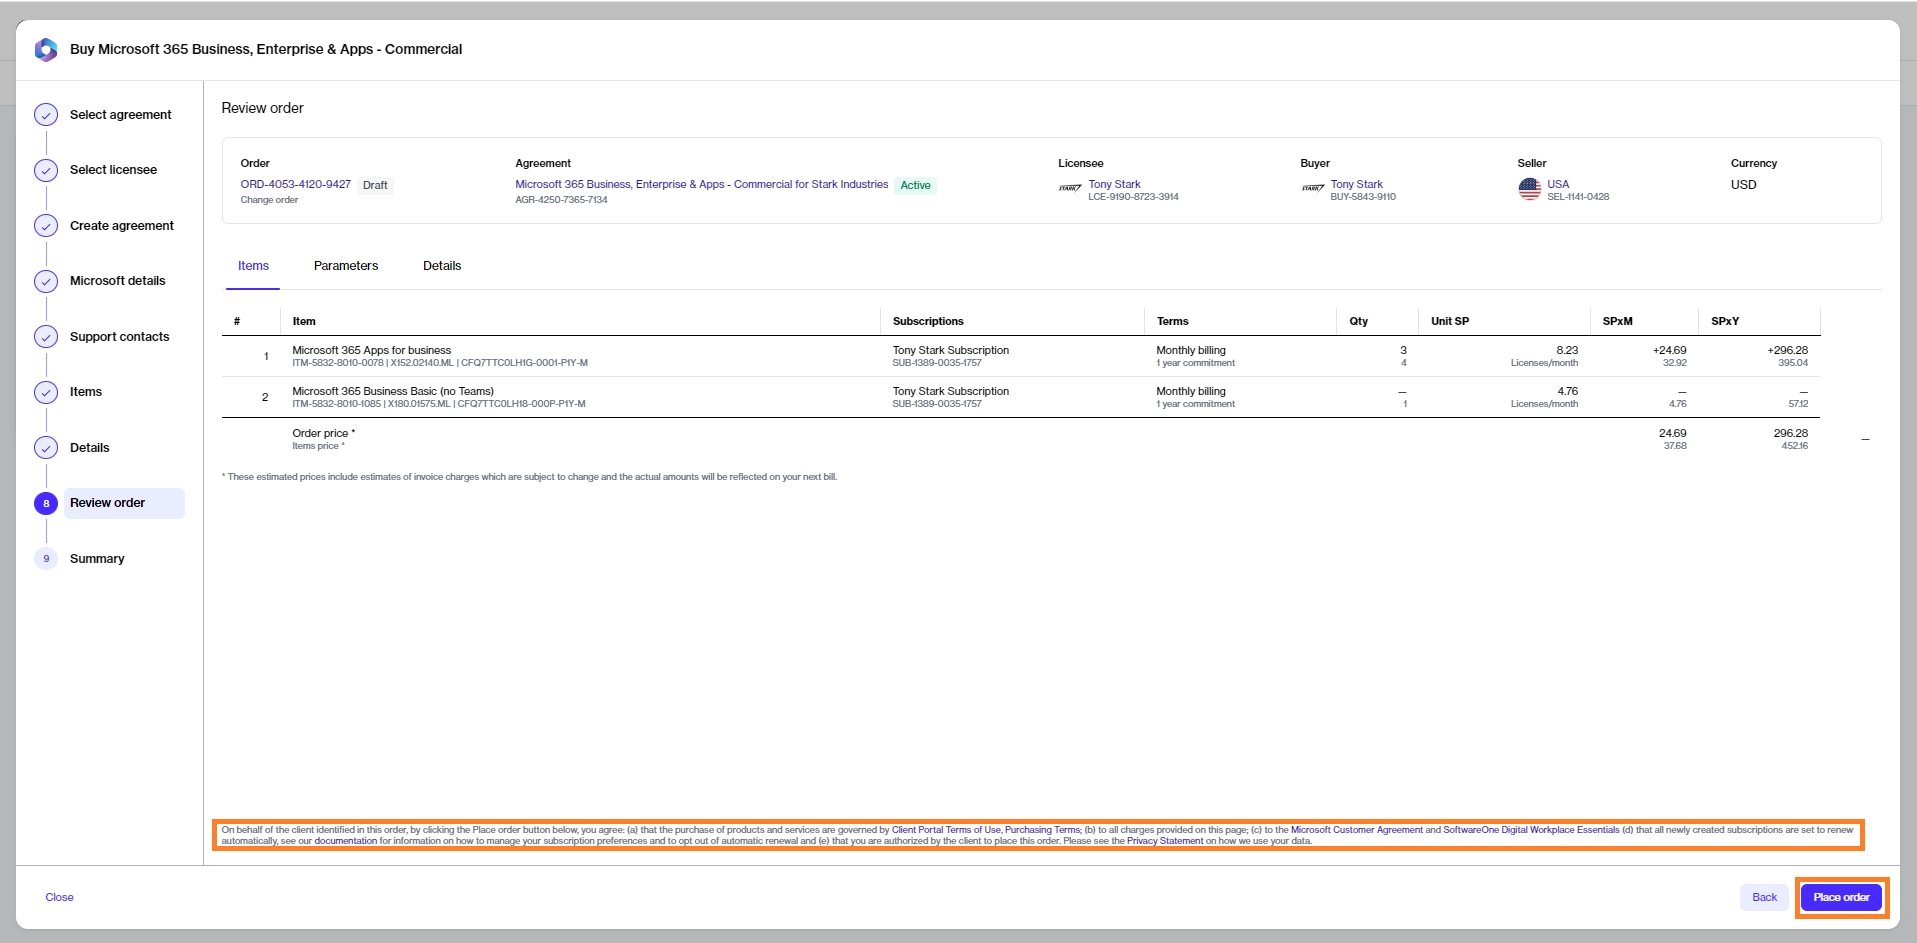
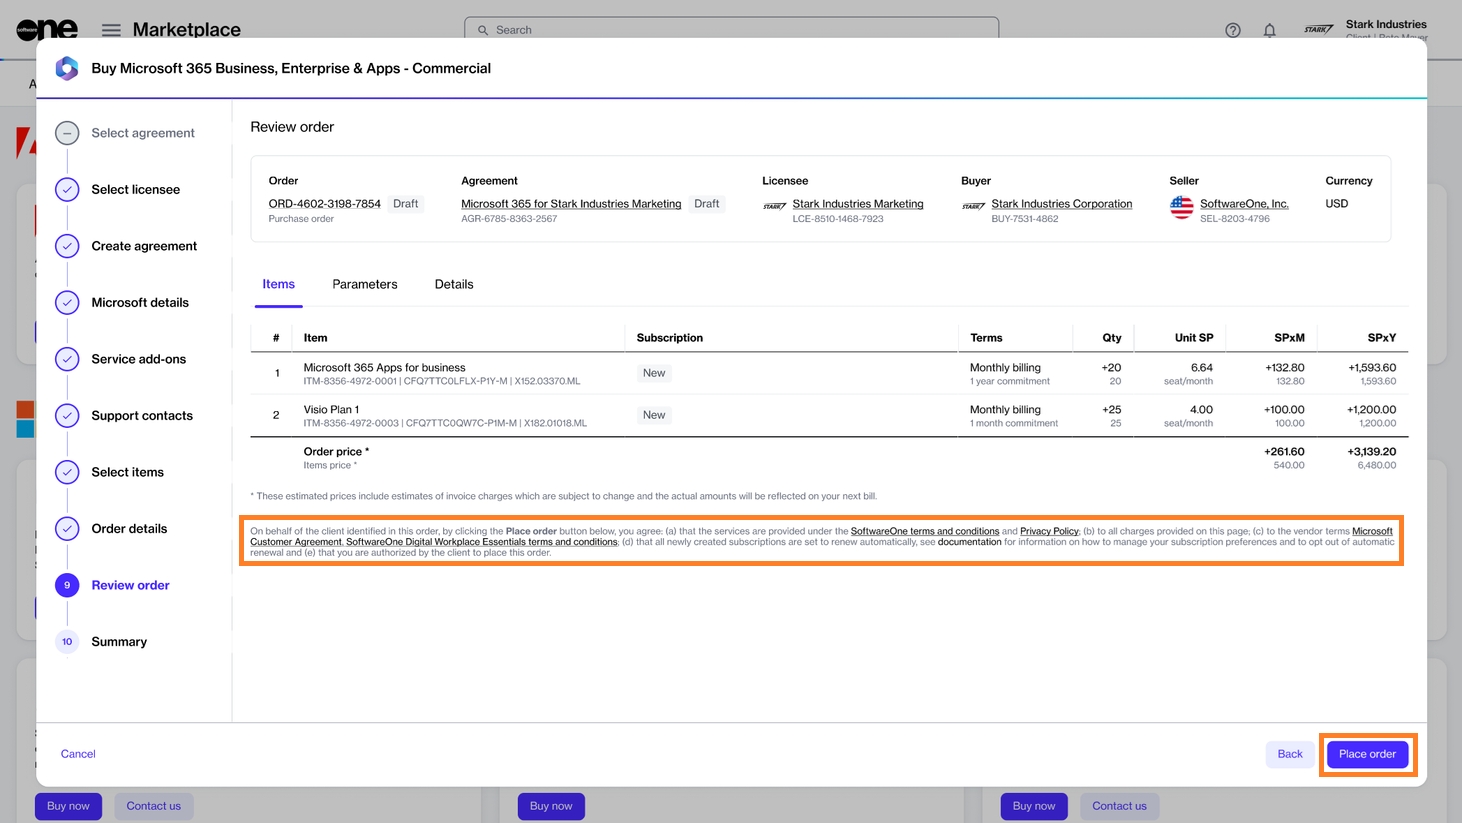
Review your order details and click Place order to complete the purchase.
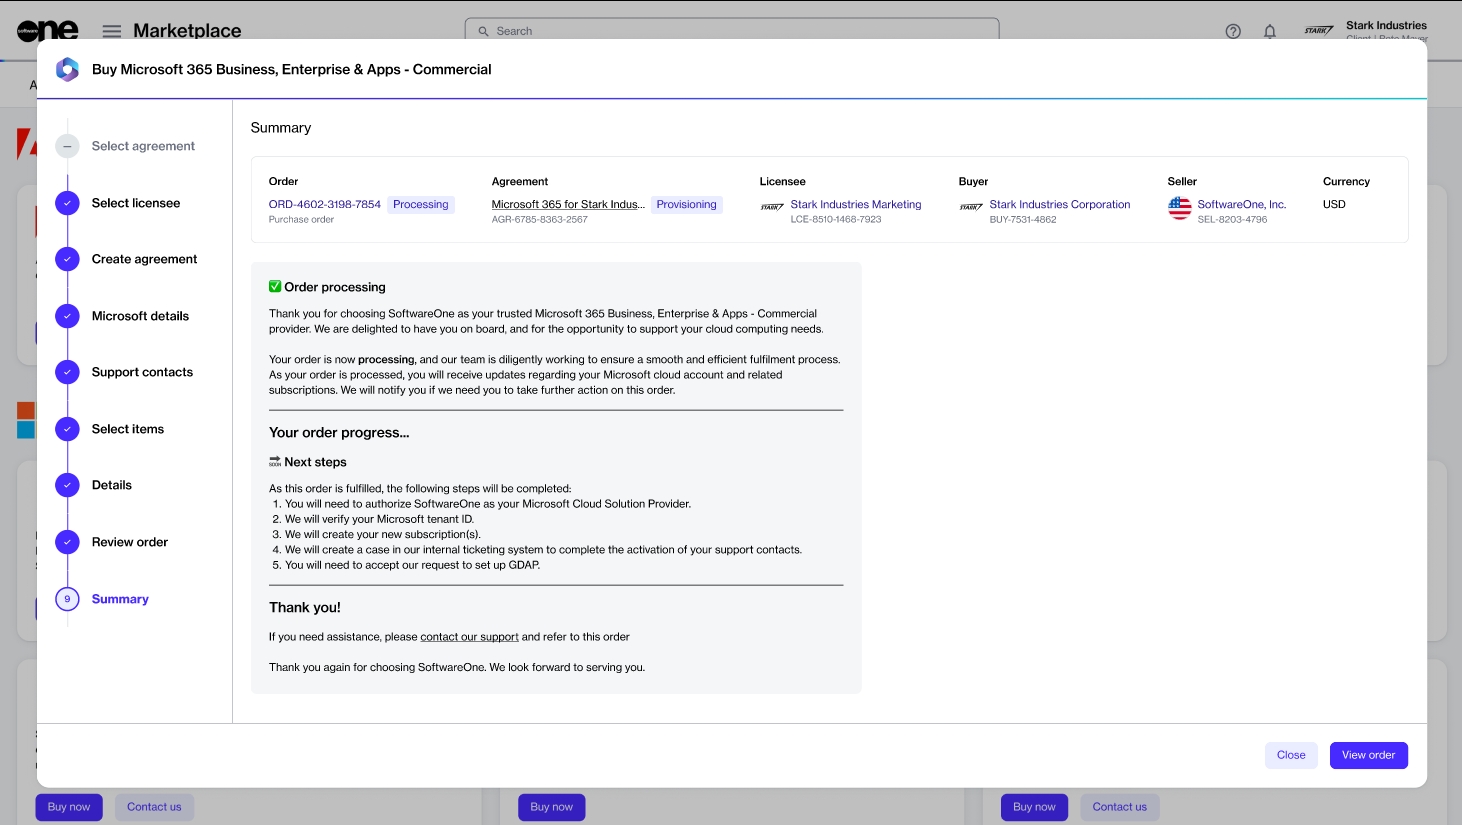
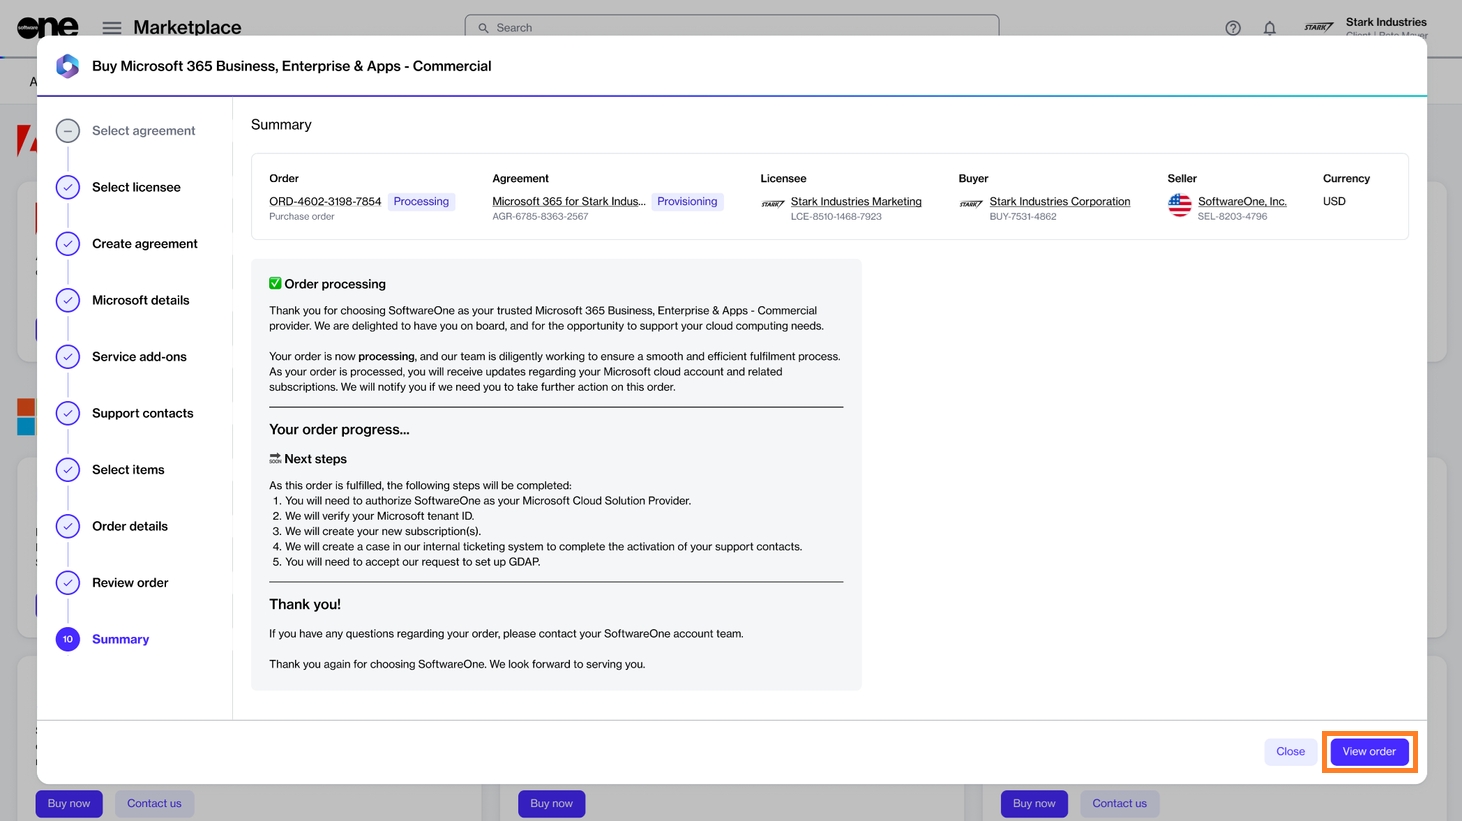
Review your order summary and the latest status message.
Click View Order to navigate to the order details page. Otherwise, click Close to close the Summary page.
Order a Microsoft 365 subscription for a new Microsoft tenant.
This tutorial shows how to order a Microsoft 365 subscription by setting up a new agreement and a new Microsoft tenant.
Before starting this tutorial, make sure you have the following:
A licensee in the active state or permission to create a new licensee if you don't want to use an existing licensee. You'll need to select a licensee when setting up the new agreement.
Your company details, like the company name, registration ID, and address. These details will be required when creating your new Microsoft tenant.
The contact details of the person who will manage your account.
On the Products page (Marketplace > Products), select Microsoft 365 Business, Enterprise & Apps - Commercial.
Click Buy now in the upper right on the details page. The purchase wizard starts and the Select agreement section of the wizard is displayed.
Click Create agreement to set up your new agreement.
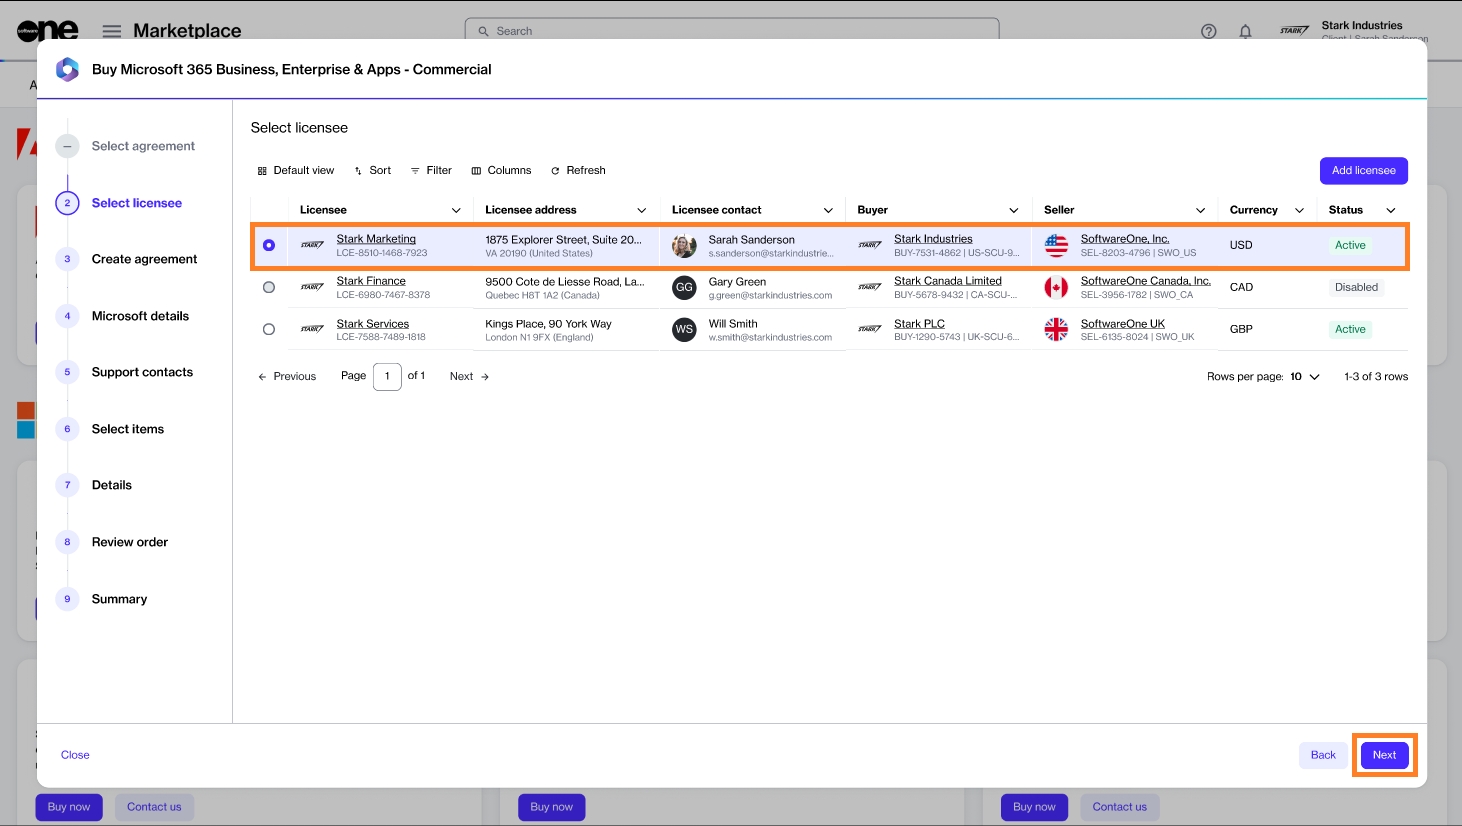
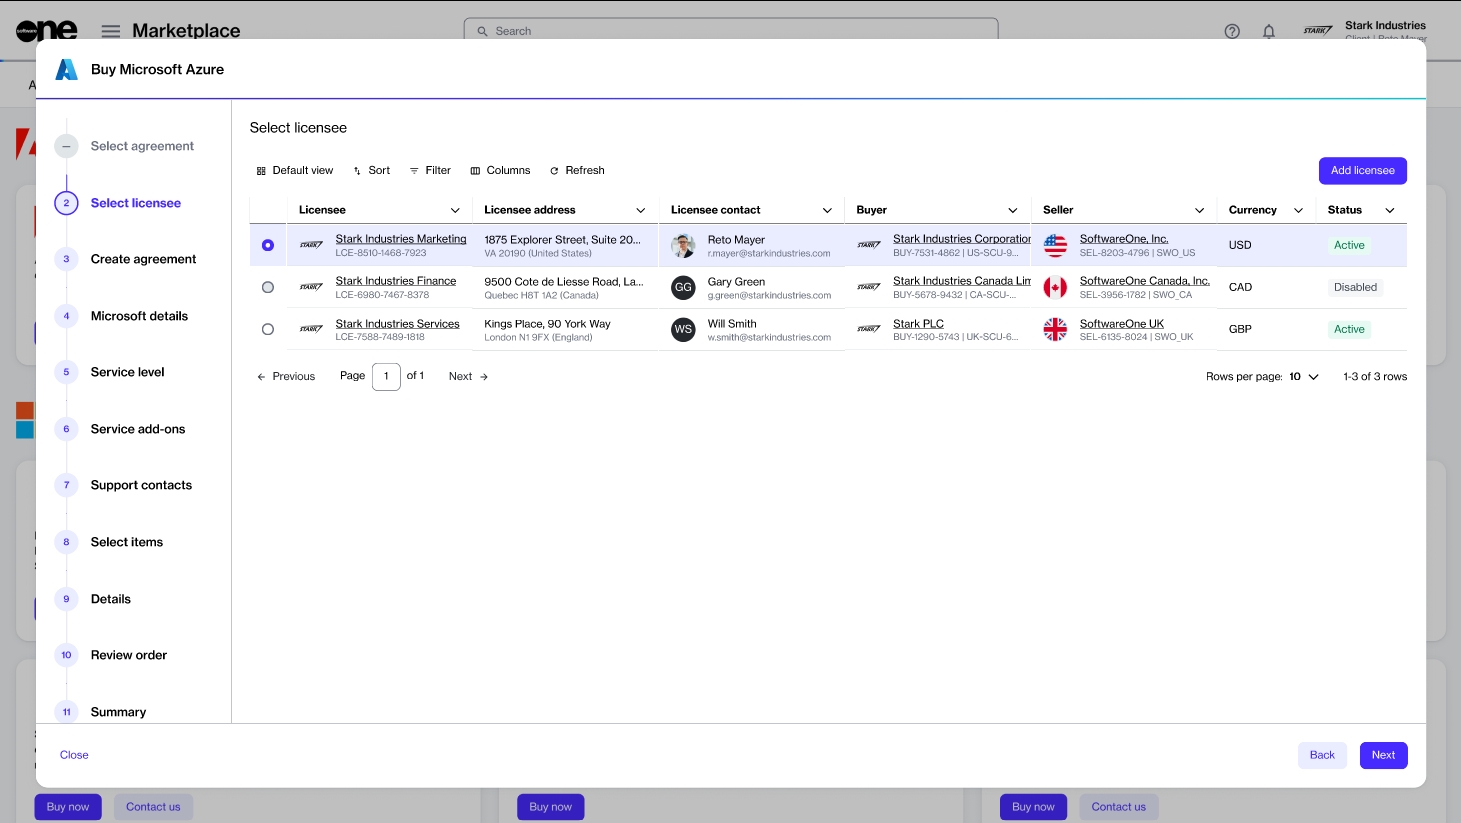
Choose the licensee you want to use for this agreement. In this tutorial, we'll select an existing licensee, as shown in the following image. However, you can add a new licensee by clicking Add licensee and following the instructions in Create Licensees.
Click Next.
Select Create new cloud account to create a new Microsoft tenant and click Next.
(Optional) Click Access tenant name availability tool to check if the tenant name you want to provide is available.
After checking the availability, enter the name you want to use on the onmicrosoft.com domain. Make sure that the name doesn't include punctuation marks or spaces.
Click Next to continue. The platform validates the details you entered.
Provide the following information and click Next:
Company name.
Company registration ID or tax number.
Company address, including city and zip/postal code.
Contact details of the person who will manage your account.
These fields are enabled only after the platform validates your Microsoft tenant.
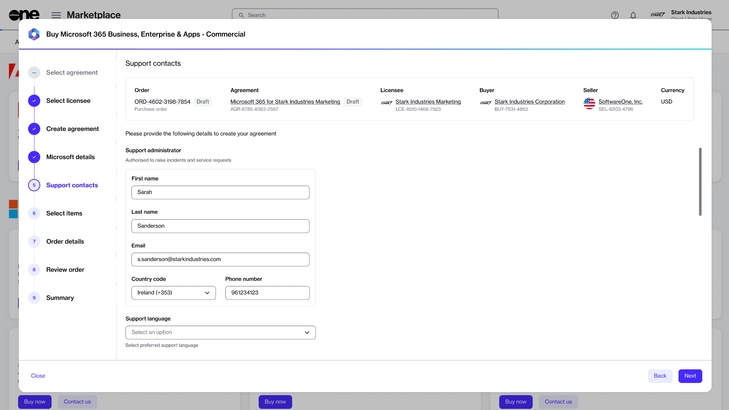
Enter the contact details of your support administrator and choose your preferred support language.
Click Next.
Choose the items you want to order and then click Add items. You can select multiple items. Once the items are added, the Select items section is displayed.
Review and adjust the license quantity as required and click Next to continue.
Add the additional IDs and notes associated with this purchase, and click Next.
Review the details of your order. Make sure to read the terms and conditions associated with this purchase, including the privacy statement. By placing the order, you accept all terms.
Click Place order to complete your purchase.
View your order summary and the latest status message. Click View Order to navigate to the order details page. Otherwise, click Close to close the Summary page.
After your order is submitted for processing, we'll confirm your Microsoft tenant and create your new subscription.
Order a Microsoft 365 subscription for your existing Microsoft tenant.
If you already have a Microsoft account and want to order a Microsoft 365 subscription using the same account, you can do so through the Marketplace Platform.
This tutorial shows how to order a Microsoft 365 subscription by setting up a new agreement and connecting your existing Microsoft tenant.
Before starting this tutorial, make sure you have the following:
Your Microsoft tenant name.
A Marketplace licensee in the active state or permission to create a new licensee (if you don't want to use an existing licensee). You'll need to select the licensee when you are creating the agreement.
Navigate to the Products page (Marketplace > Products) and select Microsoft 365 Business, Enterprise & Apps - Commercial.
Click Buy now on the details page.
The purchase wizard starts and the Select agreement section displays.
Click Create new agreement to set up your new agreement.
Choose the licensee you want to use. In this tutorial, we'll select an existing licensee, as shown in the following image. However, you can add a new licensee by clicking Add licensee and following the instructions in Create Licensees.
Click Next.
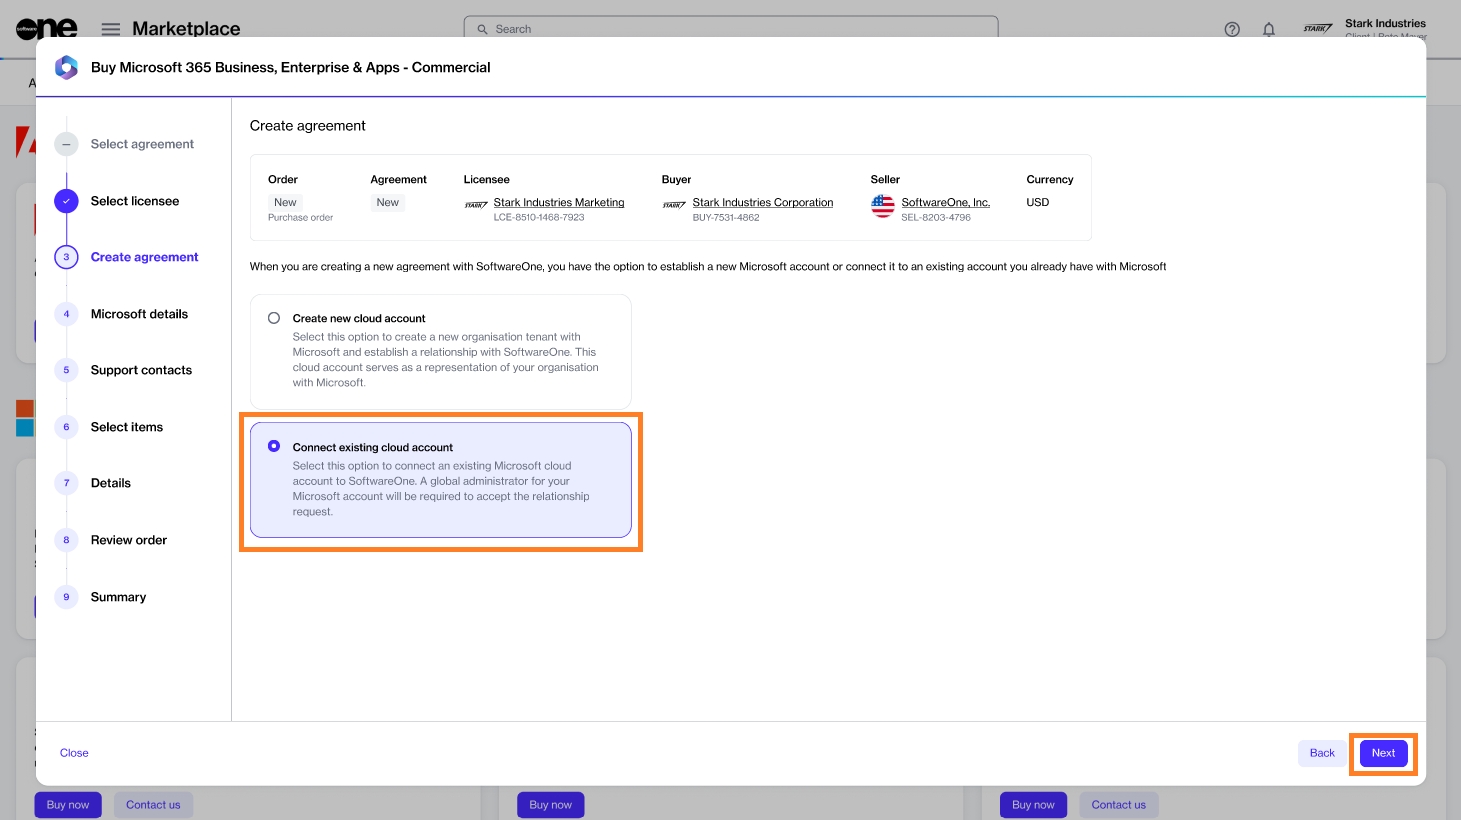
Select Connect existing cloud account and click Next.
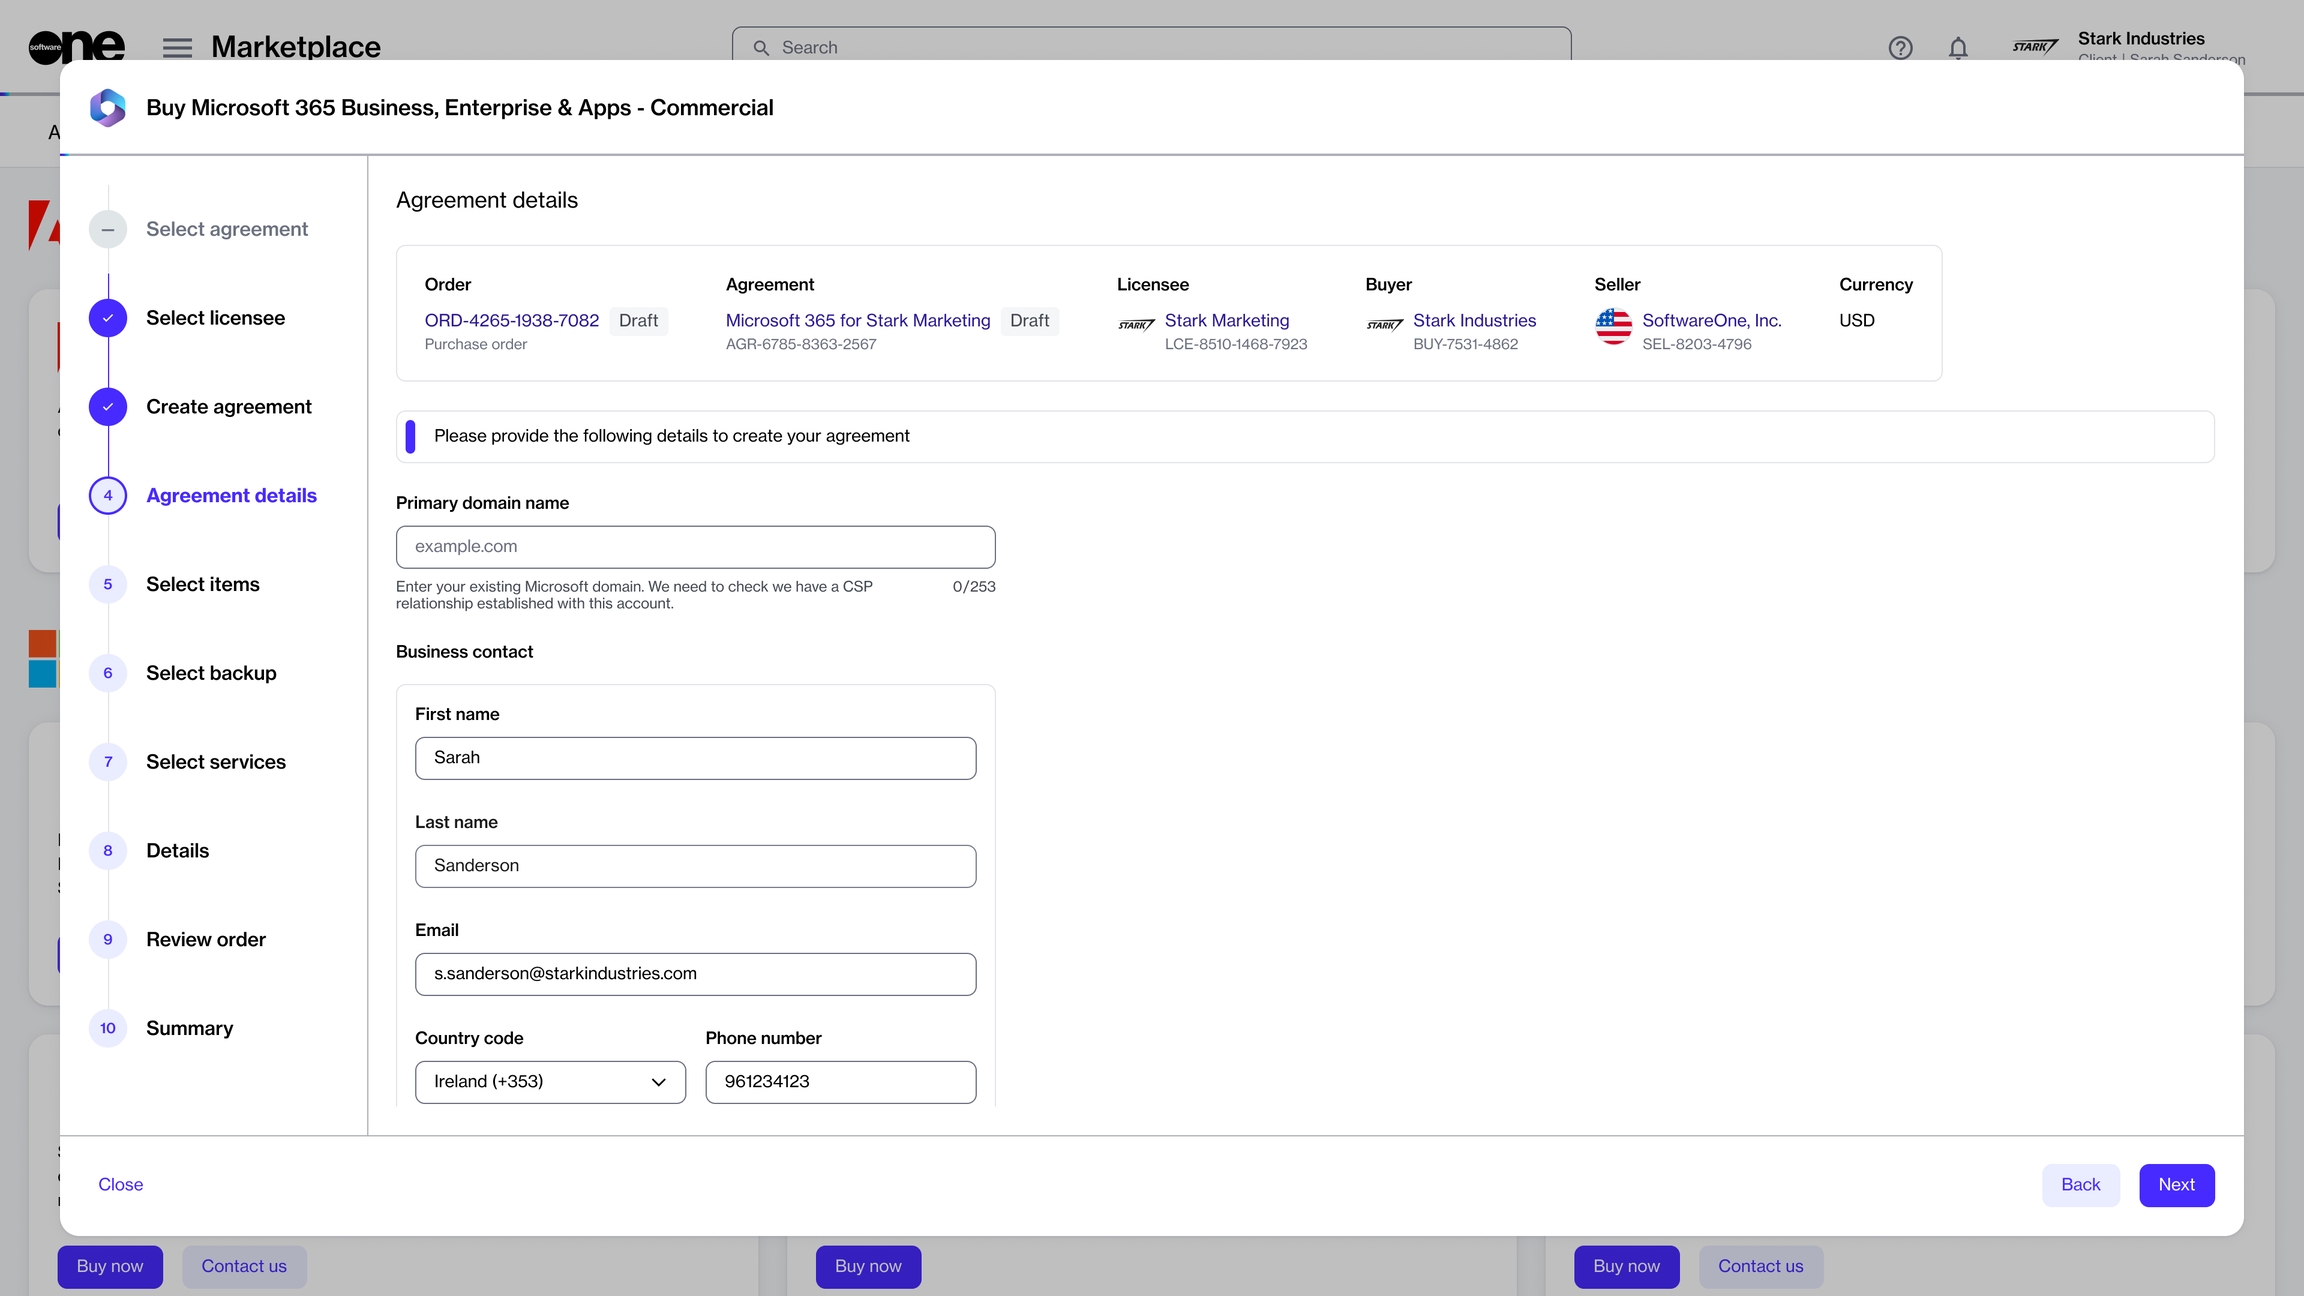
Enter your existing Microsoft domain and the details of your contact person who will receive updates about this order. Click Next.
Enter the contact you want to use for support and your preferred support language. The contact details are populated from the Licensee information, but you can change the details if required.
Click Next.
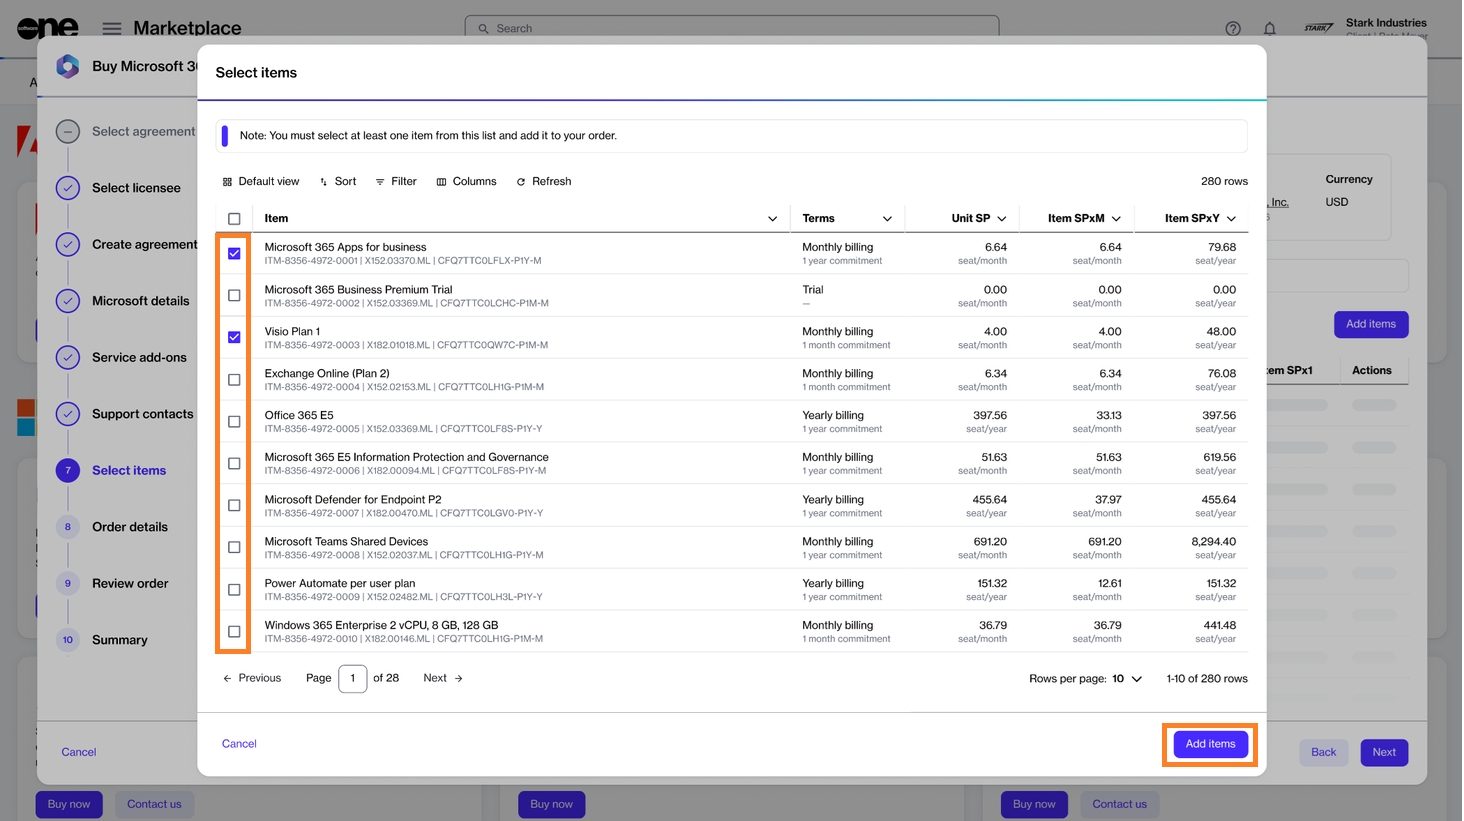
Choose the required items and click Add items to add those items to your order. You can select multiple items as shown in the following image.
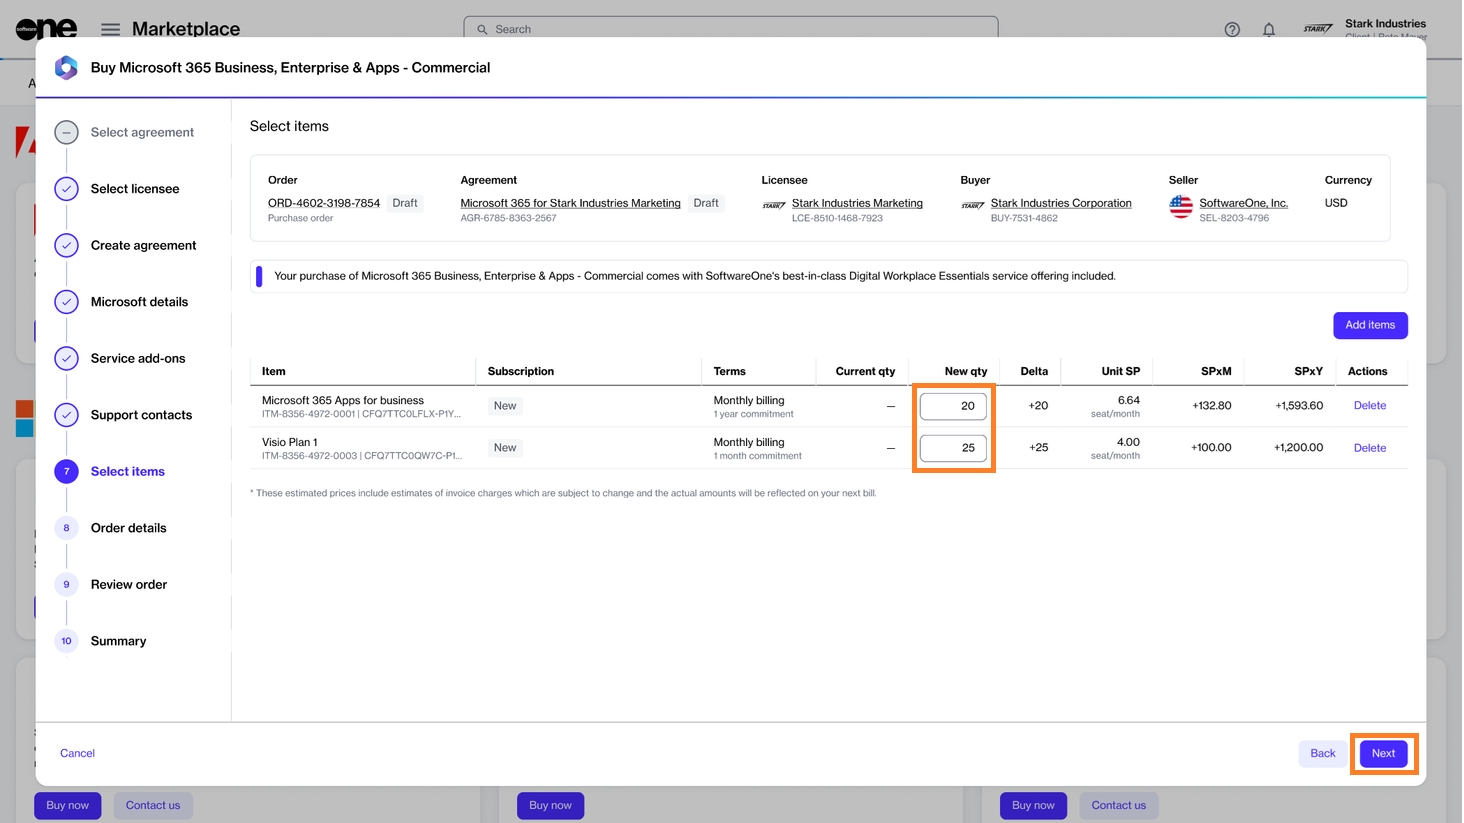
Update the quantity as needed and then click Next.
(Optional) Add your order and agreement details as necessary so you can identify them easily.
Click Next.
Review the details of your order and make sure to read all terms and conditions, including the privacy statement. By placing the order, you accept all terms.
Click Place order to complete your purchase.
Review your order summary and the latest status message.
Click View Order to navigate to the order details page. Otherwise, click Close to close the Summary page.
After your order is submitted for processing, we'll create your new subscription under your existing tenant.
Order additional Microsoft Azure subscriptions using an existing agreement.
If you already have an active agreement and want to order additional Azure subscriptions under the same agreement, you can place a change order.
Before starting this tutorial, make sure that the agreement you want to use is in the Active state.
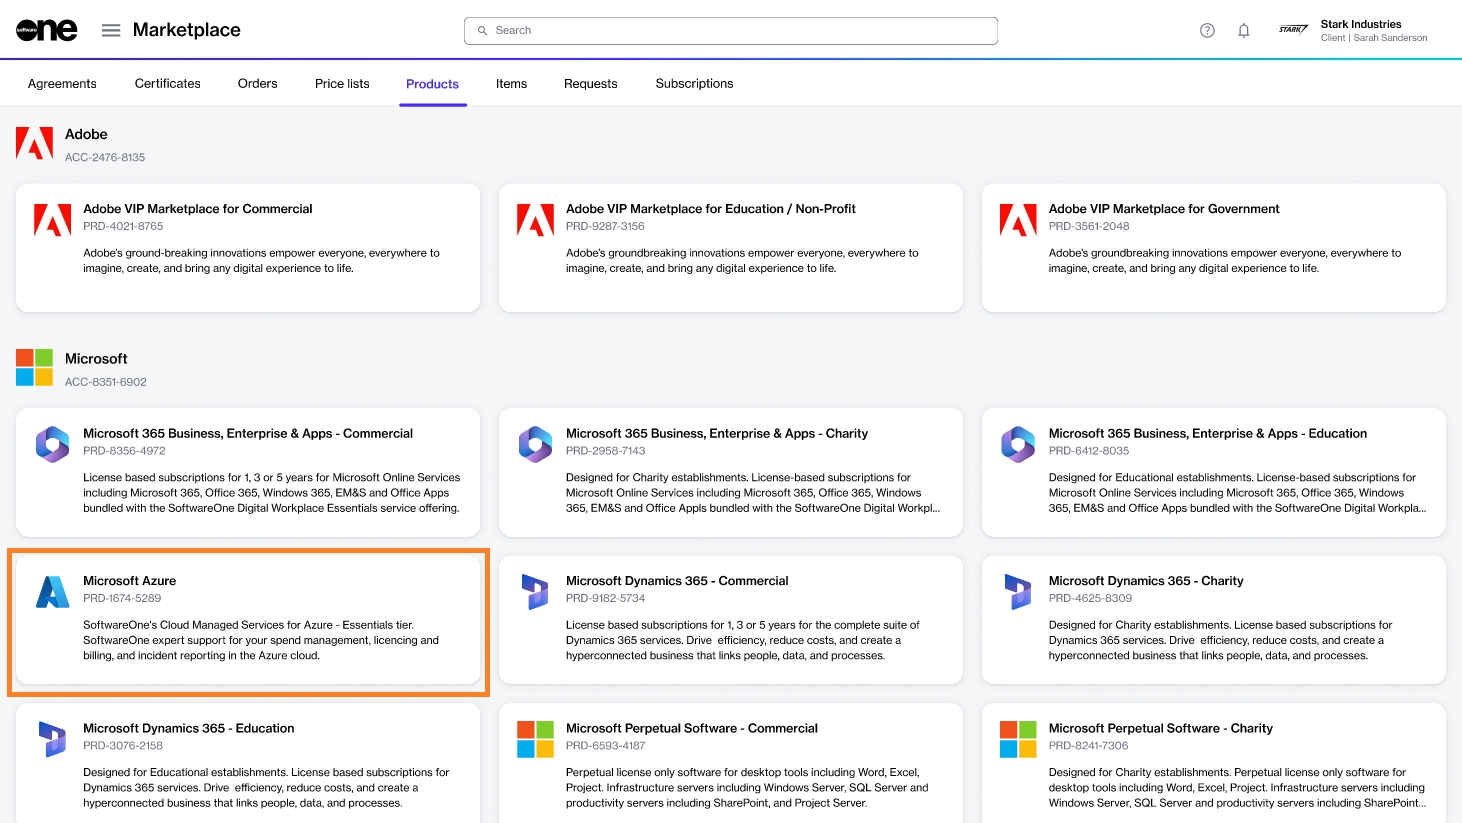
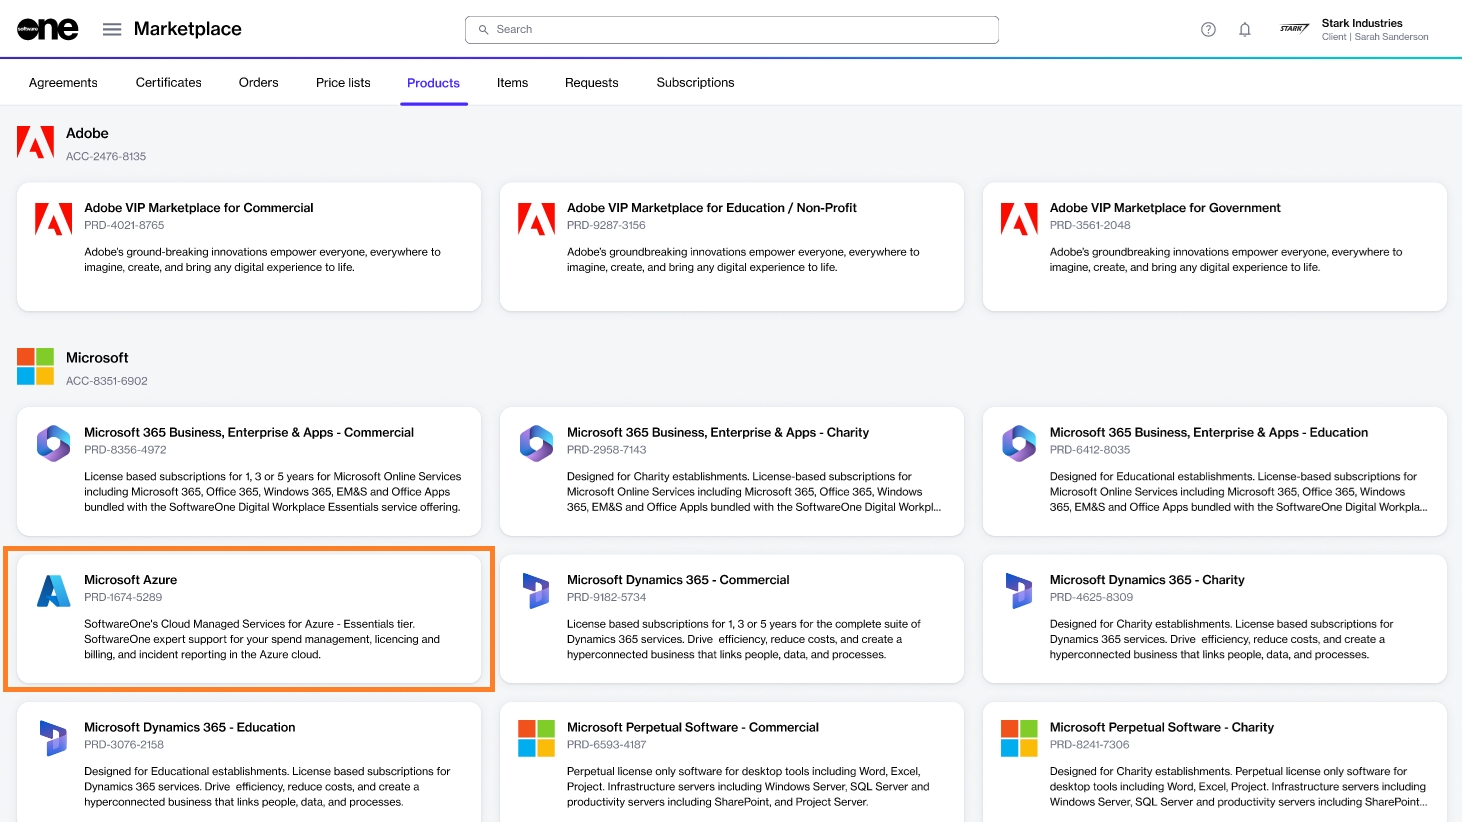
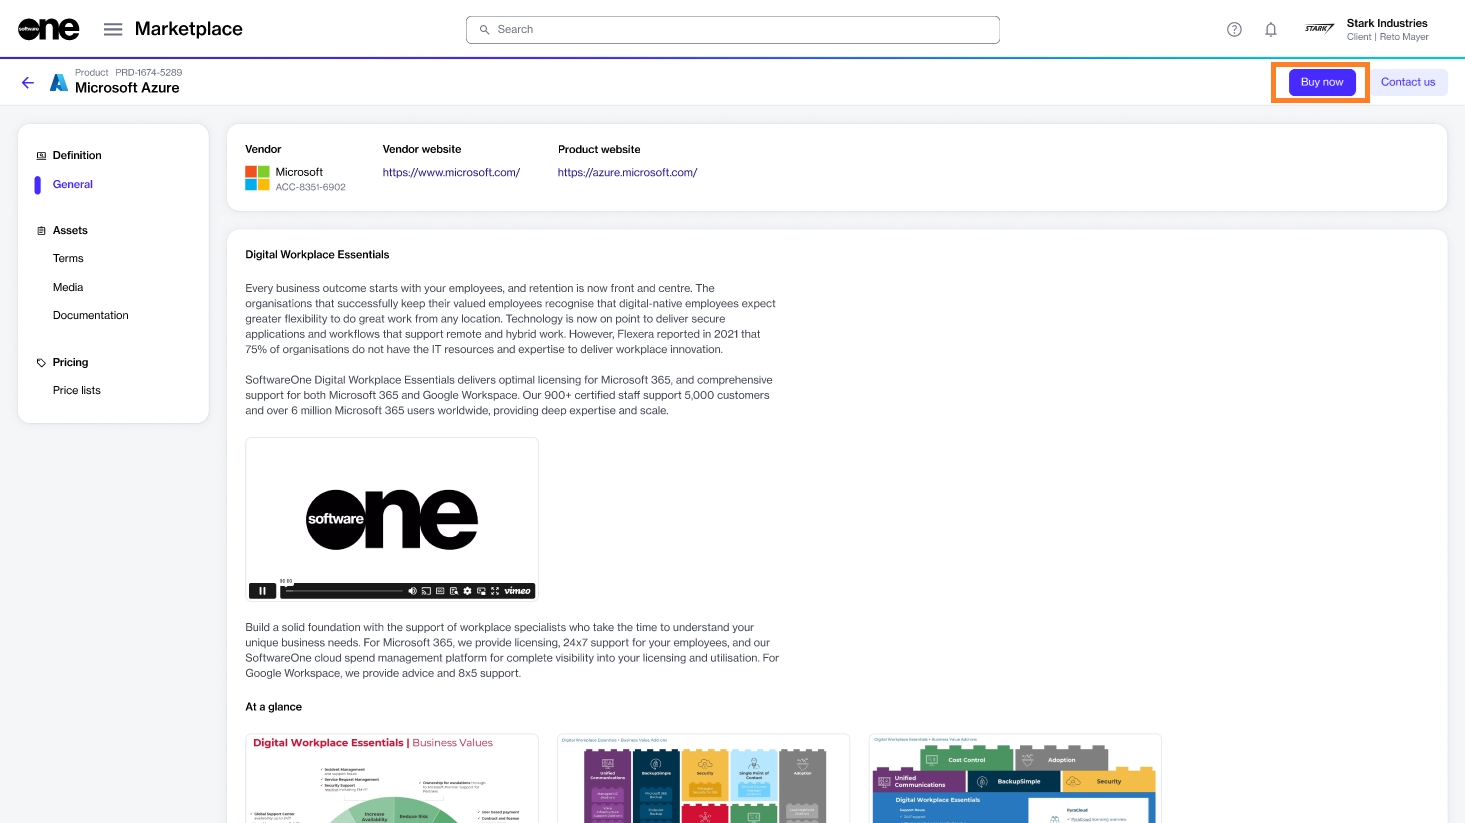
Navigate to the Products page (Marketplace > Products) and click Microsoft Azure.
Click Buy now on the details page.
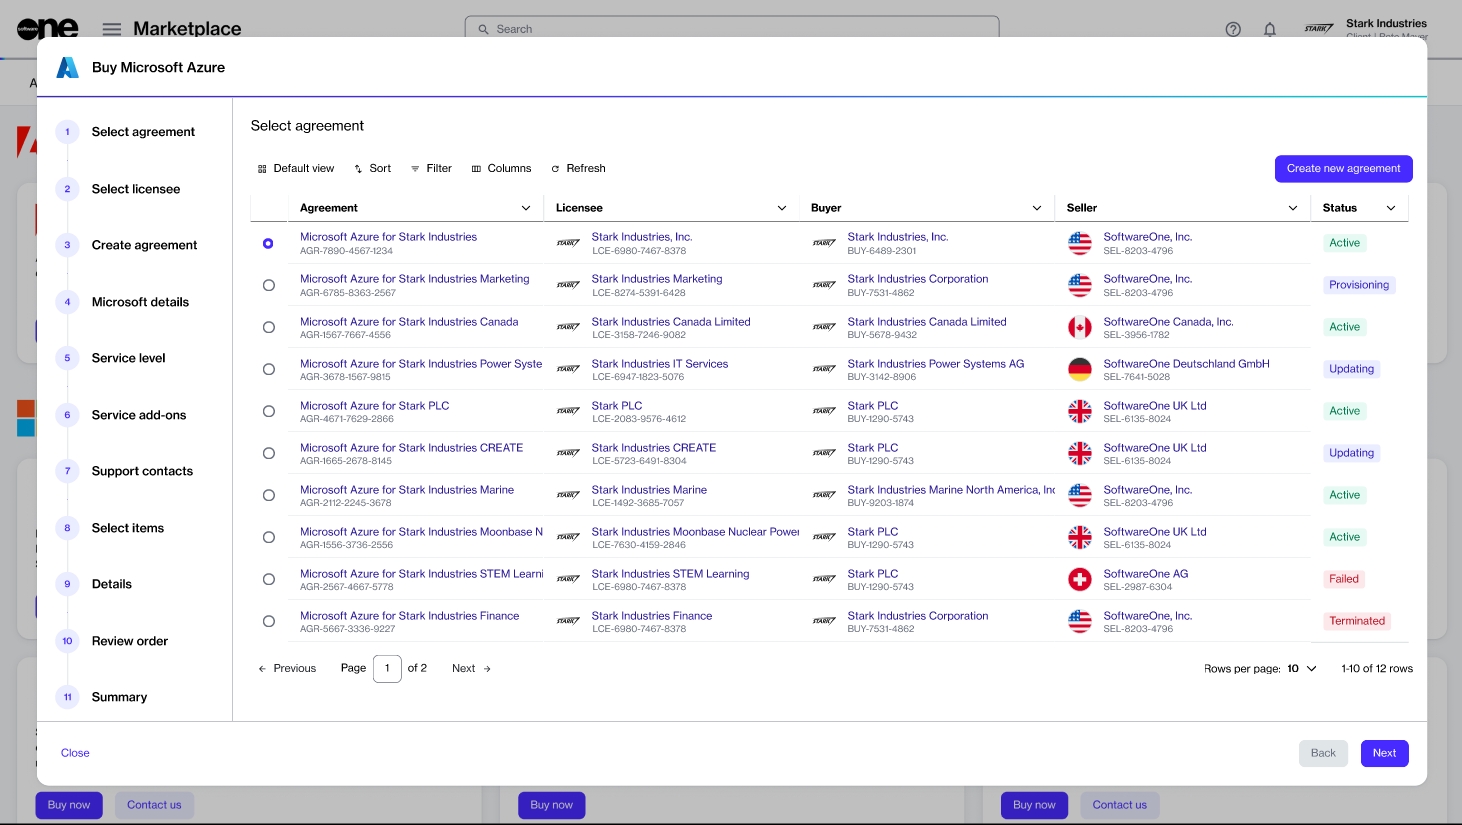
The purchase wizard starts and the Select agreement section of the wizard is displayed.
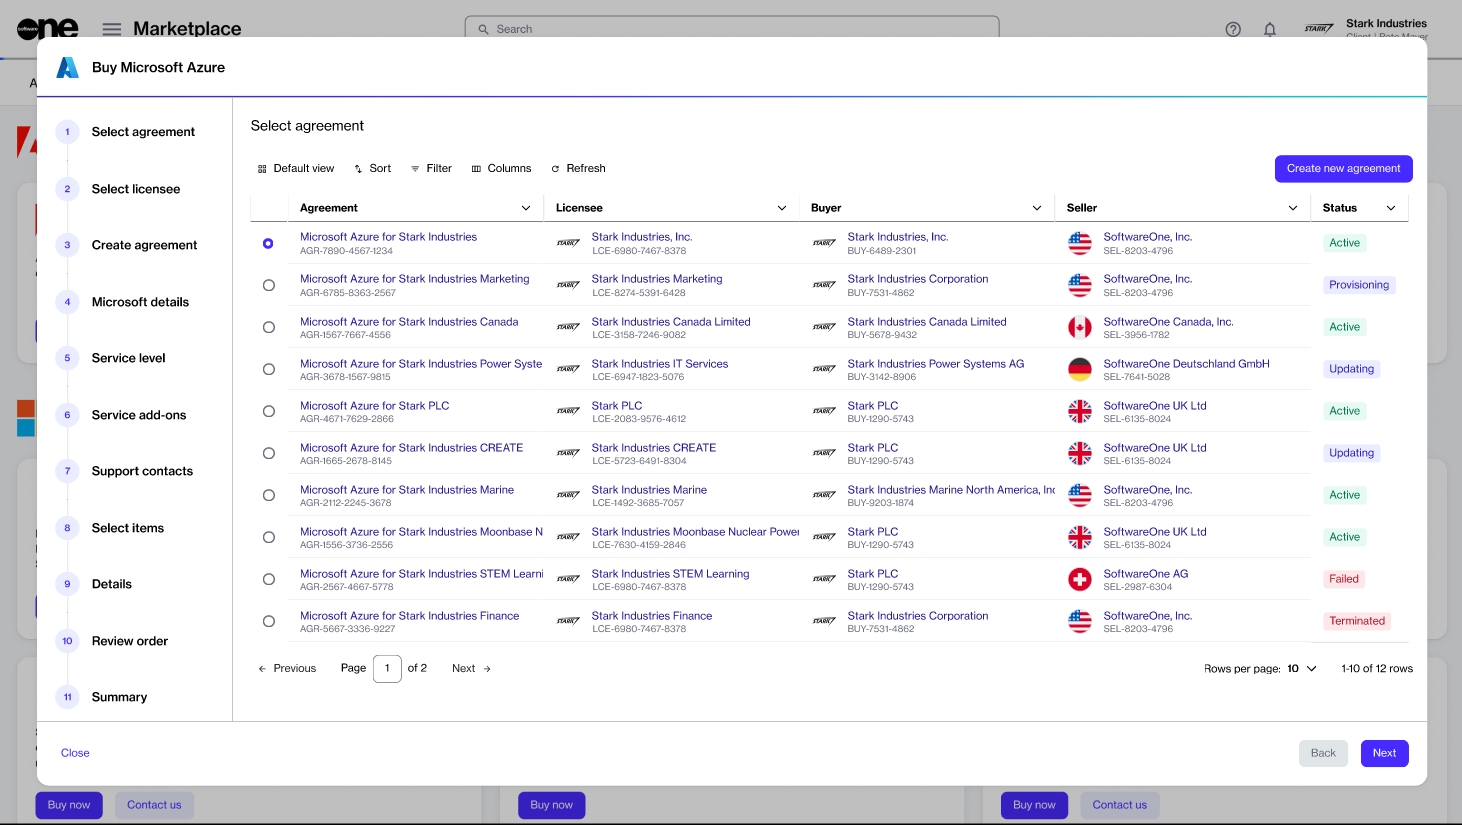
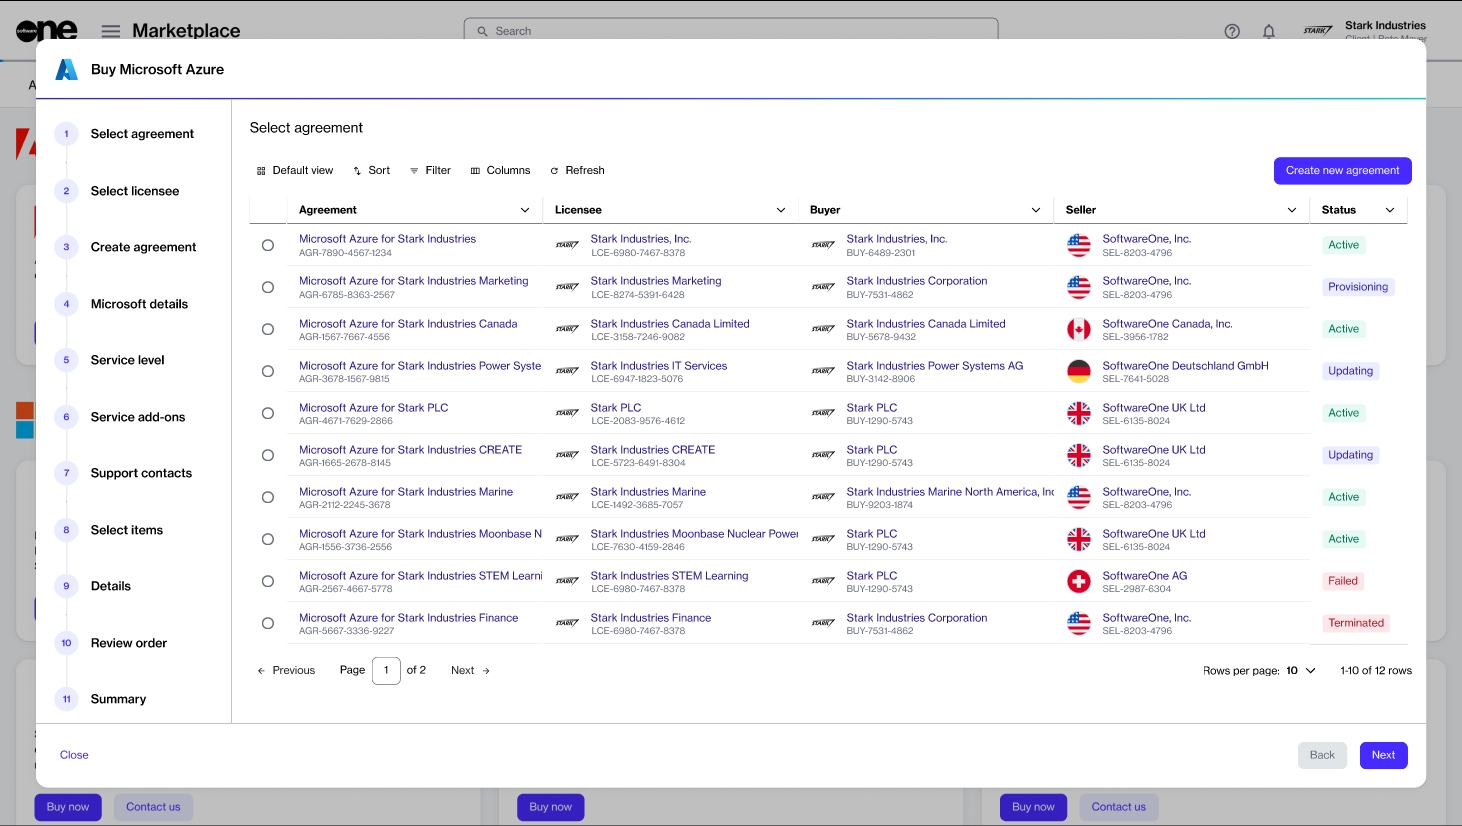
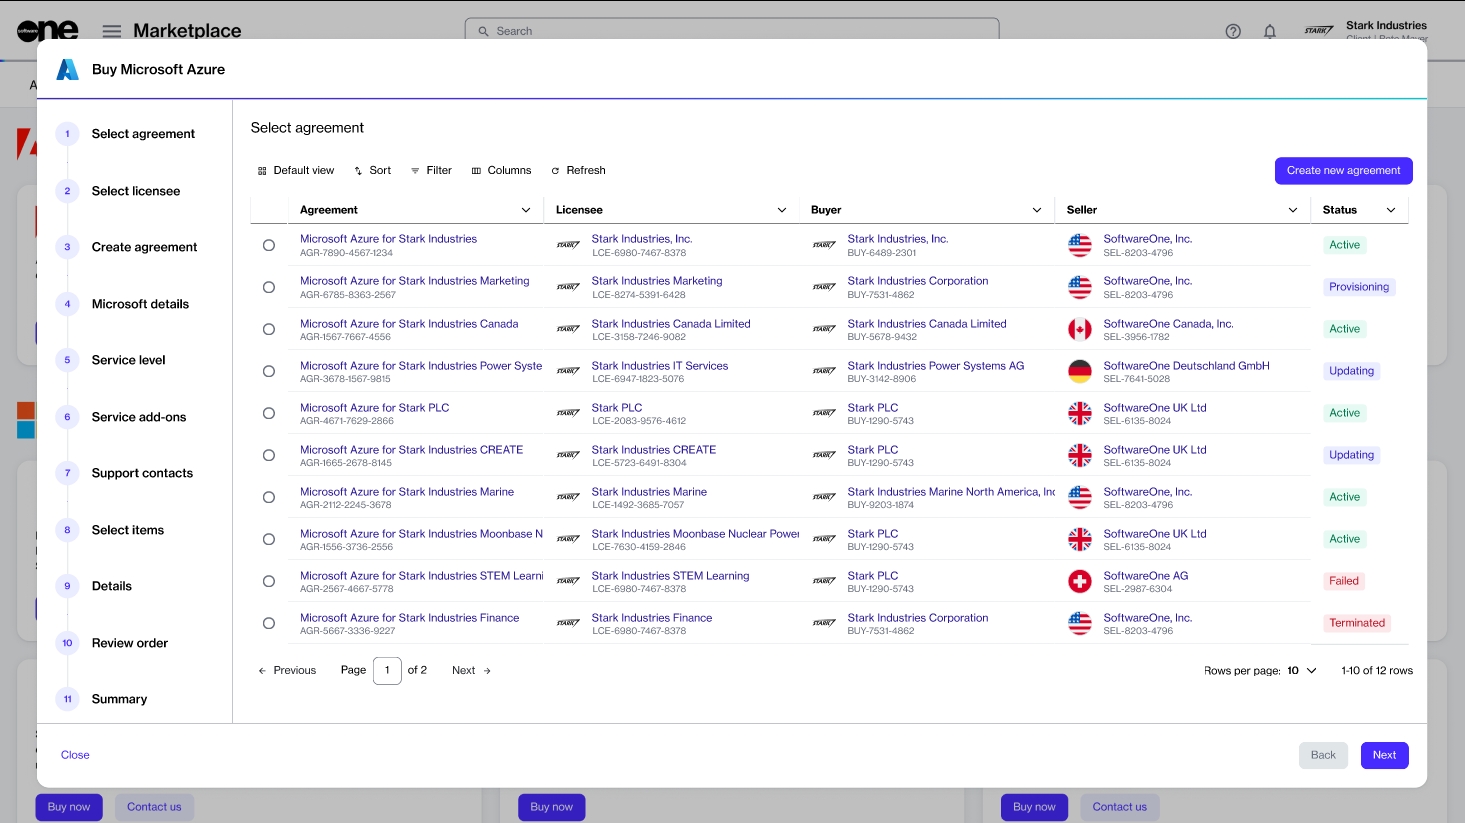
Select an active agreement from the list of your agreements and click Next.
You'll be directed to the Select Items section of the purchase wizard.
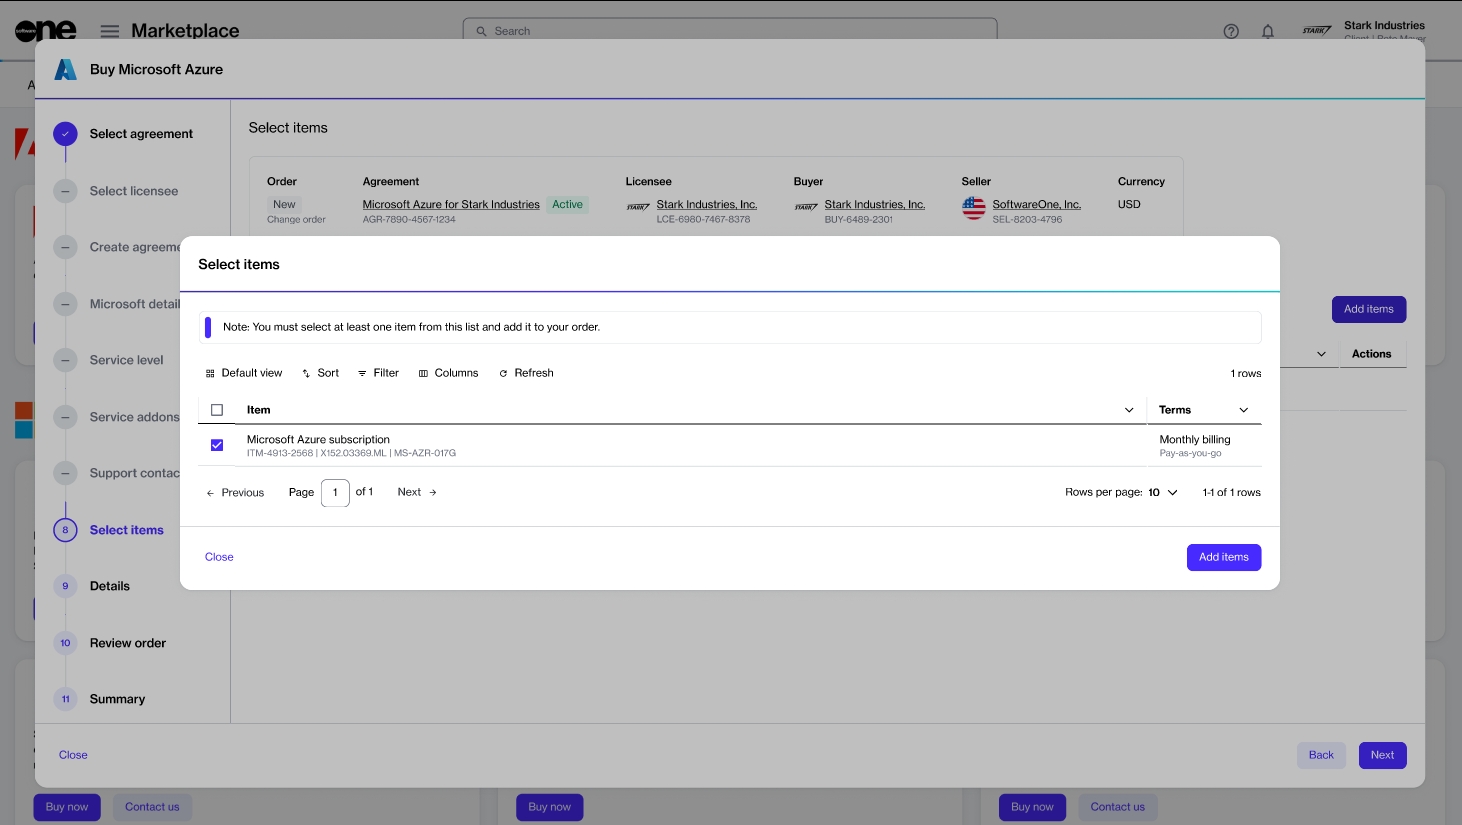
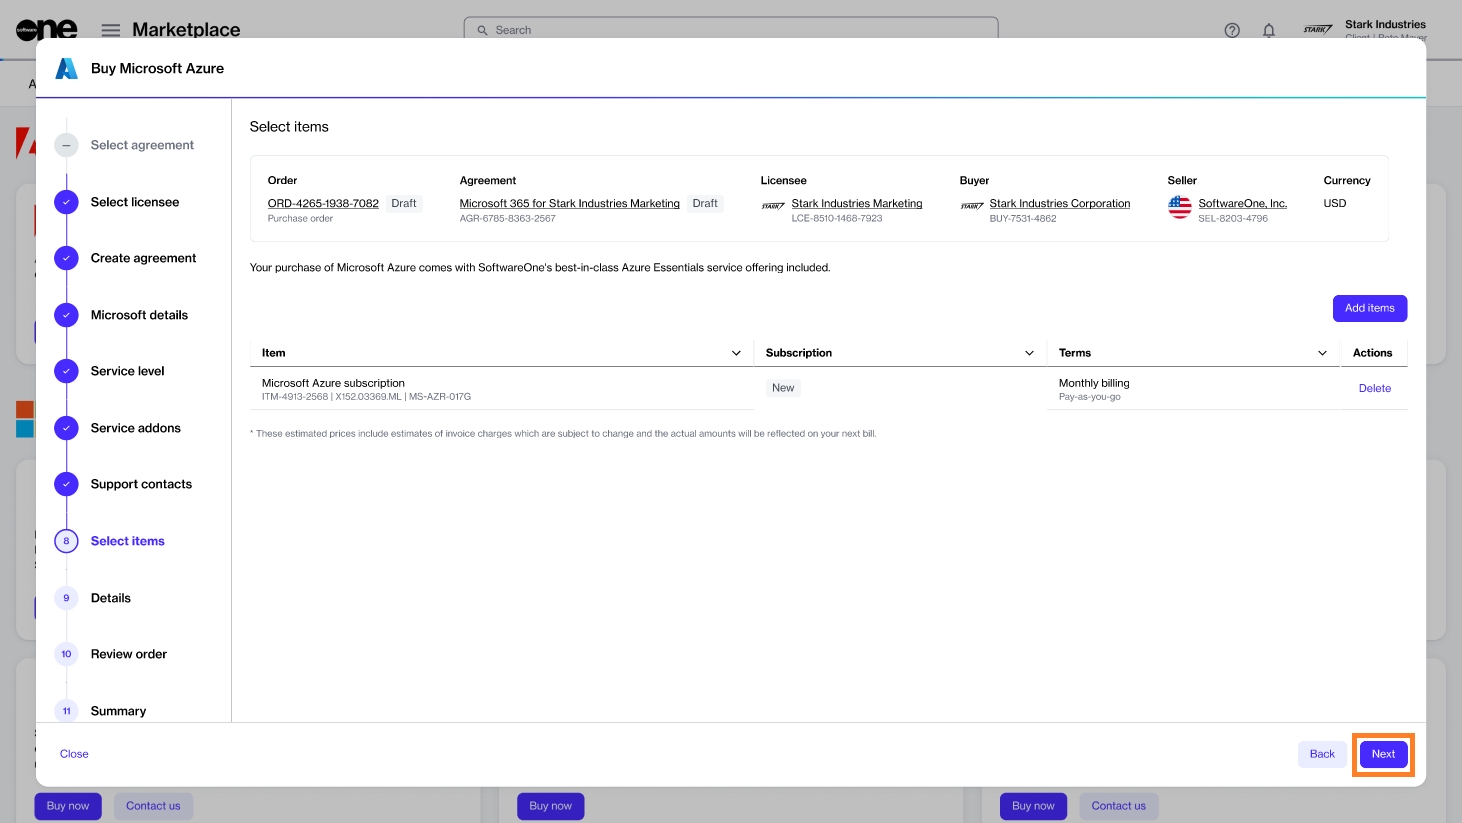
Click Add items to add the new Azure subscription to your order. Click Next.
For Microsoft Azure, there is only one item, with no associated cost. When using Azure services, pay-as-you-go charges are generated against the subscription.
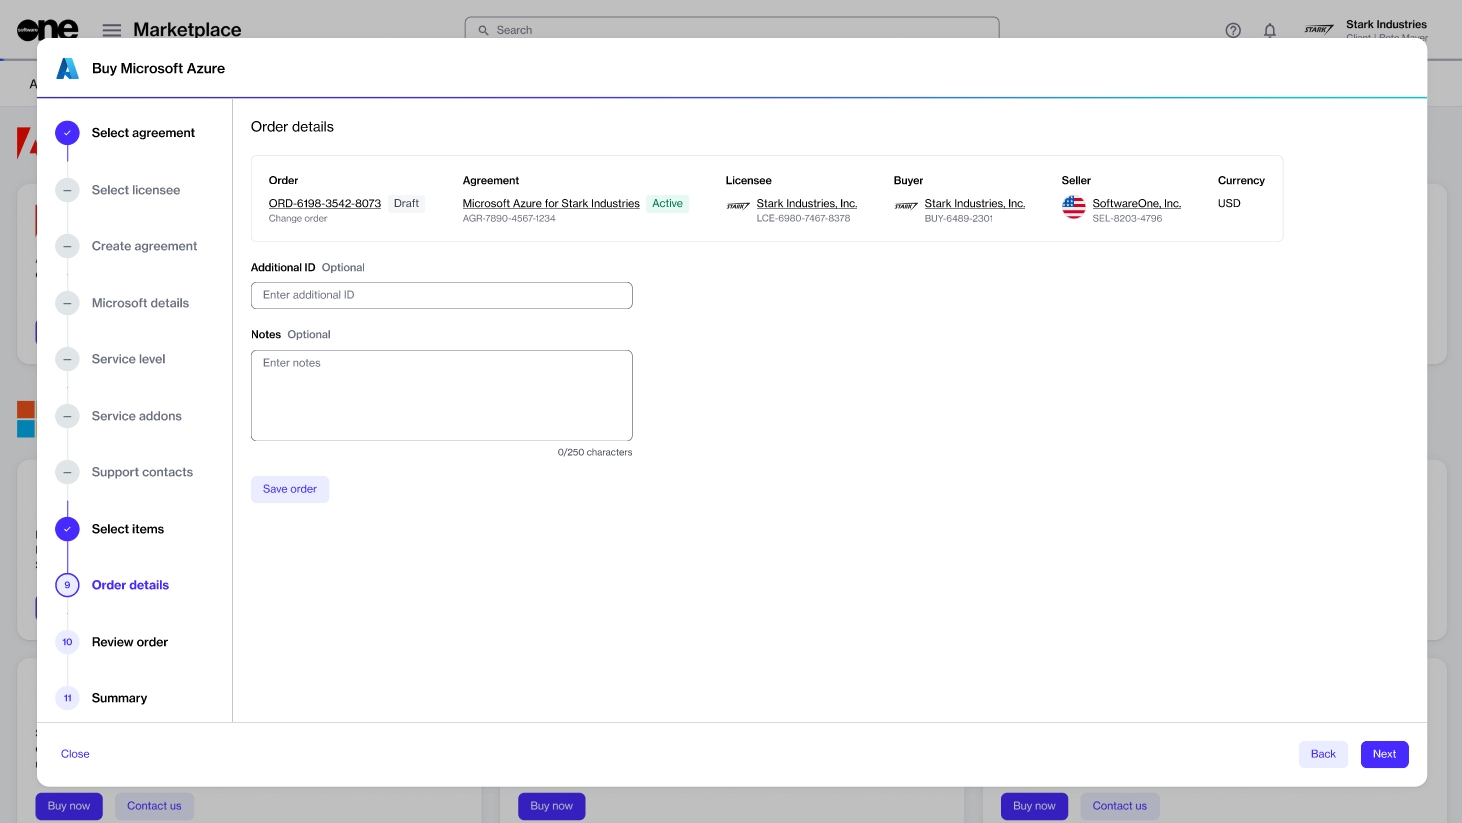
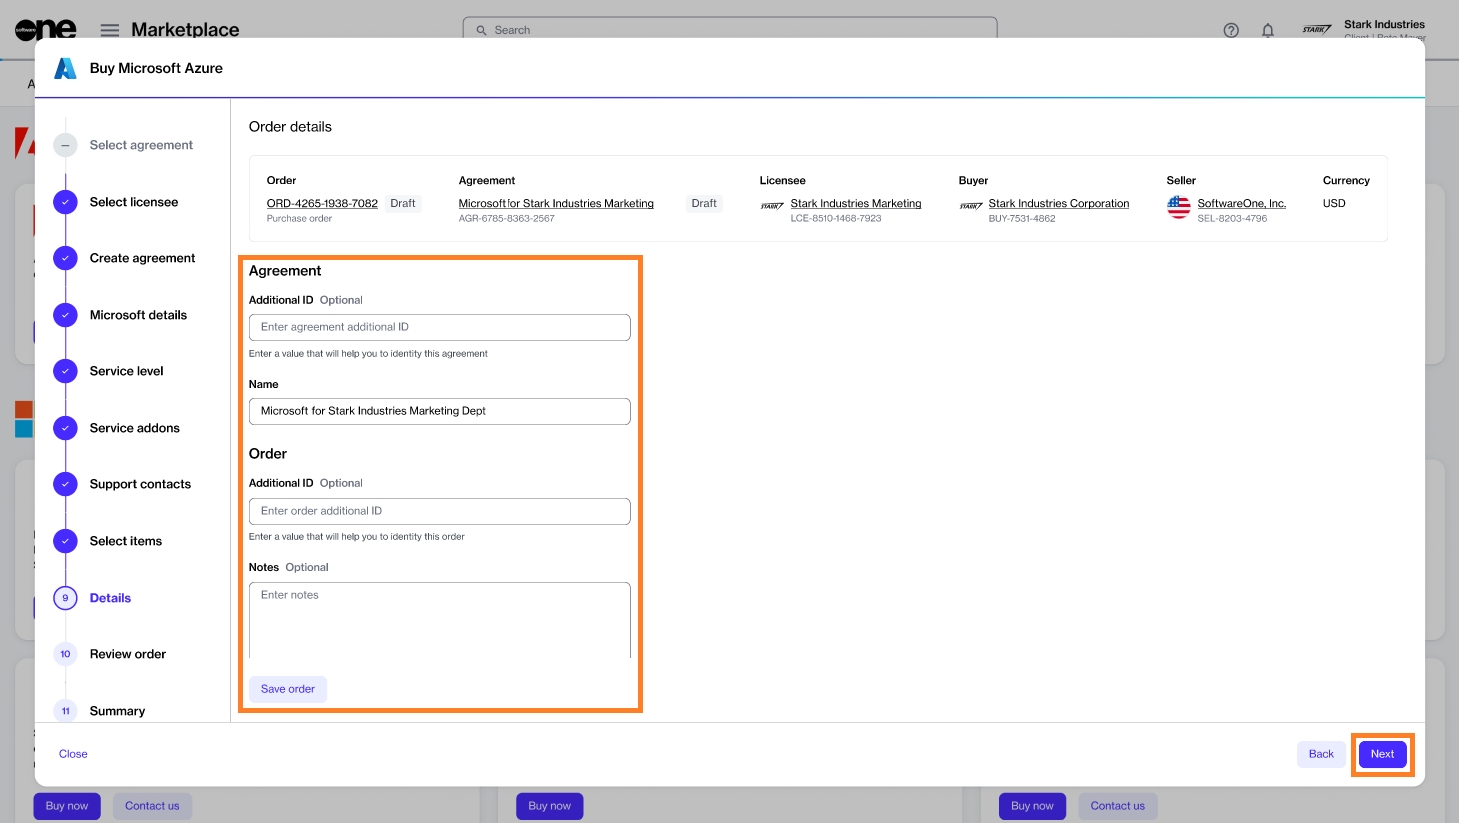
Enter the reference information as needed and click Next.
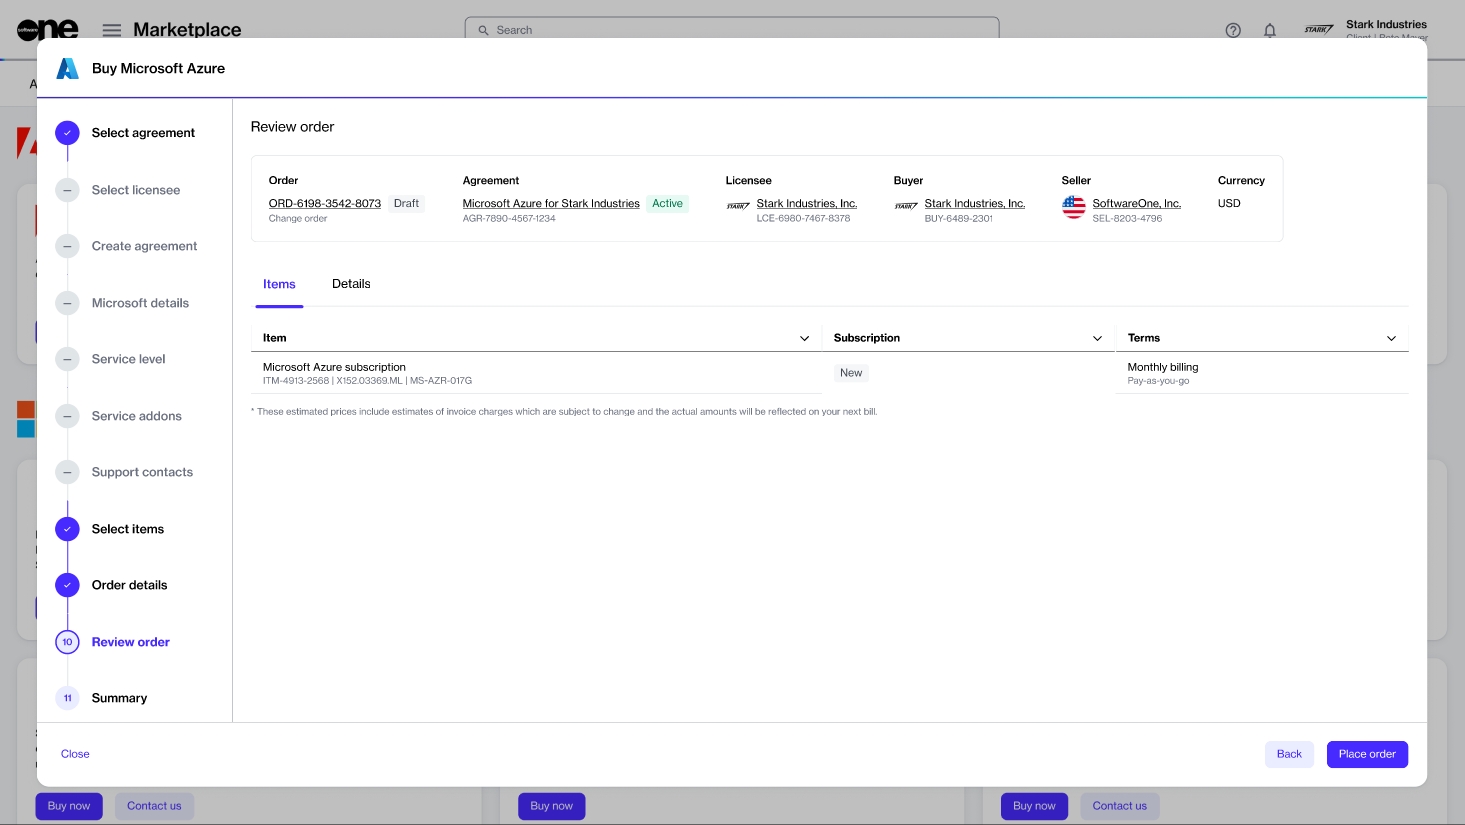
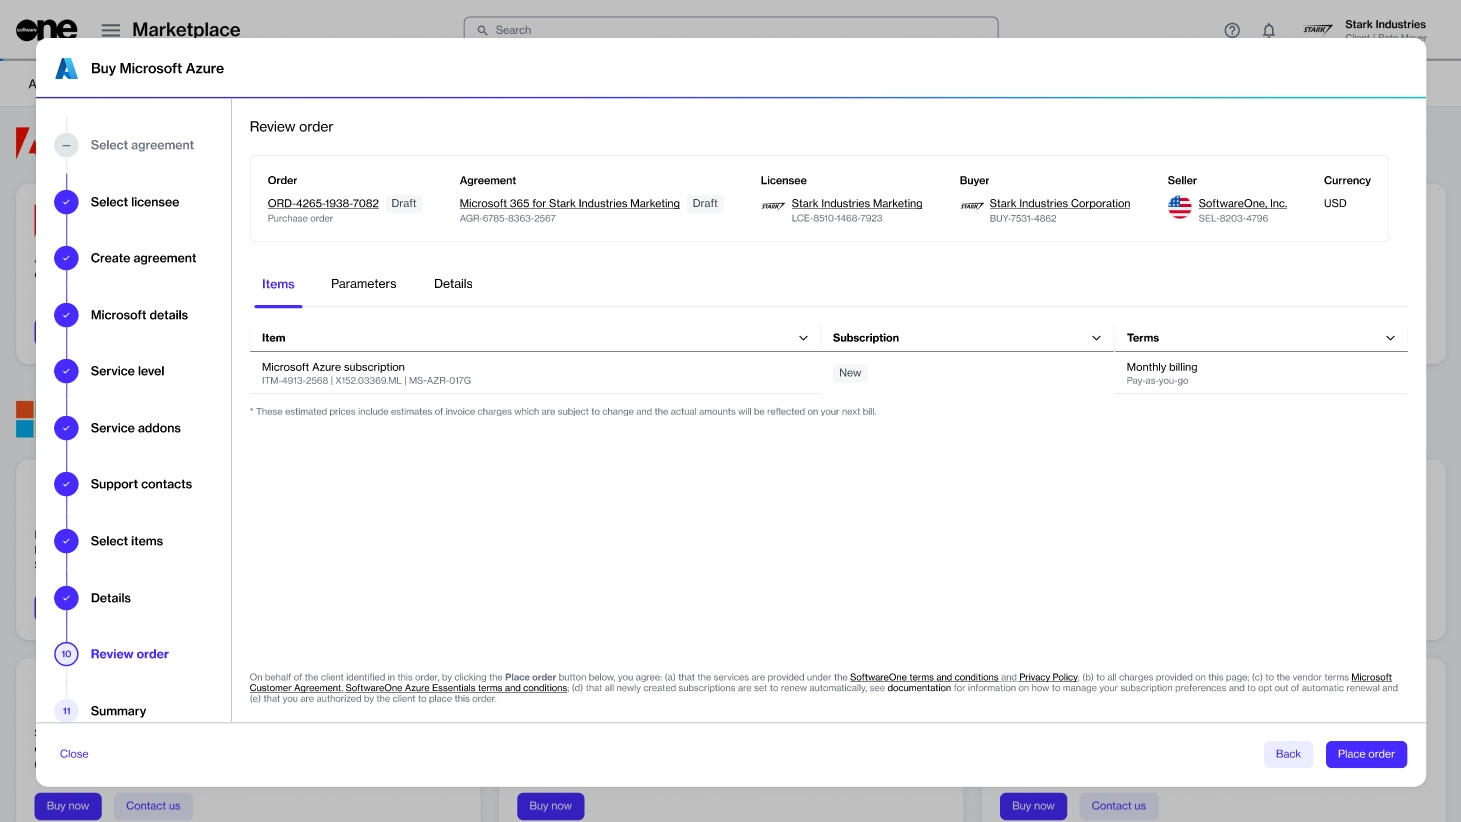
Review the details of your change order and click Place order to complete your purchase.
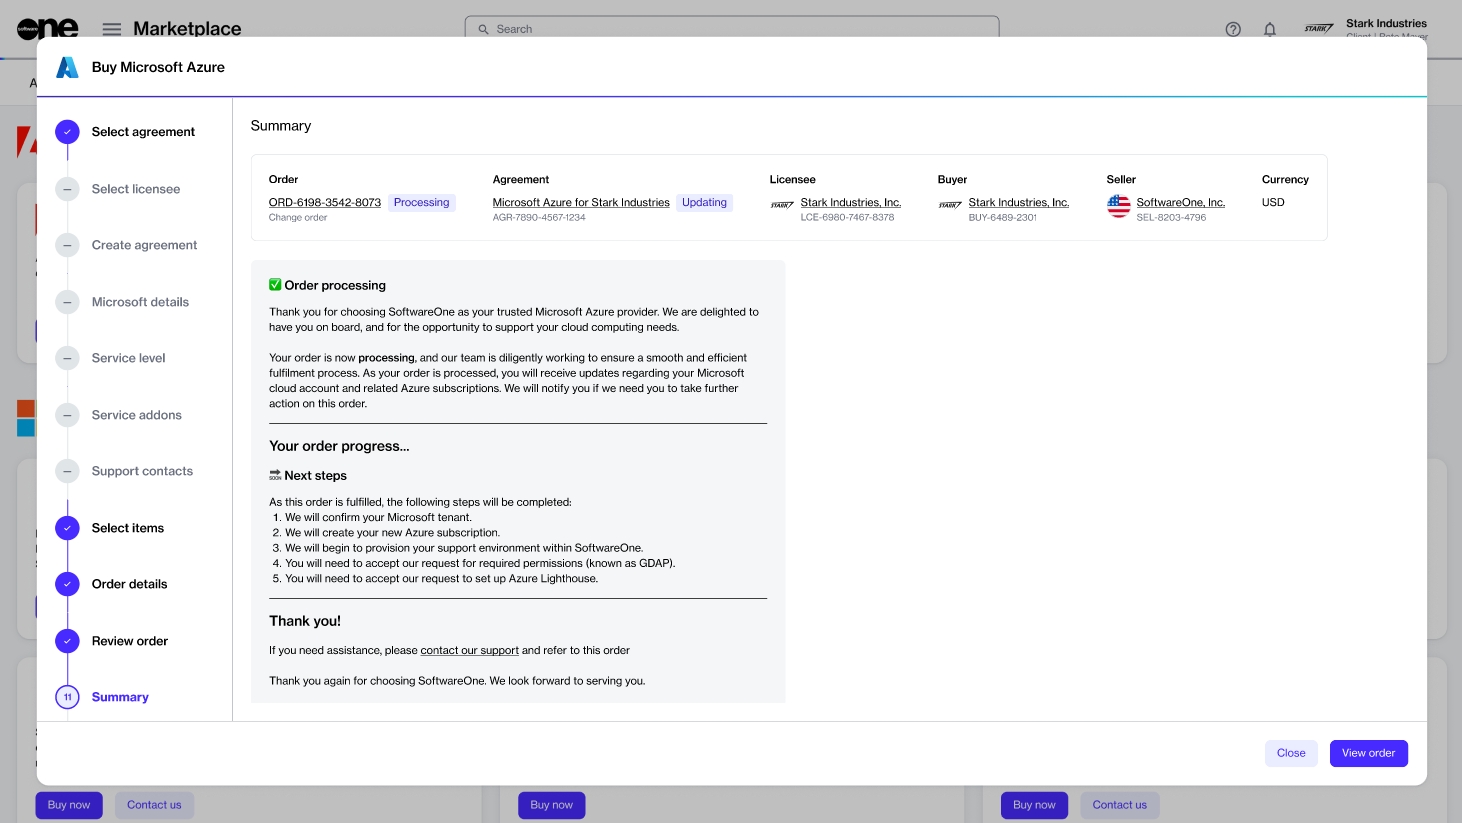
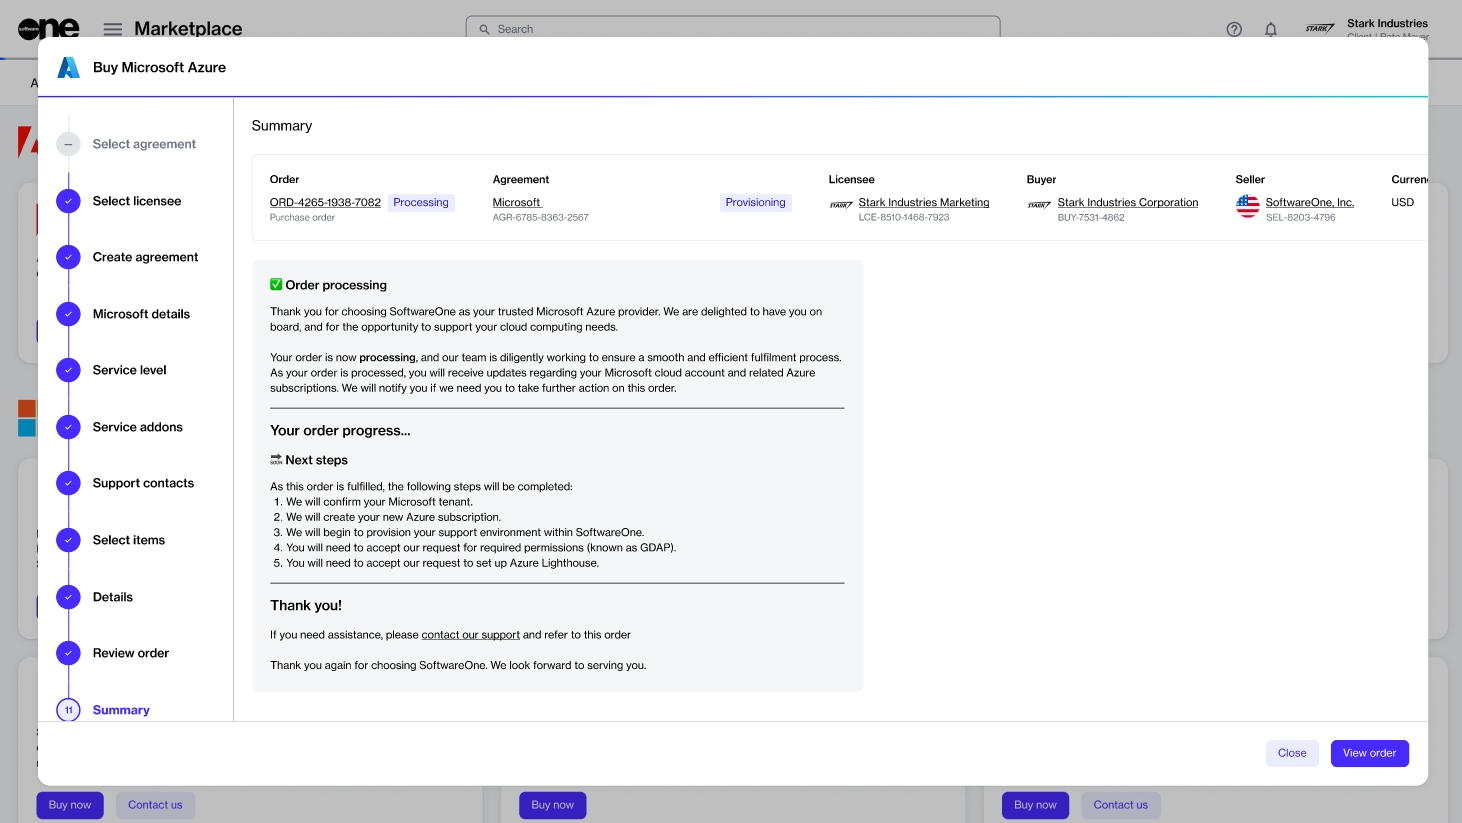
Review your order summary and the latest status message.
Click View Order to navigate to the order details page. Otherwise, click Close to close the Summary page.
Order a Microsoft Azure subscription by connecting your existing Microsoft account.
This tutorial shows how to order a Microsoft Azure subscription by setting up a new agreement and connecting your existing Microsoft tenant.
Before starting this tutorial, make sure you have the following:
Your Microsoft tenant name.
The contact details of the person who will manage your account.
Navigate to the Products page and click Microsoft Azure.
Click Buy now on the details page.
The purchase wizard starts and the Select agreement section of the wizard is displayed.
Click Create new agreement to set up your new agreement.
Click Next.
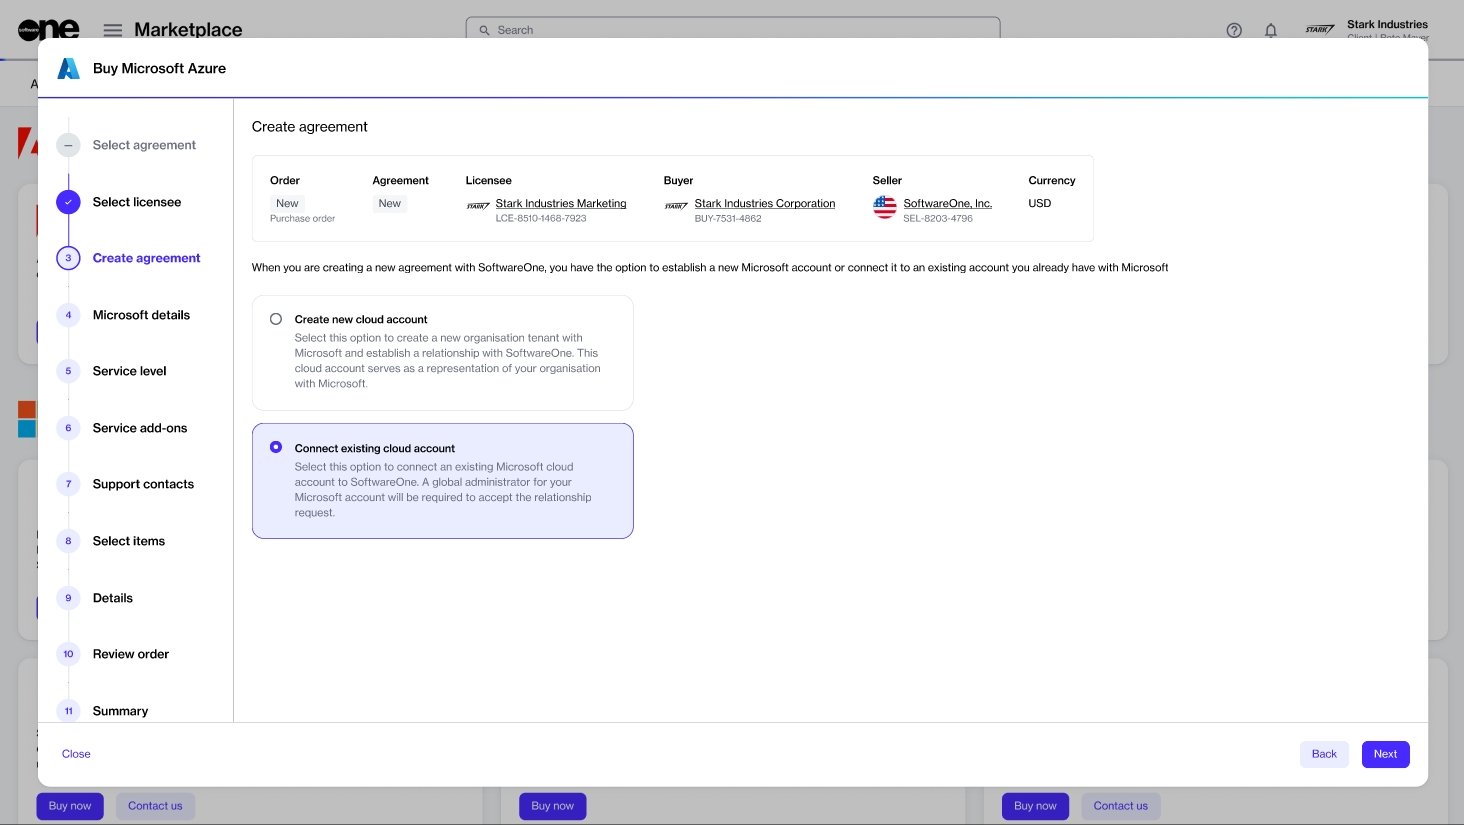
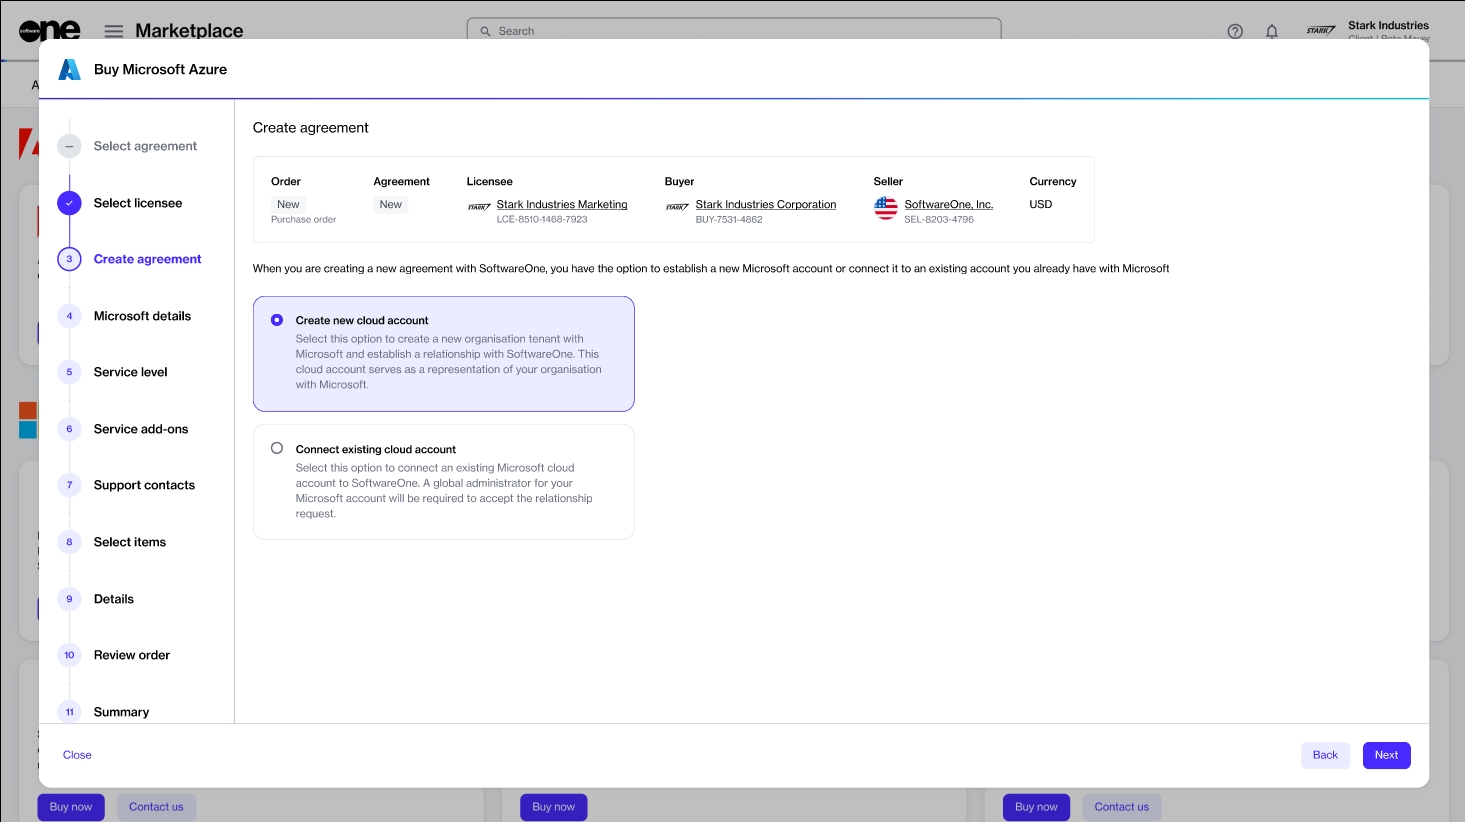
Choose whether you want to create a new Microsoft account or use your existing account. In this tutorial, we'll select Connect existing cloud account, as shown in the following image.
Click Next.
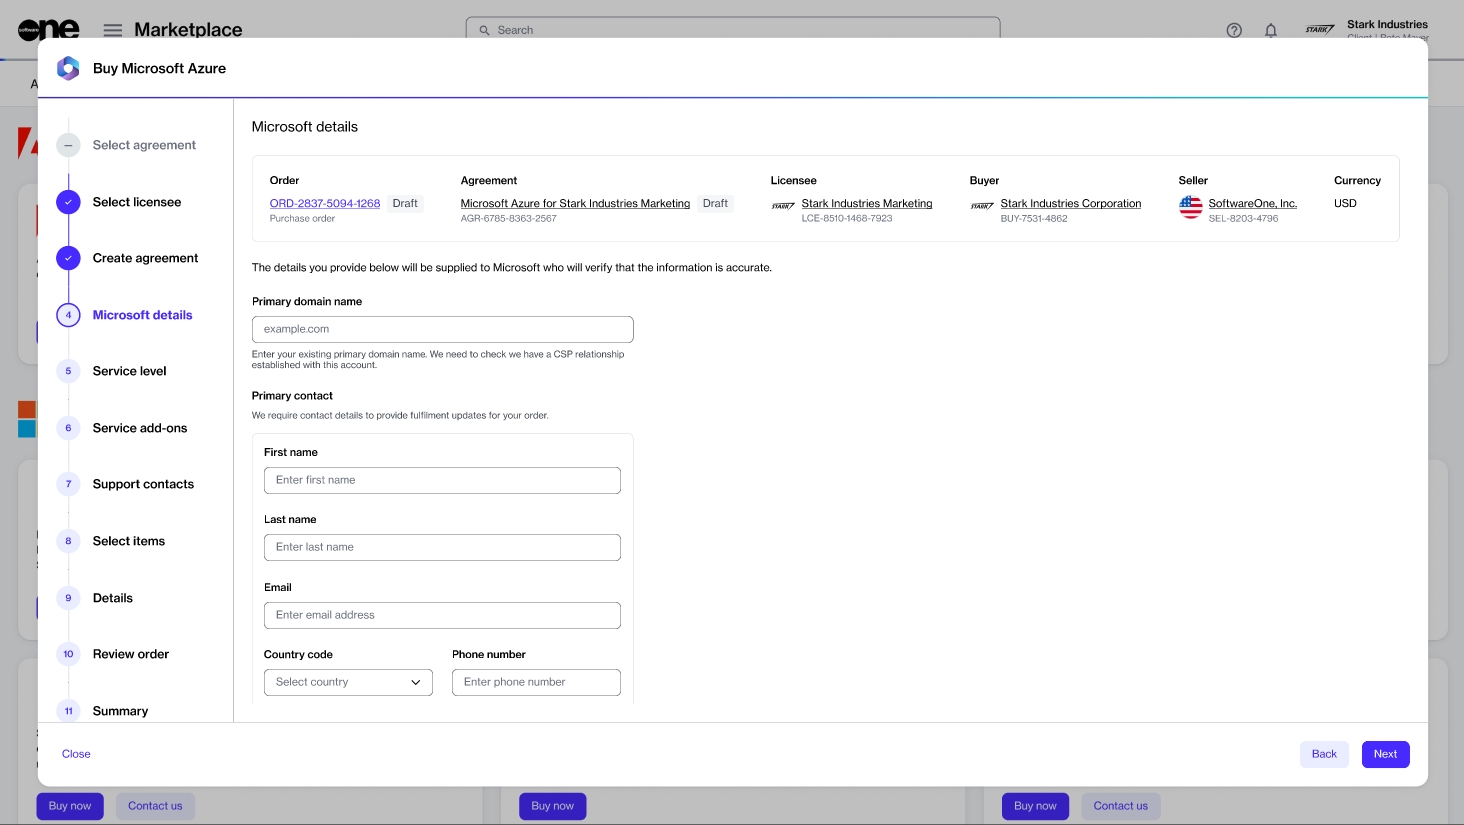
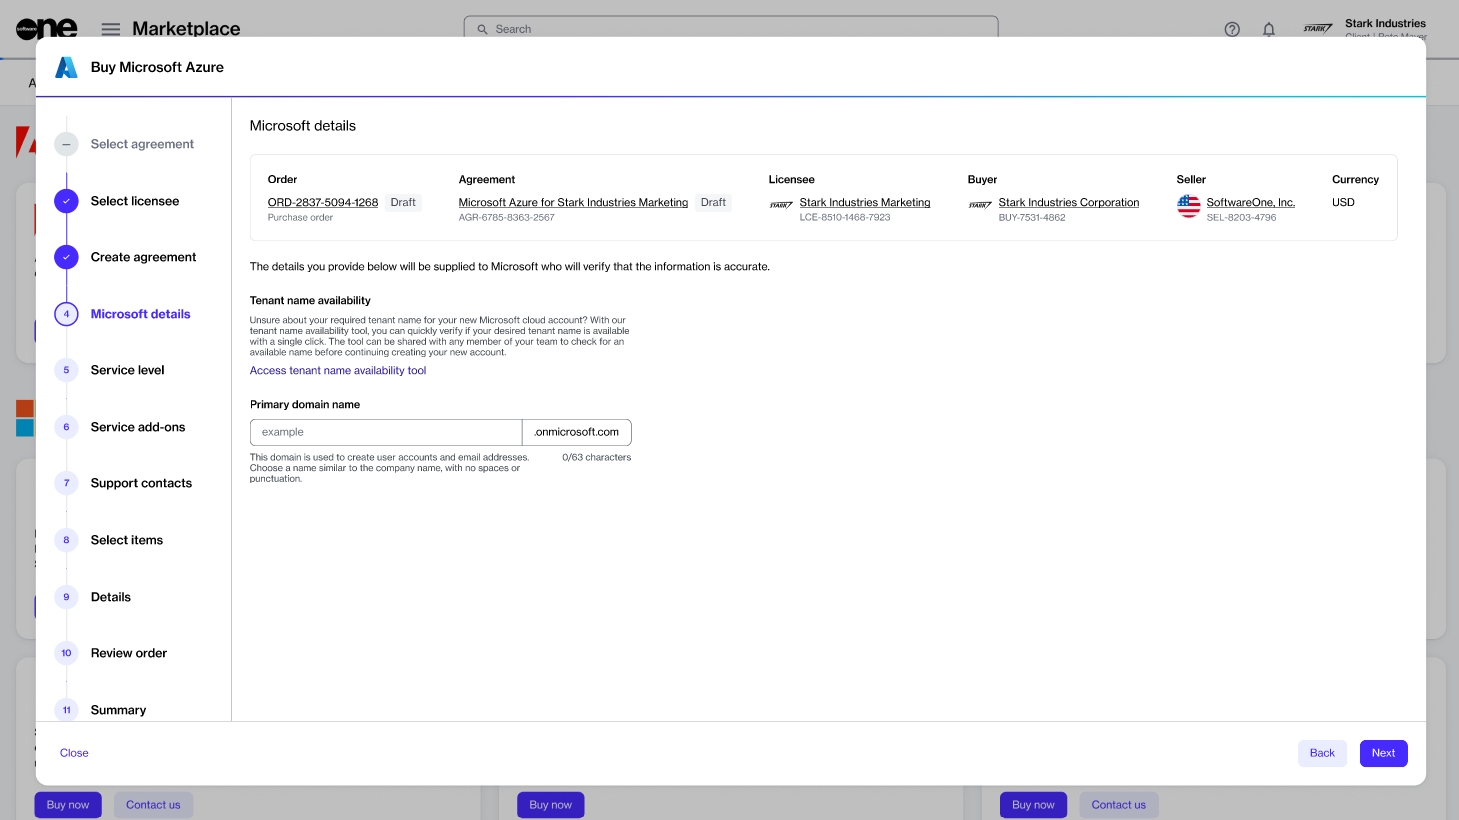
(Optional) Click Access tenant name availability tool to check the availability of tenant names from Microsoft.
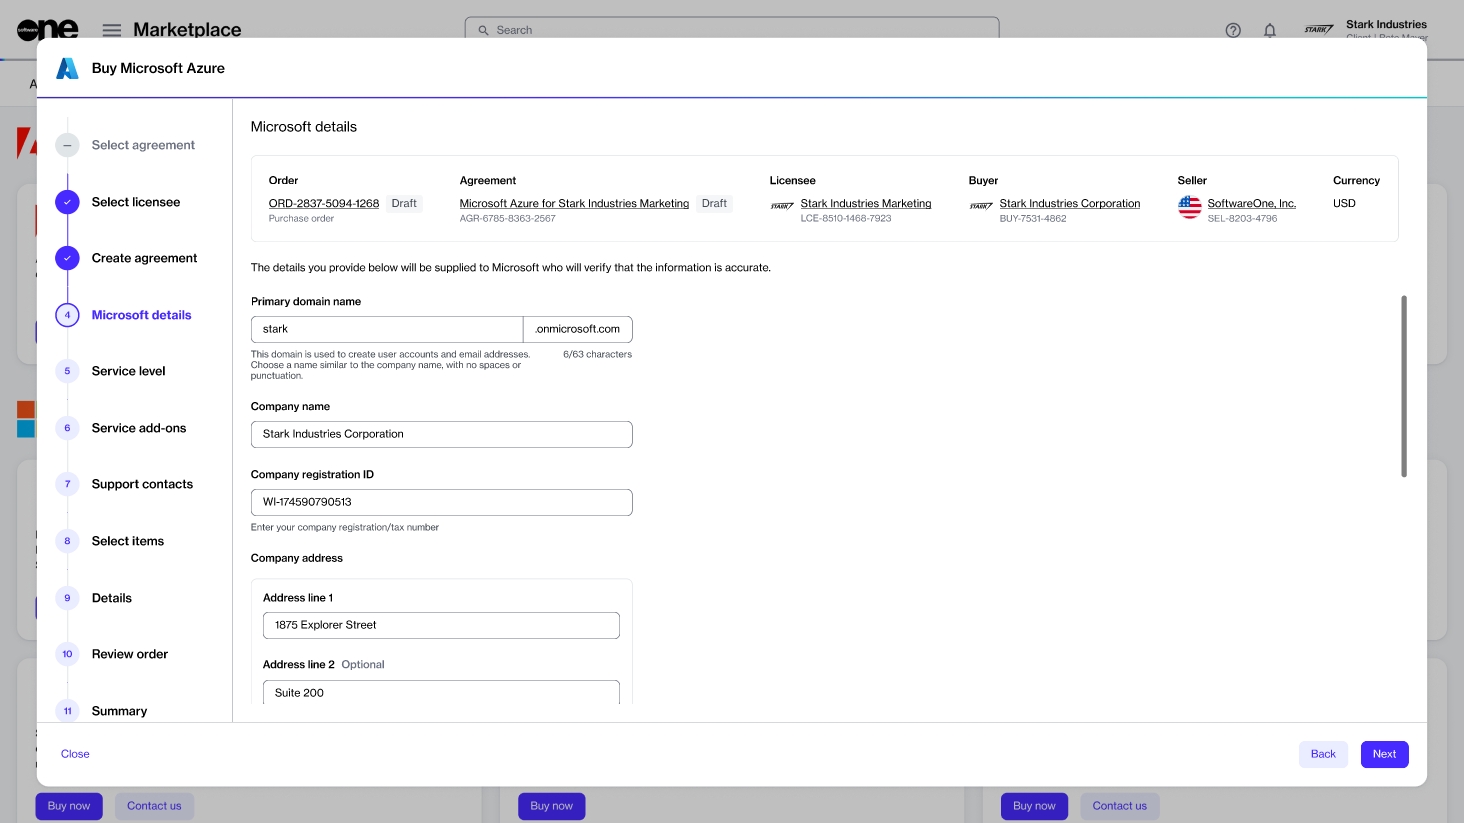
Enter your preferred domain name (also known as tenant name) in the Primary domain name field.
Fill out the required fields and click Next.
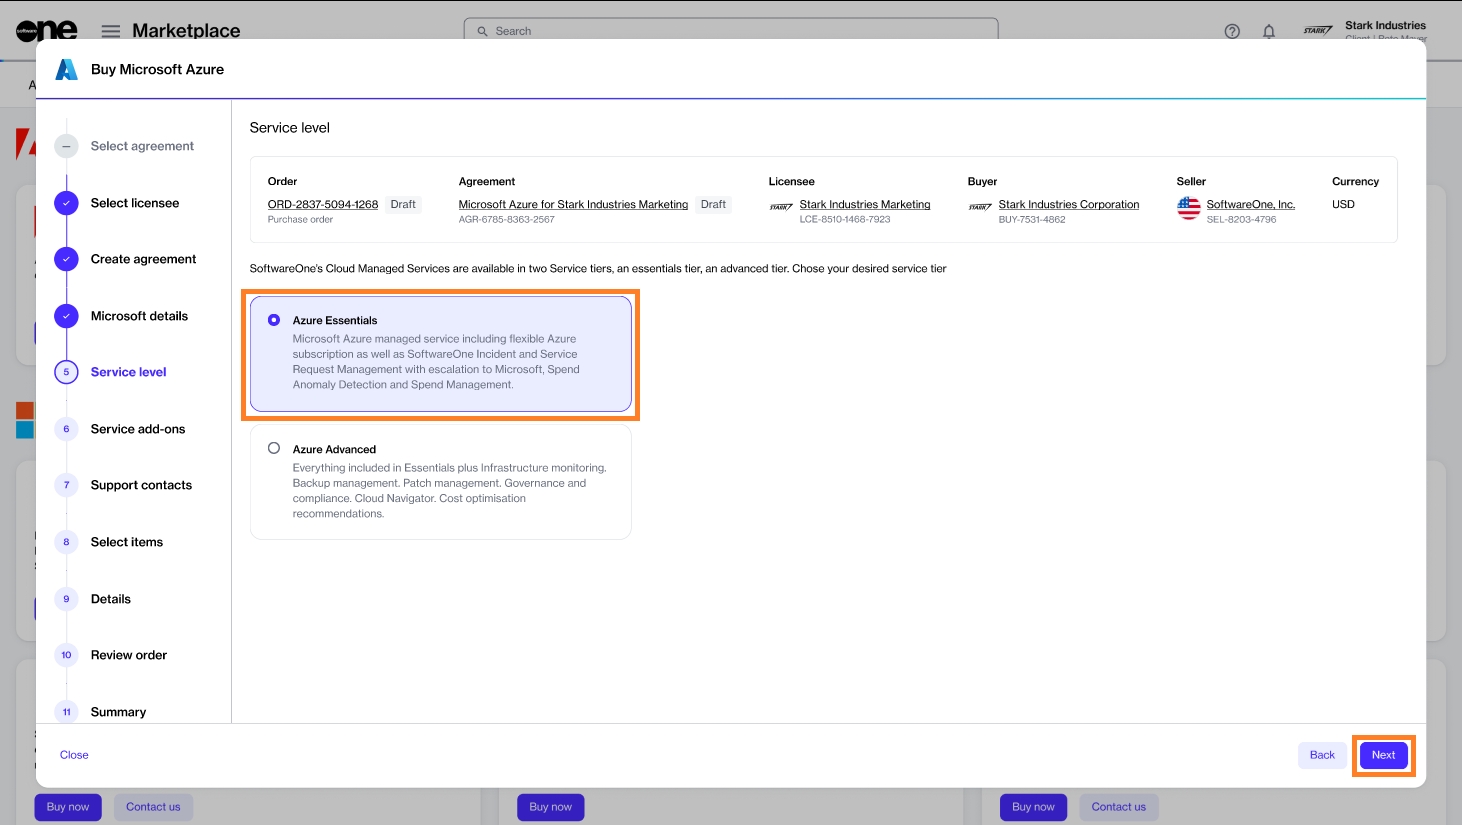
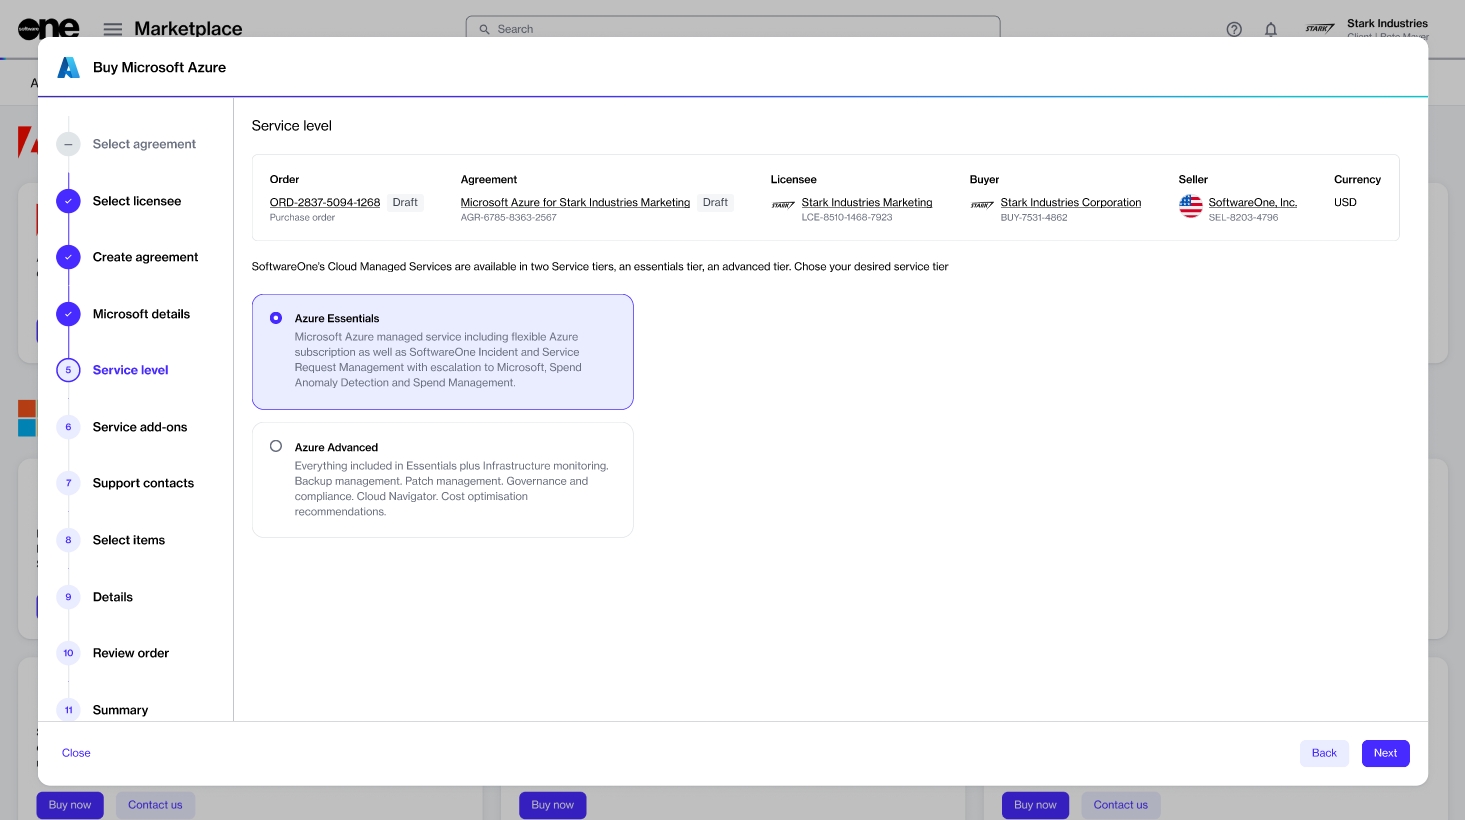
Select Azure Essentials or Azure Advanced, depending on the level of service you require for Azure. In this tutorial, we'll select Azure Essentials, as shown in the following image.
Click Next to continue.
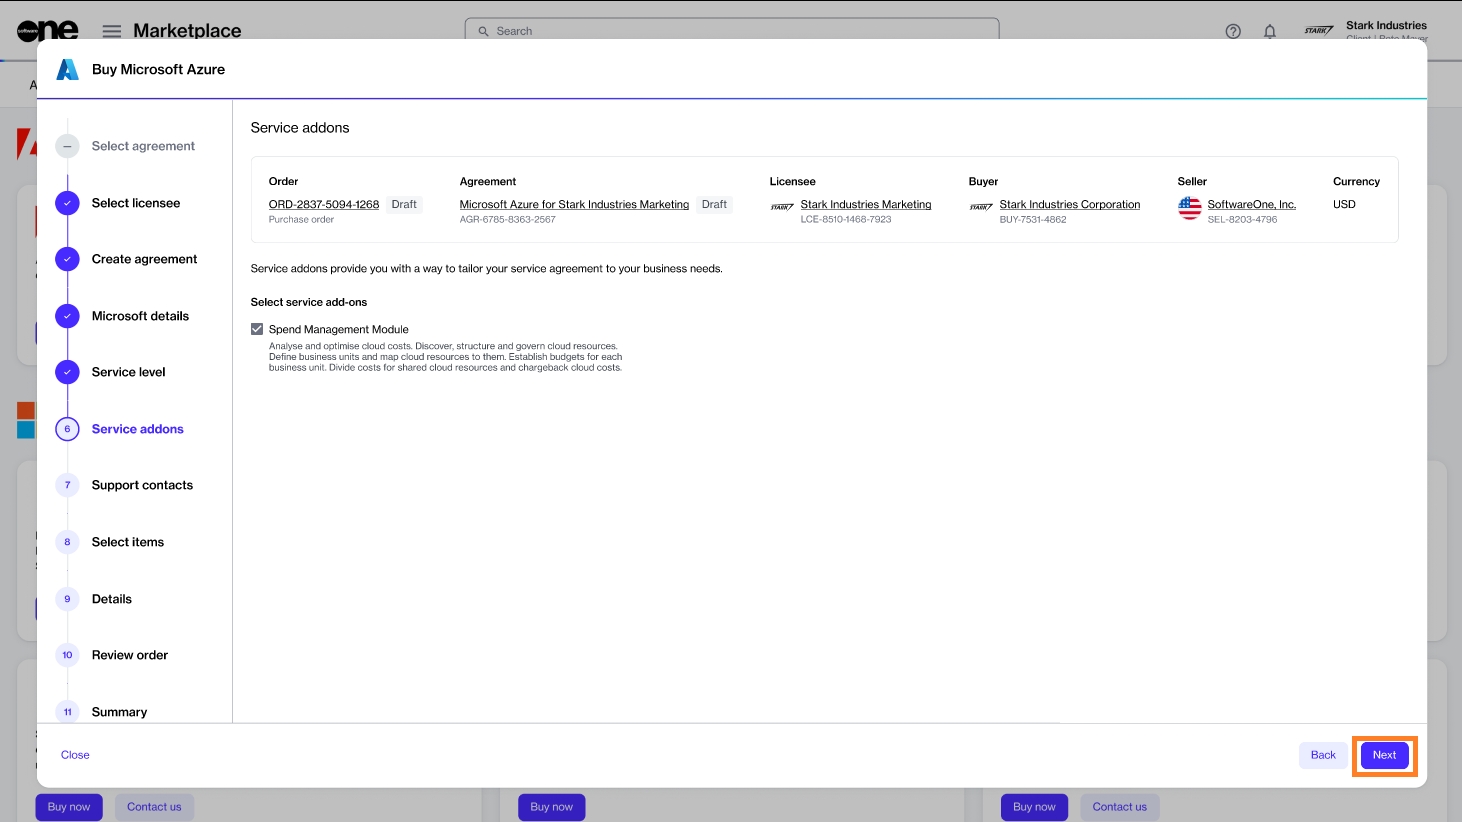
When you select Azure Essentials or Azure Advanced, all add-ons offered as part of the Azure services are displayed. All service add-ons are selected by default and you cannot change them.
Click Next.
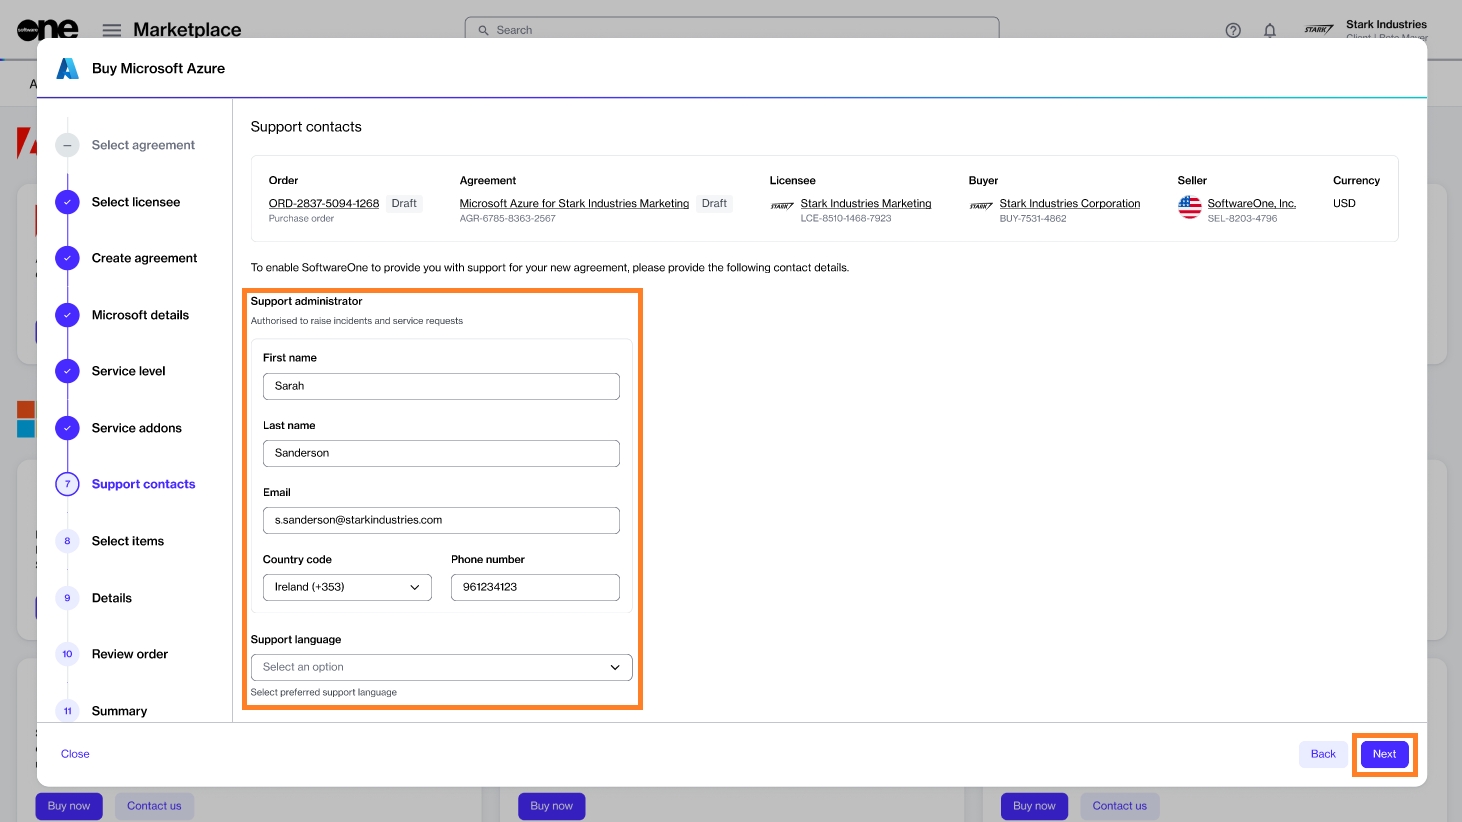
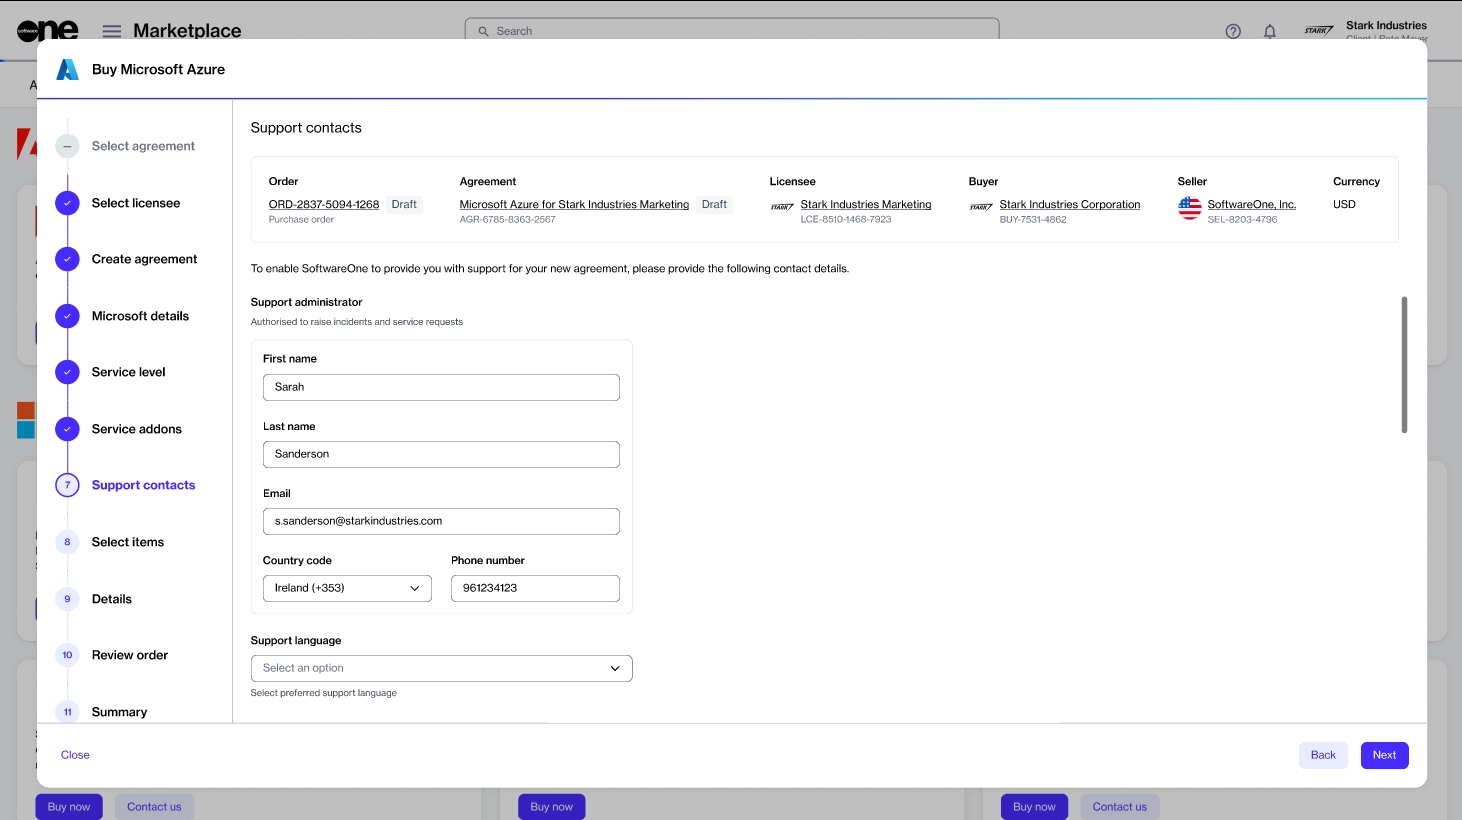
Enter the contact you want to use for support and your preferred support language.
Click Next to continue.
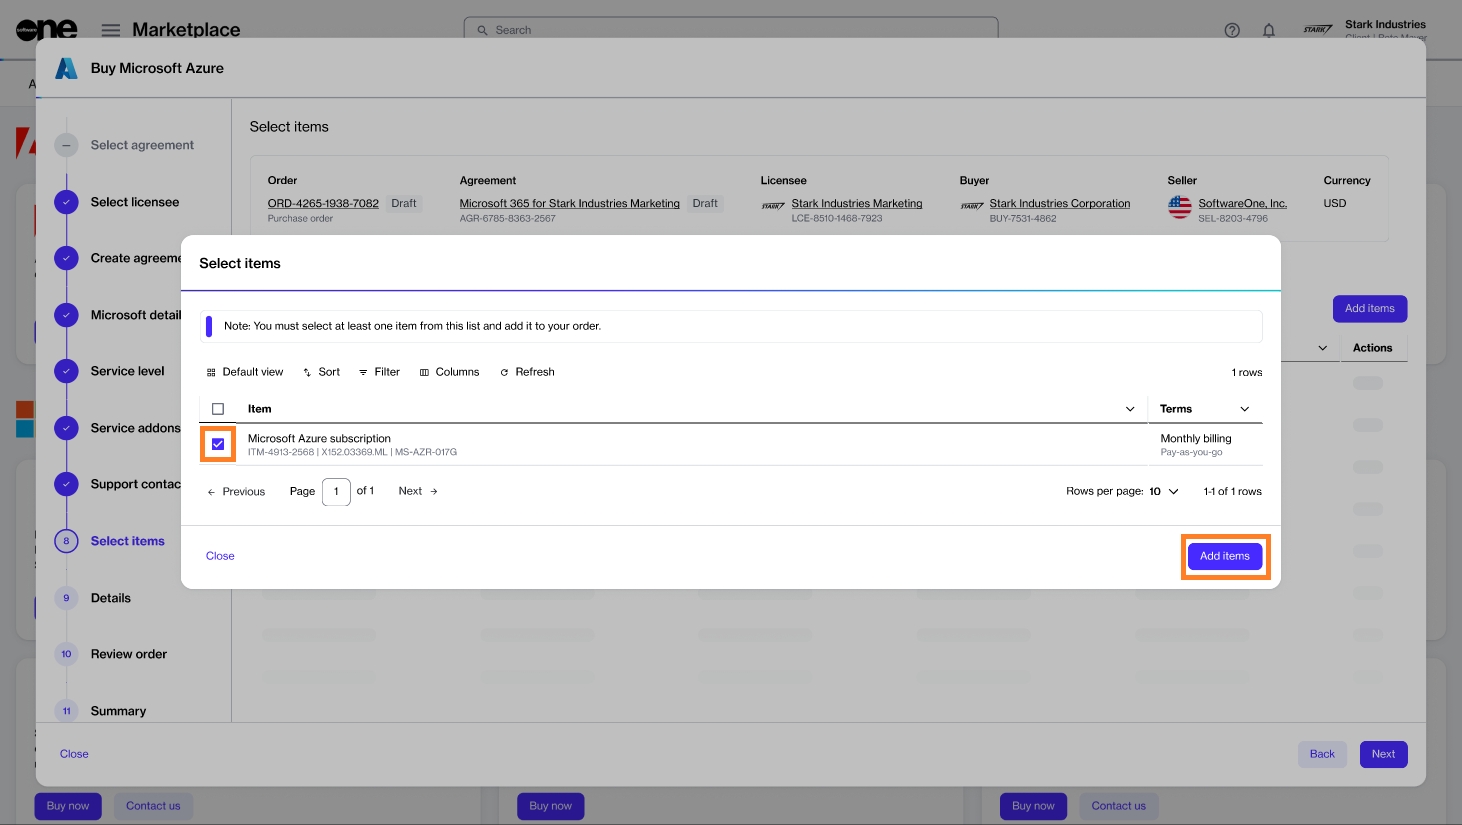
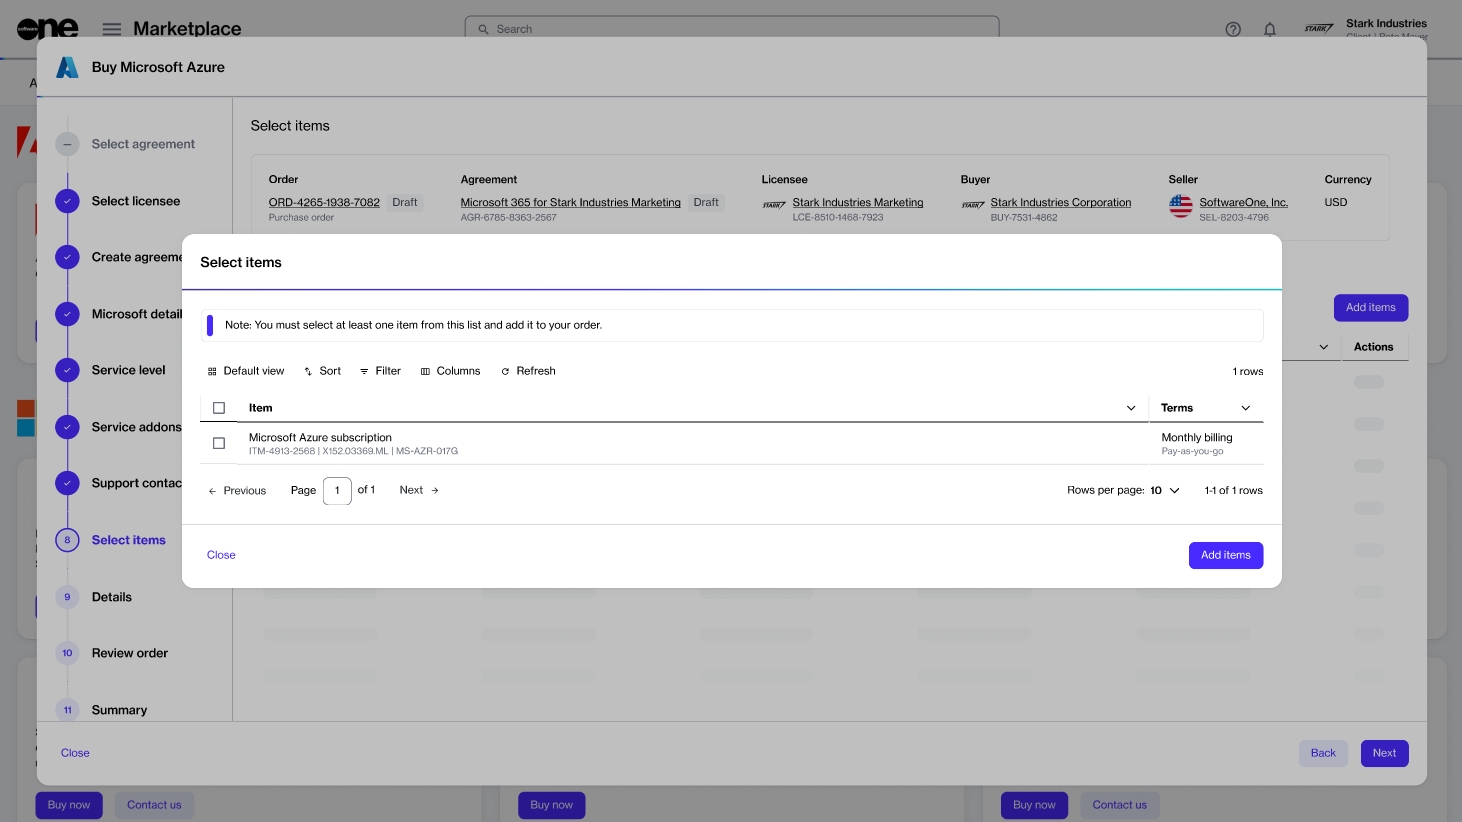
Select the Azure subscription item and click Add items to add it to your order. Note that for Microsoft Azure, there is only one item, with no associated cost. When using Azure services, pay-as-you-go charges are generated against the subscription.
Click Next to continue.
Enter the reference information as needed and click Next.
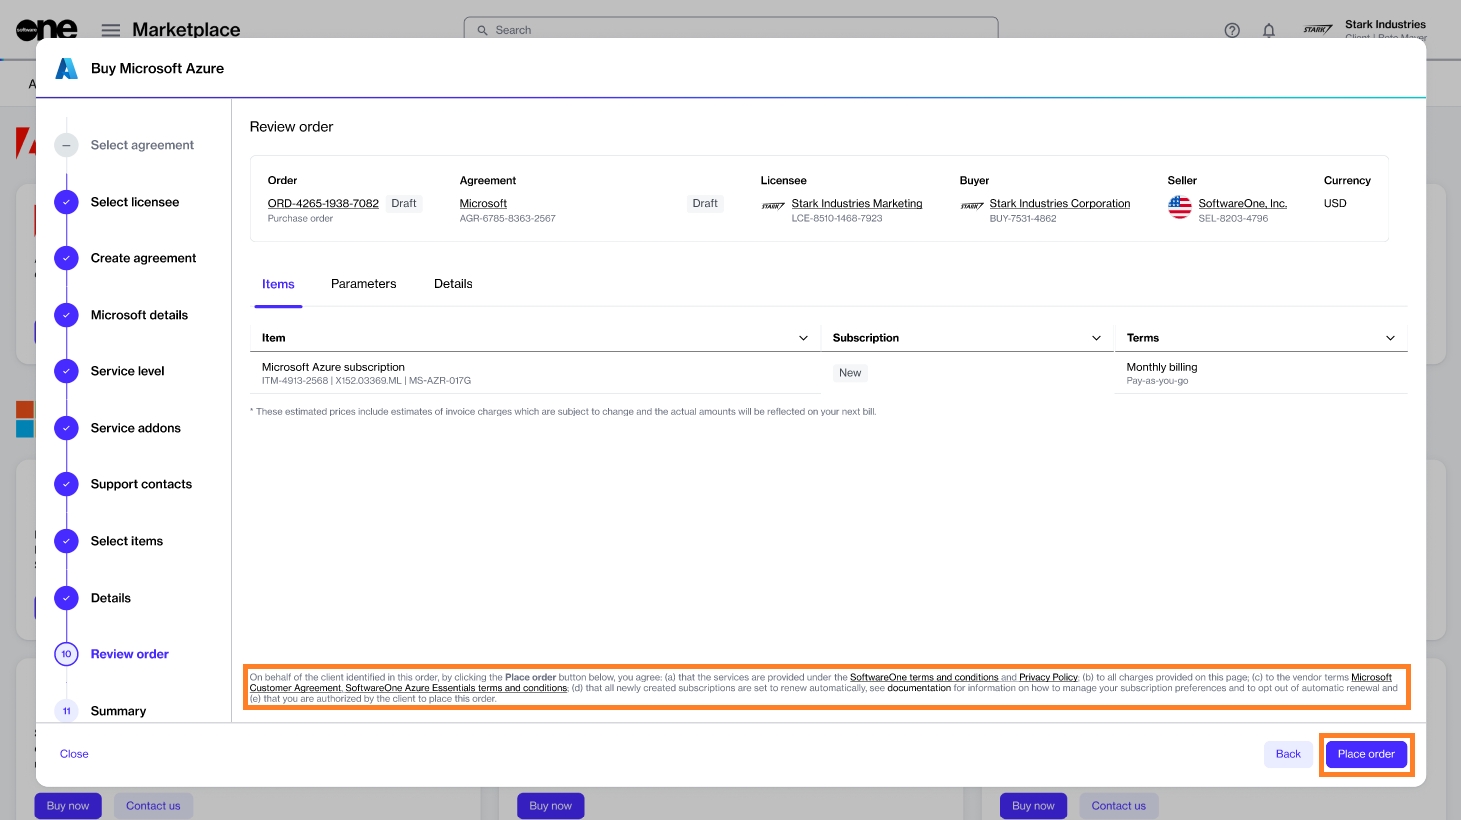
Review the details of your order and make sure to read the terms using the links in the footer.
Click Place order to complete your purchase.
Review your order summary and the latest status message.
Click View Order to navigate to the order details page. Otherwise, click Close to close the Summary page.
Terminate all Microsoft subscriptions and cancel your agreement.
This tutorial shows how to cancel all Microsoft subscriptions in an agreement by placing a termination order for the agreement.
Before starting this tutorial, make sure that the subscription you want to terminate is active. You can check the status on the Subscriptions page or by accessing the agreement.
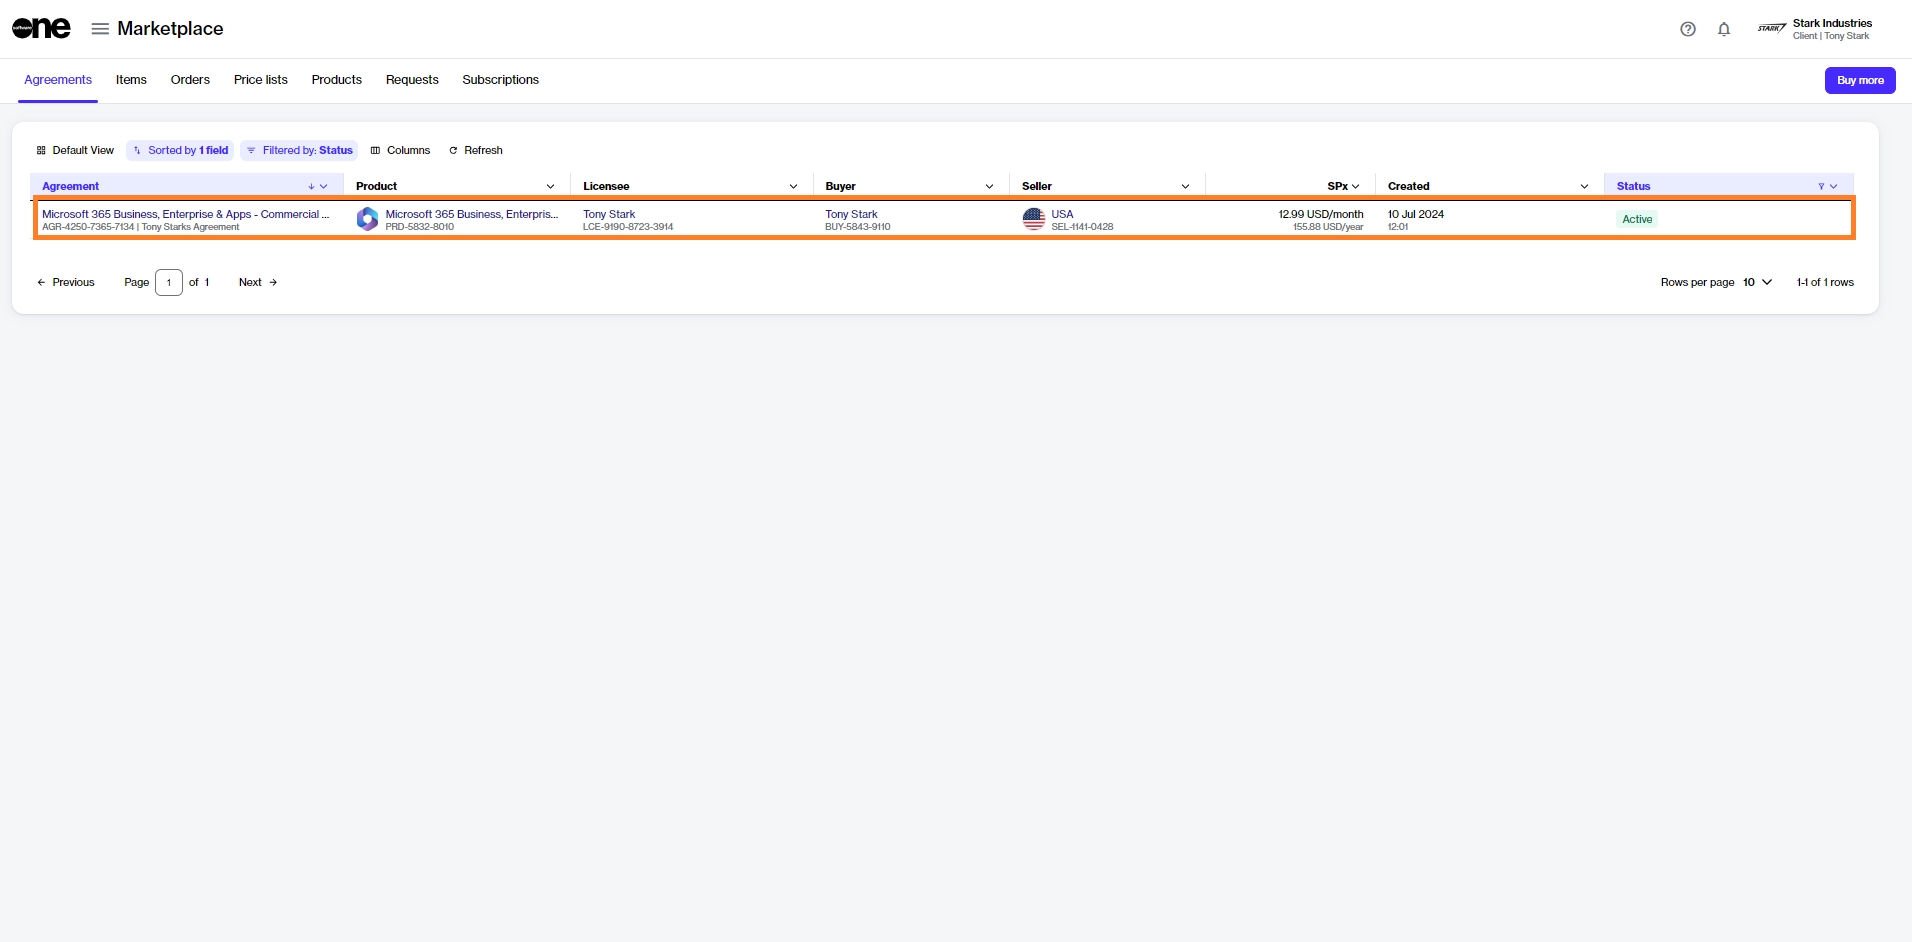
Navigate to the Agreements page (Marketplace > Agreements) and locate the agreement containing subscriptions you want to terminate.
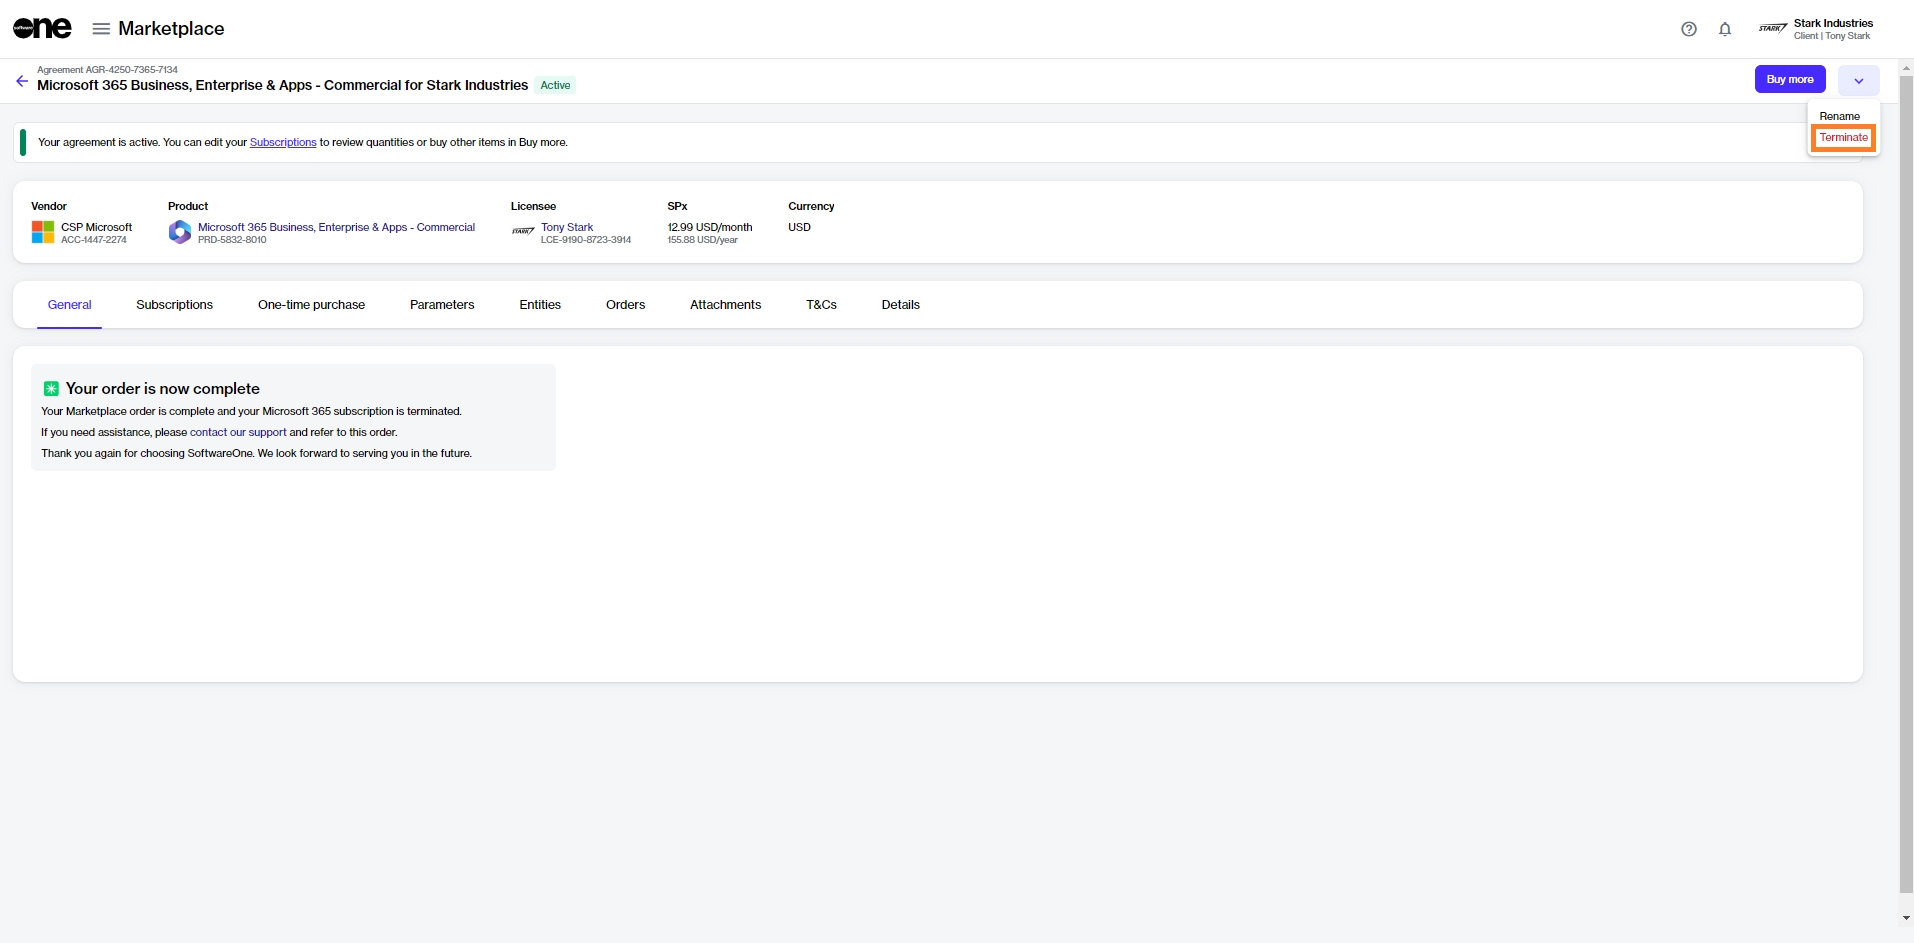
Click the agreement name. The following image shows an example agreement:
Click the chevron in the upper right on the details page and select Terminate.
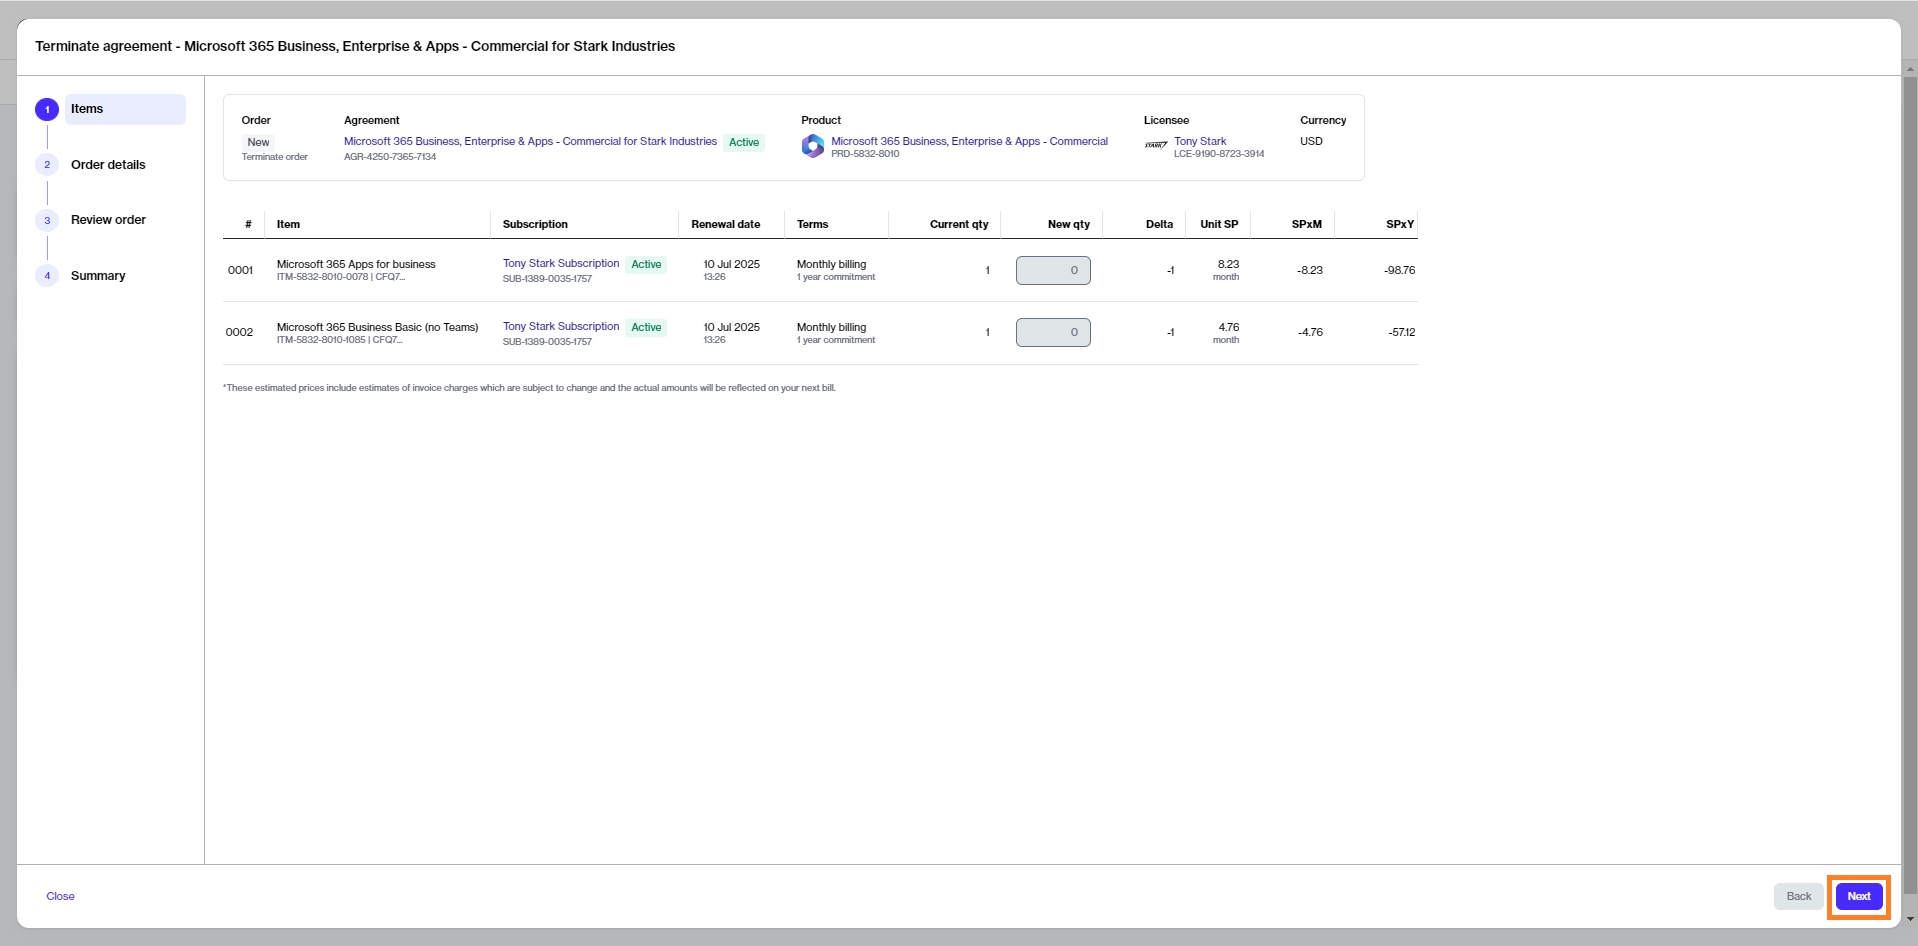
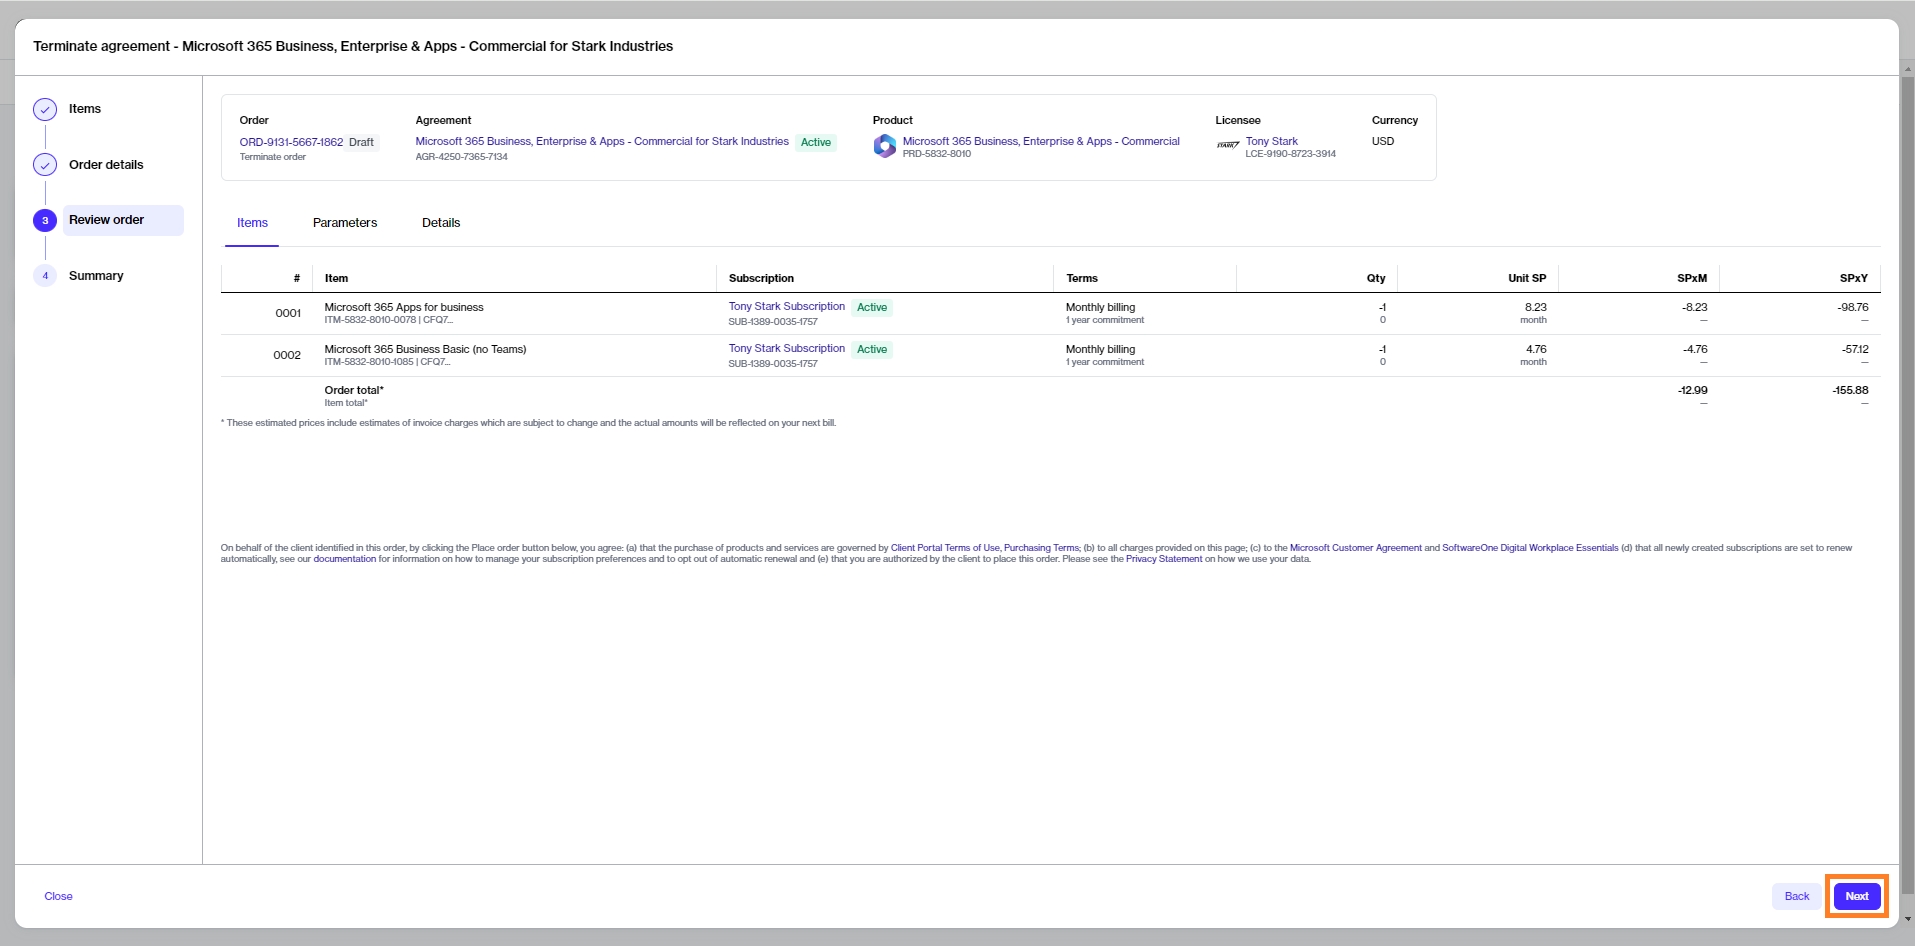
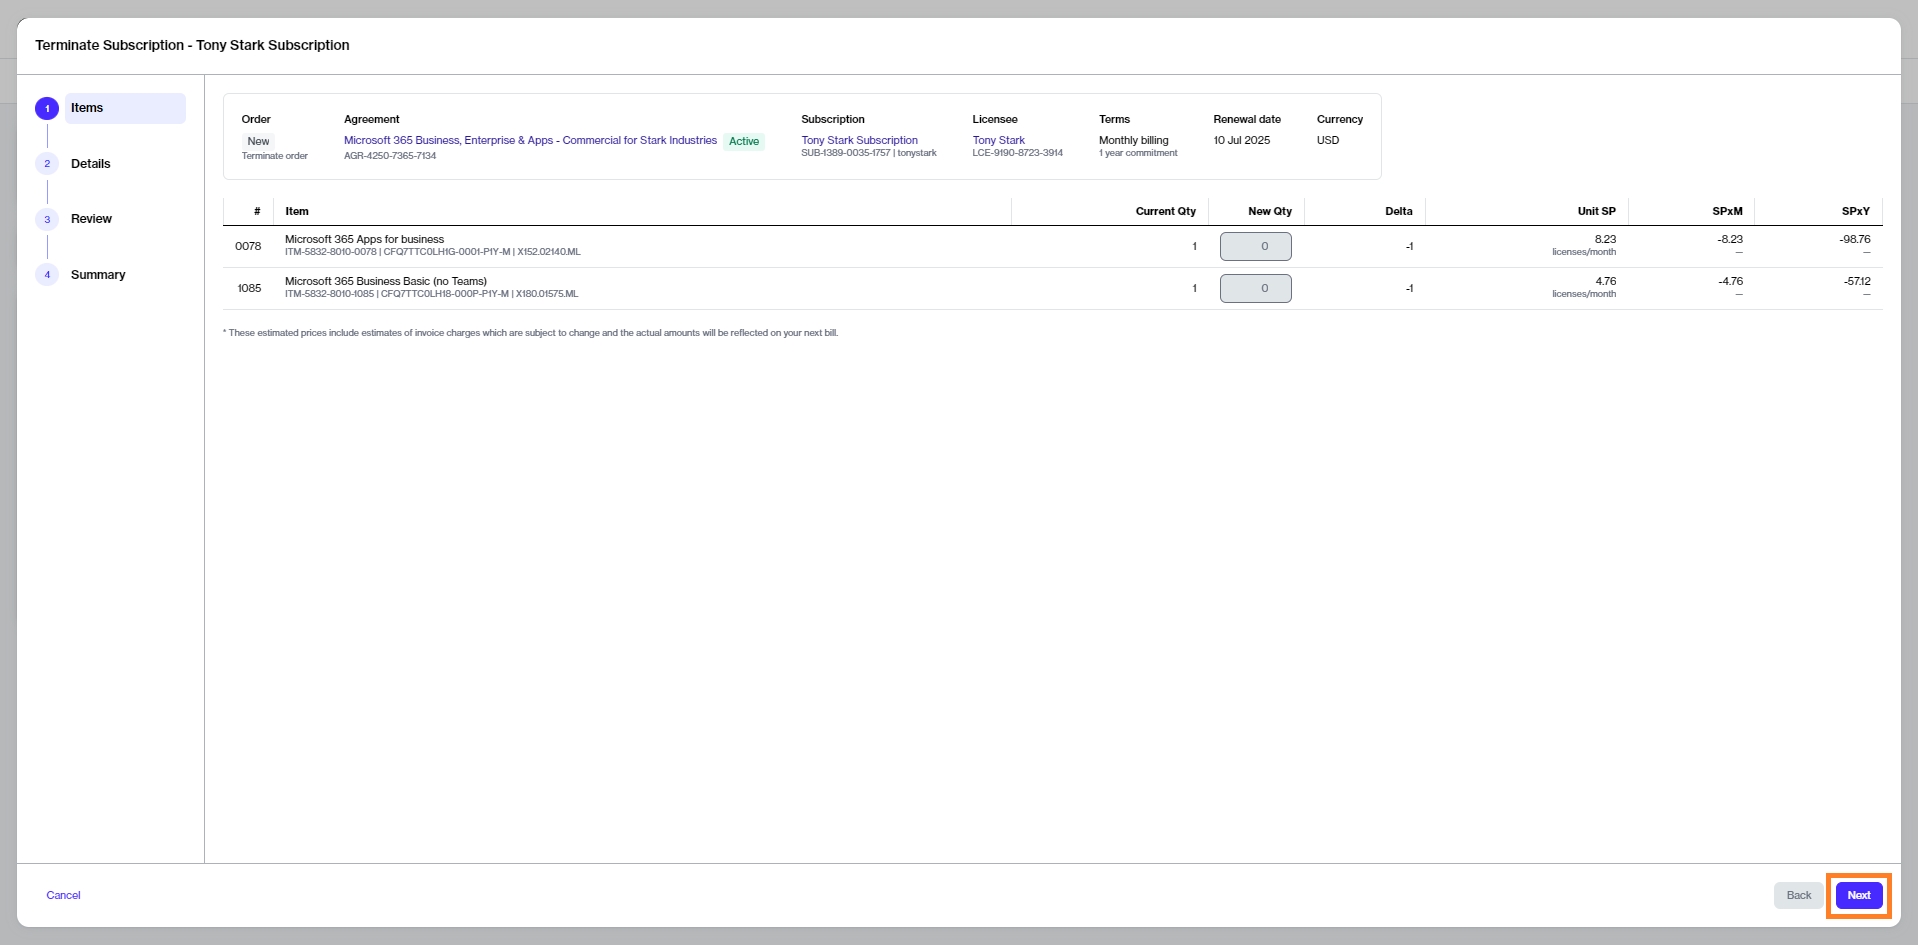
Review the details to make sure that all subscriptions have zero quantity. Click Next.
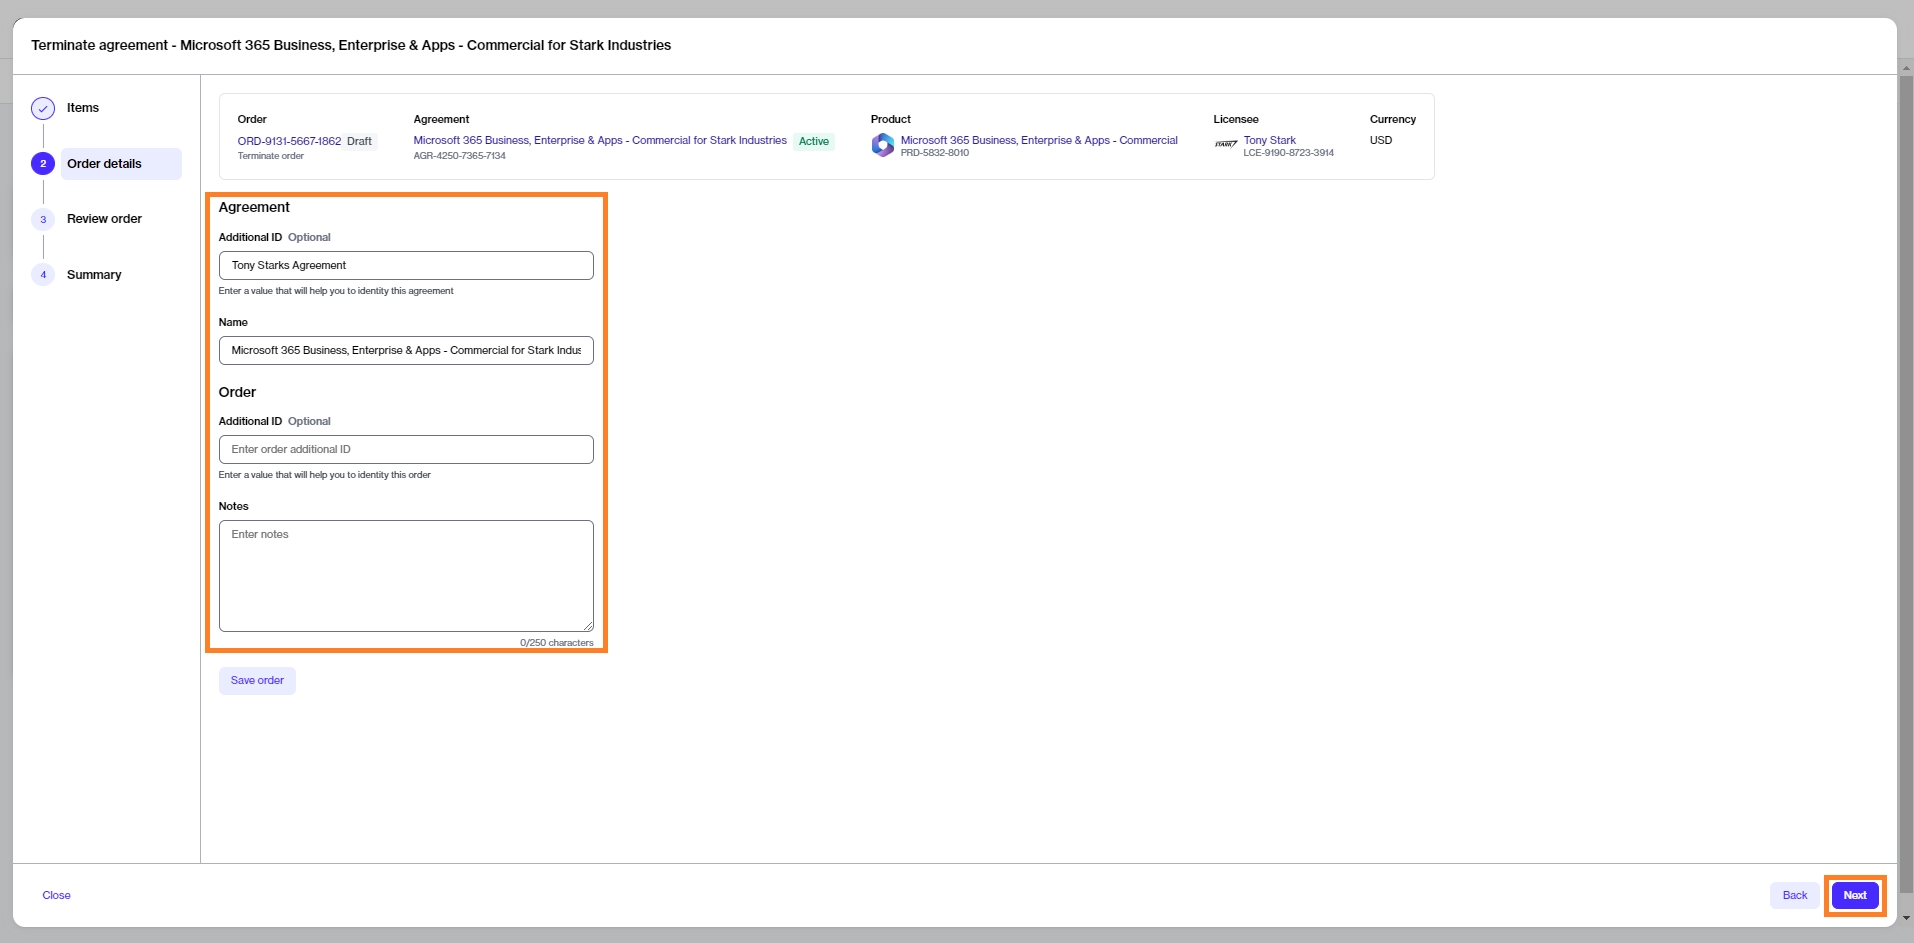
Enter the optional reference information as needed and click Next.
Click Next to place the termination order for your agreement.
Click View Order to navigate to the order details page. Otherwise, click Close to close the Summary page.
A termination order is created for the agreement and sent to the vendor for processing.
Terminate a Microsoft subscription in an agreement.
This tutorial shows how to cancel a subscription within an agreement by placing a termination order for the subscription.
Before starting this tutorial, make sure that the subscription you want to terminate is active. You can check the status on the Subscriptions page or by accessing the agreement.
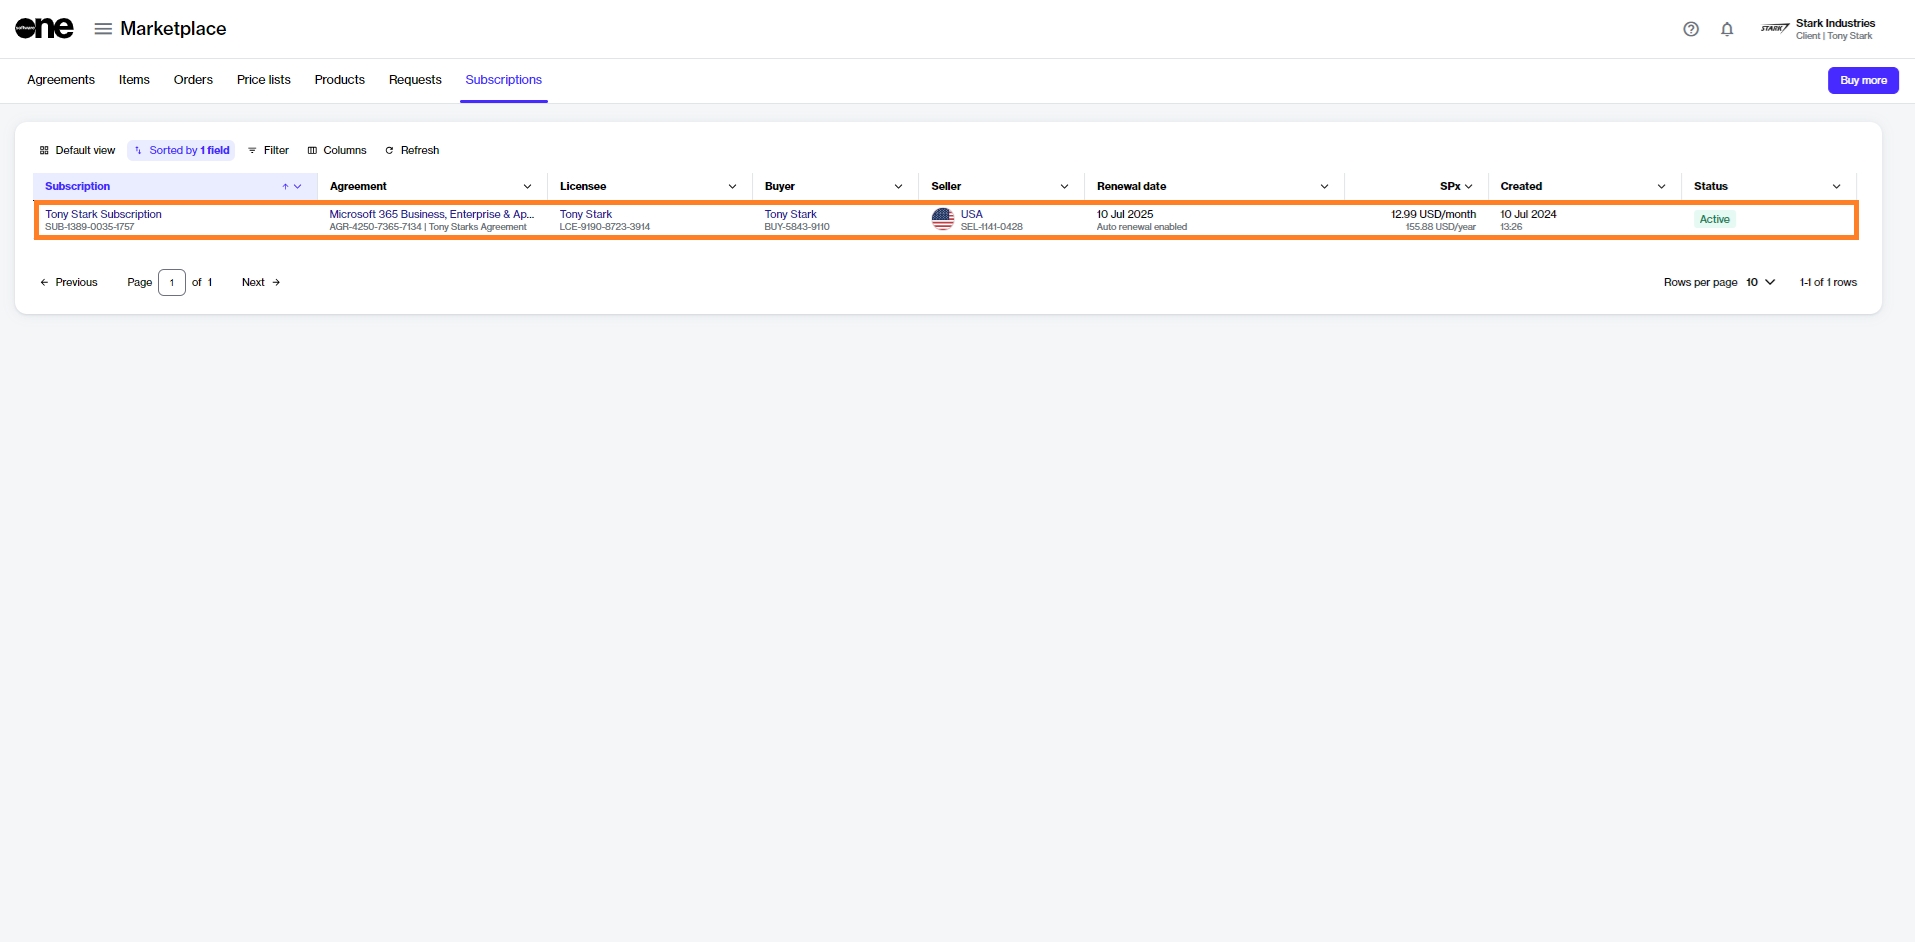
Navigate to the Subscriptions page (Marketplace > Subscriptions) and click the subscription to terminate. Make sure that the subscription is Active.
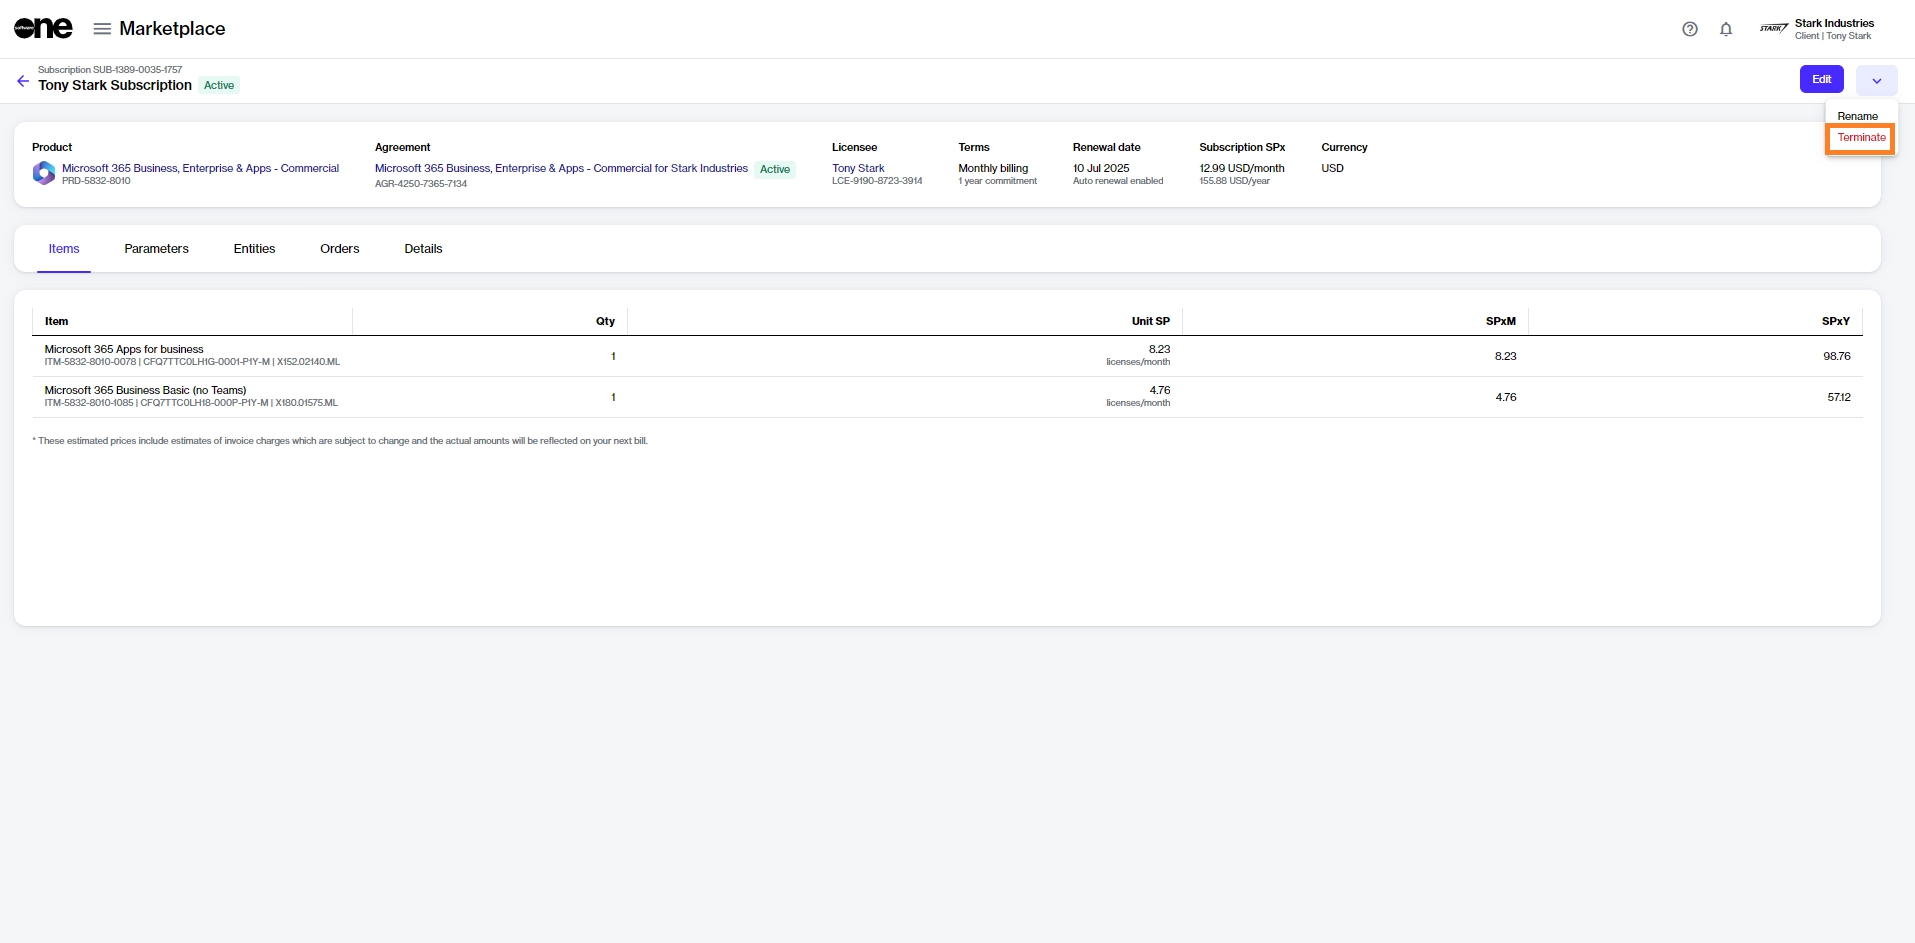
Click the chevron in the upper right on the details page and select Terminate.
The Terminate subscription wizard launches.
Review the details to make sure that the quantity of the subscription you want to terminate is zero. Click Next.
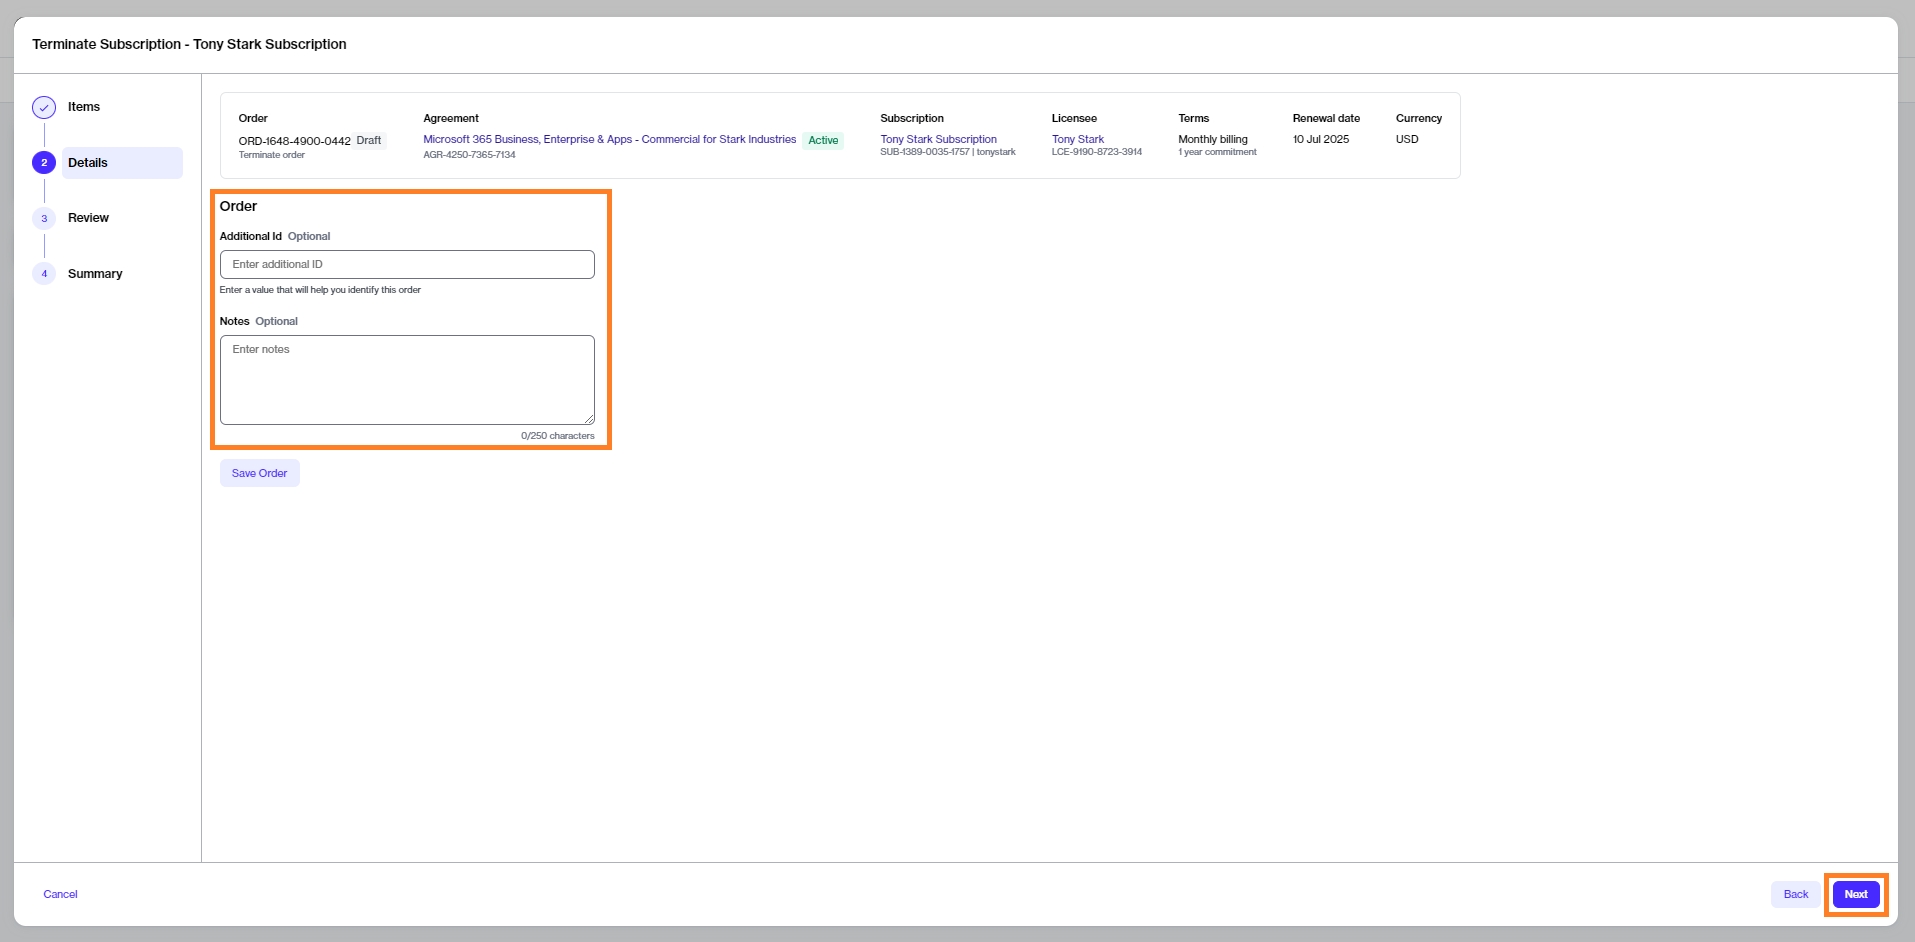
Enter the reference information as needed and then click Next.
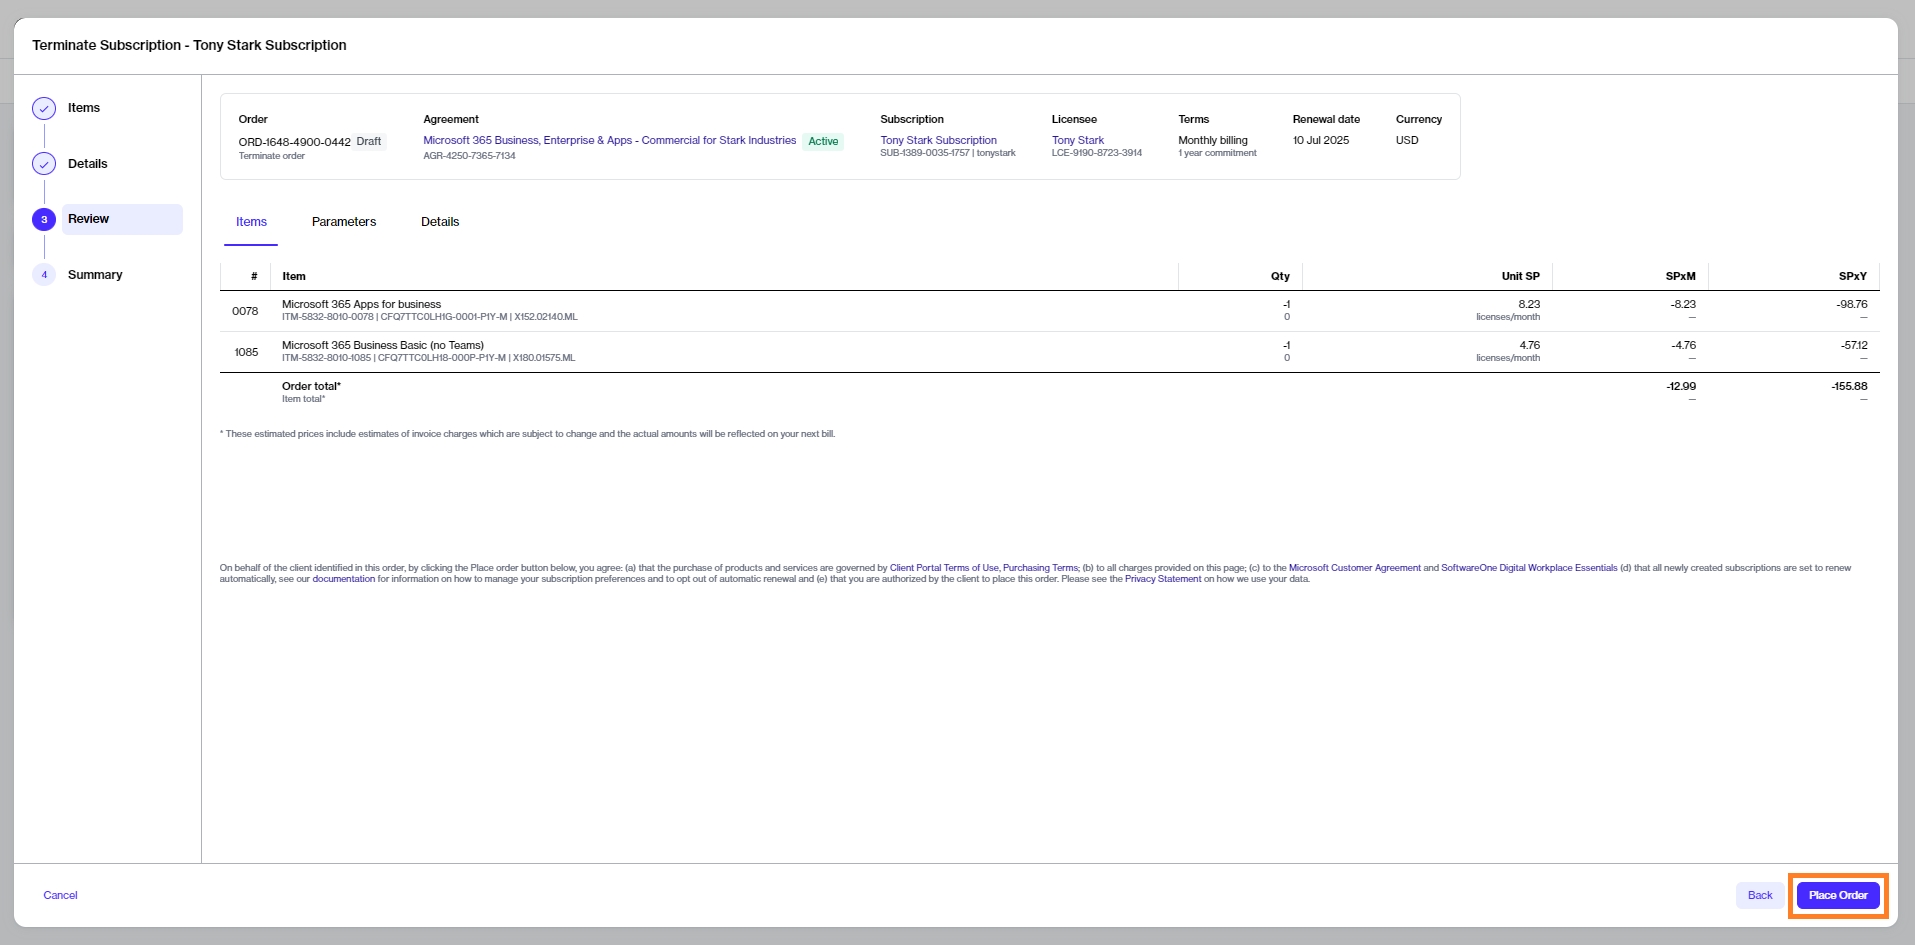
Click Place Order to place your termination order.
Click View Order to navigate to the order details page. Otherwise, click Close to close the Summary page.
The termination order is submitted to the vendor for processing.
Order a Microsoft Azure subscription through the Marketplace Platform.
This tutorial shows how to order a Microsoft Azure subscription by setting up a new agreement and a new Microsoft tenant.
Before starting this tutorial, make sure you have the following:
Details, such as your company name, registration ID, and address. You'll need to provide these details when creating the new Microsoft tenant.
Contact details of the person who will manage your account.
Navigate to the Products page and click Microsoft Azure.
Click Buy now on the details page.
The purchase wizard starts and the Select agreement section of the wizard is displayed.
Click Create new agreement to set up your new agreement.
Click Next.
Choose whether you want to create a new Microsoft account or use your existing account. In this tutorial, we'll create a new cloud account by selecting Create new cloud account, as shown in the following image.
Click Next.
(Optional) Click Access tenant name availability tool to check the availability of tenant names from Microsoft.
Enter your preferred domain name (also known as tenant name) in Primary domain name.
Fill out the required fields and click Next.
Select Azure Essentials or Azure Advanced, depending on the level of service you require for Microsoft Azure.
Click Next.
When you select Azure Essentials or Azure Advanced, all add-ons offered as part of the Azure services are displayed. All service add-ons are selected by default and you cannot change them.
Click Next.
Enter the contact you want to use for support and your preferred support language.
Click Next.
Choose the Azure subscription and click Add items to add it to your order. For Microsoft Azure, there is only one item, with no associated cost. When using Azure services, pay-as-you-go charges are generated against the subscription.
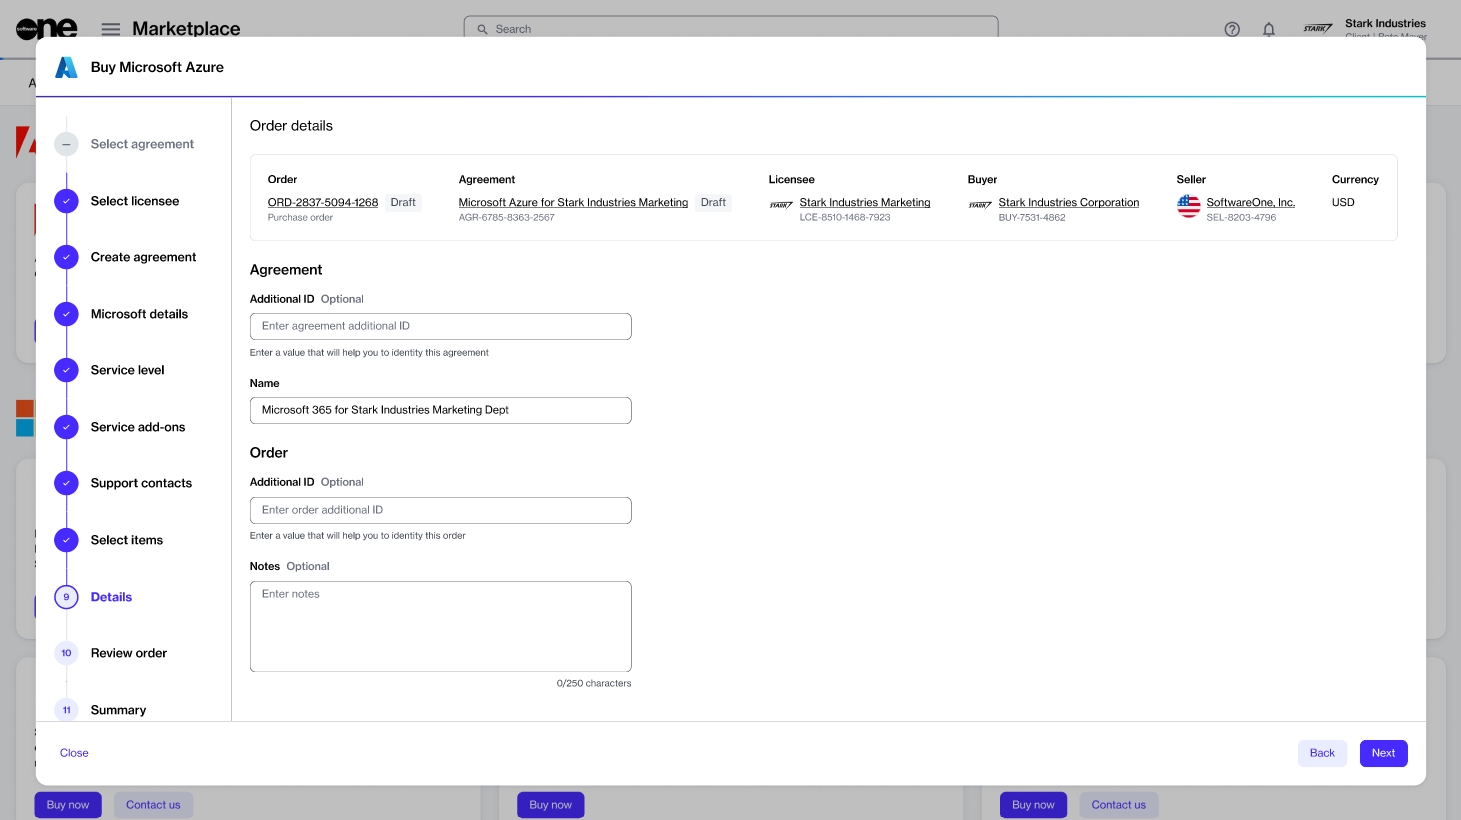
Enter the reference information as needed and click Next.
Review the details of your order. Make sure to read all terms and conditions, including the privacy statement. By placing the order, you accept all terms.
Click Place order to complete your purchase.
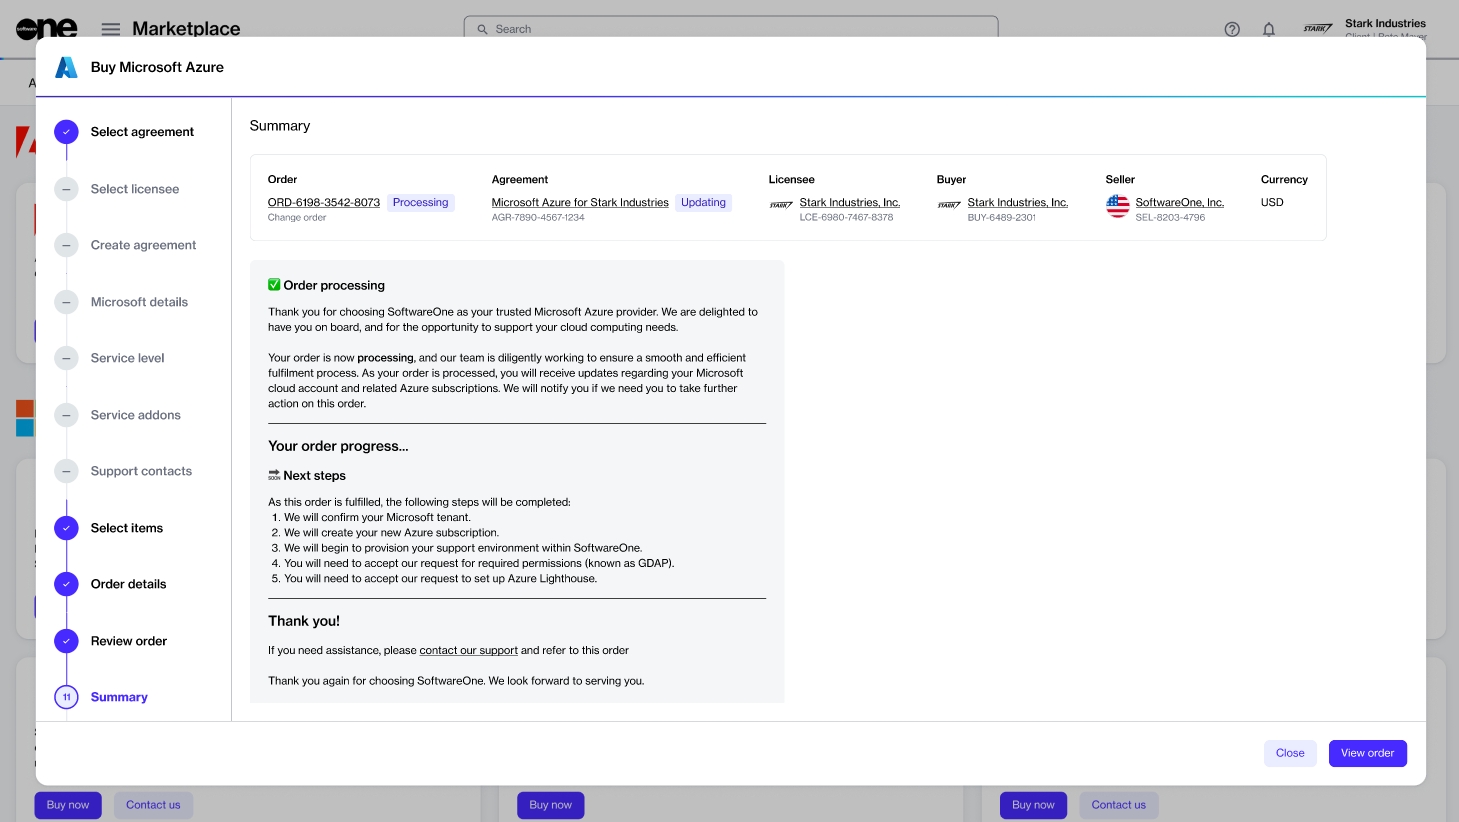
Review your order summary and the latest status message.
Click View Order to navigate to the order details page. Otherwise, click Close to close the Summary page.
In the Marketplace Platform, renewal notifications are sent when your Microsoft CSP subscriptions are nearing expiration. We send these email notifications to inform you of your expiring subscriptions and to facilitate automatic renewal.
Renewal notifications are sent 1, 7, and 30 days before your subscription ends. If your subscription is currently active, you have the option to enable auto-renewal, which will allow your subscription to renew automatically.
Follow these steps to manage your subscription:
Open your renewal notification and click Manage Subscription.
In the Subscription Auto-Renewal form, turn on Auto Renewal to let your subscription renew automatically. If you don't enable auto-renewal, your subscription will expire on the renewal date.
Click Save to submit your request.
You'll receive a confirmation email once your subscription status is updated. Note that processing your request might take up to 24 hours.
If you want to stop receiving emails about your upcoming renewals and subscription status, use the Manage your notification settings link in the renewal email to adjust your preferences.
A licensee in the active state or permission to (if you don't want to use an existing licensee). You'll need to select the licensee when setting up the new agreement.
Choose the licensee you want to use. In this tutorial, we'll select an existing licensee, as shown in the following image. However, you can add a new licensee by clicking Add licensee and following the instructions in .
You can view the most up-to-date information for your order and its status on the page.
You can view the most up-to-date information about your order and its status on the page.
A licensee in the active state or permission to (if you don't want to use an existing licensee). You'll need to select the licensee when setting up the new agreement.
Choose the licensee you want to use. In this tutorial, we'll select an existing licensee, as shown in the following image. However, you can add a new licensee by clicking Add licensee and following the instructions in .
Order Microsoft 365 Subscription (New Tenant)
Order a Microsoft 365 subscription by creating a new agreement and a new Microsoft tenant.
Order Microsoft 365 Subscription (Existing Tenant)
Order a Microsoft 365 subscription for an existing Microsoft tenant.
Buy More Licenses for Microsoft 365 Subscription
Buy more licenses for your Microsoft 365 subscription.
Order Microsoft Azure Subscription (New Tenant)
Buy an Azure subscription for a new Microsoft tenant.
Order Microsoft Azure Subscription (Existing Tenant)
Order an Azure subscription for an existing Microsoft tenant.
Order Additional Microsoft Azure Subscriptions
Order more licenses through an existing agreement.
Terminate Microsoft Subscription
Cancel a single subscription in an agreement.
Terminate All Microsoft Subscriptions
Cancel all subscriptions and terminate your agreement.
License-based New Commerce
(example: Microsoft 365 / Dynamics 365)
Active
Cancelled
Suspended
Expired
Disabled
Deleted
Active
Active
Terminated
Terminated
Terminated
Terminated
License-based Legacy
(example: Microsoft 365 / Dynamics 365)
Active
Suspended
Deleted
Active
Terminated
Terminated
Usage-based
(example: Microsoft Azure)
Active/Enabled
Deleted
Disabled
Expired
Active
Terminated
Terminated
Terminated
Perpetual
(example: Perpetual Excel license)
Active
Cancelled
Active
Terminated
Software subscription
(example: Windows Server CAL 1yr)
Active
Cancelled
Active
Terminated
Microsoft subscriptions can be canceled by placing a termination order through the Marketplace Platform.
A termination order suspends the subscription until it reaches the end date when it'll be terminated. A suspended subscription cannot be used, but it's still billed until the end date.
The following cancelation specifics apply to Microsoft subscriptions:
For Microsoft Azure, you can cancel a single subscription or the entire agreement containing subscriptions. Note that for Microsoft Azure, the usage is billed in arrears. It means you'll be billed as per your usage in the previous month.
For all other Microsoft products, such as Microsoft Dynamics and Microsoft 365, you can terminate or reduce the quantity within 7 days from your date of purchase. Subscriptions terminated or reduced in quantity within 7 days of purchase are eligible for a prorated refund. To learn more, see New Commerce Experience Cancellation Policy.
Although Microsoft supports co-terming, the Marketplace Platform doesn't support co-terming for Microsoft products.
For step-by-step instructions on canceling your subscription, see Terminate Microsoft Subscriptions and Terminate All Microsoft Subscriptions.
We've updated the provisioning flow for Microsoft product purchase orders. Previously, the process was delayed by Granular Delegated Admin Privileges (GDAP) management, which could take up to 21 days. Now, the provisioning process will no longer wait for GDAP approval to complete the order. A time limit has been set, counting from the order creation in the Microsoft Partner Center, after which the order will be completed regardless of GDAP status.
Note that this does not remove the need for GDAP approval. For cases where approval is delayed or pending, services dependent on GDAP will remain inactive until approval is obtained. The sync process will be updated to handle such cases accordingly.
To enhance the efficiency and accuracy of purchase and change order fulfillment, updates have been made to the key validation processes. These improvements are designed to streamline the purchasing experience by reducing unnecessary delays and simplifying the workflow for existing users and accounts. The updates include:
Cart validation for existing users - Ensuring that the items in the cart meet the requirements for processing, providing a smoother purchasing and fulfillment experience.
Billing profile validation for existing accounts - Verifying that the Microsoft account billing profile is complete, reducing the risk of fulfillment delays.
Microsoft client Agreement (MCA) validation - Ensuring compliance with the Microsoft client Agreement, allowing for a more efficient order-handling process.
Removal of validation on ordering parameters for existing agreements - This change eliminates redundant checks on established agreements, speeding up order processing for returning clients.
These updates aim to improve the fulfillment process by minimizing manual interventions and enhancing the overall client journey for CSP orders in the Marketplace.
We have introduced an enhancement for existing CSP clients creating new agreements. clients can now use their vanity domain (like, <http://mybusiness.com>) as the principal domain, instead of the default mybusiness.onmicrosoft.com.
This enhancement allows the SoftwareOne Marketplace to support Microsoft’s effort to create a more customized and professional experience by enabling businesses to represent themselves using their branded domain throughout the agreement creation process. This enhances brand consistency but also simplifies domain management for clients with established vanity domains.
We are introducing new parameters to enhance the subscription fulfillment process, improving tracking, accuracy, and transparency in subscription management. The new parameters are as follows:
Last successful sync - This parameter stores the timestamp of the most recent successful synchronization, making it easier to monitor and resolve any sync-related issues.
Current seat quantities - This parameter tracks the current number of active seats in a subscription, providing real-time visibility into the active usage.
Scheduled seat quantities - This parameter stores the number of seats scheduled for future changes, ensuring that planned adjustments are properly documented and aligned with client expectations.
These updates will streamline subscription management, offering better control and oversight of active and scheduled seat quantities during the fulfillment process.
The CSP program allows you to purchase Microsoft subscriptions through the Marketplace Platform and self-manage those subscriptions.
To learn about the CSP program, see .


