If you no longer wish to use a buyer, you can disable them temporarily through the platform and re-enable them when required.
When you disable a buyer, the licensees associated with that buyer also become unavailable. It means you will no longer be able to select those licensees when creating agreements or making purchases.
Follow these steps to enable or disable a buyer:
On the Buyers page (Settings > Buyers), locate the buyer you want to manage.
Click the actions icon (•••) for the buyer and select Enable or Disable. Note that only one of these options is shown depending on the current state of the buyer. For example, the Enable option is shown only if the buyer has been disabled.
Confirm that you want to enable or disable the buyer.
A message is displayed stating that the buyer has been updated. You can view the updated buyer status on the Buyers page.

After the buyers have been linked to your account by SoftwareOne, you can manage them through the platform and edit buyer details as needed. You can update the contact person assigned to the buyer and the buyer's logo in the system.
Follow these steps to update the buyer details:
Navigate to the Buyers page (Settings > Buyer).
Click the buyer's name. When the details page of your selected buyer opens, click Edit in the upper right. The Edit buyer page opens.
In the General section, add or update the buyer's logo. You can upload an image by clicking Select file or by dragging the image into the field.
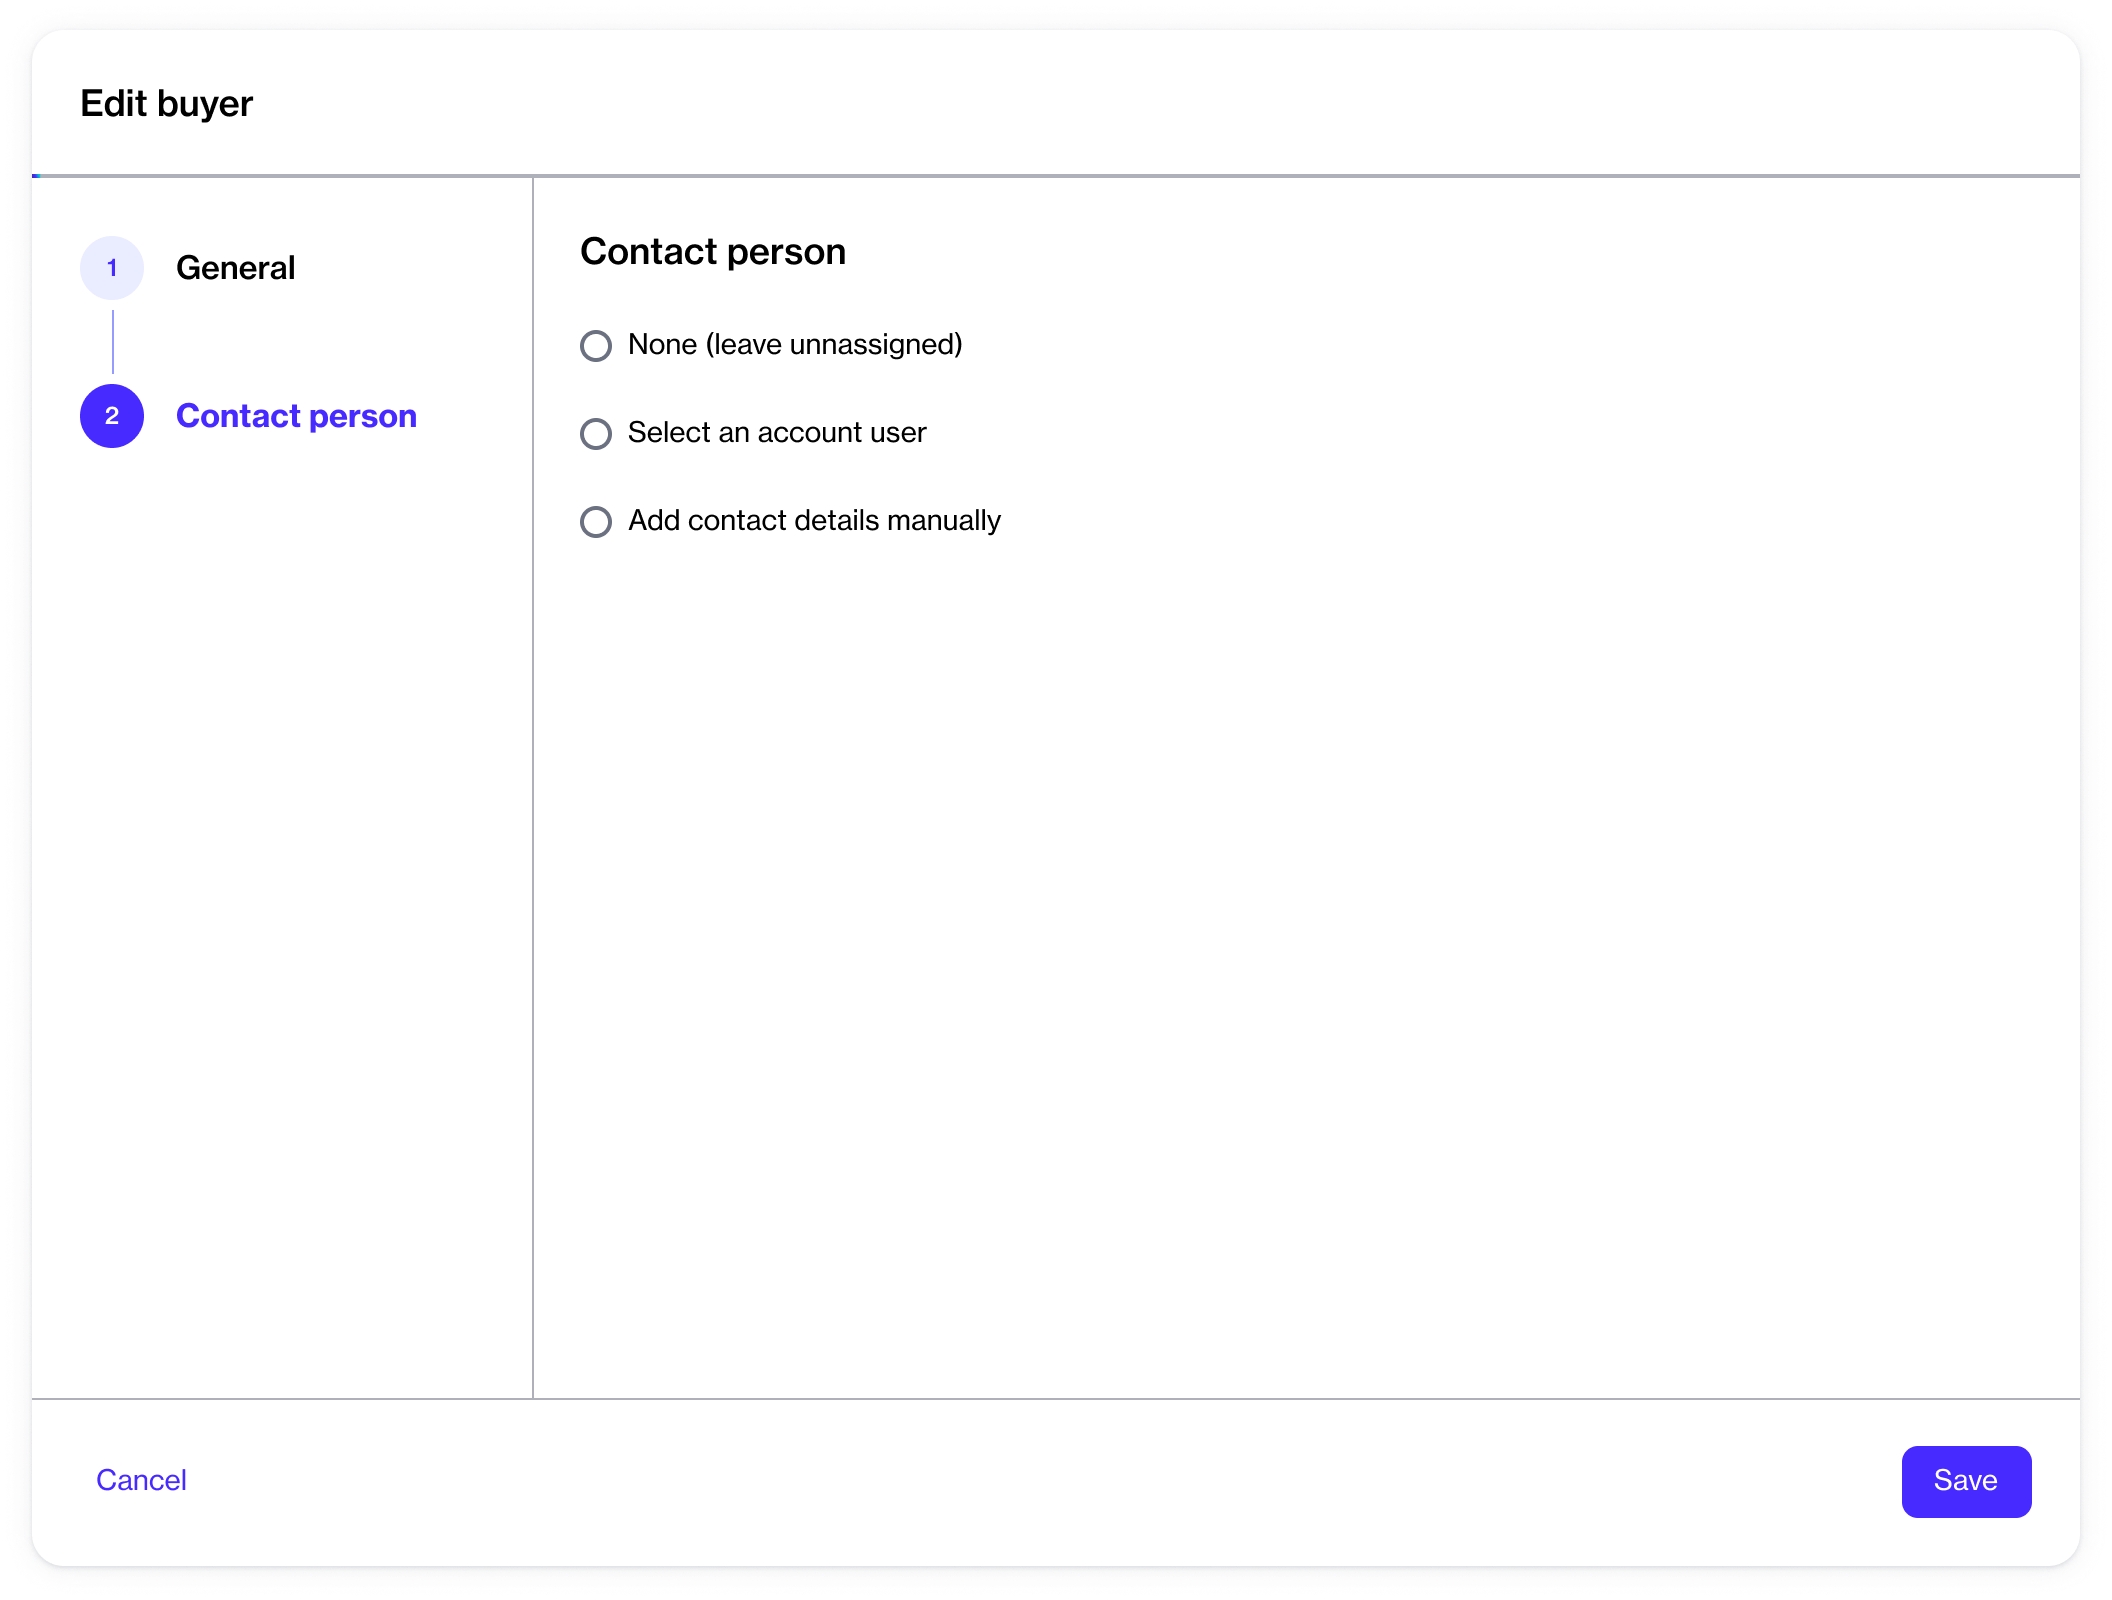
In the Contact Person section, make the following changes as necessary:
None (leave unassigned) - Select to leave the contact person unassigned.
Select an account user - Select to choose an existing user. When you select this option, all active users that exist in your account are displayed. If your account contains several users, use the Search option to find the user easily.
Add contact details manually - Select to add the individual's details manually. You'll need to provide the person's first name, last name, email address, and the optional contact information.
Click Save. A confirmation message is displayed stating that the buyer details have been updated.
In the Marketplace Platform, a buyer refers to any organization or legal entity that procures products or services from SoftwareOne. Buyers are the recipients of the invoices issued by SoftwareOne. See Key Concepts to learn more about buyers.
As a client, you can enable or disable a buyer, and update buyer details as needed through the user interface (UI). However, you cannot add new buyers. New buyers can be added by SoftwareOne only.
Account administrators can access the Buyers page by navigating to the main menu and selecting Settings > Buyers.
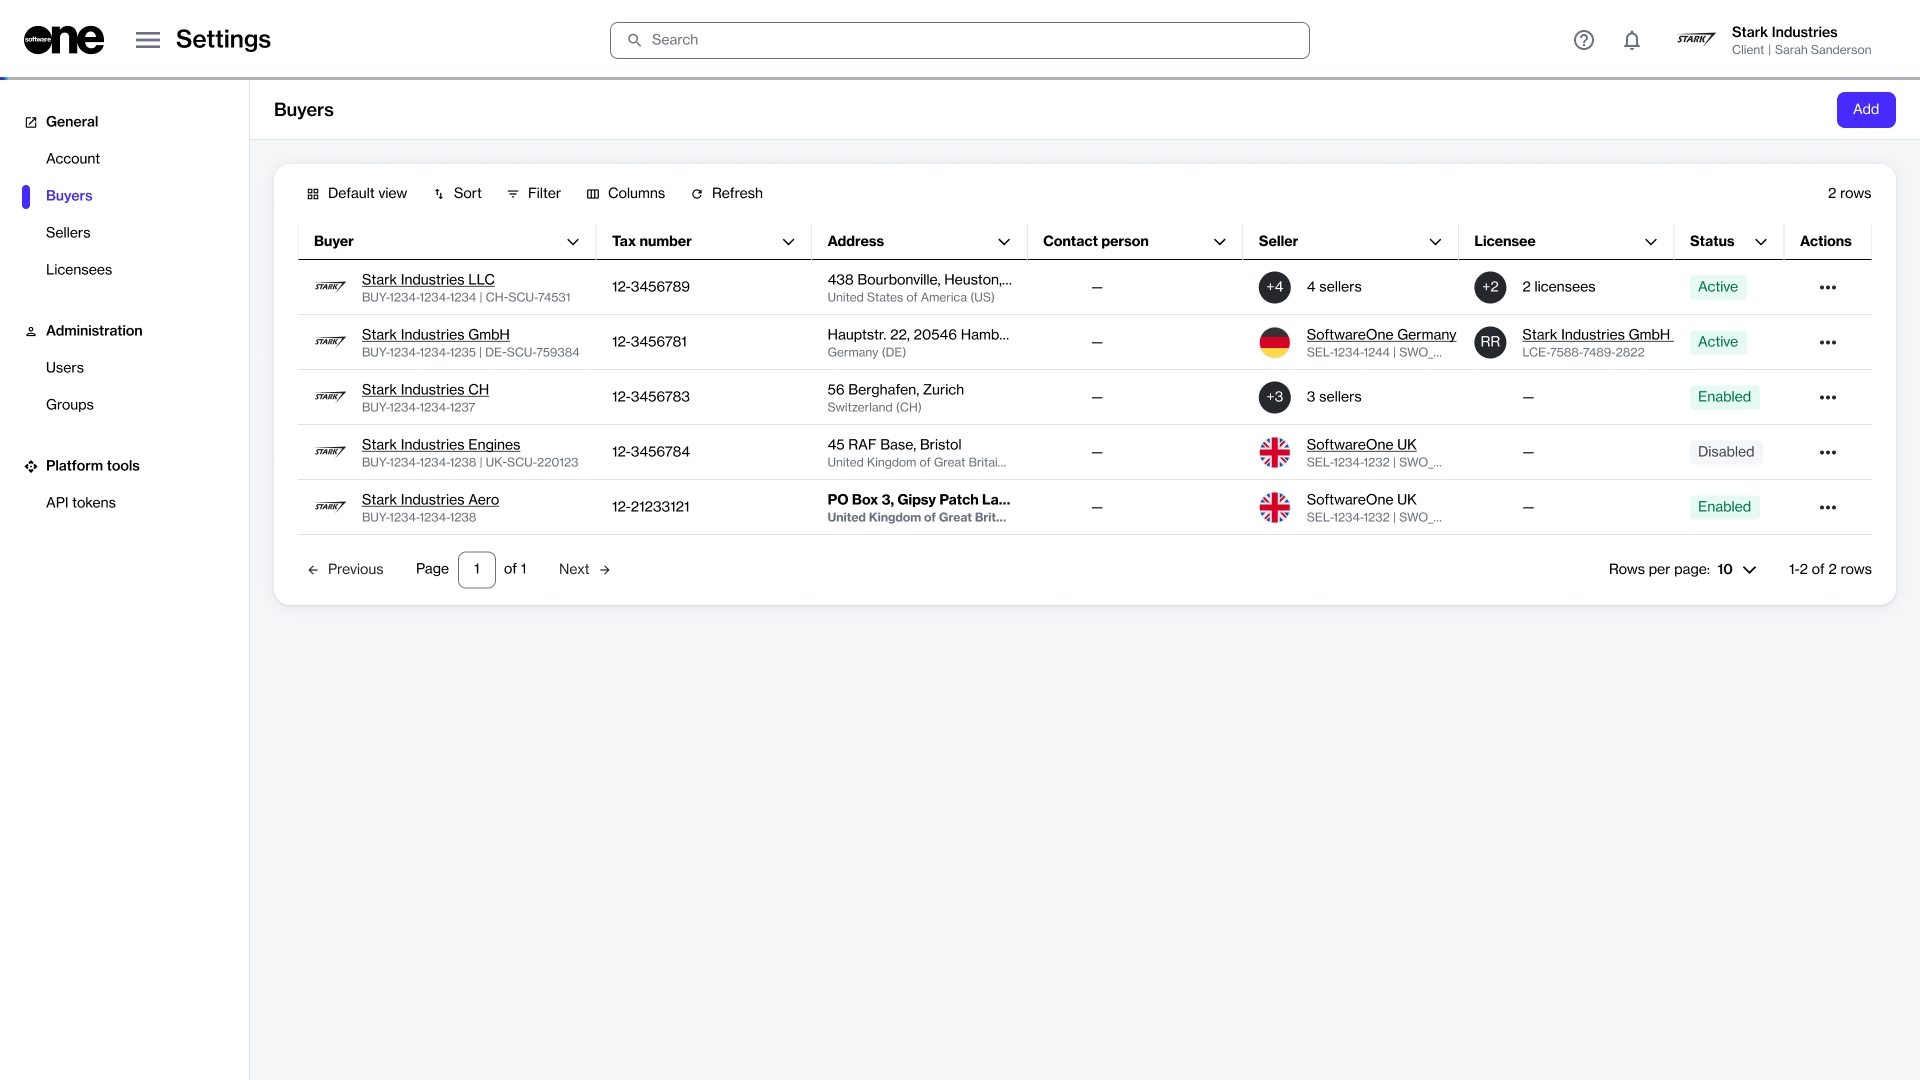
The Buyers page shows a list of buyers in the account. For each buyer, you can view the following information:
Buyer - Displays the buyer's name and their unique identifier on the Marketplace platform.
Tax number - Displays the tax identifier for the buyer, if available.
Address - Displays the buyer's address.
Contact Person - Displays the contact person for the buyer. You can assign a contact person by editing the buyer. For instructions, see Edit Buyers.
Seller - Displays the name of the SoftwareOne legal entity from which the buyer can procure.
Licensee - Displays the licensee mapped to the buyer.
Status - Displays the buyer's status in the system. Possible values include:
Enabled - The buyer has been created in the system but it hasn't been activated yet by SoftwareOne.
Active - The buyer is active and you can select it from your list of buyers when buying products.
Disabled - The buyer has been disabled and can no longer be selected when buying products.
Mismatch - The buyer’s data is not in sync with the data in our backend system. This discrepancy can occur due to various reasons. Contact support for assistance.
Actions - Displays options that allow you to edit a buyer or enable or disable a buyer. These options are visible only if you have access to the Account Management module.
The details page of a buyer provides all information related to the buyer. You can open the details page by clicking the buyer on the Buyers page.
When you open the details page, it shows the data associated with the buyer, like the name, marketplace ID, status, and so on.
The page also contains the following tabs that display corresponding information:
General - Displays the buyer's address and the contact person details.
Sellers - Displays the SoftwareOne entities linked to the buyer. Clicking the seller's name opens up the details page for the seller.
Licensees - Displays all licensees associated with the buyer.
Details - Displays reference information, such as the external IDs as well as event summary.
Audit trail - Displays an audit trail of all changes. For each audit record, you can view the log details and summary. To learn more, see Audit Trail.


