Get started as a client using the Marketplace Platform.
Use this section to complete common Marketplace tasks as a client.
Start with buying products. Then, use the related tutorials to filter orders, update subscriptions, order more licenses, split billing, and manage invoice currency.
Browse the catalog and place a new order.
Find orders by status, order ID, or search query.
Change license quantities for a subscription.
Buy more items using an existing agreement.
Assign billing to different buyers in your account.
Choose the currency for future invoices.
Access the product catalog, discover products, and submit your order.
This tutorial describes how to order products from the SoftwareOne Marketplace using the purchase wizard.
The exact steps depend on the product and vendor. This page covers the common flow.
Review the product
Go to Catalog > Products.
Select a product, for example, Microsoft 365 Business, Enterprise & Apps-Commercial.
Review the information, including product details, features, and more.
Start the order
On the product details page, select Buy now.
The purchase flow starts automatically and guides you through each step.
Review and submit the order
The ordering steps and required details vary by product and vendor. Most orders follow this flow:
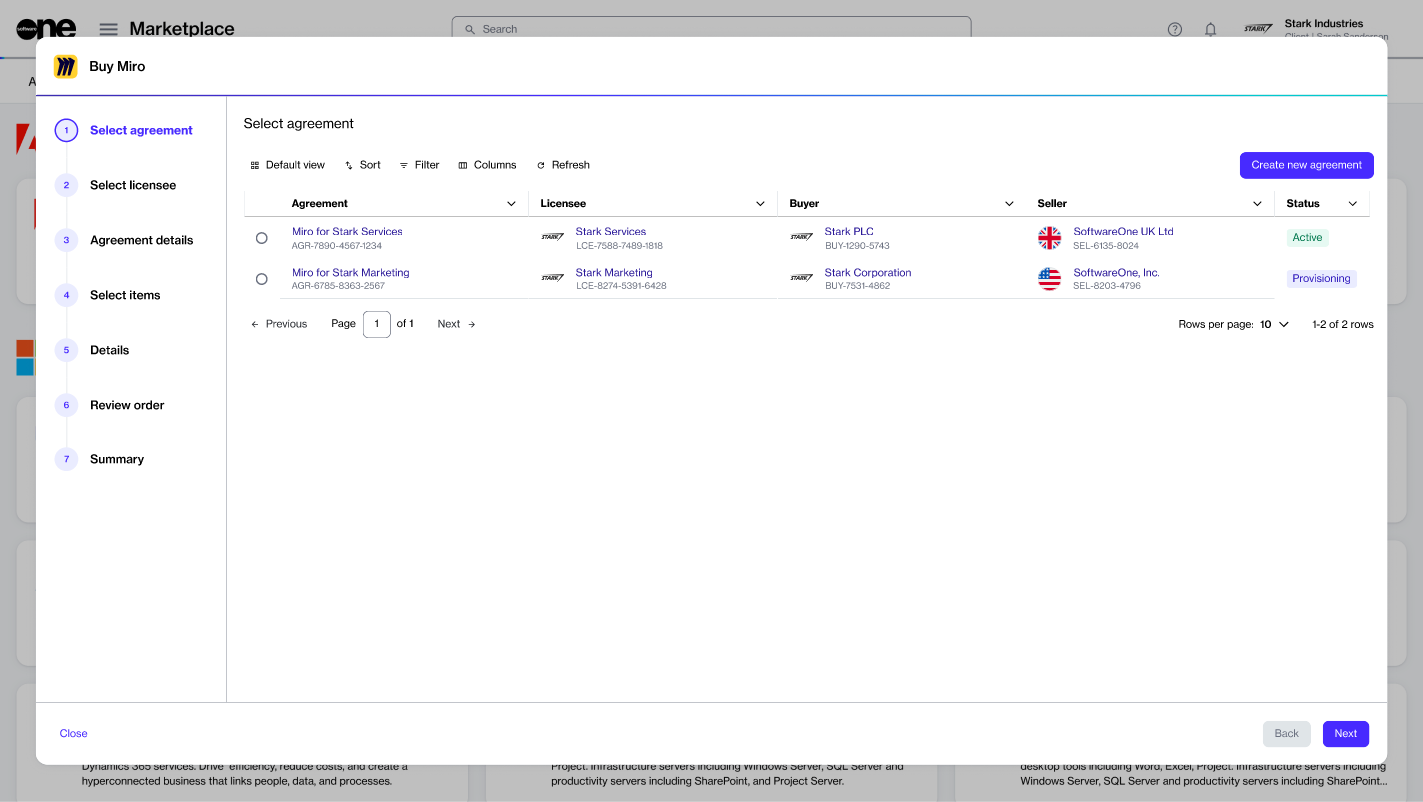
Select agreement – Select an existing agreement or create a new one. The option you select in this step determines the next step. For example, if you create a new agreement, the Select licensee step is displayed. However, if you select an existing agreement, the Select items step appears.
Select licensee – Choose an existing licensee or create a new one.
After you place the order, we verify the order details and start processing it. You can track the current status in the General tab on the order details page.
If action is required, the order details page shows the issue and the next step.
Agreement details – Complete agreement details, such as your company name, address, and more.
Select items – Select the items you want to order and adjust quantities.
Additional information – Add reference details, like internal order or agreement IDs, if needed.
Review order – Review the order details, go through the terms and conditions, and then submit your order.
Summary – Review your order summary to ensure everything is correct.
Learn how to choose a currency for your Marketplace invoices.
This tutorial describes how to choose the billing currency for a Marketplace agreement.
SoftwareOne issues invoices at the agreement level. It means that invoices are generated for specific agreements. Therefore, currency selection must be done at the agreement level.
There are two ways to choose a billing currency. You can select it when creating a new agreement. Alternatively, you can change it after the order is placed.
Start a new purchase
Go to Catalog > Products.
Select the product you want, then select Buy now. The purchase flow starts.
Under Select agreement, select Create agreement.
Continue through the steps until you reach the Billing currency step.
Choose the billing currency
From the Billing currency list, select your preferred currency for future invoices.
Select Next.
Complete the remaining steps to finalize your order.
Changing the billing currency affects future invoices only. Past invoices remain in the original currency.
Open the agreement
Go to Marketplace > Agreements.
Select the agreement whose currency you want to update.
On the agreement details page, select the dropdown arrow
Future Marketplace invoices are issued in your selected billing currency. You can view and manage invoices using the page.
Change the number of licenses for your subscription.
This tutorial describes how to change license quantities for an existing subscription.
When reducing licenses, these rules apply:
If the subscription contains one item, you cannot reduce the quantity to zero. Terminate the subscription instead.
If the subscription contains multiple items, at least one item must remain above zero.
Start from the subscription
Go to Marketplace > Subscriptions.
Select the required subscription. Ensure that the subscription is active.
On the subscription details page, select Edit.
Change the license quantities
In the Edit subscription flow, do the following:
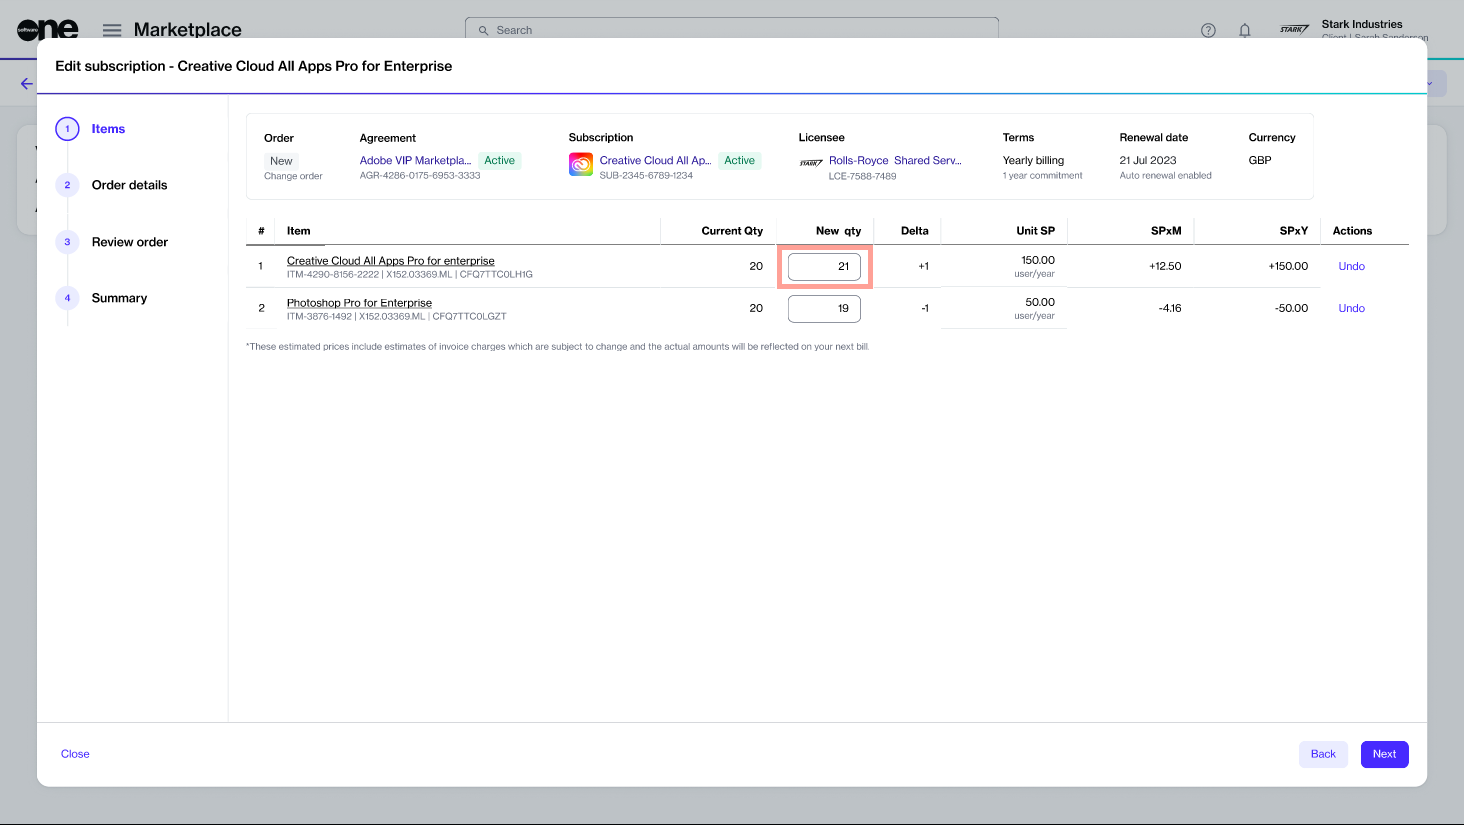
Update the New qty value, then select Next.
Add or update the reference ID and your comments. Select Next
After you place the order, a change order is created and sent to the vendor for processing. You can also see it on the Orders page.
While the change order is in progress, the subscription and agreement status change to Updating. No further orders can be placed under that agreement until processing is complete.
Add new items to your existing Marketplace agreement.
This tutorial describes how to add more items to your existing Marketplace agreement.
New items can be added using Buy more on the agreement details page. When you start from Buy more, the purchase wizard opens directly on the Items step.
Start from the agreement
Go to Marketplace > Agreements
Save the new currency
In Select billing currency, choose the new currency.
Select Save.
Verify the information, then select Place order. Select Next.
Select View details to open the order details page or select Close.
Select the agreement you want to update.
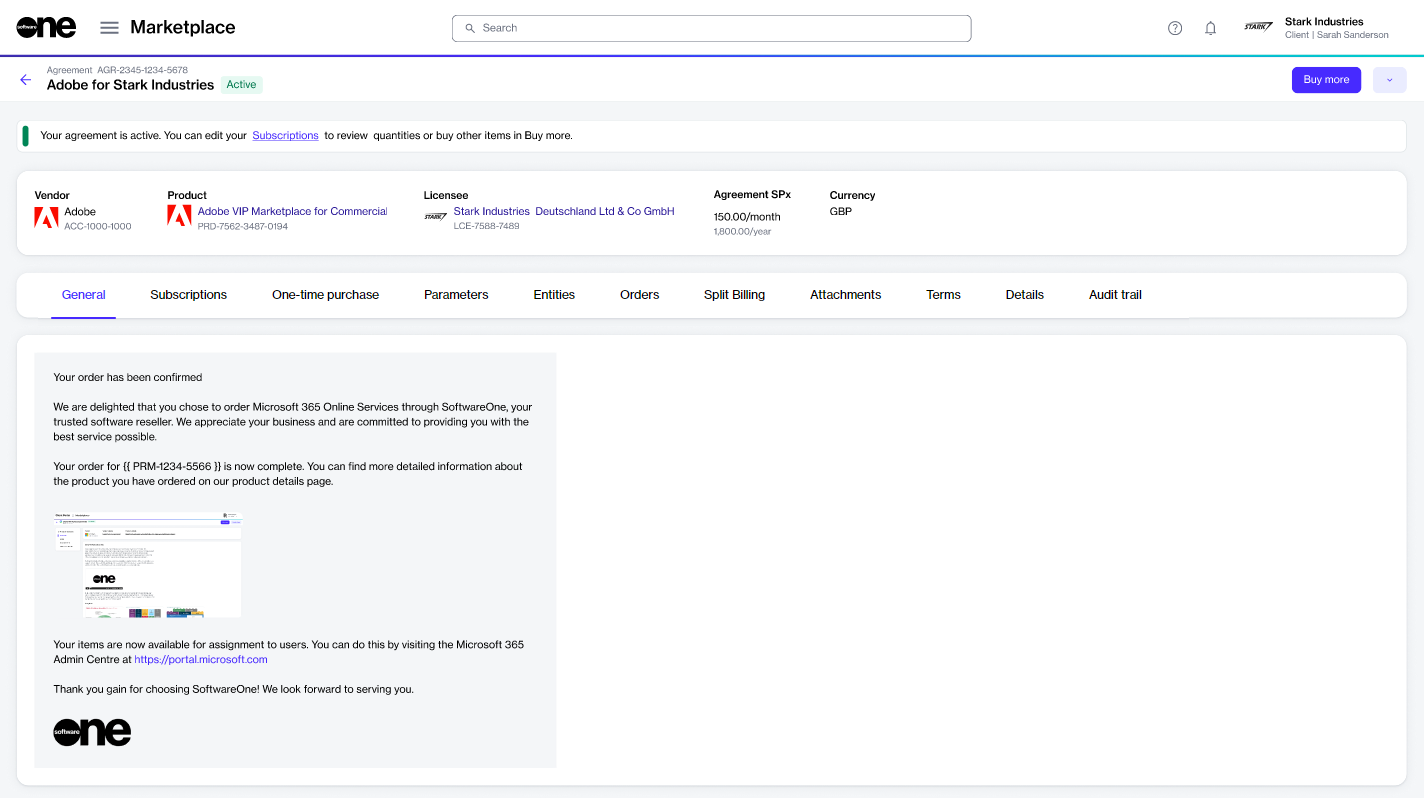
On the agreement details page, select Buy more.
Add the new items
In the guided Purchase flow, complete the following steps:
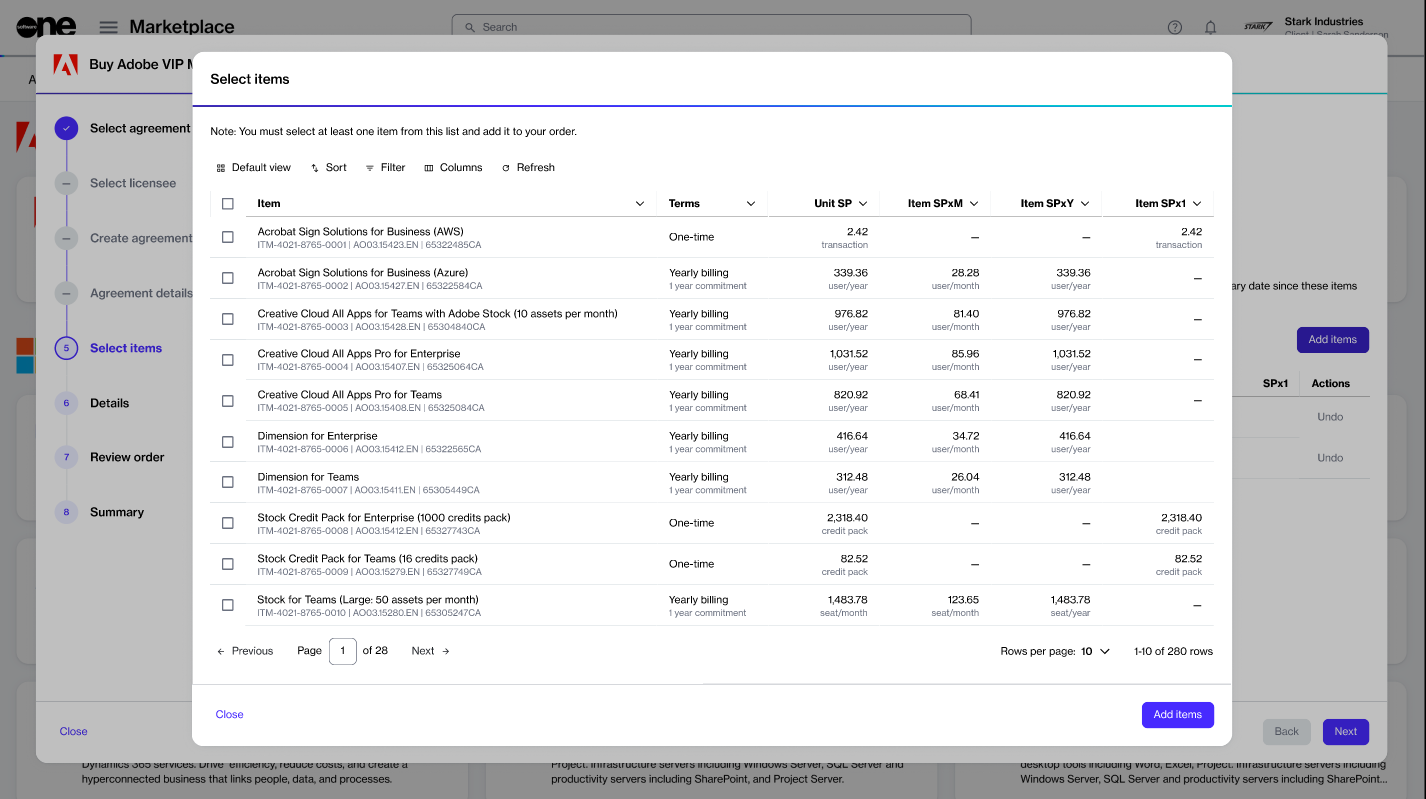
Select Add items.
Choose the items you want to order. Make sure to check the billing terms and duration. Select Add items.
In the New Qty field, update the quantity of licenses.
Select Next.
Review and submit the order
Add or update the reference ID and your comments. Select Next.
Verify the order information, then select Place order.
Select View details to open the order details page or select Close.
After you place the order, a change order is created for the agreement and sent to the vendor for fulfillment.
The agreement status also changes from Active to Updating. While the agreement is updating, you cannot place more orders under that agreement.
You can track the order on the Orders page or in the Orders tab on the agreement details page.
You can add items only to active agreements. If the agreement is not active, the Buy more option is unavailable.
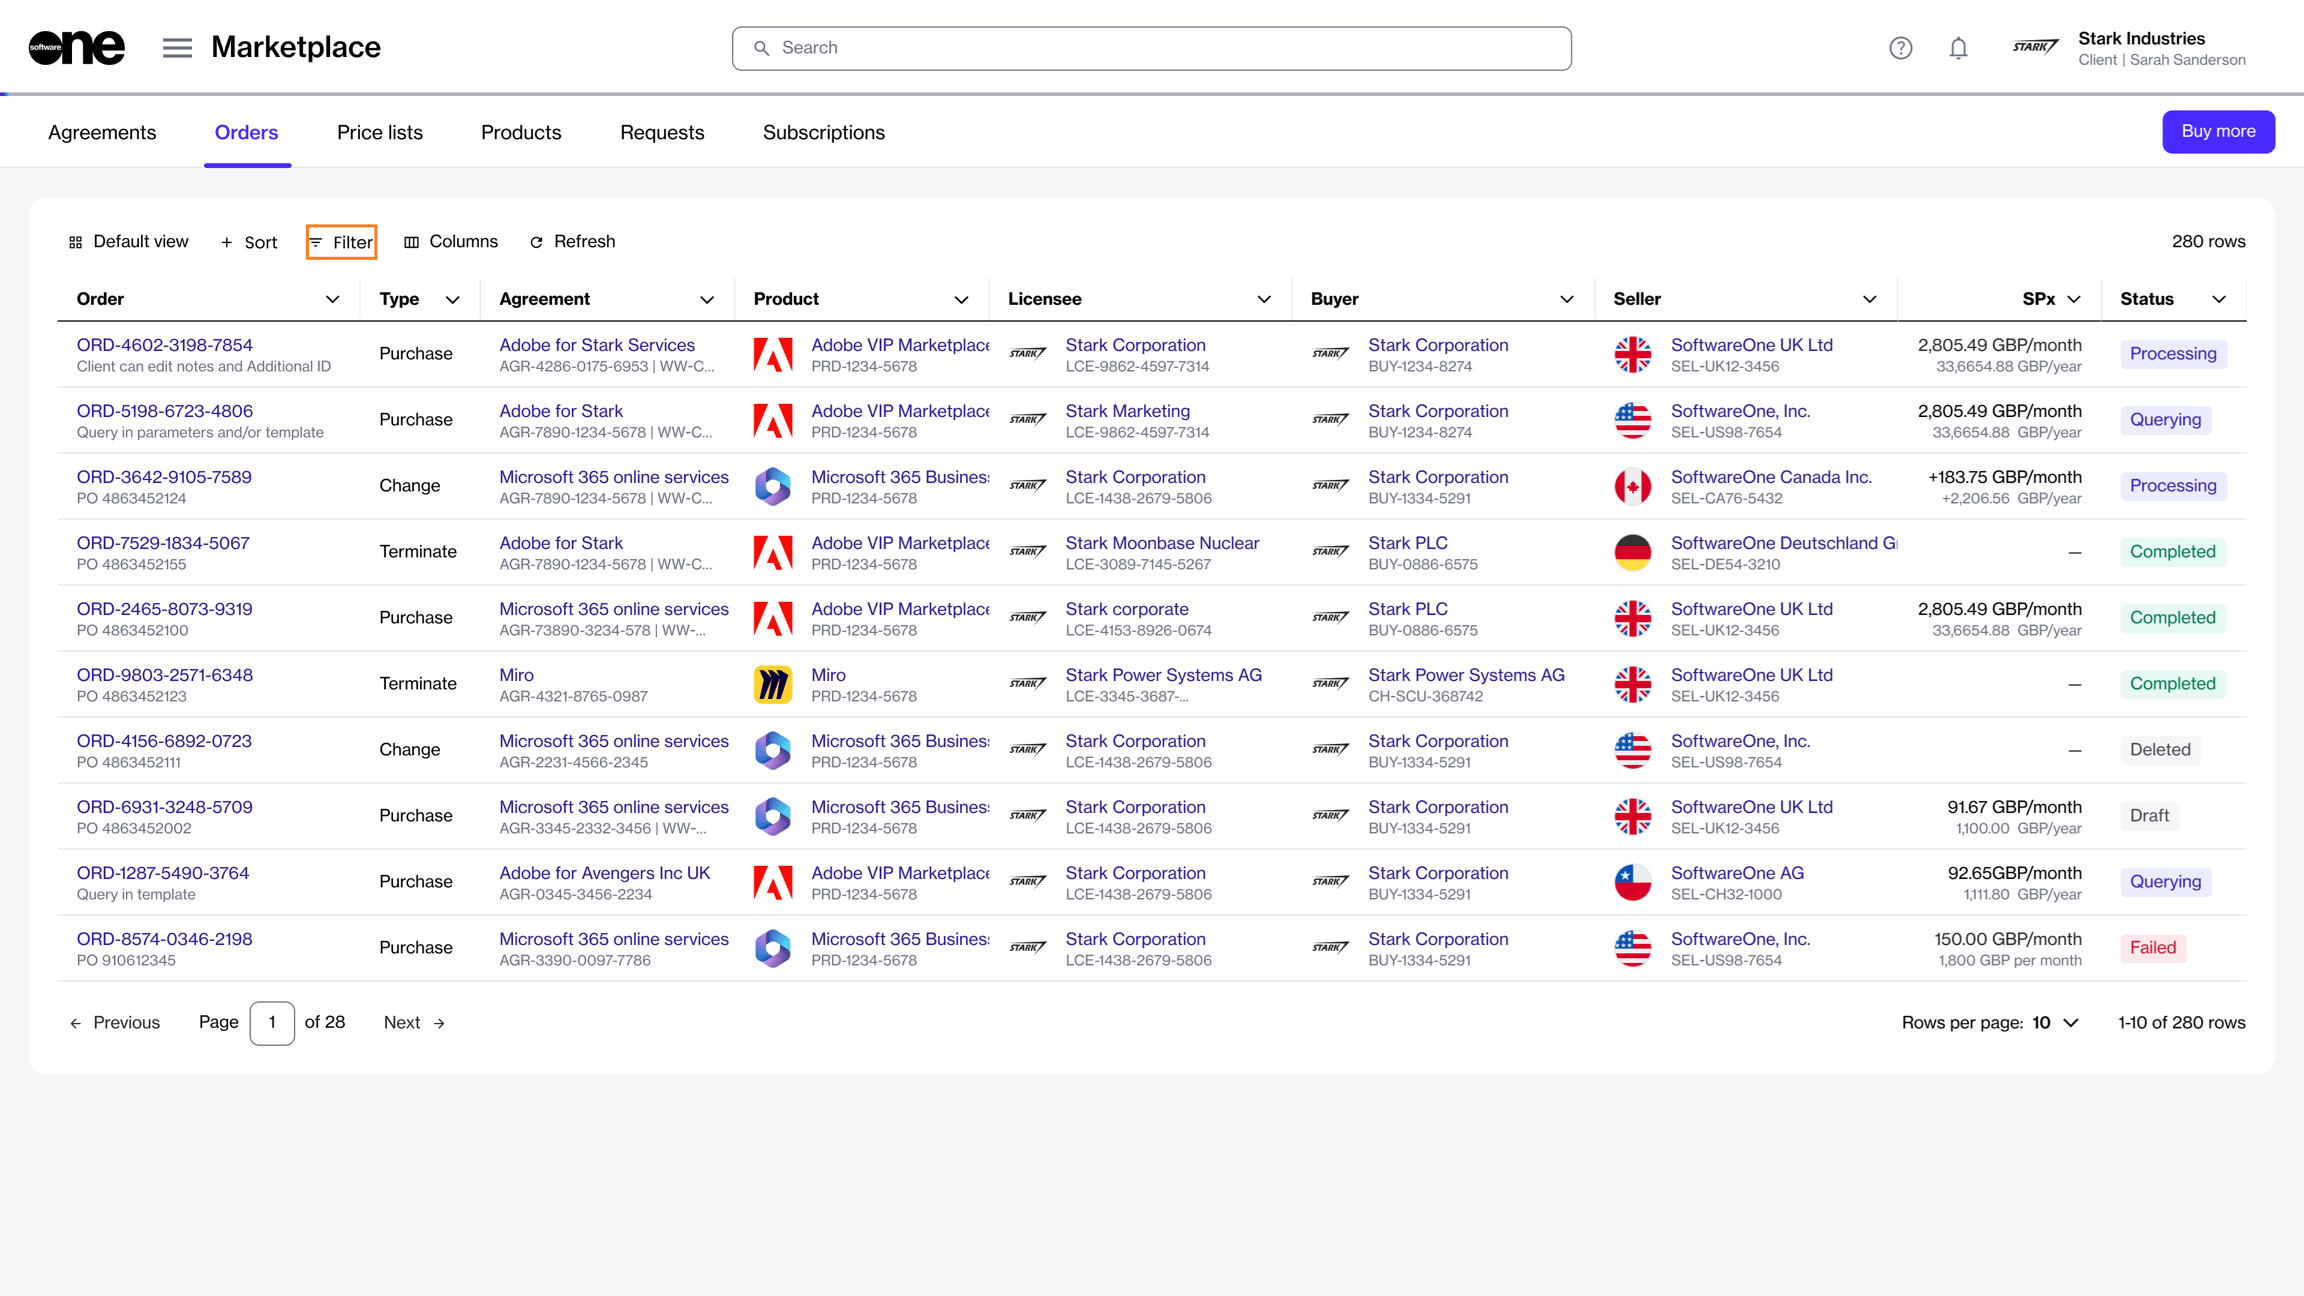
Use the different types of filters to find and view your orders.
This tutorial describes how to use filters to quickly find specific orders.
The Marketplace offers several filter options to help you find orders. You can apply a single filter or create a combination of filters by selecting different fields, operators, and values.
To filter orders by status, such as Draft:
Go to Marketplace > Orders.
Select the Filter icon.
Select Add another condition.
Define the filter:
In the first field, select Status.
In the second field, select the operator. For this example, leave it set to Equal.
The list of orders refreshes automatically when you apply the filter.
To find an order by ID:
Go to Marketplace > Orders.
Select the Filter icon, then define the filter:
In the first field, select Order ID.
In the second field, choose the operator. For this example, leave it set to
The list of orders refreshes automatically.
Use Search query to find matching records across orders, agreements, and related details.
To search for an order:
Go to Marketplace > Orders.
Select the Filter icon.
Enter the desired search term.
The list of orders refreshes automatically to show matching records. To clear all filters and return to the default view, select Reset filters.
Divide subscription costs across buyers in your account.
Split billing is a feature that allows you to divide the cost of a subscription across different buyers in your account. If your organization has multiple legal entities, split billing can be used to distribute costs effectively. To learn more, see .
In the SoftwareOne Marketplace, the split billing process begins by activating the feature from the user interface (UI), selecting buyers for allocation, and then specifying each buyer's allocation percentage or license count. This tutorial describes how to complete all of these steps.
In this tutorial, an agreement named Adobe VIP Marketplace for Stark Industries contains three subscriptions. Currently, 100% of the billing for these subscriptions is assigned to a single buyer named Stark Industries. We'll activate split billing, add two new buyers named Stark Industries II and Stark Industries III, and specify the allocation percentage for these buyers.

In the third field, select Draft.
Add more conditions if you need to narrow the results further.
In the third field, enter all or part of the order ID.
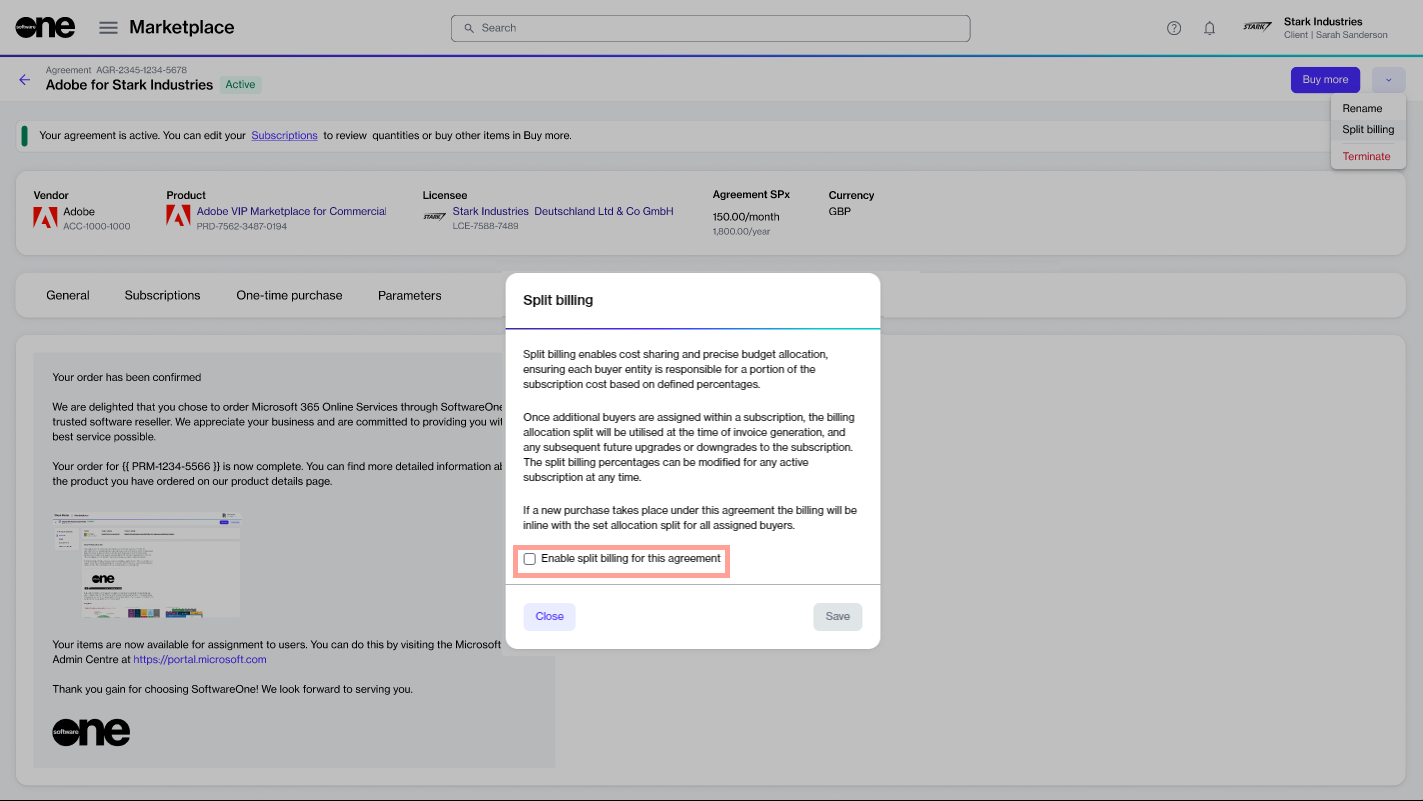
Split billing can only be activated at the agreement level. To activate split billing:
On the Agreements page, select an active agreement.
On the agreement details page, select the dropdown arrow , then choose Split billing.
Select the checkbox, then select Save.
Split billing is activated, and the Split billing tab appears on the agreement details page.
Configure buyers
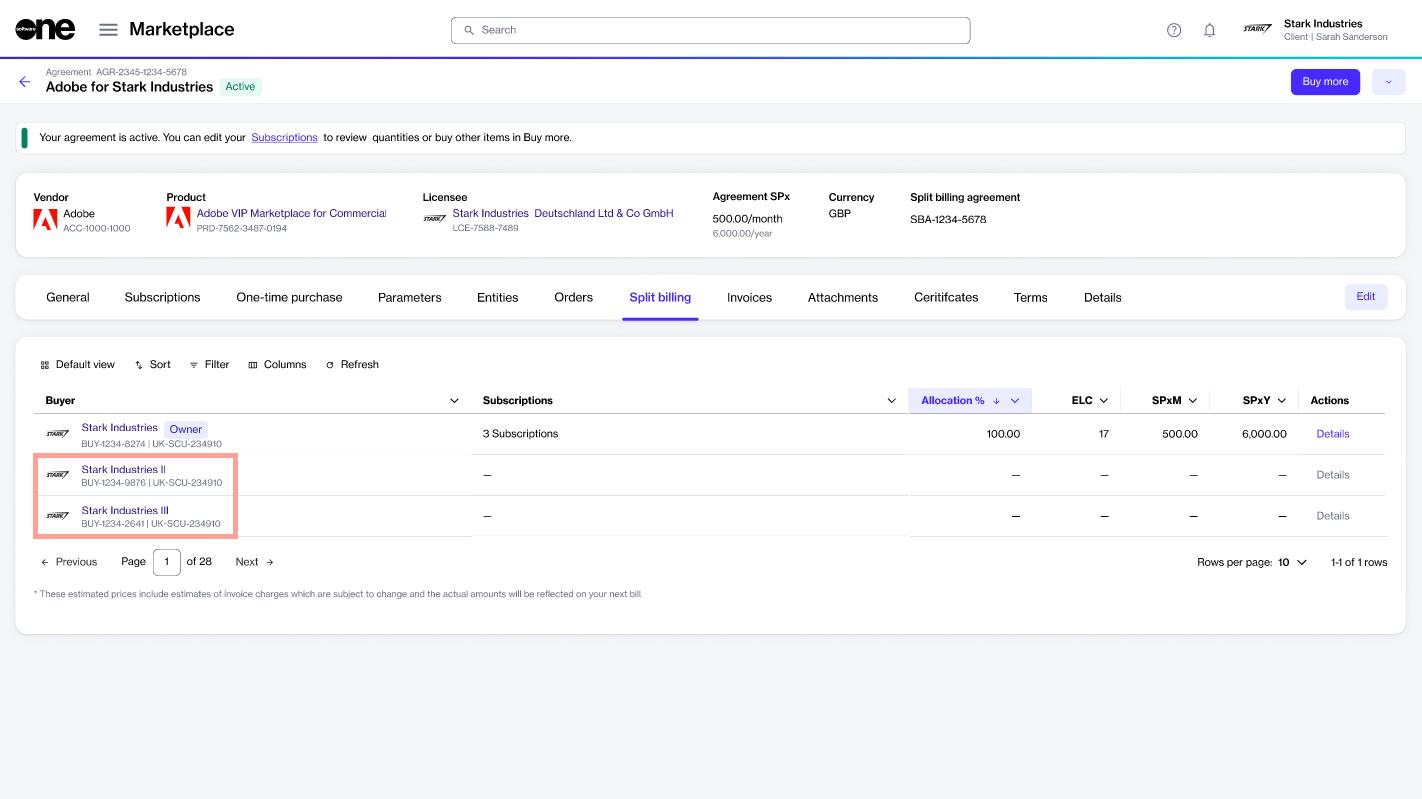
In this tutorial, Stark Industries is the Owner buyer who has been allocated 100% of the billing. We will configure Stark Industries II and Stark Industries III as additional buyers and divide costs across buyers.
To configure buyers:
On the agreement details page, select the Split billing tab.
Select Edit.
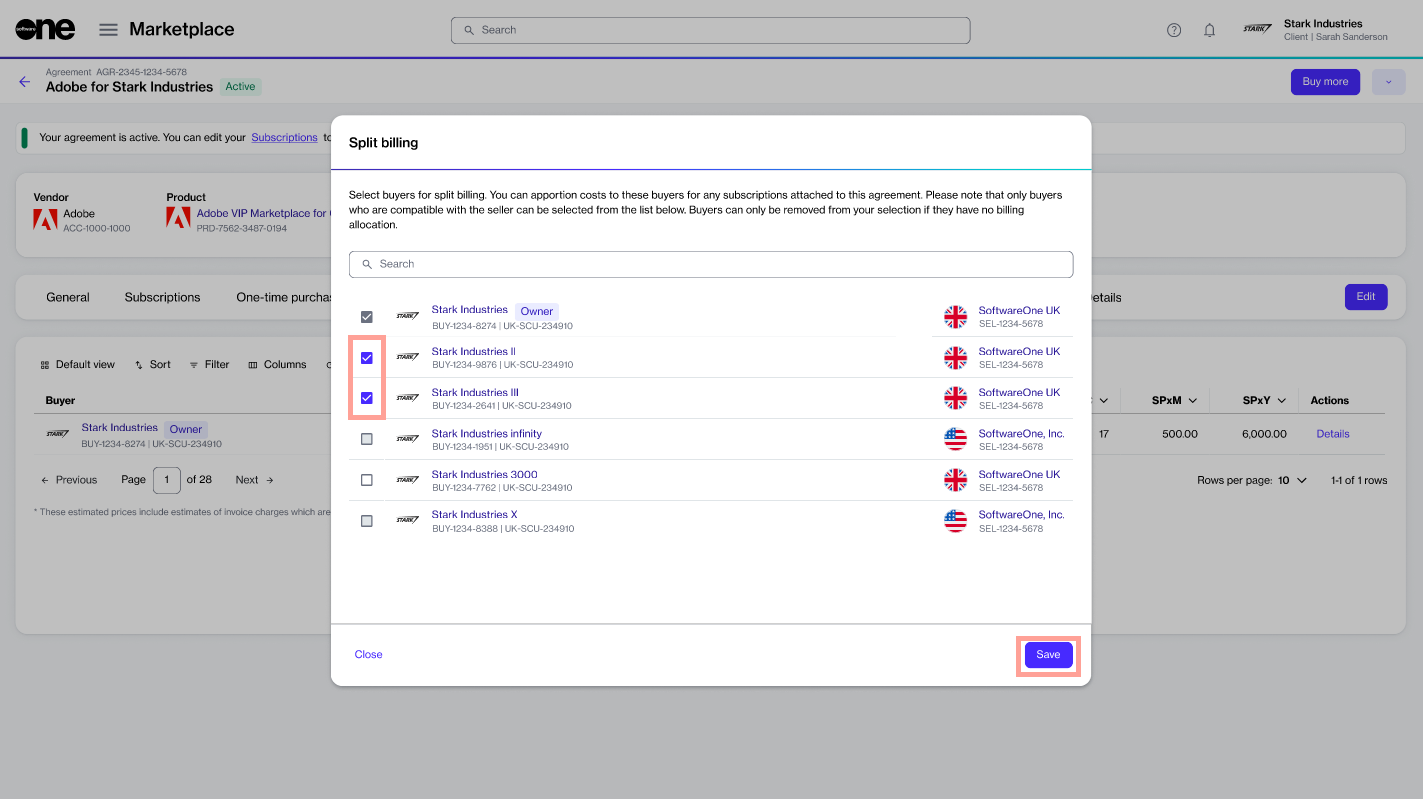
In the Split billing dialog, select the required buyers, then select Save.
Stark Industries II and Stark Industries III are added as buyers and displayed on the Split billing tab. You are now ready to allocate billing to these buyers.
Allocate percentage
Billing can be allocated by specifying percentages for each buyer. You can also specify the estimated license count. Both of these options are linked, meaning that changing one automatically updates the other, although only the allocation % is used during billing (see Split billing rules to learn more).
To start configuring the split for each buyer:
In the Actions column for the Owner buyer, select Details.
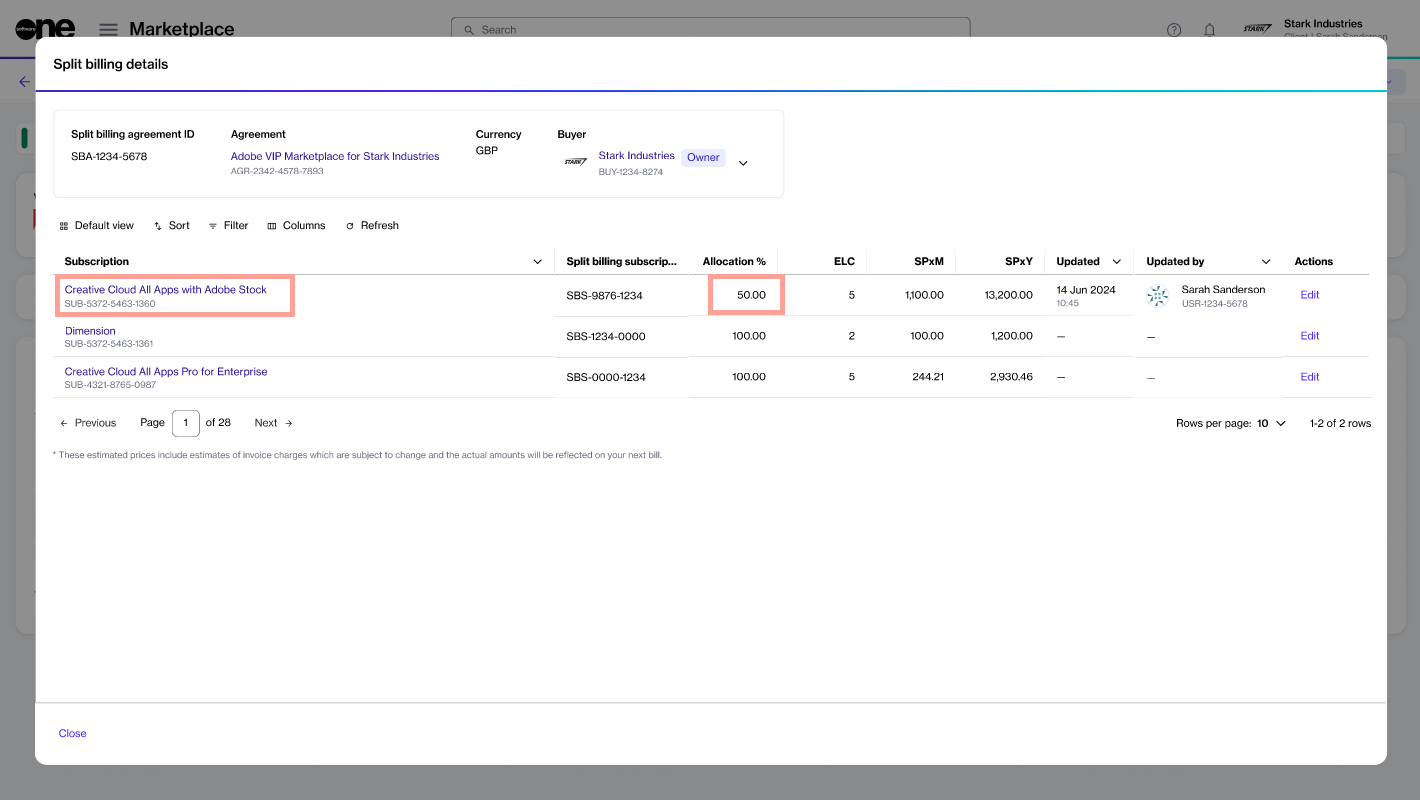
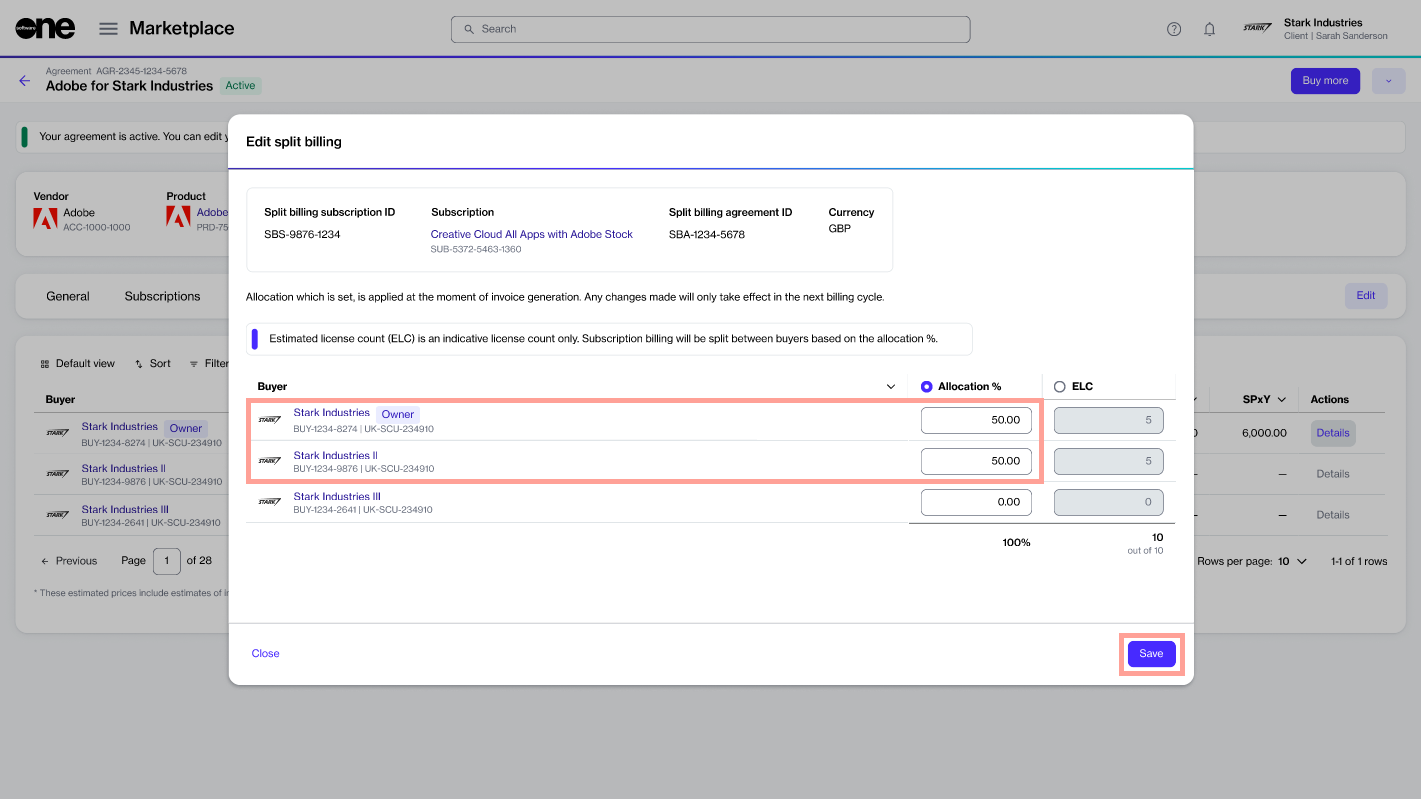
Find the required subscription, then select Edit. The example agreement contains three subscriptions, but we will only configure allocation for the first subscription, called Creative Cloud All Apps with Adobe Stock.
Under Allocation%, enter the allocation percentage for each buyer. Then, select Save. In this example, 50% of the billing is allocated to Stark Industries (owner buyer) and the remaining 50% to Stark Industries II. No split billing percentage is assigned to Stark Industries III.
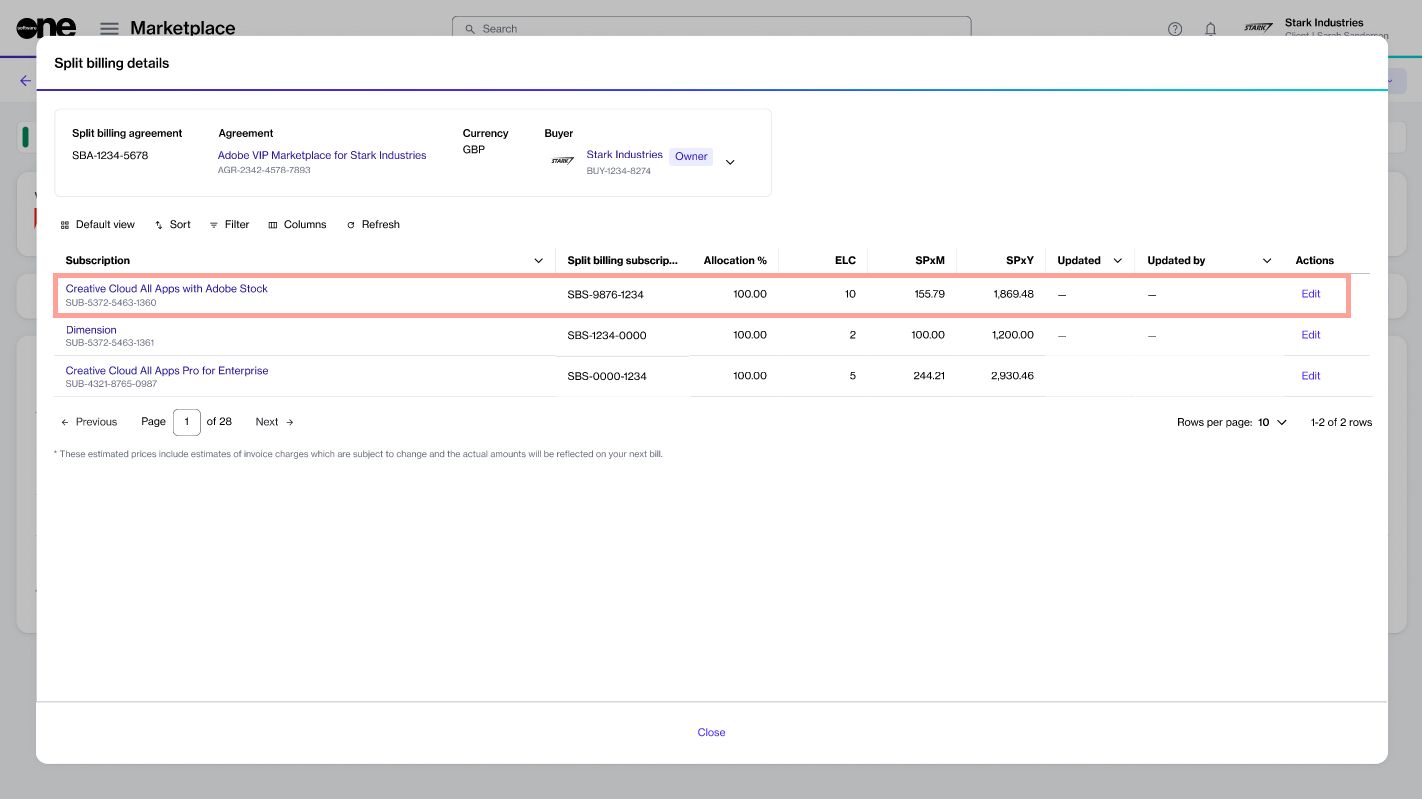
The allocation is updated and displayed on the Split billing details page. By default, the allocation for the owner buyer is displayed:
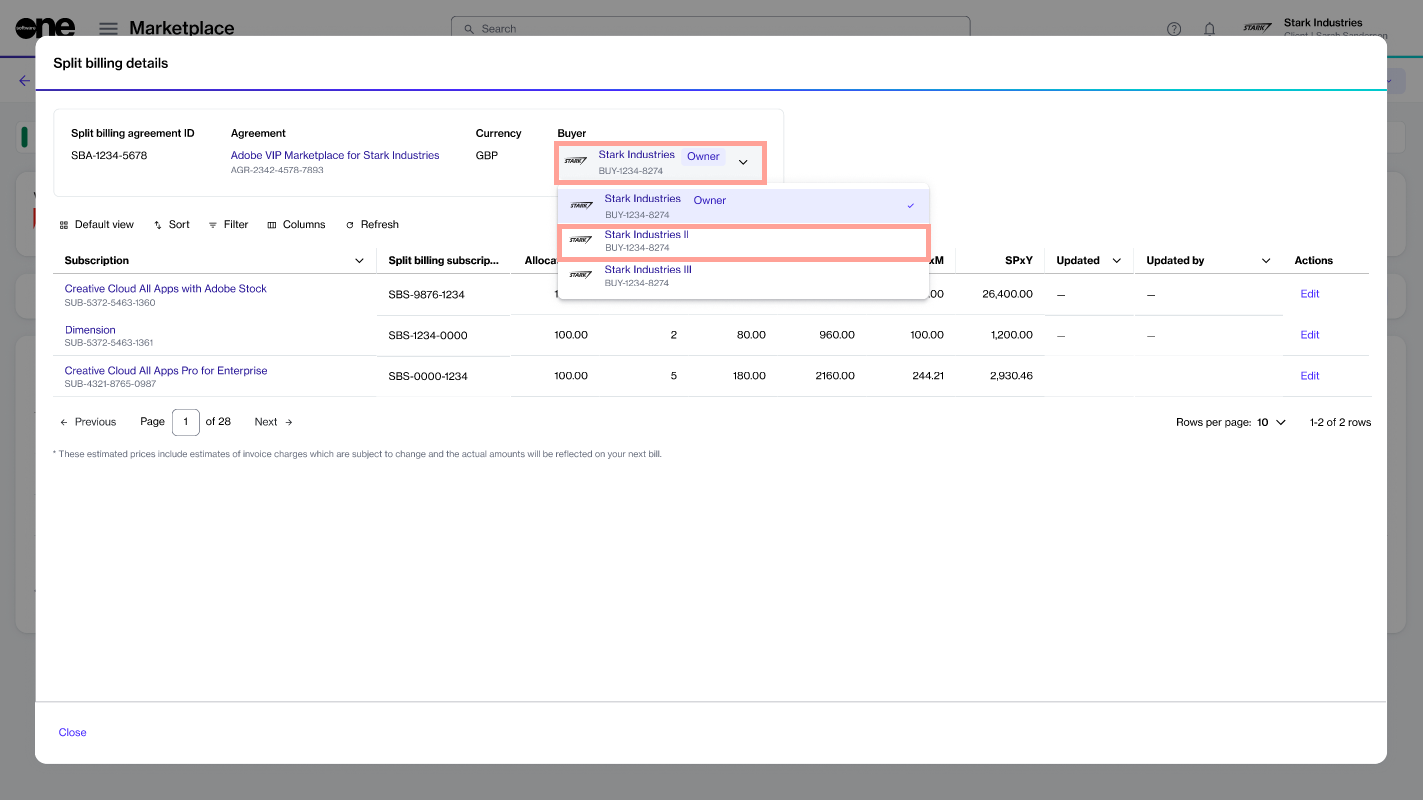
Use the Buyer menu at the top to view the allocation for the other buyers (Stark Industries II in this example):
Select Close. You are returned to the Split billing details tab.
Repeat the same steps if you have additional subscriptions and want to split the billing for those subscriptions.
You can also edit the split at any time. For details, see Edit split billing.