Assign Reader and Tag Contributor Roles (multiple subscriptions)
Use Azure Management Group to assign permissions across multiple subscriptions in a single step.
You can use Azure Management Groups to grant the Client Portal access to your Azure subscriptions. This approach has the following benefits:
You can assign access to multiple subscriptions in a single step.
If you create more Azure subscriptions in the future, access will be automatically granted. It means when you add an Azure subscription to your tenant, activating it in the Client Portal is unnecessary.
Grant access using Azure CLI
Before granting access using Azure CLI, note the following points:
Ensure that you've installed PowerShell and Azure CLI. For installation instructions, see Install PowerShell and Install Azure CLI.
The script utilizes PowerShell variables, therefore, you must execute this script at a PowerShell prompt instead of a normal command prompt.
Use the following commands to onboard your Azure subscriptions:
The following table explains these commands:
Command | Description |
---|---|
| Log in to your Microsoft tenant. |
| Elevate your permissions to manage all Azure subscriptions and management groups. See Microsoft Documentation. |
| Create the PyraCloud (Azure) service principal (Enterprise Application) in your tenant. |
| Get the ID of your Tenant Root Group. |
| Assign the Reader and Tag Contributor roles to the PyraCloud (Azure) application in your Tenant Root Group. |
Grant access using the Azure Portal
Before granting access through the Azure Portal, note the following points:
Ensure that you've onboarded your tenant.
Ensure that have the correct permissions to manage access to all Azure subscriptions and management groups in your tenant. For instructions, see Elevate access to manage all Azure subscriptions and management groups in the Microsoft documentation.
Step 1: Search for Management Groups
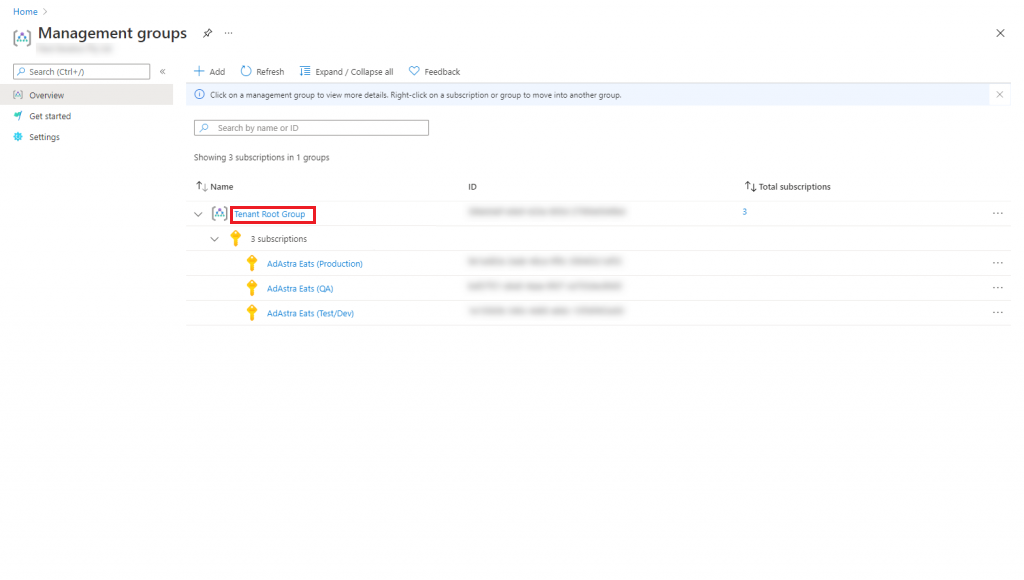
Launch the Azure Portal and search for Management groups.
On the Management groups page, select Tenant Root Group. Note that regardless of your organization's configuration, you'll always have a Tenant Root Group. It might have been renamed, but it always appears at the top of the hierarchy.
Step 2: Open the Add role assignment page
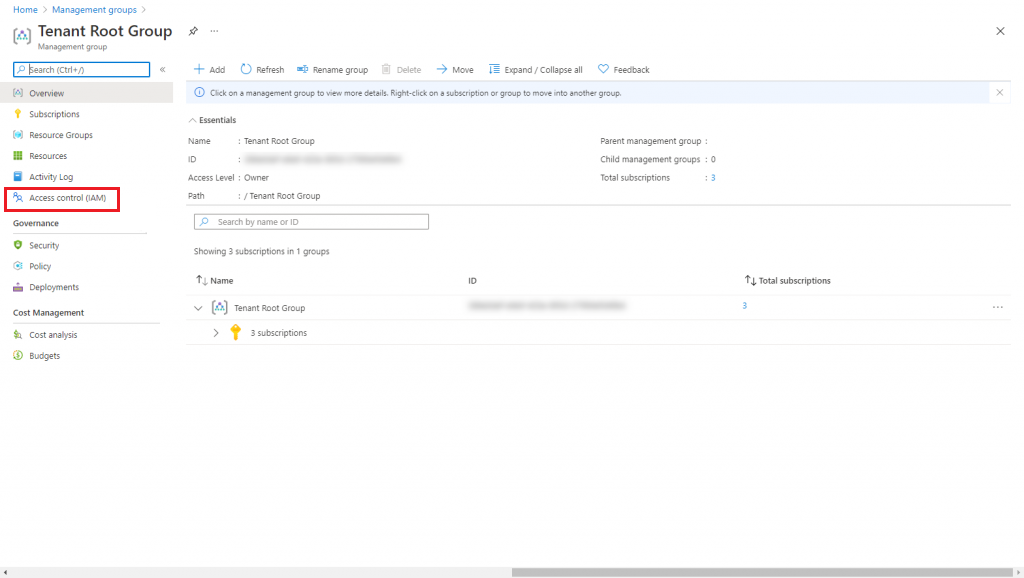
From the left sidebar, select Access control (IAM).
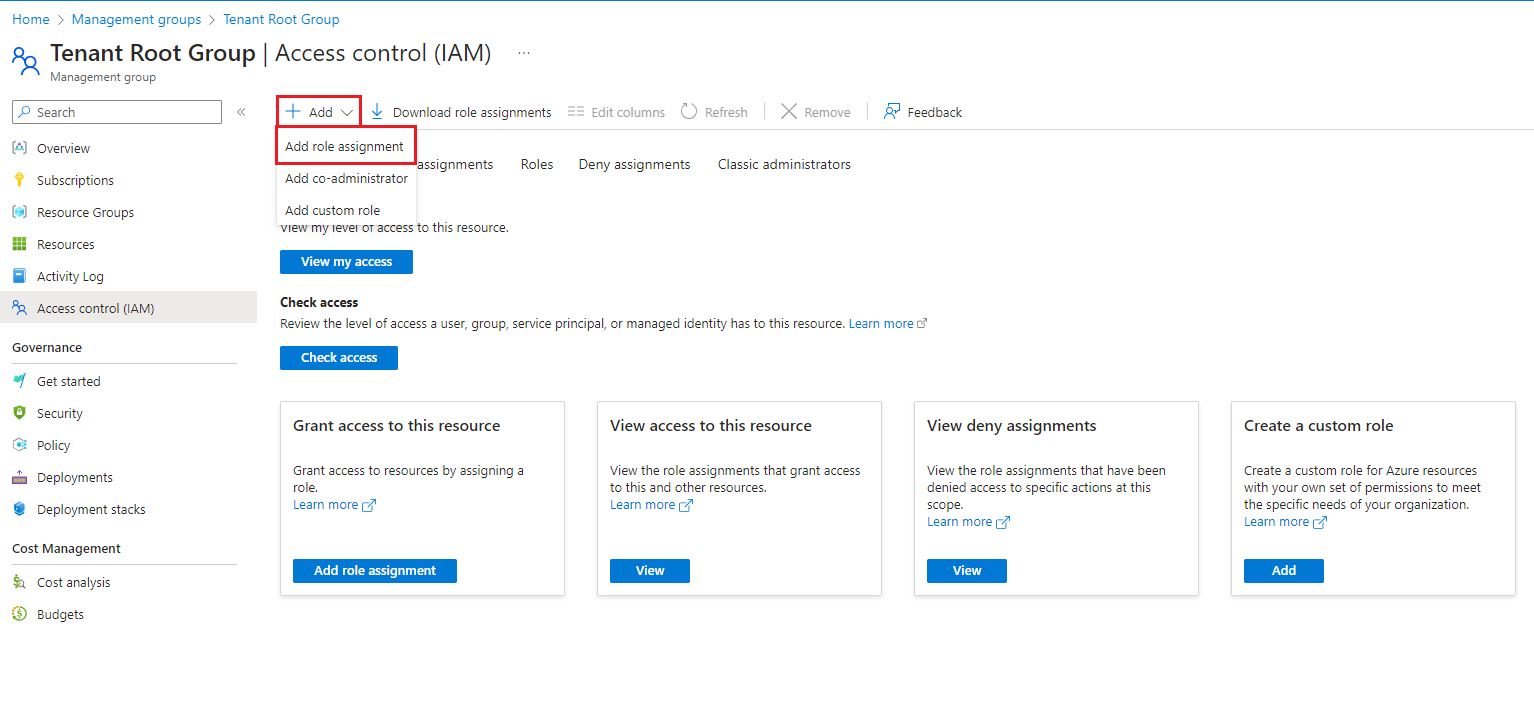
Click Add > Add role assignment.
The Add role assignment page opens.
Step 3: Assign the Reader role
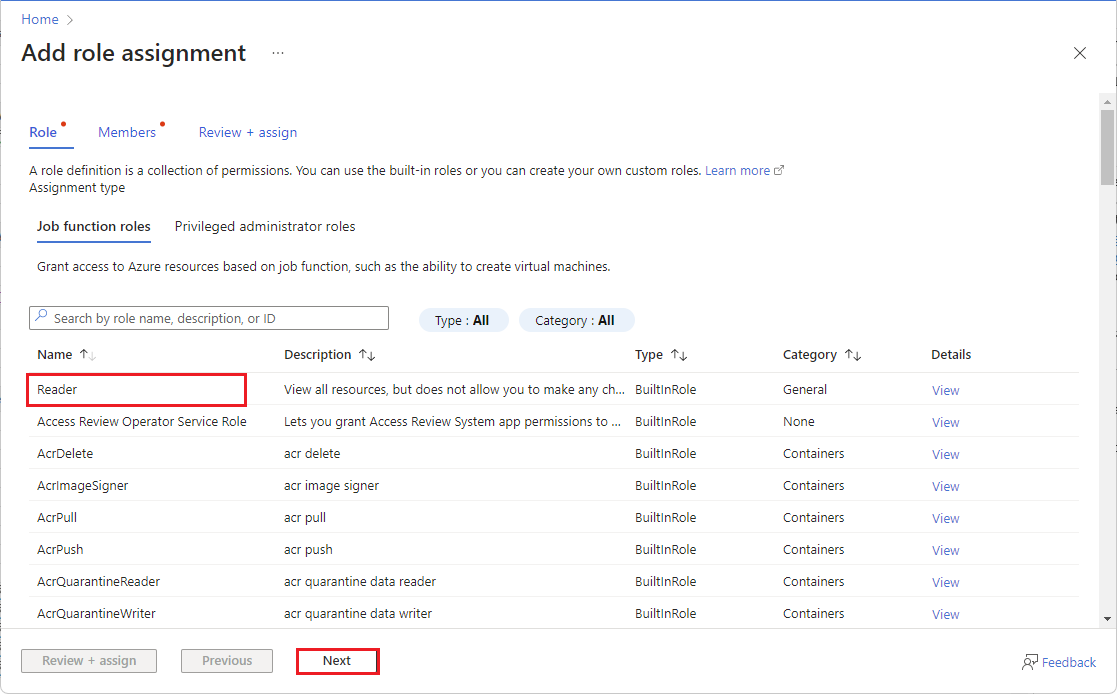
On the Role tab, select Reader as the role and click Next. The Member tab opens.
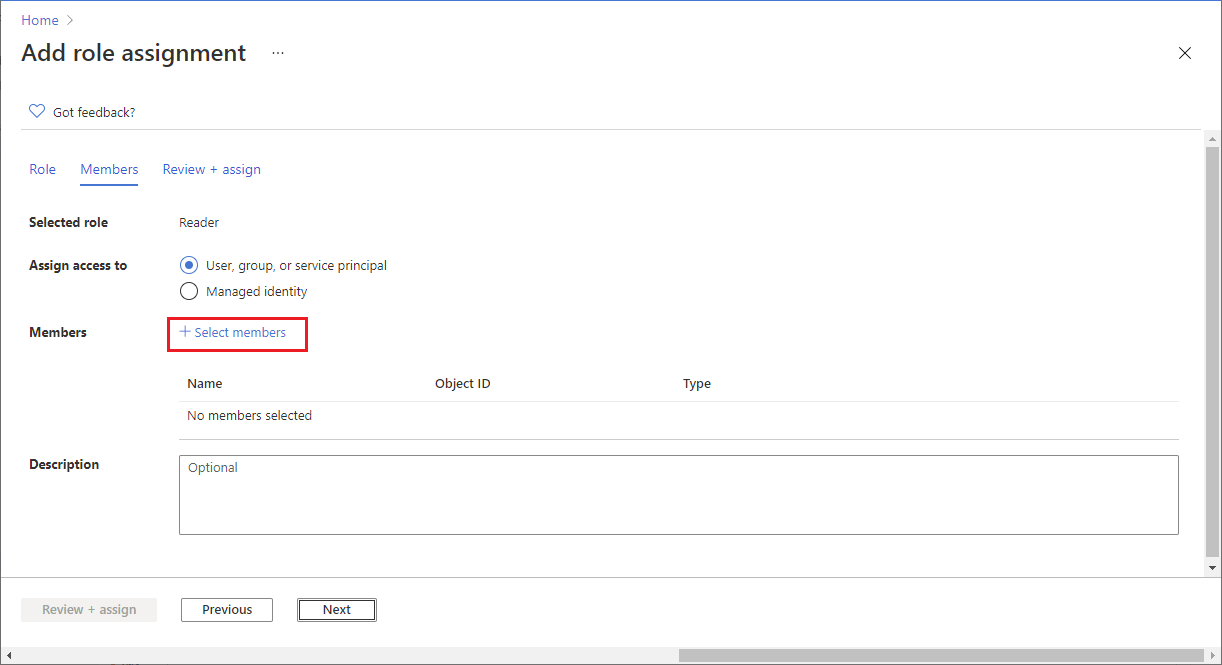
Select User, group, or service principal if it's not selected by default, and then click Select members.
In the Select members panel, type Pyra and then select PyraCloud (Azure) from the search results.
Click Select to add PyraCloud (Azure) to the Members list. Once PyraCloud (Azure) is added, click Review + assign.
On the Review + assign tab, review the details and click Review + assign to confirm the role assignment.
Step 4: Assign the Tag Contributor role
To assign the Tag Contributor role, follow all of the steps in Step 3: Assign the Reader role, but choose Tag Contributor as your role instead of Reader.
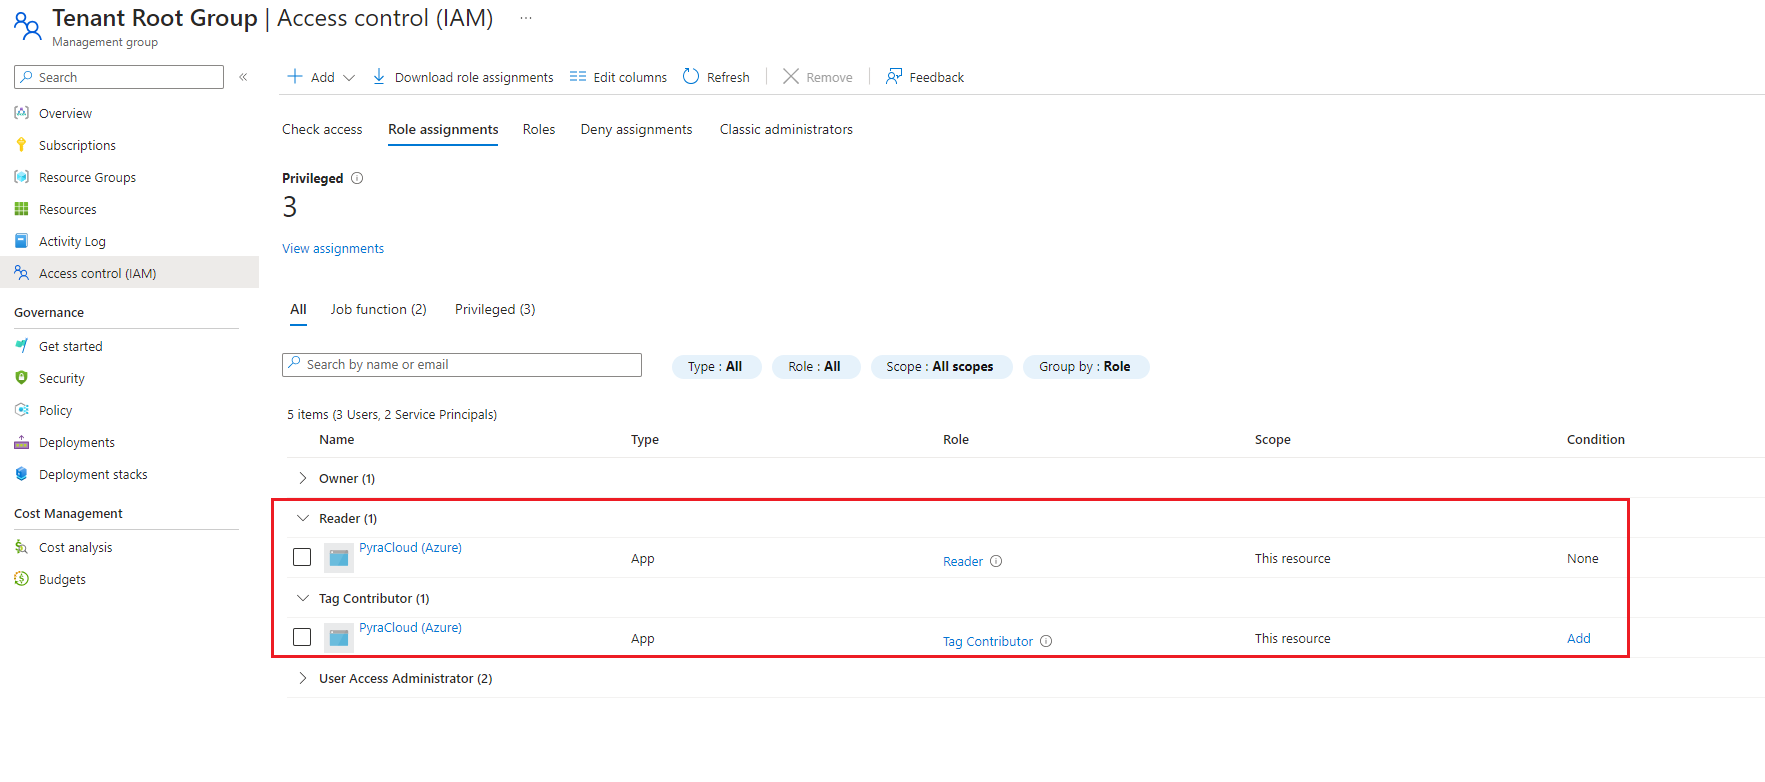
After you've completed the steps, the roles are assigned and displayed on the Role assignments tab.