Add an Azure MCA Account
Last updated
Last updated
SoftwareOne is a trademark of SoftwareOne, Inc. "The Software Licensing Experts" is a service mark of SoftwareOne, Inc. VAR assist is a trademark of SoftwareOne, Inc. "It pays to partner" is a service mark of SoftwareOne, Incorporated.
The Client Portal supports both legacy Enterprise Agreement and modern Microsoft Customer Agreement models. This topic describes how to add an Azure MCA account to the Client Portal. For information on adding an EA or MPSA account, see Activating an Azure EA or MPSA account.
Before adding an MCA account to the Client Portal, make sure your account has the correct billing account type set up. You can verify the account type in the Azure Portal.
To verify, select Cost Management + Billing and then navigate to Settings > Properties. The account type is displayed in the right pane.
Follow these steps to assign the Billing account reader role to the Client Portal through Azure:
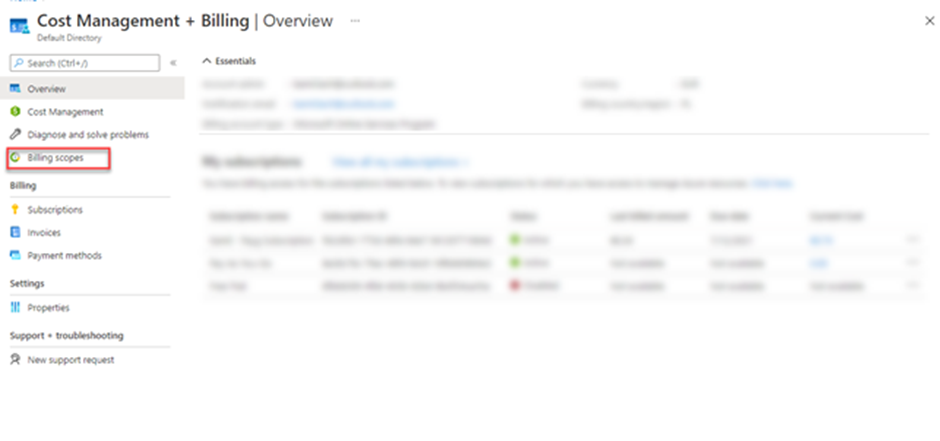
In the Azure Portal, search for Cost Management + Billing.
In the left navigation pane, select Billing scopes and then select your MCA billing scope.
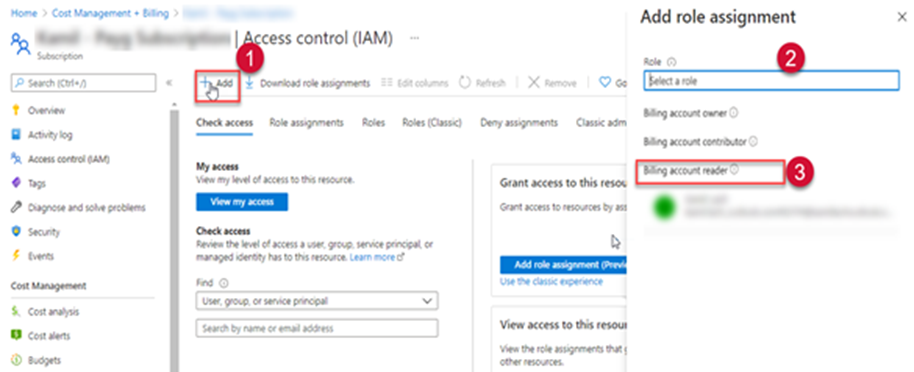
Select Access Control (IAM) to start assigning permissions.
On the Access Control (IAM) tab, click Add > Add role assignment. The Add role assignment pane opens. From the Role list, select the Billing account reader role.
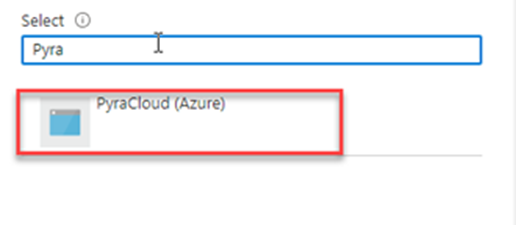
For Members, select the PyraCloud (Azure) application to give access to the Client Portal.
Click Save. Your MCA billing data will be synchronized with the Client Portal after 24 hours.
After assigning permissions to the billing account, you can add the tenant to the Client Portal via Cloud tenant setup, found under Cloud tools in the main menu.
For instructions on how to add the tenant, see Activate your cloud account.