Add New Software Items to Your Agreement
How to add new software items to your existing Marketplace agreement.
Prerequisites
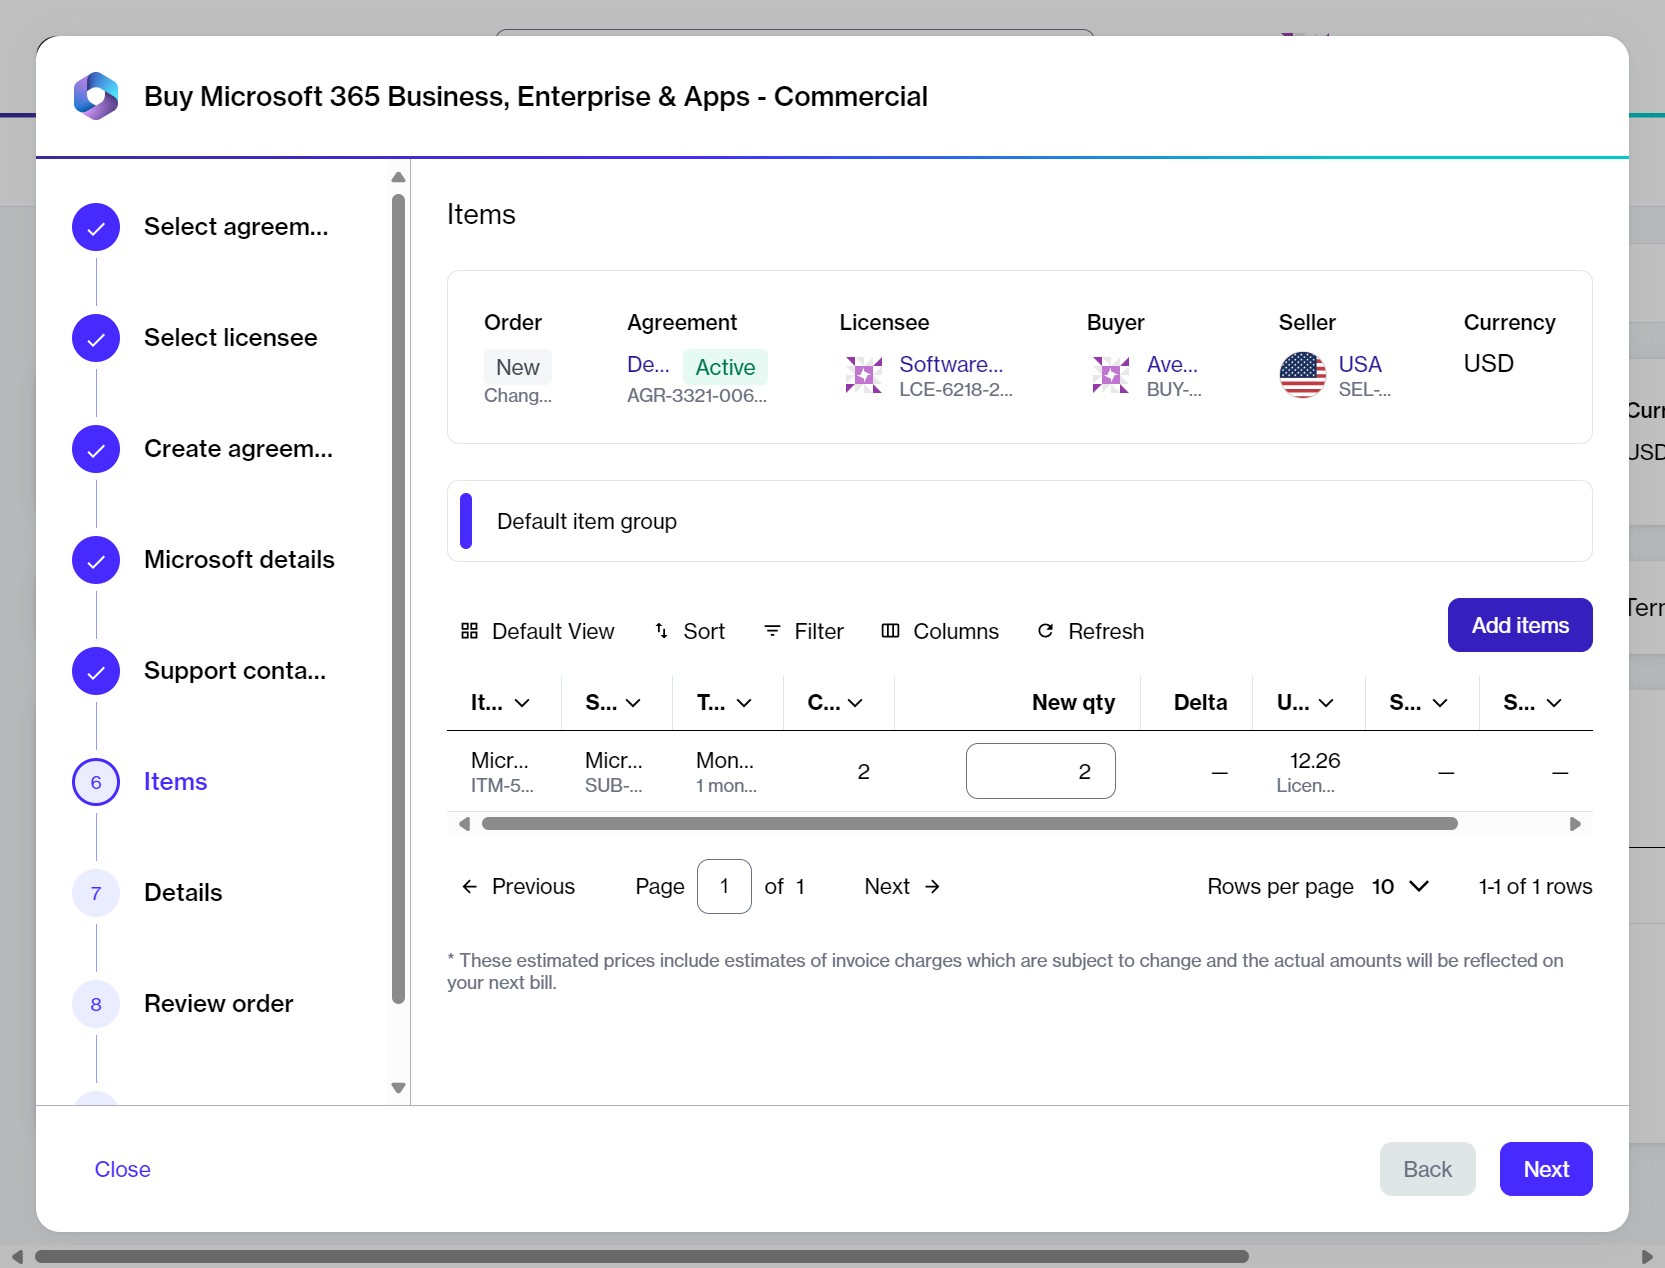
Adding new software items to your agreement
1
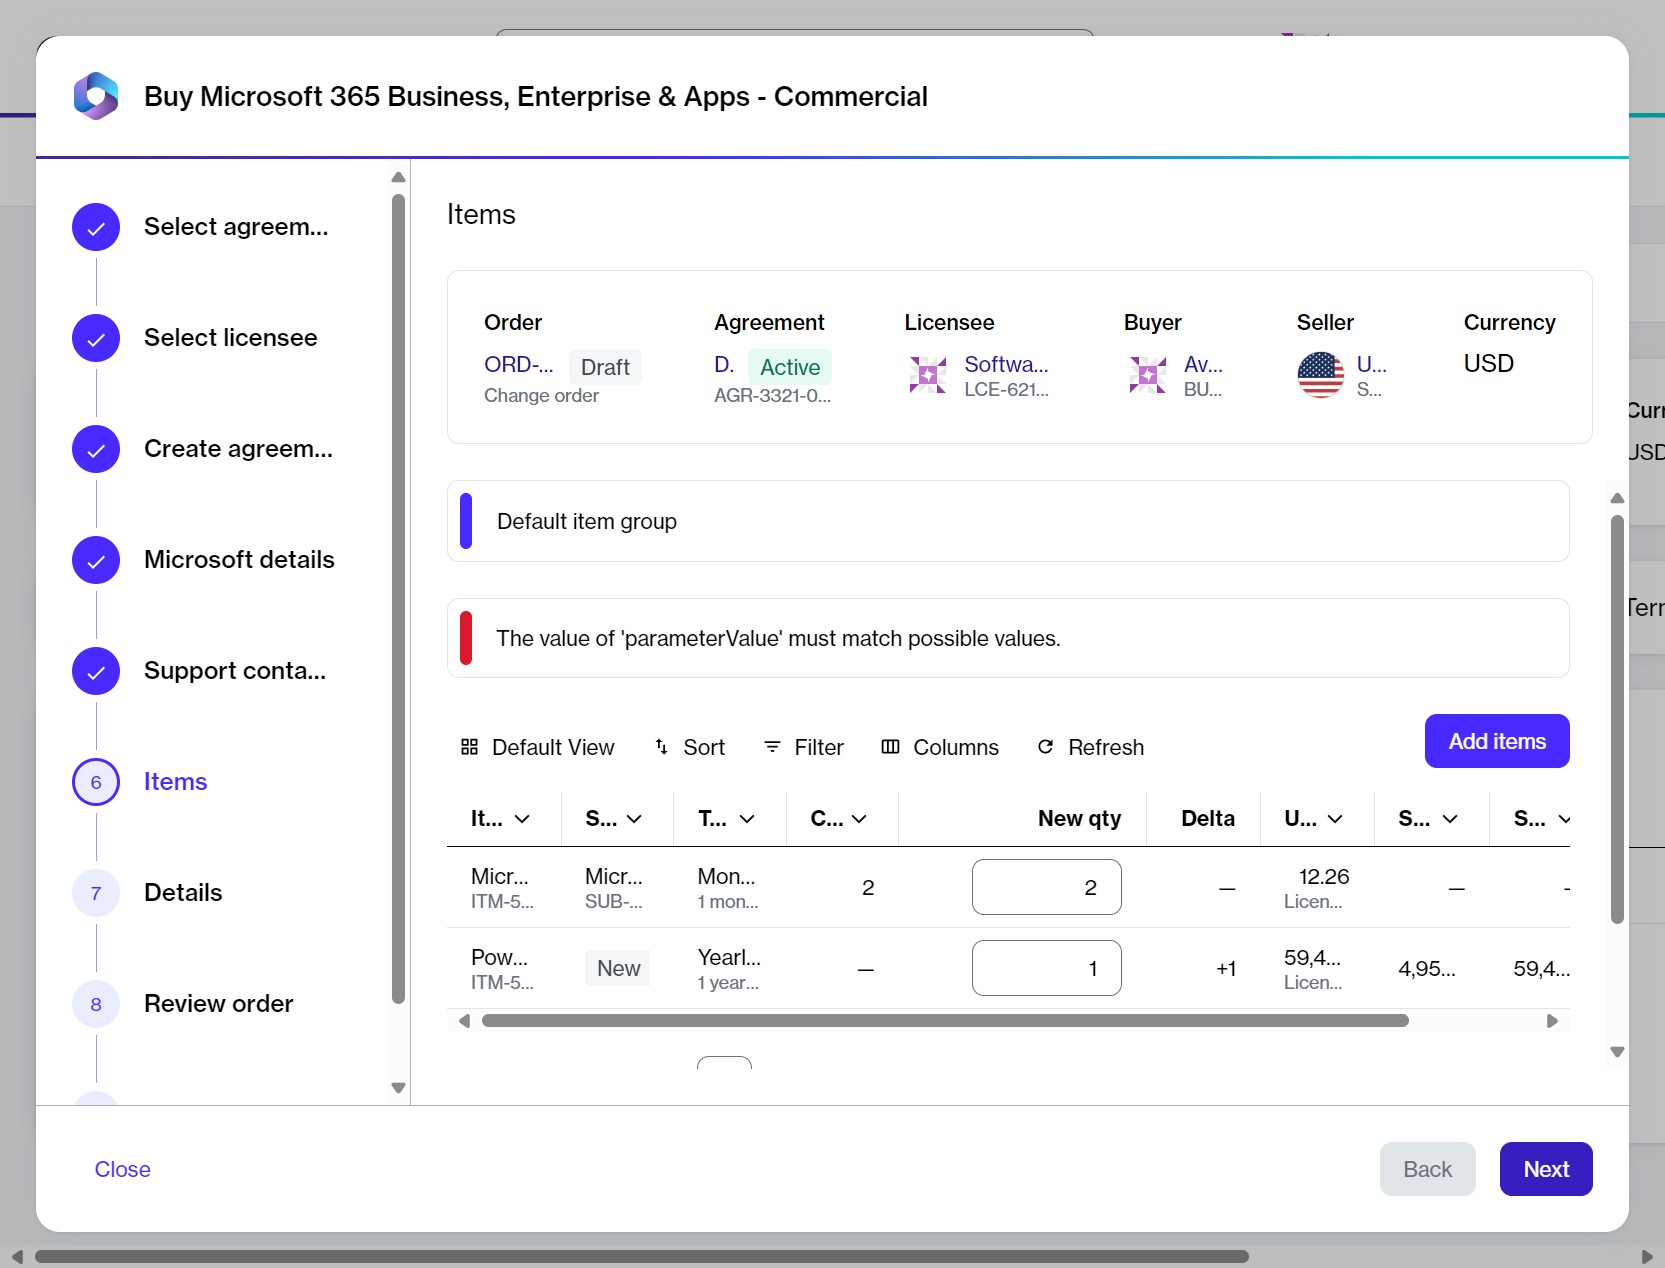
2
Select the
 Filter option in the grid.
3
Next steps
Last updated
Was this helpful?